Swagger2 生成 Spring Boot API 文档
Swagger 是一个规范和完整的框架,用于生成、描述、调用和可视化 RESTful 风格的 Web 服务。本文主要介绍了在 Spring Boot 添加 Swagger 支持, 生成可自动维护的 API 文档。
POM 文件
首先我们需要修改工程的 POM 文件 , 添加 Swagger 的 JAR 包 springfox-swagger2 swagger-annotations。
<dependency><groupId>io.springfox</groupId><artifactId>springfox-swagger2</artifactId><version>2.6.1</version></dependency><dependency><groupId>io.swagger</groupId><artifactId>swagger-annotations</artifactId><version>1.5.13</version></dependency>代码支持
其次我们需要在代码中添加支持,于 Application 同级目录添加 Swagger 配置类.
import org.springframework.context.annotation.Bean;
import org.springframework.context.annotation.ComponentScan;
import org.springframework.context.annotation.Configuration;
import springfox.documentation.builders.ApiInfoBuilder;
import springfox.documentation.builders.RequestHandlerSelectors;
import springfox.documentation.service.ApiInfo;
import springfox.documentation.service.Contact;
import springfox.documentation.spi.DocumentationType;
import springfox.documentation.spring.web.plugins.Docket;
import springfox.documentation.swagger2.annotations.EnableSwagger2;

@Configuration@EnableSwagger2
public class Swagger2 {

    @Beanpublic Docket config() {
        return new Docket(DocumentationType.SWAGGER_2)
                .apiInfo(apiInfo())
                .useDefaultResponseMessages(false)
                .select()
                .apis(RequestHandlerSelectors.basePackage("com.pxx.xxx.controller"))
                .build();
    }

    private ApiInfo apiInfo() {
        return new ApiInfoBuilder()
                .title("Blog系统API文档")
                .contact(new Contact("作者", "访问地址", "联系方式"))
                .build();
    }
}
这里需要注意的是
.apis(RequestHandlerSelectors.basePackage("com.pxx.xxx.controller"))指定了 Swagger 的扫描包名, 假如不指定此项, 在 Spring Boot 项目中, 会生成 base-err-controller 的 api 接口项。
访问地址
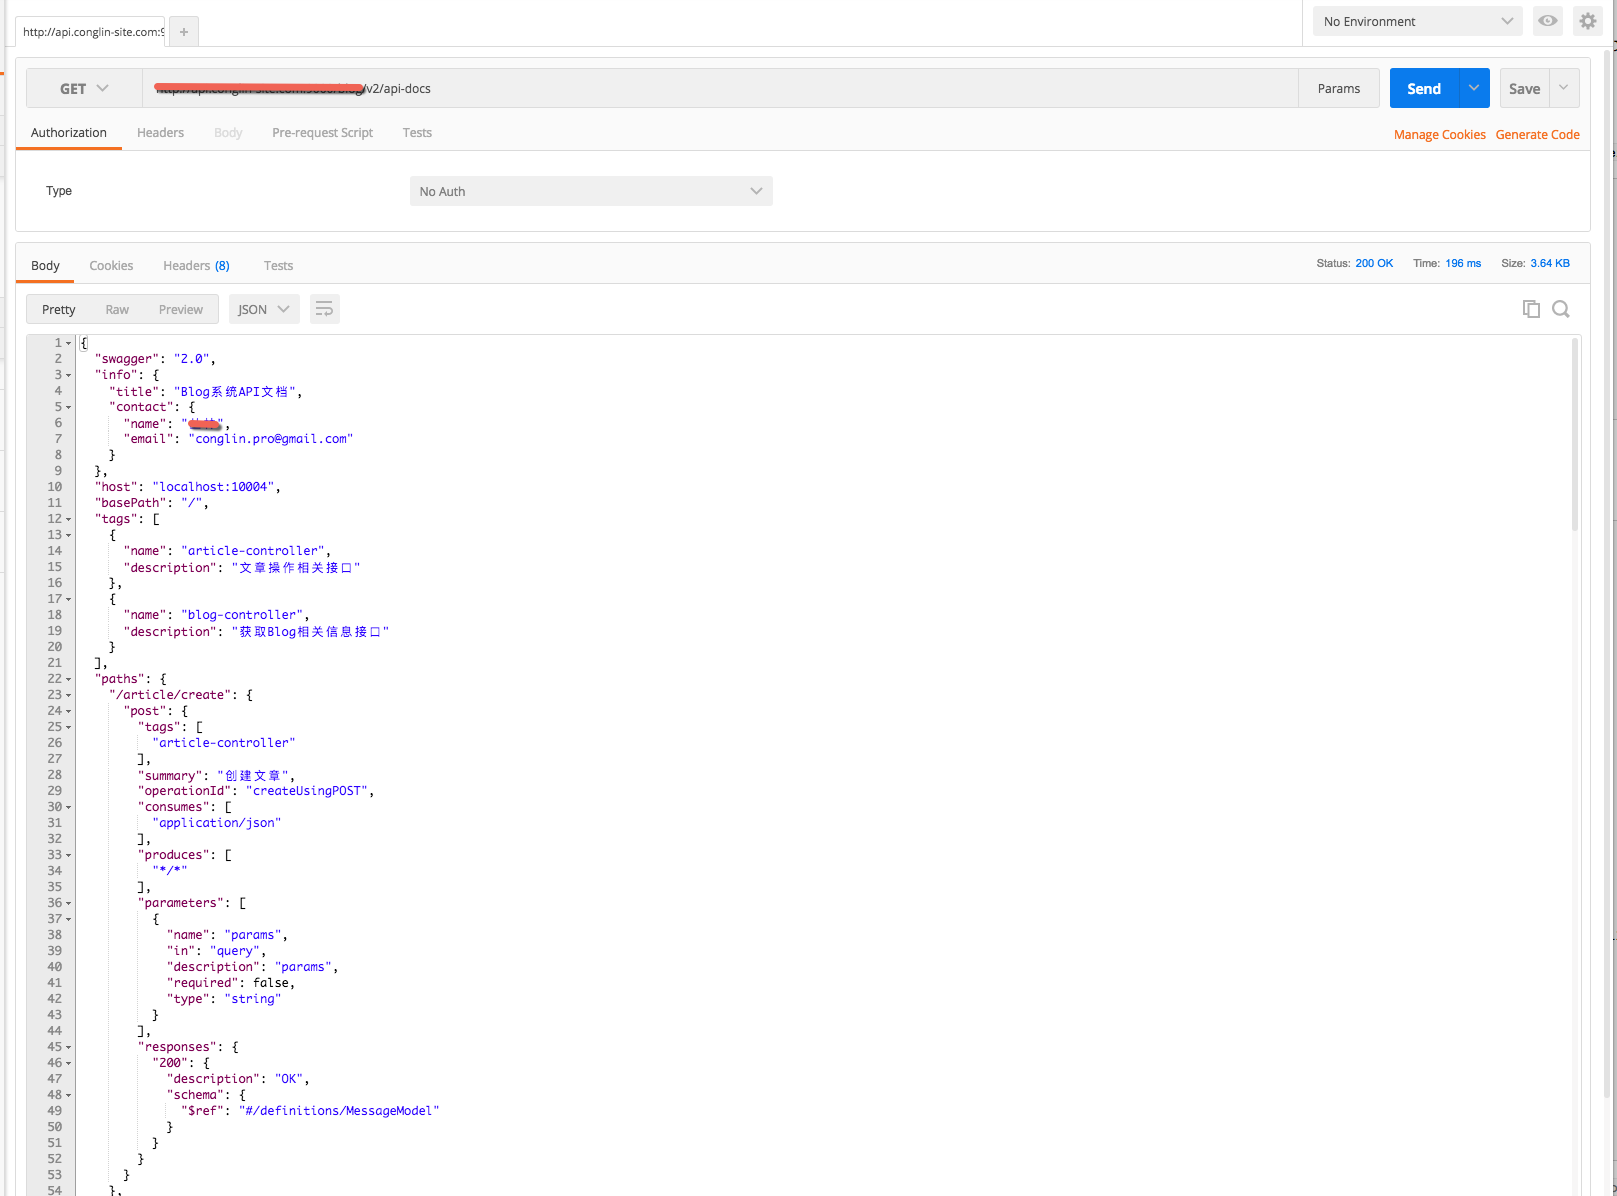
Ok. 接下来运行项目, 访问 http://项目启动地址/v2/api-docs , 就可以访问到生成的文档的json结构. (如下图 )

具体结构可参阅 Swagger官方示例
Swagger UI
当然, 仅有一份JSON文档,还是无法形成直观的API接口文档,我们还需要一份 UI 工具去直观的显示它。Swagger 官方提供了 Swagger UI 来用于文档界面的生成(官方演示)。
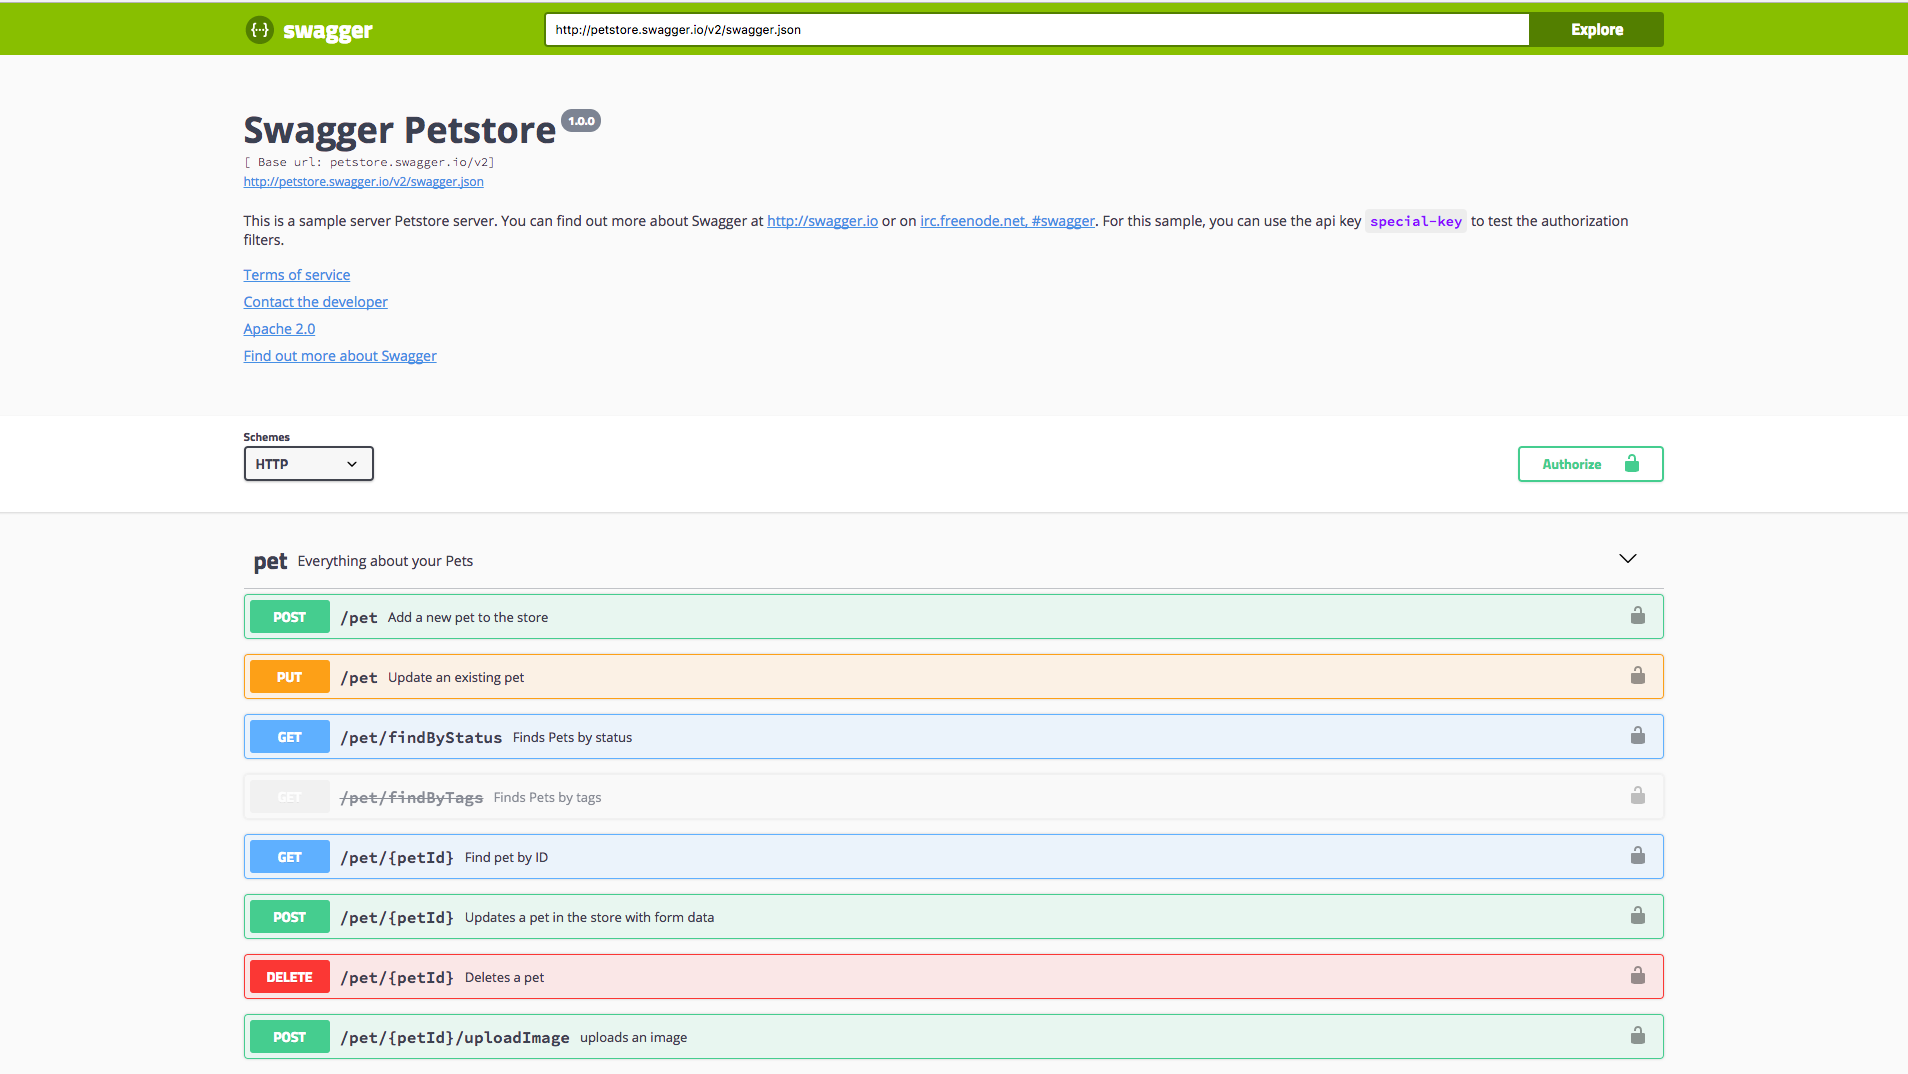
其安装也相对来说比较简单。从官方 GitHub https://github.com/swagger-api/swagger-ui 下载整个项目包 、 解压, 然后运行 dist 目录中的 index.html 即可。 (如下图)

需要注意的是,原始文件中,JSON 文件的来源是固定官方示例,虽然可以收工更改,但是相对来说比较麻烦,所以推荐修改
index.html中
window.onload = function() {
// Build a system
const ui = SwaggerUIBundle({
url:此处修改为你的JSON文件地址,
dom_id: '#swagger-ui',
presets: [
SwaggerUIBundle.presets.apis,
SwaggerUIStandalonePreset
],
plugins: [
SwaggerUIBundle.plugins.DownloadUrl
],
layout: "StandaloneLayout"
})
window.ui = ui
}
注解
OK. 现在所有工作基本就绪,通过添加相应注解就可以快速生成相关接口文档, 这也是个人认为比较好的一点。
@Api(description = "文章操作相关接口")
@RestController@RequestMapping("/article")
public class ArticleController {
    private final Logger logger = LoggerFactory.getLogger(ArticleController.class);

    @Autowiredprivate BlogService blogService;


    @Autowiredprivate JsonMapper jsonMapper;

    @Autowiredprivate Environment env;

    @Autowiredprivate PxxHttp pxxHttp;


    @ApiOperation(value="创建文章", notes="")
    @RequestMapping(value = {"/create"} , method = RequestMethod.POST)
    MessageModel create(@ApiParam @RequestParam("params") String params) throws IOException {

        return result;
    }

    @ApiOperation(value="更新文章", notes="")
    @RequestMapping(value = "/update", method = RequestMethod.POST)
    public @ResponseBodyMessageModel update(@ApiParam @RequestParam("params") String params) throws Exception {

        return result;
    }


    @ApiOperation(value="mns更新文章", notes="")
    @RequestMapping(value = "/updatearticle", method = RequestMethod.POST)
    public @ResponseBodyMessageModel updateArticle(@ApiParam @RequestParam("params") String params) throws Exception {

        return result;
    }

}
@Api(description = ""): 对整个 Controller 的定义做一个解释@ApiOperation(value="", notes=""): 对 Controller 内 function 定义的内容作一解释@ApiParam: 添加到参数前, Swagger 会自动生成 API 文档中对参数的标示
链接:https://www.zhihu.com/question/28119576/answer/134580038
来源:知乎
著作权归作者所有。商业转载请联系作者获得授权,非商业转载请注明出处。
一、环境
1. JAVA8
2. MAVEN 3.0.5
3. IDEA 2016.2.5
4. spring boot 1.4.1
<dependency>
    <groupId>io.springfox</groupId>
    <artifactId>springfox-swagger-ui</artifactId>
    <version>2.2.2</version>
</dependency>

<dependency>
    <groupId>io.springfox</groupId>
    <artifactId>springfox-swagger2</artifactId>
    <version>2.2.2</version>
</dependency>
设置了一些默认显示的api相关信息,最后上截图的时就可以比较清楚的看到。
@Configuration
@EnableSwagger2
public class Swagger2Config {

    @Bean
    public Docket createRestApi() {
        return new Docket(DocumentationType.SWAGGER_2)
                .apiInfo(apiInfo())
                .select()
                .apis(RequestHandlerSelectors.basePackage("info.xiaomo.website"))
                .paths(PathSelectors.any())
                .build();
    }

    private ApiInfo apiInfo() {
        return new ApiInfoBuilder()
                .title("Spring Boot中使用Swagger2构建RESTful APIs")
                .description("api根地址:http://api.xiaomo.info:8080/")
                .termsOfServiceUrl("https://xiaomo.info/")
                .contact("小莫")
                .version("1.0")
                .build();
    }
}
1. @Api
用在类上,说明该类的作用
@Api(value = "UserController", description = "用户相关api")
用在方法上,说明方法的作用
@ApiOperation(value = "查找用户", notes = "查找用户", httpMethod = "GET", produces = MediaType.APPLICATION_JSON_UTF8_VALUE)
用在方法上包含一组参数说明
4. @ApiImplicitParam用在@ApiImplicitParams注解中,指定一个请求参数的各个方面
paramType:参数放在哪个地方
header–>请求参数的获取:@RequestHeader
query–>请求参数的获取:@RequestParam
path(用于restful接口)–>请求参数的获取:@PathVariable
body(不常用)
form(不常用)
name:参数名
dataType:参数类型
required:参数是否必须传
value:参数的意思
defaultValue:参数的默认值
@ApiImplicitParams({
        @ApiImplicitParam(name = "id", value = "唯一id", required = true, dataType = "Long", paramType = "path"),
})
用于表示一组响应
6. @ApiResponse用在@ApiResponses中,一般用于表达一个错误的响应信息
code:数字,例如400
message:信息,例如”请求参数没填好”
response:抛出异常的类
@ApiResponses(value = {
          @ApiResponse(code = 400, message = "No Name Provided")
  })
描述一个Model的信息(这种一般用在post创建的时候,使用@RequestBody这样的场景,请求参数无法使用@ApiImplicitParam注解进行描述的时候)
@ApiModel(value = "用户实体类")
描述一个model的属性
@ApiModelProperty(value = "登录用户")
首先,从github swagger-ui 上下载Swagger-UI, 把该项目dist目录下的内容拷贝到项目的resources的目录public下。
六、访问http://localhost:8080/swagger-ui.html 就可以看到效果如下