浏览器默认是不允许在HTTPS里面引用HTTP资源的
解决办法,https页面里加载的url以双斜杠“//”开头,这种写法有特殊的用途,它会判断当前的页面协议是http 还是 https 来决定请求 url 的协议,防止浏览器报错,如:
<script type="text/javascript" src="//code.jquery.com/jquery-migrate-1.2.1.min.js"></script>
.box { background: url(//zhuimengzhu/public/index/img/logo.png); }
以上情况要保证在https的页面中拉取https的静态资源,那么静态资源就必须支持https。这方面需要运维配置,申请证书,配置到需要使用的服务器上(我们应该事先提供会用到哪些静态资源的域名)。
a标签跳转,因为https的页面中可以跳转到http的页面。如果使用相对协议,跳转的时候会带上页面的协议,我们不能保证目标地址是否支持本页面的协议,所以,建议你使用绝对协议写到页面中
<a href="http://abc.cn/product/1290.html" target="_blank"></a>
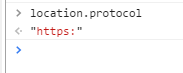
但是当url的参数中需要加入url时,相对协议就不是很好用了。我们的“//”并没有成功,我们需要根据页面的情况加入协议,拼装成完整的url,我们怎么获取协议呢?其实浏览器为我们提供了这种API window.location.protocol 如下图:
Https在各种Web服务器下配置
https的加密方式主要是非对称加密,所以会有一对密钥,分别是一个公钥(证书)和私钥。访问服务器之后客户端会接受一个证书,并利用这个证书里的公钥对数据加密,加密后,服务端tony用自己的私钥解密就行了。
Web服务一般使用OpenSSL工具提供的密码库,生成PEM、KEY、CRT等格式的证书文件。
其中.crt后缀一般存放证书,.key后缀一般存放私钥,.pem后缀的可以同时存放把CA证书和密钥。
生成证书和密钥
可以直接用命令生成
#使用以下命令生成一个证书密钥对 key.pem 和 cert.pem,它将有效期约10年(准确地说是3650天)
openssl req -newkey rsa:2048 -new -nodes -x509 -days 3650 -keyout key.key -out cert.crt
#或者直接生成到一个pem文件中
openssl req -newkey rsa:2048 -new -nodes -x509 -days 3650 -keyout all.pem -out all.pem
也可以用selfsigned插件生成
基于以上生成的all.pem
在cmd的同目录编写app.js,并运行node app.js,启动node服务监听88端口,在页面会展现不是安全的连接:
var https = require('https');
const fs = require('fs');
const path = require('path');

const options = {
  key: fs.readFileSync(path.resolve(__dirname, './all.pem')),//密钥
  cert: fs.readFileSync(path.resolve(__dirname, './all.pem'))//证书
};
https.createServer(options, (request, response)=> {
    // 发送 HTTP 头部
    // HTTP 状态值: 200 : OK
    // 内容类型: text/plain
    response.writeHead(200, {'Content-Type': 'text/plain'});
    // 发送响应数据 "Hello World"
    response.end('Hello World
');
}).listen(88);

// 终端打印如下信息
console.log('Server running at https://127.0.0.1:88/');
webpack的dev-server
配置很简单,只要将https选项设成true即可
module.exports = {
    devServer: {
        https: true
    }
};
原理
在server.js里面判断如果没有证书和密钥,则用selfsigned生成,并放在ssl目录中的server.pem文件下,默认生成有效期为30天:
const certPath = path.join(__dirname, '../ssl/server.pem');
let certExists = fs.existsSync(certPath);
...
if (!certExists) {
log('Generating SSL Certificate');
const attrs = [{ name: 'commonName', value: 'localhost' }];
const pems = selfsigned.generate(attrs, {
  algorithm: 'sha256',
  days: 30,
  keySize: 2048,
  extensions: [...]
});

fs.writeFileSync(certPath, pems.private + pems.cert, { encoding: 'utf-8' });
}
fakeCert = fs.readFileSync(certPath);
启动服务的时候引用证书和密钥