12.自定义拦截器
拦截器是Struts2的一个重要特性。因为Struts2的大多数核心功能都是通过拦截器实现的。拦截器之所以称之为“拦截器”,是因为它可以拦截Action方法的执行,即在Acton方法执行之前或之后执行,以加强Action方法的功能。例如,一般情况下,用户在打开某个页面之前,需要先登录,否则是无法对资源进行访问的。这就是权限拦截器。
1、定义拦截器类
自定义的拦截器类需要实现拦截器接口com.opensymphony.xwork2.interceptor.Interceptor。
该接口中定义了三个方法:
public void init():拦截器实例被创建之前被调用
public void destroy():拦截器实例被销毁之前被调用
public String intercept (ActionInvocation invocation) throws Exception
该方法在Action执行之前被调用,拦截器的附加功能在该方法中实现。
执行参数invocation的invoke()方法,就是调用Action方法在执行。
intercept()方法的完全结构如下图所示:

2、注册拦截器
拦截器类在定义好后,需要在struts.xml配置文件中注册,以通知Struts2框架。
在<package>中添加如下标签:
<package name="one" extends="struts-default">
<interceptors>
      <interceptor name="permission" class="interceptors.PermissionInterceptor"/>
</interceptors>
    <action name="my" class="actions.MyAction">
            <result>/message.jsp</result>
    </action>
 </package>
注册后的拦截器,便可由Action通过配置文件配置来使用了。
<package name="one" extends="struts-default">
        <interceptors>
                     <interceptor name="permission" class="interceptors.PermissionInterceptor"/>
        </interceptors>
        <action name="my" class="actions.MyAction">
                     <interceptor-ref name="permission" />
        </action>
 </package>
但,这种用法非常不好。因为这样会使该Action不能再使用Struts2自带的各种核心拦截器,而只使用这一个了。
若要使该Action既能使用自定义的拦截器,又能使用Struts2自带的拦截器,那么就需要在包中定义拦截器栈:
在<interceptors>中添加<interceptor-stack>标签。
<interceptors>
      <interceptor name="permission"
                     class="interceptors.PermissionInterceptor"/>
      <interceptor-stack name="permissionStack">
<interceptor-ref name="defaultStack"/>
<interceptor-ref name="permission" />
      </interceptor-stack>
</interceptors>
defaultStack为Struts2自带的各种拦截器的栈。
即该自定义的拦截器栈permissionStack中,包括一个拦截器栈与一个拦截器。
<action name="my" class="actions.MyAction">
<interceptor-ref name=" permissionStack " />
</action>
当然,不定义permissionStack 拦截器栈直接按如下写法也可:
<action name="list" class="actions.MyAction">
<interceptor-ref name="defaultStack"/>
<interceptor-ref name="permission" />
</action>
这样,该action即可以使用defaultStack核心拦截器栈,又可以使用自定义的拦截器。
若该<package>中的所有Action均要使用该拦截器,一种方式是,每个Action均像上面那样指定要使用的拦截器栈permissionStack ;另一种方式是,指定默认的拦截器栈。即在<package>下定义:<default-interceptor-ref name=" permissionStack " />这样,每一个本包中的Action不用声明使可直接使用该拦截器栈。注意:每个包只能指定一个默认拦截器。另外,一旦为该包中的某个action显式指定了某个拦截器,则默认拦截器就不会起作用了。
实例:权限拦截器--interceptor
只有经过登录的用户方可访问Action中的方法,否则,将返回“无权访问”提示。本例的登录,由一个JSP页面完成。即在该页面里将用户信息放入session中。也就是说,只要访问过该页面,就说明登录了。没访问过,则为未登录用户。
代码文档目录:

Step1:编写index.jsp与login.jsp页面
index.jsp源码如下:
<%@ page language="java" import="java.util.*" pageEncoding="ISO-8859-1"%>
<%
String path = request.getContextPath();
String basePath = request.getScheme()+"://"+request.getServerName()+":"+request.getServerPort()+path+"/";
%>

<!DOCTYPE HTML PUBLIC "-//W3C//DTD HTML 4.01 Transitional//EN">
<html>
  <head>
    <base href="<%=basePath%>">

    <title>My JSP 'index.jsp' starting page</title>

    <meta http-equiv="pragma" content="no-cache">
    <meta http-equiv="cache-control" content="no-cache">
    <meta http-equiv="expires" content="0">
    <meta http-equiv="keywords" content="keyword1,keyword2,keyword3">
    <meta http-equiv="description" content="This is my page">
    <!--
    <link rel="stylesheet" type="text/css" href="styles.css">
    -->

  </head>

  <body>
    This is my JSP page. <br>
  </body>
</html>
login.jsp源码如下:
<%@page pageEncoding="utf-8"%>
<%
     session.setAttribute("user", "aynu");
 %>
登陆成功!
Step2:编写MyAction.java与PermissionInterceptor.java
MyAction.java源码如下:
package actions;

public class MyAction {

  public String execute(){
      System.out.println("执行Action方法");
      return "success";
  }
}
PermissionInterceptor.java源码如下:
package interceptors;

import com.opensymphony.xwork2.ActionContext;
import com.opensymphony.xwork2.ActionInvocation;
import com.opensymphony.xwork2.interceptor.Interceptor;

public class PermissionInterceptor implements Interceptor {

    public void destroy() { }

    public void init() {    }

    public String intercept(ActionInvocation invocation) throws Exception {
        String user=(String) ActionContext.getContext().getSession().get("user");

        //执行Action方法
        String result="success";
        if (user!=null) {
            System.out.println("Action方法执行之前的附加功能");
            result = invocation.invoke();
            System.out.println("Action方法执行之后的附加功能");
            ActionContext.getContext().getSession().put("message","欢迎访问");
        }else{
            ActionContext.getContext().getSession().put("message","无权访问");

        }
        return result;
    }

}
Step3:编写web.xml与struts.xml
web.xml配置如下:
<?xml version="1.0" encoding="UTF-8"?>
<web-app version="2.5"
    xmlns="http://java.sun.com/xml/ns/javaee"
    xmlns:xsi="http://www.w3.org/2001/XMLSchema-instance"
    xsi:schemaLocation="http://java.sun.com/xml/ns/javaee
    http://java.sun.com/xml/ns/javaee/web-app_2_5.xsd">

        <filter>
        <filter-name>struts2</filter-name>
        <filter-class>org.apache.struts2.dispatcher.ng.filter.StrutsPrepareAndExecuteFilter</filter-class>
        </filter>

        <filter-mapping>
        <filter-name>struts2</filter-name>
        <url-pattern>/*</url-pattern>
        </filter-mapping>


  <welcome-file-list>
    <welcome-file>index.jsp</welcome-file>
  </welcome-file-list>
</web-app>
struts.xml配置如下:
<?xml version="1.0" encoding="UTF-8" ?>
<!DOCTYPE struts PUBLIC
    "-//Apache Software Foundation//DTD Struts Configuration 2.0//EN"
    "http://struts.apache.org/dtds/struts-2.0.dtd">

<struts>

     <package name="one" extends="struts-default">
     <interceptors>
       <interceptor name="permission" class="interceptors.PermissionInterceptor"/>
                   <interceptor-stack name="permissionStack">
                   <interceptor-ref name="defaultStack"/>
                   <interceptor-ref name="permission"/>
                   </interceptor-stack>
     </interceptors>
     <default-interceptor-ref name="permissionStack"/>
        <action name="my" class="actions.MyAction">
            <result>/message.jsp</result>
        </action>

    </package>

</struts>
Step4:编写message.jsp页面
<%@ page pageEncoding="utf-8" isELIgnored="false"%>

<html>
  <head>
        <title>message page</title>
  </head>
  <body>
  提示信息:${message}
</body>
</html>
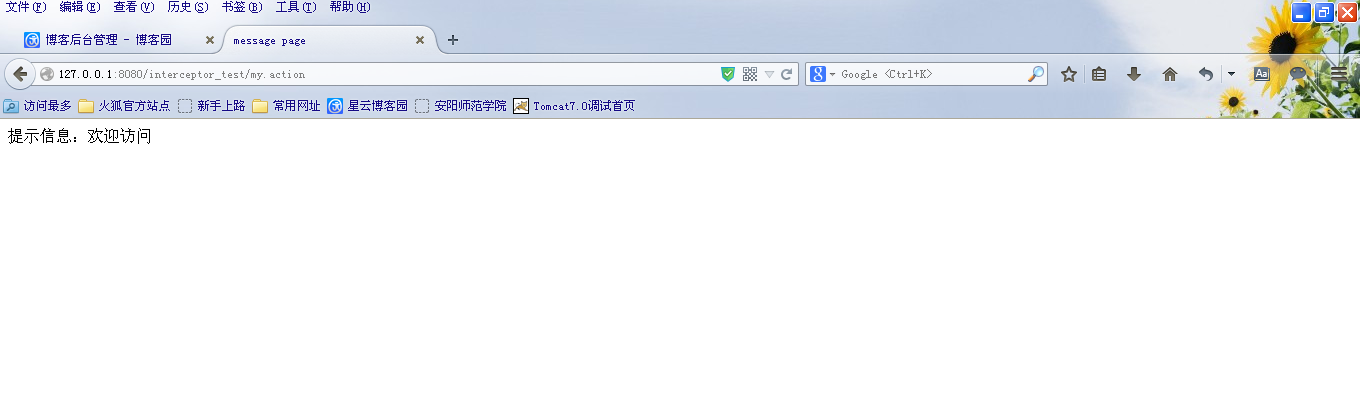
部署发布,启动tomcat,输入地址:
http://127.0.0.1:8080/interceptor_test/my.action

输入地址:
http://127.0.0.1:8080/interceptor_test/login.jsp

输入地址:
http://127.0.0.1:8080/interceptor_test/my.action