一、配置prometheus
1、修改配置文件
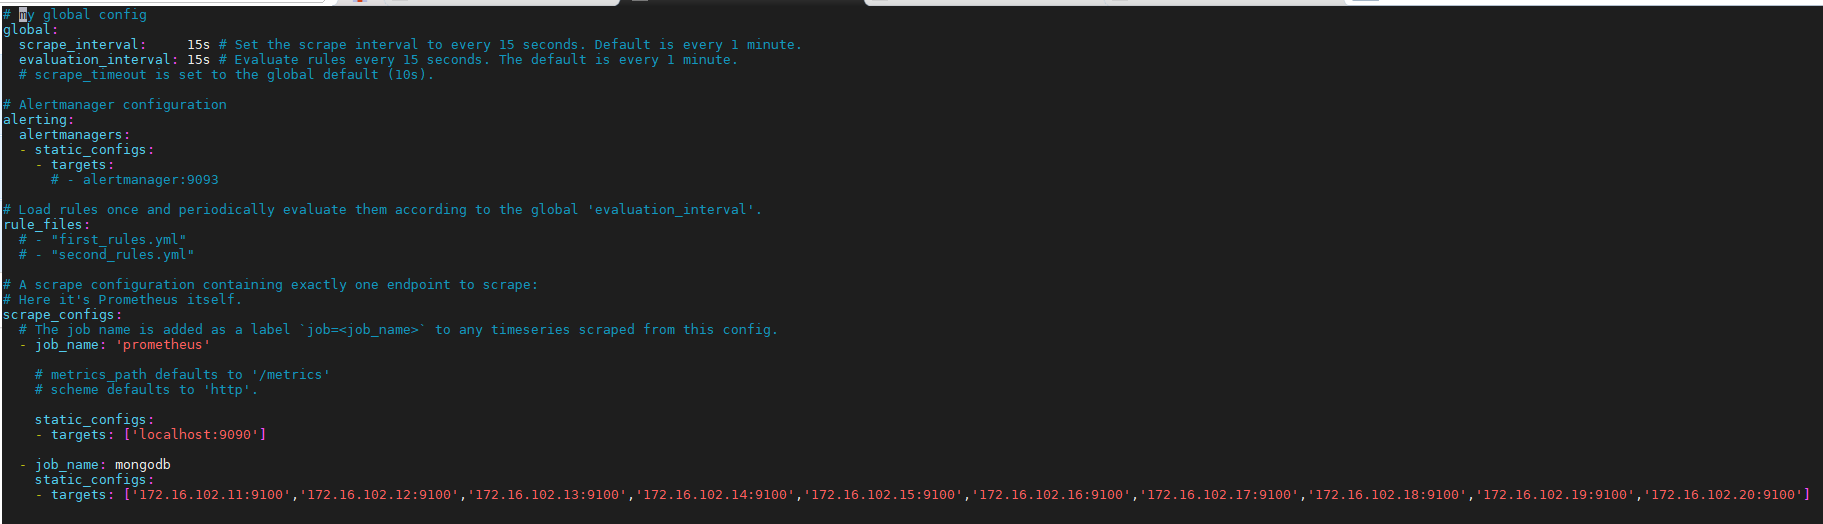
[root@mongodb05 cfg]# cat prometheus.yml
# my global config
global:
scrape_interval: 15s # Set the scrape interval to every 15 seconds. Default is every 1 minute.
evaluation_interval: 15s # Evaluate rules every 15 seconds. The default is every 1 minute.
# scrape_timeout is set to the global default (10s).
# my global config
global:
scrape_interval: 15s # Set the scrape interval to every 15 seconds. Default is every 1 minute.
evaluation_interval: 15s # Evaluate rules every 15 seconds. The default is every 1 minute.
# scrape_timeout is set to the global default (10s).
# Alertmanager configuration
alerting:
alertmanagers:
- static_configs:
- targets:
# - alertmanager:9093
alerting:
alertmanagers:
- static_configs:
- targets:
# - alertmanager:9093
# Load rules once and periodically evaluate them according to the global 'evaluation_interval'.
rule_files:
# - "first_rules.yml"
# - "second_rules.yml"
rule_files:
# - "first_rules.yml"
# - "second_rules.yml"
# A scrape configuration containing exactly one endpoint to scrape:
# Here it's Prometheus itself.
scrape_configs:
# The job name is added as a label `job=<job_name>` to any timeseries scraped from this config.
- job_name: 'prometheus'
# Here it's Prometheus itself.
scrape_configs:
# The job name is added as a label `job=<job_name>` to any timeseries scraped from this config.
- job_name: 'prometheus'
# metrics_path defaults to '/metrics'
# scheme defaults to 'http'.
# scheme defaults to 'http'.
static_configs:
- targets: ['localhost:9090']
- targets: ['localhost:9090']
- job_name: mongodb05
static_configs:
- targets: ['172.16.102.15:9100']
static_configs:
- targets: ['172.16.102.15:9100']
监控多个mongodb服务器
- targets 包含多个ip
2、检查配置文件
# promtool check config /app/prometheus/config/prometheus.yml
Checking /app/prometheus/config/prometheus.yml
  SUCCESS: 0 rule files found

3、重启prometheus
关闭后,使用下面方式开启,并记下日志
/u01/soft/prometheus/bin/prometheus --config.file=/u01/soft/prometheus/cfg/prometheus.yml --storage.tsdb.path=/u01/soft/prometheus/data > prometheus.log 2>&1 &
二、Grafana添加数据源
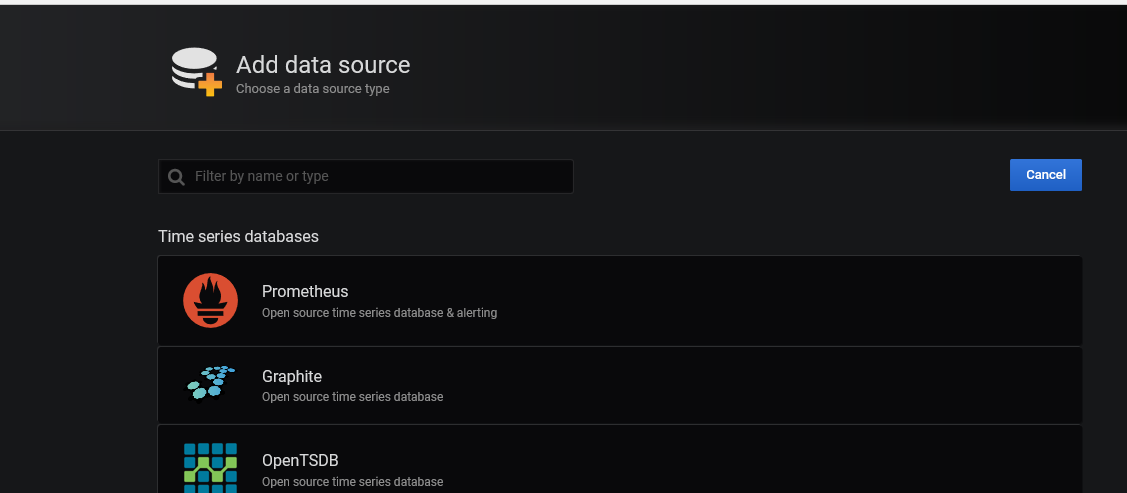
1、首页选择Add data source

2、选择prometheus
3、配置

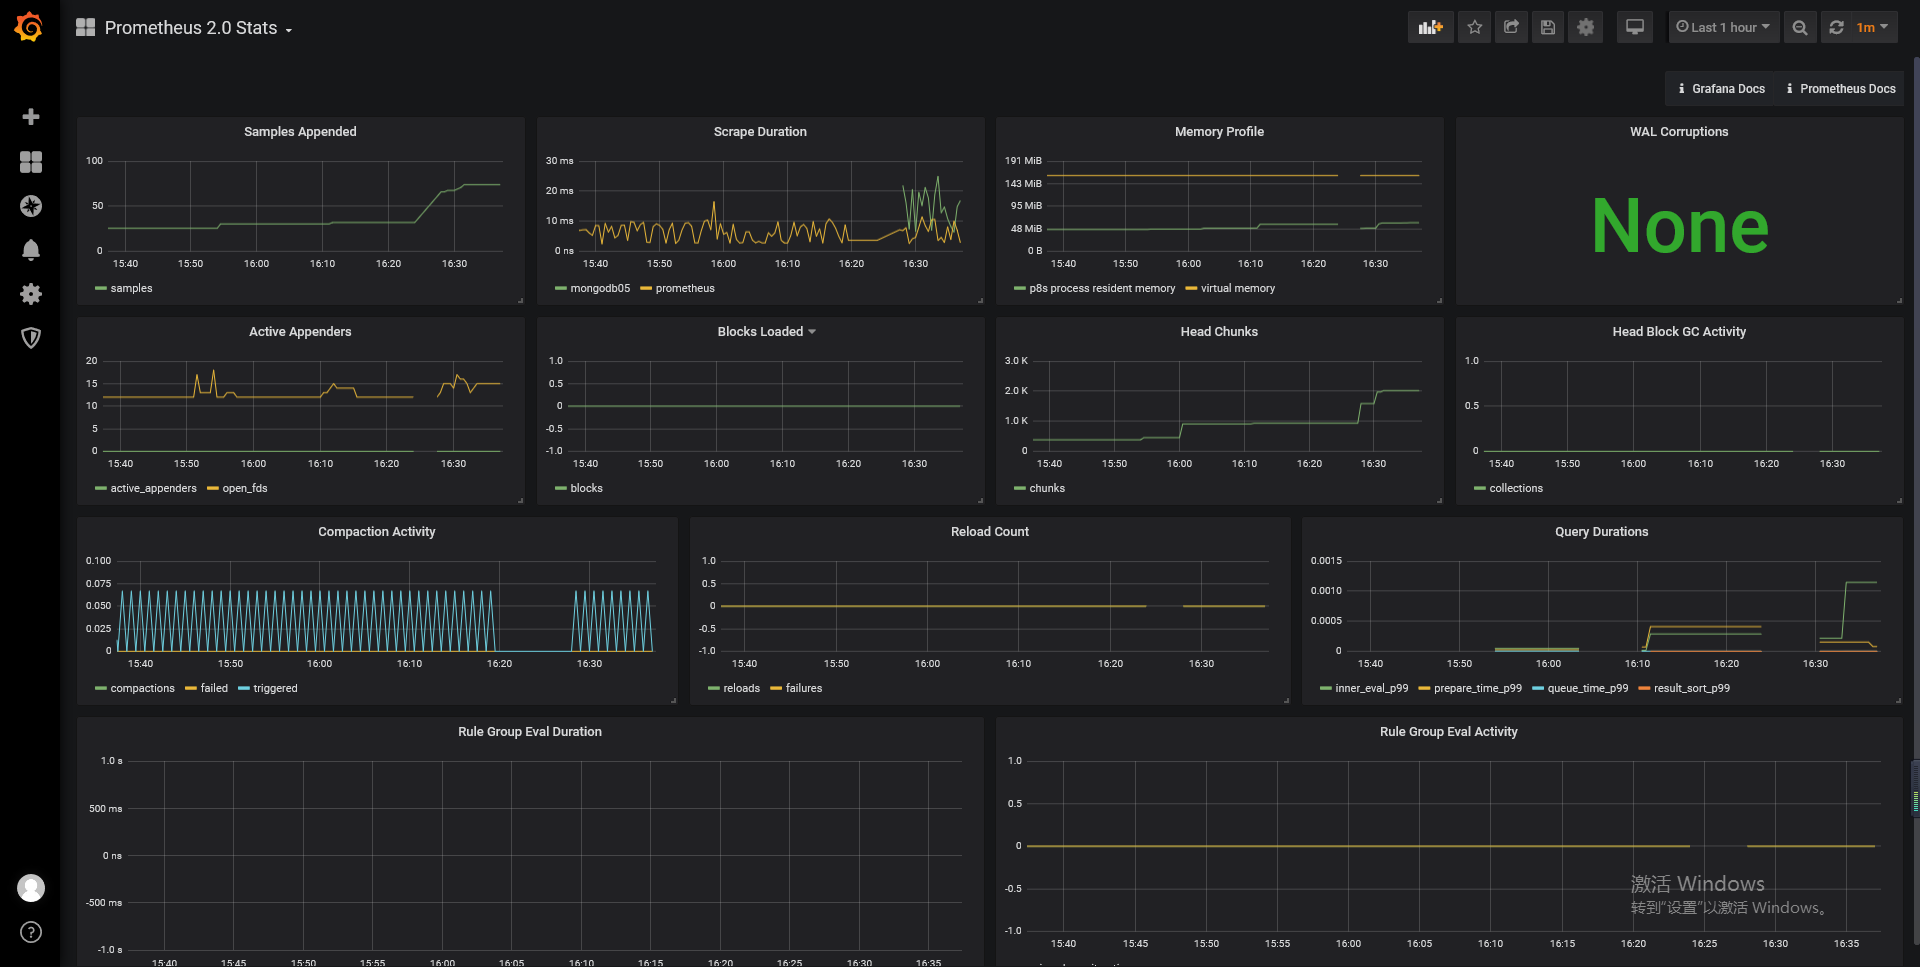
4、进入grafana默认提供的页面

三、导入模板
1、下载模板
https://grafana.com/grafana/dashboards
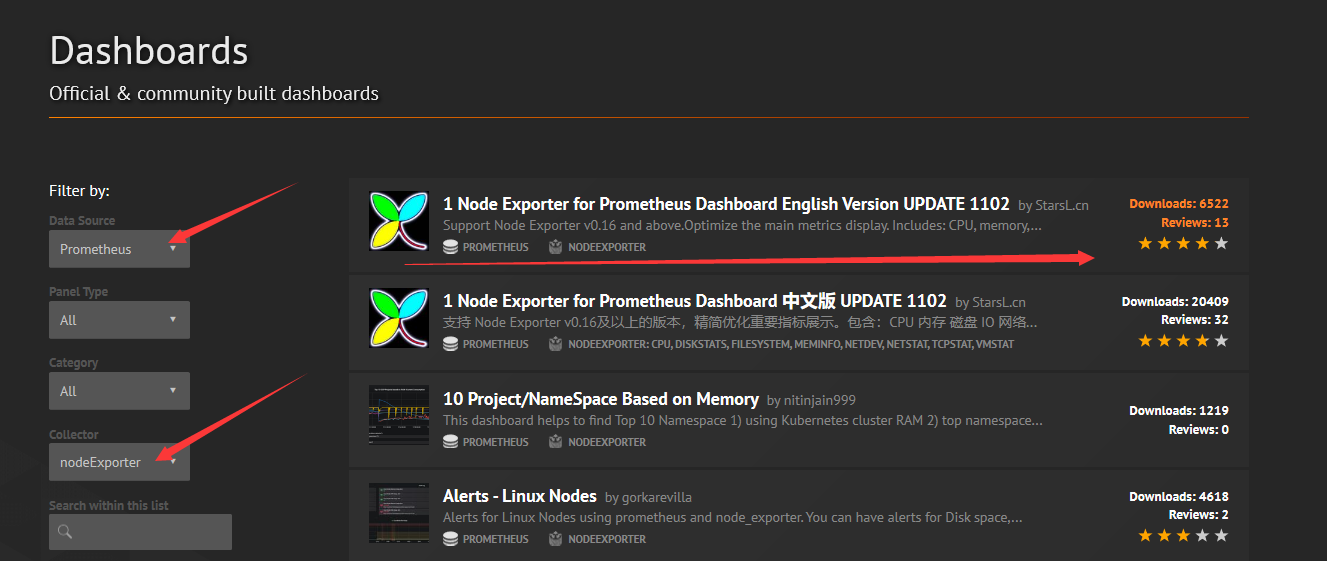
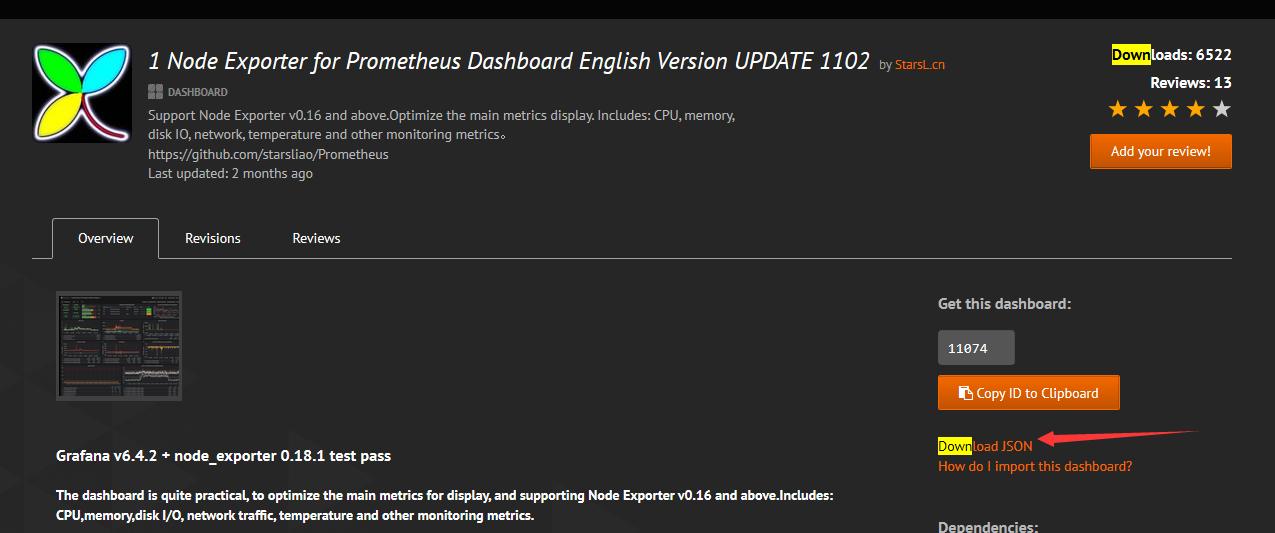
2、down json
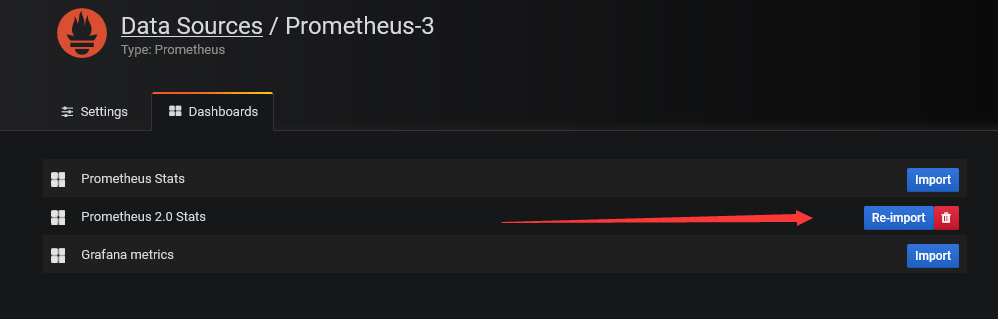
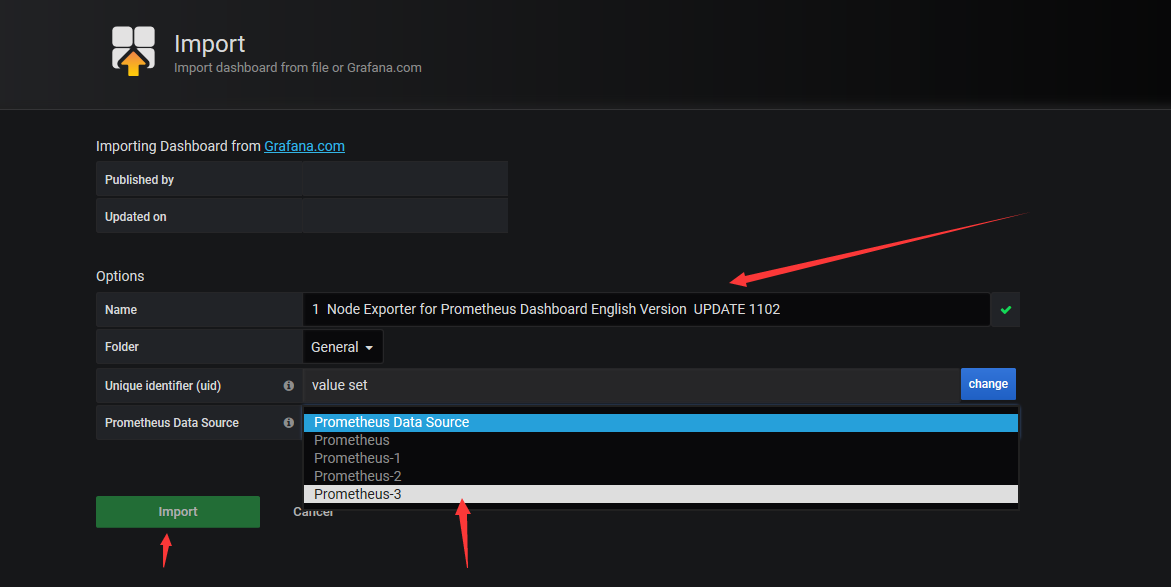
3、导入模板

4、新模板效果
