ElasticSearch
1、概述
Elasticsearch 是一个分布式可扩展的实时搜索和分析引擎,一个建立在全文搜索引擎 Apache Lucene(TM) 基础上的搜索引擎.当然 Elasticsearch 并不仅仅是 Lucene 那么简单,它不仅包括了全文搜索功能,还可以进行以下工作:
- 分布式实时文件存储,并将每一个字段都编入索引,使其可以被搜索。
- 实时分析的分布式搜索引擎。
- 可以扩展到上百台服务器,处理PB级别的结构化或非结构化数据。
基本概念
先说Elasticsearch的文件存储,Elasticsearch是面向文档型数据库,一条数据在这里就是一个文档,用JSON作为文档序列化的格式,比如下面这条用户数据:
{
    "name" :     "John",
    "sex" :      "Male",
    "age" :      25,
    "birthDate": "1990/05/01",
    "about" :    "I love to go rock climbing",
    "interests": [ "sports", "music" ]
}
用Mysql这样的数据库存储就会容易想到建立一张User表,有balabala的字段等,在Elasticsearch里这就是一个文档,当然这个文档会属于一个User的类型,各种各样的类型存在于一个索引当中。这里有一份简易的将Elasticsearch和关系型数据术语对照表:
关系数据库       ⇒ 数据库        ⇒ 表          ⇒ 行              ⇒ 列(Columns)

Elasticsearch  ⇒ 索引(Index)   ⇒ 类型(type)  ⇒ 文档(Docments)  ⇒ 字段(Fields)
一个 Elasticsearch 集群可以包含多个索引(数据库),也就是说其中包含了很多类型(表)。这些类型中包含了很多的文档(行),然后每个文档中又包含了很多的字段(列)。Elasticsearch的交互,可以使用Java API,也可以直接使用HTTP的Restful API方式,比如我们打算插入一条记录,可以简单发送一个HTTP的请求:
PUT /megacorp/employee/1
{
    "name" :     "John",
    "sex" :      "Male",
    "age" :      25,
    "about" :    "I love to go rock climbing",
    "interests": [ "sports", "music" ]
}
更新,查询也是类似这样的操作,具体操作手册可以参见Elasticsearch权威指南
ElasticSearch的搜索是采用的倒排索引,具体的看倒排索引
2、ik分词器
什么是ik分词器?
分词:即把一段中文或者别的划分为一个个关键字,我们在搜索的时候会把自己的信息进行分词,会把数据库中或者索引库中的数据进行分词,然后进行一个匹配操作,默认的中文分词是将每个字看成一个词,比如“我爱小胖”,就会被分成"我",”爱“,”小“,”胖“,这明显是不符合要求的,所以我们需要安装一个中文分词器来解决这个问题。
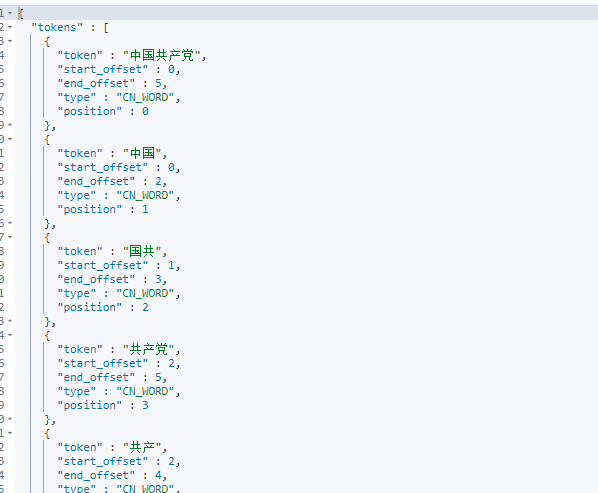
IK提供了两个分词算法:ik_smart和ik_max_word,其中ik_smart为最少划分,ik_max_word为最细度划分。
测试:
ik_smart最少划分

ik_max_word最细度划分
我们还使用过程中,还可能遇到ik词中没有”张锦豪“这个词,把它划分成了"张","锦",”豪“。
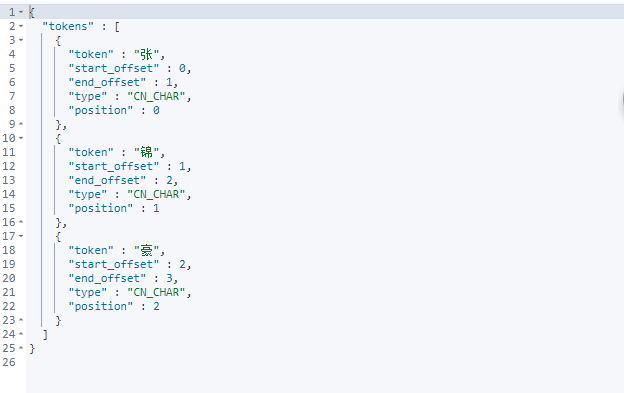
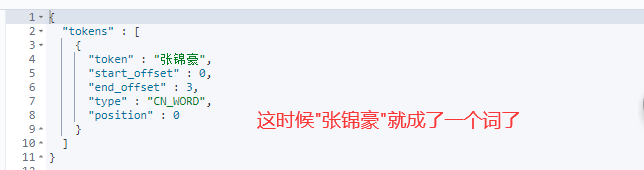
这时候我们可以在ik分词器中的配置文件添加自己所需要的词。

然后查询出来的就是”张锦豪“
注意:类型为keyword类型的字段不能被分词器解析。
3、Restful风格
一种软件架构风格,而不是标准,只是提供了一组设计原则和约束条件。它主要用于客户端和服务端交互的软件,基于这个风格设计的软件可以更加简洁,更有层次,更易于实现缓存等机制。
基本的Rest命令说明:
| method | url | 描述 |
|---|---|---|
| put | localhost:9200/索引名称/类型名称/文档id | 创建文档(指定id) |
| post | localhost:9200/索引名称/类型名称 | 创建文档(随机文档id) |
| post | localhost:9200/索引名称/类型名称/文档id/_update | 修改文档 |
| delete | localhost:9200/索引名称/类型名称/文档id | 删除文档 |
| get | localhost:9200/索引名称/类型名称/文档id | 查询文档通过id |
| post | localhost:9200/索引名称/类型名称/_search | 查询所有数据 |
基础测试
1、创建索引

数据添加成功,我们在创建的时候没有标明数据字段的类型,es会自动帮我们设置

我这也可以自己设置索引的数据类型,在创建的时候。

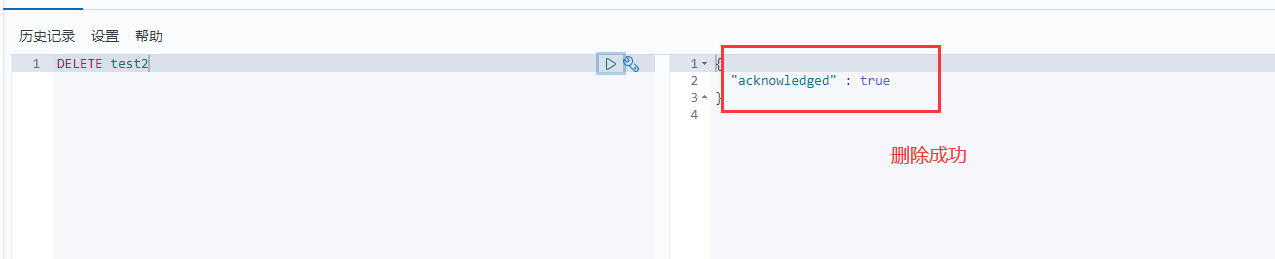
2、删除索引
3、修改索引数据
- 通过put方式在原有的数据上直接修改,把原来的数据覆盖掉(如果有些字段没写,就会变为了空)

- 通过post的put方式指定文档id/_update修改数据(推荐使用这种方式,灵活性更高)

4、查询索引数据
get 索引名
4、文档的花式查询
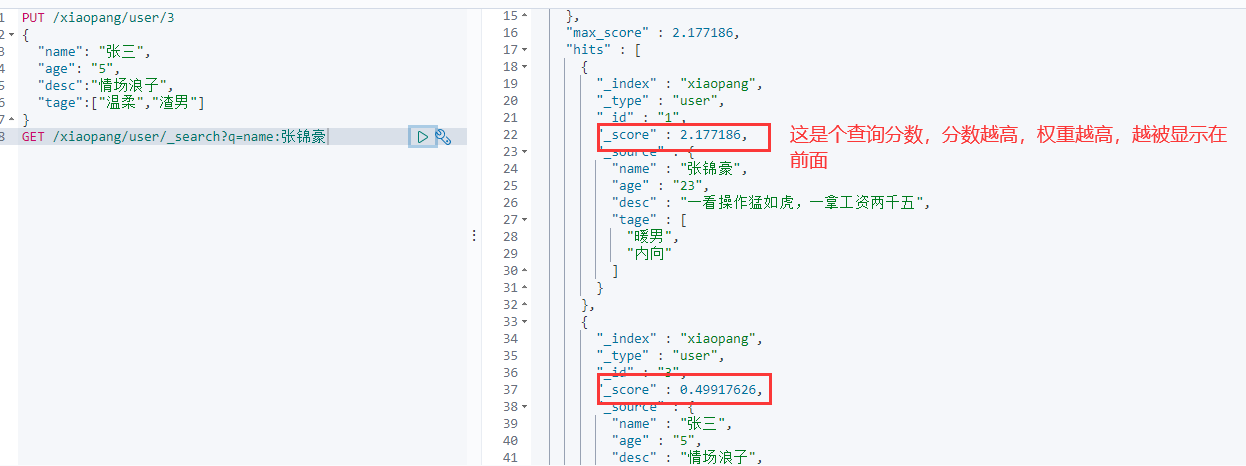
1、简单的查询

这里需要注意
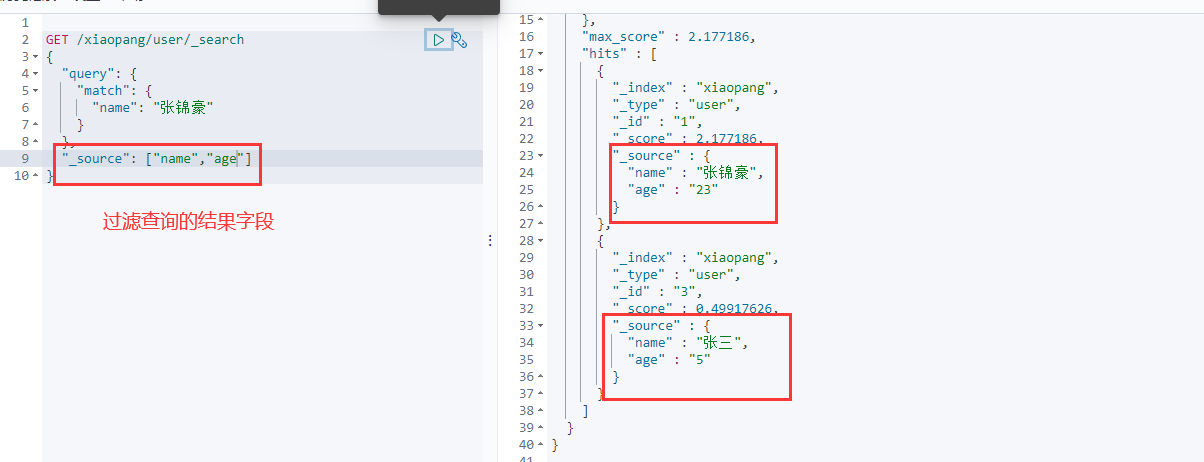
复杂查询

过滤查询结果 相当于mysql种的select * 跟select 字段的区别
排序

分页查询

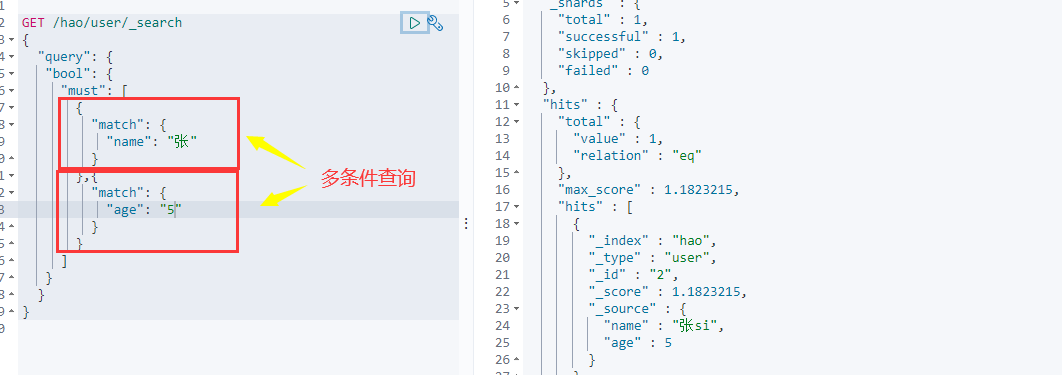
bool 布尔值查询
多条件查询 must就相当于sql中的and,所有条件都必须满足
should 相当于or,只要满足了其中一个条件的就可以

must_not 相当于not,非,不满足

filter 过滤器

匹配多个条件查询

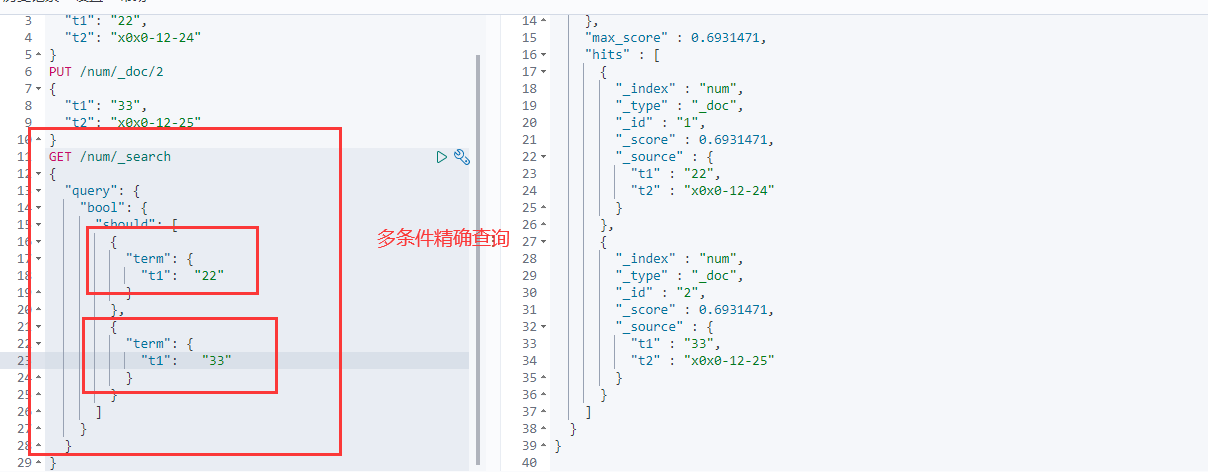
term 精确查询
term查询是直接通过倒排索引指定的词条进程精确的查找的。
在使用term精确查询时,类型为keyword的不会被分词器解析。
多条件精确查询
highlight 高亮

5、Spingboot集成
1、导入依赖
<dependency>
			<groupId>org.elasticsearch.client</groupId>
			<artifactId>elasticsearch-rest-high-level-client</artifactId>
			<version>7.6.1</version>
		</dependency>
注意点:导入的依赖版本一定要跟自己安装的版本所对应

2、编写配置文件
@Configuration
public class EsConfig {
    @Bean
    public RestHighLevelClient restHighLevelClient(){
        RestHighLevelClient client = new RestHighLevelClient(
                RestClient.builder(
                        new HttpHost("127.0.0.1", 9200,"http")
                )
        );
        return client;
    }
}
3测试
3.1、创建索引
   @Autowired
    @Qualifier("restHighLevelClient")
    private RestHighLevelClient client;

    //测试创建索引请求 相当于一个put请求
    @Test
    void contextLoads() throws IOException {
        //创建索引请求
        CreateIndexRequest request = new CreateIndexRequest("xiaopang_index");
        //客户端执行请求
        CreateIndexResponse response = client.indices().create(request, RequestOptions.DEFAULT);
        System.out.println(response);

    }

3.2、查询索引是否存在
//测试查询索引
 @Test
 void contextLoads2() throws IOException {
     //查询索引请求
     GetIndexRequest request = new GetIndexRequest("xiaopang_index");
     //客户端执行请求
     boolean response = client.indices().exists(request,RequestOptions.DEFAULT);
     System.out.println(response);

 }
//结果返回true
3.3、删除索引
//测试删除索引
@Test
void contextLoads3() throws IOException {
    //删除索引请求
    DeleteIndexRequest request = new DeleteIndexRequest("xiaopang_index");
    //客户端执行请求
    AcknowledgedResponse delete = client.indices().delete(request, RequestOptions.DEFAULT);
    System.out.println(delete.isAcknowledged());

}
//结果返回true
6、springboot集成之文档型操作
1、添加文档
 //测试添加文档
    @Test
    public void addDocumentTest() throws IOException {
        //创建对象
        User user = new User("小胖", 13);
        //创建请求
        IndexRequest request = new IndexRequest("xiaopang");
        //创建规则 相当于 put  /xiaopang/_doc/1
        //设置文档id
        request.id("1");
        //设置请求实践
        request.timeout("1s");
        //将我们的user类封装成json,放入请求中
        request.source(JSON.toJSONString(user), XContentType.JSON);

        //客户端发送请求,返回响应结果
        IndexResponse index = client.index(request, RequestOptions.DEFAULT);
        System.out.println(index.toString());
        System.out.println(index.status());

    }
//返回结果
IndexResponse[index=xiaopang,type=_doc,id=1,version=1,result=created,seqNo=0,primaryTerm=1,shards={"total":2,"successful":1,"failed":0}]  //具体的信息
CREATED  //执行的状态  添加

2、查询文档信息
//测试查询文档信息
@Test
public void selectDocumentTest() throws IOException {
    //创建查询请求
    GetRequest request = new GetRequest("xiaopang", "1");

    //判断文档是否存在
    boolean exists = client.exists(request, RequestOptions.DEFAULT);
    System.out.println(exists);
    GetResponse response = client.get(request, RequestOptions.DEFAULT);
    System.out.println(response.getSource()); //获取文档内容信息
    System.out.println(response);  //获取文档全部信息

}
//返回结果
true
{name=小胖, age=13}
{"_index":"xiaopang","_type":"_doc","_id":"1","_version":1,"_seq_no":0,"_primary_term":1,"found":true,"_source":{"age":13,"name":"小胖"}}
3、修改文档信息
 //测试修改文档信息
    @Test
    public void updateDocumentTest() throws IOException {
        //创建修改请求
        UpdateRequest request = new UpdateRequest("xiaopang", "1");
        //设置响应时间
        request.timeout("1s");
        //创建新的user类,这里相当于使用了put命令去修改文档信息,直接覆盖信息
        User user = new User("张锦豪", 18);
        //将新的user放入请求
       request.doc(JSON.toJSONString(user),XContentType.JSON);
       //客户端执行请求
        UpdateResponse update = client.update(request, RequestOptions.DEFAULT);
        System.out.println(update.status());
    }
//返回结果
OK

4、删除文档信息
//测试删除文档信息
@Test
public void deleteDocumentTest() throws IOException {
    DeleteRequest request = new DeleteRequest("xiaopang", "1");
    request.timeout("1s");
    DeleteResponse delete = client.delete(request, RequestOptions.DEFAULT);
    System.out.println(delete.status());
}
//返回结果
ok
5、数据批量插入
//数据批量插入
    @Test
    public void test1() throws IOException {
        BulkRequest bulkRequest = new BulkRequest();
        bulkRequest.timeout("10s");
        ArrayList<User> users = new ArrayList<>();
        users.add(new User("xiaopang1",1));
        users.add(new User("xiaopang2",1));
        users.add(new User("xiaopang3",1));
        users.add(new User("jinhao1",3));
        users.add(new User("jinhao2",3));
        users.add(new User("jinhao3",3));

        for (int i = 0; i <users.size() ; i++) {
            bulkRequest.add(
                    new IndexRequest("xiaopang")
                    .id(""+(i+1))
                    .source(JSON.toJSONString(users.get(i)),XContentType.JSON)
            );
        }
        BulkResponse responses = client.bulk(bulkRequest, RequestOptions.DEFAULT);
        System.out.println(responses.hasFailures());//是否失败,false代表成功了
    }

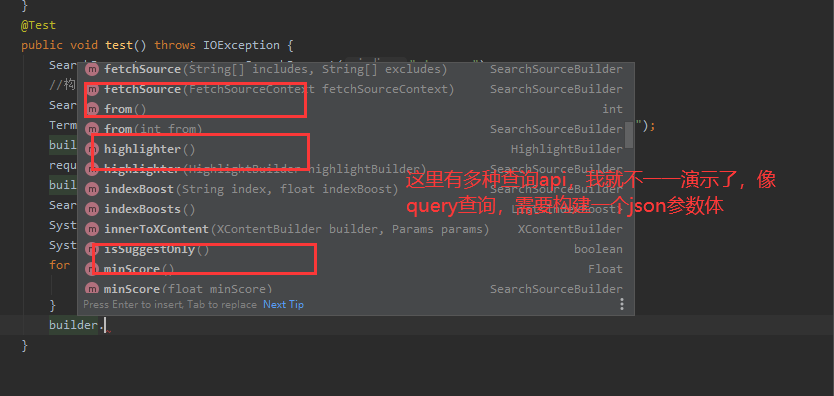
6、复杂查询处理
  @Test
    public void test() throws IOException {
        SearchRequest request = new SearchRequest("xiaopang");
        //构建条件搜索
        SearchSourceBuilder builder = new SearchSourceBuilder();
        TermQueryBuilder matchQuery = QueryBuilders.termQuery("name", "jinhao1");
        builder.query(matchQuery);
        request.source(builder);
        builder.timeout(new TimeValue(60, TimeUnit.SECONDS));
        SearchResponse search = client.search(request, RequestOptions.DEFAULT);
        System.out.println(JSON.toJSONString(search));
        System.out.println("============================================");
        for (SearchHit hit : search.getHits().getHits()) {
            System.out.println(hit.getSourceAsMap());
        }

    }