今天项目第一次验收,夜晚吃过晚饭后,想把项目中用到的关于微信配置总结一下,虽然网上关于这方面的资料很多很多,还有官方API,但是总感觉缺点什么,就像期初做这个项目时,各方面找了很久的资料,说说配置吧!
1.你必须有一个微信可以访问的网站,然后有一个公众账户。
2.成为开发者。
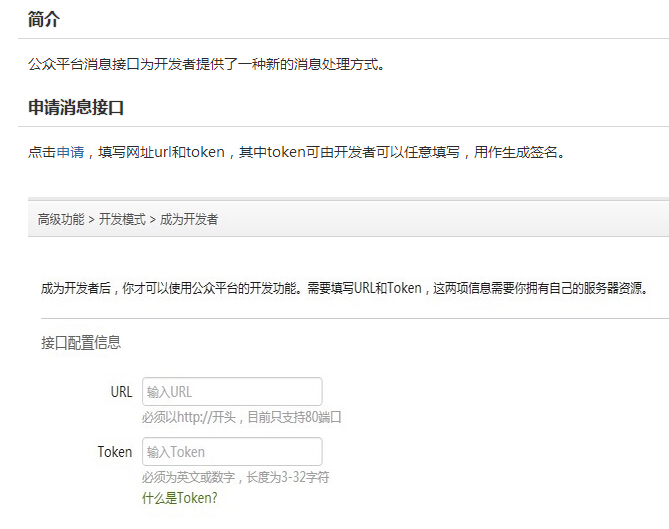
上面这个URL填写你的网站的链接,微信服务器会放这个URL推送一些验证信息,具体验证信息,你可以查看官方API,写的很详细,因为我用的是MVC,所以我写了一个类,让控制器继承这个类,源码贴下,大家一看就明白。还有这个URL有很大用处,以后微信会往这个URL推送很多消息,比如用户的地理位置等,这里地理位置是微信推送给我们的,大家不要像我一样,理解错了,到时候会走很多弯路。


  1 using System;
  2 using System.Collections.Generic;
  3 using System.IO;
  4 using System.Linq;
  5 using System.Text;
  6 using System.Web;
  7 using System.Web.Mvc;
  8 using System.Web.Security;
  9 using System.Xml;
 10
 11 namespace SCKY.WebApp.Controllers
 12 {
 13     public class BaseController:Controller
 14     {
 15         //public Model.UCML_User LoginUser { get; set; }
 16         const string Token = "123qweasd";
 17         protected override void OnActionExecuting(ActionExecutingContext filterContext)
 18         {
 19             string postStr = "";
 20             Valid();
 21             if (Request.HttpMethod.ToLower() == "post")//当普通微信用户向公众账号发消息时,微信服务器将POST该消息到填写的URL上
 22             {
 23                 postStr = PostInput();
 24                 if (string.IsNullOrEmpty(postStr) == false)
 25                 {
 26                     //WriteLog(postStr,Server);//计入日记
 27                     //ResponseMsg(postStr);
 28                 }
 29                 //else
 30                 //{
 31                 //    using (FileStream fs = new FileStream("~/File/2.txt", FileMode.Create, FileAccess.Write, FileShare.Write))
 32                 //    {
 33                 //        string msg = postStr;
 34                 //        byte[] bytes = System.Text.Encoding.Default.GetBytes(msg);
 35                 //        fs.Write(bytes, 0, bytes.Length);
 36                 //    }
 37                 //}
 38             }
 39         }
 40         private void Valid()
 41         {
 42             string echoStr = Request.QueryString["echoStr"].ToString();
 43             if (CheckSignature())
 44             {
 45                 if (!string.IsNullOrEmpty(echoStr))
 46                 {
 47                     Response.Write(echoStr);
 48                     Response.End();
 49                 }
 50             }
 51         }
 52
 53         /// <summary>
 54         /// 验证微信签名
 55         /// </summary>
 56         /// <returns></returns>
 57         private bool CheckSignature()
 58         {
 59             string signature = Request.QueryString["signature"].ToString();
 60             string timestamp = Request.QueryString["timestamp"].ToString();
 61             string nonce = Request.QueryString["nonce"].ToString();
 62             string[] ArrTmp = { Token, timestamp, nonce };
 63             Array.Sort(ArrTmp);//字典排序
 64             string tmpStr = string.Join("", ArrTmp);
 65             tmpStr = FormsAuthentication.HashPasswordForStoringInConfigFile(tmpStr, "SHA1");//对该字符串进行sha1加密
 66             tmpStr = tmpStr.ToLower();//对字符串中的字母部分进行小写转换,非字母字符不作处理
 67             //WriteLog(tmpStr, Server);//计入日志
 68             if (tmpStr == signature)//开发者获得加密后的字符串可与signature对比,标识该请求来源于微信。开发者通过检验signature对请求进行校验,若确认此次GET请求来自微信服务器,请原样返回echostr参数内容,则接入生效,否则接入失败
 69             {
 70                 return true;
 71             }
 72             else
 73                 return false;
 74         }
 75
 76         /// <summary>
 77         /// 获取post返回来的数据
 78         /// </summary>
 79         /// <returns></returns>
 80         private string PostInput()
 81         {
 82             Stream s = System.Web.HttpContext.Current.Request.InputStream;
 83             byte[] b = new byte[s.Length];
 84             s.Read(b, 0, (int)s.Length);
 85             return Encoding.UTF8.GetString(b);
 86         }
 87         /// <summary>
 88         ///返回微信信息结果
 89         /// </summary>
 90         /// <param name="weixinXML"></param>
 91         //private void ResponseMsg(string weixinXML)
 92         //{
 93         //    try
 94         //    {
 95         //        XmlDocument doc = new XmlDocument();
 96         //        doc.LoadXml(weixinXML);//读取XML字符串
 97         //        XmlElement rootElement = doc.DocumentElement;
 98
 99         //        XmlNode MsgType = rootElement.SelectSingleNode("MsgType");//获取字符串中的消息类型
100
101         //        string resxml = "";
102         //        if (MsgType.InnerText == "text")//如果消息类型为文本消息
103         //        {
104         //            var model = new
105         //            {
106         //                ToUserName = rootElement.SelectSingleNode("ToUserName").InnerText,
107         //                FromUserName = rootElement.SelectSingleNode("FromUserName").InnerText,
108         //                CreateTime = rootElement.SelectSingleNode("CreateTime").InnerText,
109         //                MsgType = MsgType.InnerText,
110         //                Content = rootElement.SelectSingleNode("Content").InnerText,
111         //                MsgId = rootElement.SelectSingleNode("MsgId").InnerText
112         //            };
113         //            resxml += "<xml><ToUserName><![CDATA[" + model.FromUserName + "]]></ToUserName><FromUserName><![CDATA[" + model.ToUserName + "]]></FromUserName><CreateTime>" + ConvertDateTimeInt(DateTime.Now) + "</CreateTime>";
114         //            if (!string.IsNullOrEmpty(model.Content))//如果接收到消息
115         //            {
116         //                if (model.Content.Contains(" 你好") || model.Content.Contains(" 好") || model.Content.Contains("hi") || model.Content.Contains("hello"))// 你好
117         //                {
118         //                    resxml += "<MsgType><![CDATA[text]]></MsgType><Content><![CDATA[你好,有事请留言,偶会及时回复你的。]]></Content><FuncFlag>0</FuncFlag></xml>";
119         //                }
120
121         //            }
122
123         //            else//没有接收到消息
124         //            {
125         //                resxml += "<MsgType><![CDATA[text]]></MsgType><Content><![CDATA[亲,感谢您对我的关注,有事请留言。]]></Content><FuncFlag>0</FuncFlag></xml>";
126         //            }
127
128         //            Response.Write(resxml);
129         //        }
130         //        if (MsgType.InnerText == "image")//如果消息类型为图片消息
131         //        {
132         //            var model = new
133         //            {
134         //                ToUserName = rootElement.SelectSingleNode("ToUserName").InnerText,
135         //                FromUserName = rootElement.SelectSingleNode("FromUserName").InnerText,
136         //                CreateTime = rootElement.SelectSingleNode("CreateTime").InnerText,
137         //                MsgType = MsgType.InnerText,
138         //                PicUrl = rootElement.SelectSingleNode("PicUrl").InnerText,
139         //                MsgId = rootElement.SelectSingleNode("MsgId").InnerText
140         //            };
141         //            resxml += "<xml><ToUserName><![CDATA[" + model.FromUserName + "]]></ToUserName><FromUserName><![CDATA[" + model.ToUserName + "]]></FromUserName><CreateTime>" + ConvertDateTimeInt(DateTime.Now) + "</CreateTime><MsgType><![CDATA[news]]></MsgType><ArticleCount>1</ArticleCount><Articles><item><Title><![CDATA[欢迎您的光临!]]></Title><Description><![CDATA[非常感谢您的关注!]]></Description><PicUrl><![CDATA[http://...jpg]]></PicUrl><Url><![CDATA[http://www.baidu.com/]]></Url></item></Articles><FuncFlag>0</FuncFlag></xml>";
142         //            Response.Write(resxml);
143         //        }
144         //        else//如果是其余的消息类型
145         //        {
146         //            var model = new
147         //            {
148         //                ToUserName = rootElement.SelectSingleNode("ToUserName").InnerText,
149         //                FromUserName = rootElement.SelectSingleNode("FromUserName").InnerText,
150         //                CreateTime = rootElement.SelectSingleNode("CreateTime").InnerText,
151         //            };
152         //            resxml += "<xml><ToUserName><![CDATA[" + model.FromUserName + "]]></ToUserName><FromUserName><![CDATA[" + model.ToUserName + "]]></FromUserName><CreateTime>" + ConvertDateTimeInt(DateTime.Now) + "</CreateTime><MsgType><![CDATA[text]]></MsgType><Content><![CDATA[亲,感谢您对我的关注,有事请留言,我会及时回复你的哦。]]></Content><FuncFlag>0</FuncFlag></xml>";
153         //            Response.Write(resxml);
154         //        }
155         //    }
156         //    catch (Exception ex)
157         //    {
158         //        throw ex;
159         //    }
160         //    Response.End();
161         //}
162         /// <summary>
163         /// datetime转换成unixtime
164         /// </summary>
165         /// <param name="time"></param>
166         /// <returns></returns>
167         private int ConvertDateTimeInt(System.DateTime time)
168         {
169             System.DateTime startTime = TimeZone.CurrentTimeZone.ToLocalTime(new System.DateTime(1970, 1, 1));
170             return (int)(time - startTime).TotalSeconds;
171         }
172         /// <summary>
173         /// 写日志(用于跟踪),可以将想打印出的内容计入一个文本文件里面,便于测试
174         /// </summary>
175         //public static void WriteLog(string strMemo, HttpServerUtility server)
176         //{
177         //    string filename = server.MapPath("/logs/log.txt");//在网站项目中建立一个文件夹命名logs(然后在文件夹中随便建立一个web页面文件,避免网站在发布到服务器之后看不到预定文件)
178         //    if (!Directory.Exists(server.MapPath("//logs//")))
179         //        Directory.CreateDirectory("//logs//");
180         //    StreamWriter sr = null;
181         //    try
182         //    {
183         //        if (!File.Exists(filename))
184         //        {
185         //            sr = File.CreateText(filename);
186         //        }
187         //        else
188         //        {
189         //            sr = File.AppendText(filename);
190         //        }
191         //        sr.WriteLine(strMemo);
192         //    }
193         //    catch
194         //    {
195         //    }
196         //    finally
197         //    {
198         //        if (sr != null)
199         //            sr.Close();
200         //    }
201         //}
202     }
203 }
看到源码那个Token了吧,大家知道作用了吧。这个是成功后的界面,我用的测试账户,而不是正式的,正式的申请太麻烦,时间很长
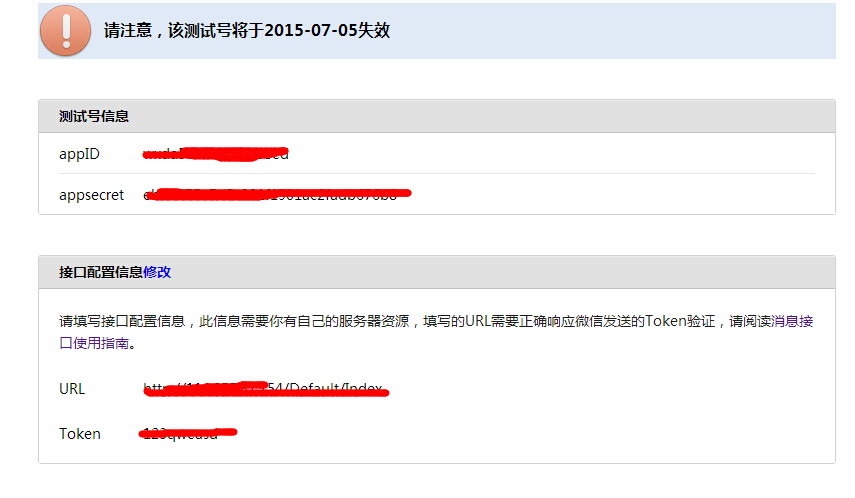
到此你就成为开发者了,接下来最重要的是会话界面自定义菜单 这个不难。
我使用微信的 微信公众平台接口调试工具演示的,在会话界面自定义菜单之前你需要获得access_token
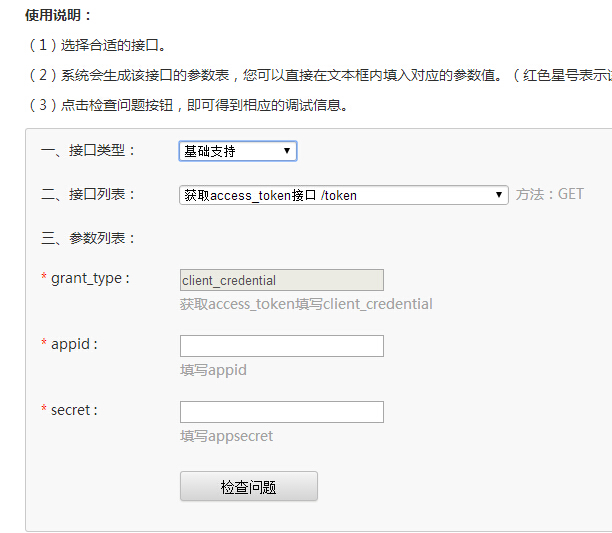
点击检查问题,你会获得access_token。

现在知道上面的access_token的用处了吧
根据官方创建菜单API就可以创建菜单了 这个其实是不难的。文档很详细。
下面介绍获得用户的openid (这个和获得用户信息是一样的)
openid每个微信账户是唯一的,这个可以作为你项目中关联用户信息的外键
我的需求是每次用户点击菜单获得该微信账户的openid,然后关联用户信息,
直接贴代码 这里的appid是你成为开发者的时候微信分配的
using System;
using System.Collections.Generic;
using System.Linq;
using System.Net;
using System.Web;
using System.Web.Mvc;
using System.Web.Script;
using System.Web.Script.Serialization;
using SCKY.WebApp.Models;
using SCKY.Model;
using SCKY.BLL;
using SCKY.Commons;

namespace SCKY.WebApp.Controllers
{
    public class TestController : Controller
    {
        //
        // GET: /Test/
        public ActionResult Index()
        {
            String code = Request["code"];//我们要的code
            //code = "0048aa3c358df7ef9ef4f7df7ee3c57b";
            string url = Request["state"];
            var client = new WebClient();
            string str = client.DownloadString("https://api.weixin.qq.com/sns/oauth2/access_token?appid="+appid+"&secret="+secret+"&code=" + code + "&grant_type=authorization_code");
            //client.DownloadString(new Uri(str));

            Oppid oppided = new Oppid();
            JavaScriptSerializer jss = new JavaScriptSerializer();
            oppided = jss.Deserialize<Oppid>(str);

            Session["Oppid"] = oppided.openid;

            UCML_UserManager userBll = new UCML_UserManager();
            UCML_User user = userBll.LoadEntities(d => d.UserEmail == oppided.openid && d.TelNumber == "2").FirstOrDefault();
            if (user != null)
            {
                Session["UserOID"] = user.UCML_UserOID;
                url = JudgeShipperPage(user, url);
                return Redirect(url);
            }
            else
            {
                return RedirectToAction("NotUser", "Test", new { rowl = "2" });
            }
        }
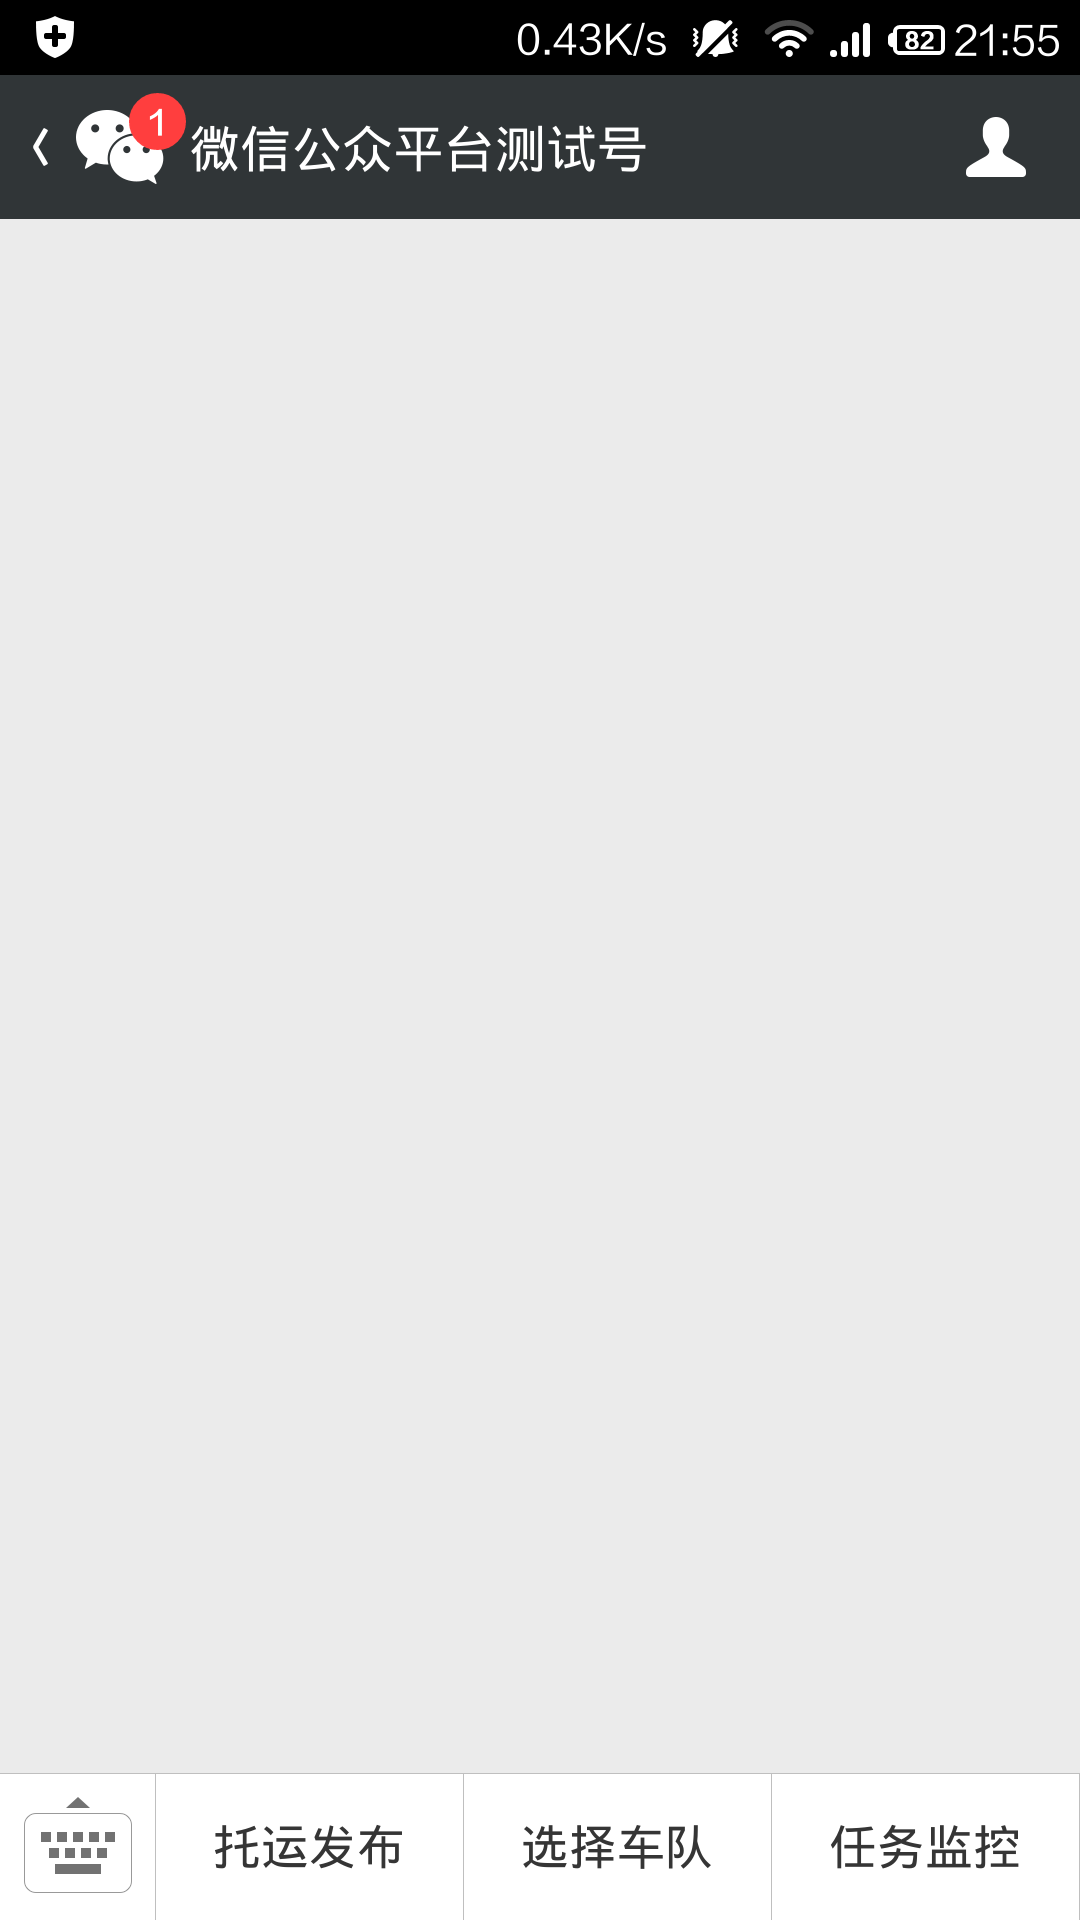
这样你就得修改你的自定义菜单的代码了,直接贴上
{
    "button": [
        {
            "type": "view",
            "name": "托运发布",
            "url": "https://open.weixin.qq.com/connect/oauth2/authorize?appid=appid&redirect_uri=http://www.CeShi.com/Test/Index&response_type=code&scope=snsapi_base&state=http://www.CeShi.com/ReleaseNews/Indx#wechat_redirect"
        },
        {
            "type": "view",
            "name": "选择车队",
            "url": "https://open.weixin.qq.com/connect/oauth2/authorize?appid=appid&redirect_uri=http://www.CeShi.com/Test/Index&response_type=code&scope=snsapi_base&state=http://www.CeShi.com/NewsManager/Index#wechat_redirect"
        },
        {
            "type": "view",
            "name": "任务监控",
            "url": "https://open.weixin.qq.com/connect/oauth2/authorize?appid=appid&redirect_uri=http://www.CeShi.com/Test/Index&response_type=code&scope=snsapi_base&state=http://www.CeShi.com/ShipperMonitoringManager/Index#wechat_redirect"
        }
    ]
    }
上面涉及我的appid我都做了处理,读者注意了。
到此成为开发者,自定义菜单,获得openid就结束了,基本上是傻瓜流程了,不善于写博,请见谅