一、前期准备
准备两个qq邮箱号,本例使用的是自己的两个邮箱
syc582535560@foxmail.com 2212444549@qq.com
下载javax.mail.jar jar包
如使用maven,在pom.xml里添加
<dependency>
<groupId>javax.mail</groupId>
<artifactId>mail</artifactId>
<version>1.4.1</version>
</dependency>
邮件的发送方要开启POP3 和SMTP服务--即发送qq邮件的账号要开启POP3 和SMTP服务
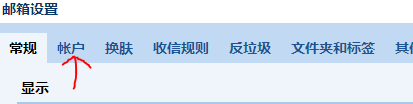
登陆qq邮箱—点击设置—点击—账户—找到:POP3/IMAP/SMTP/Exchange/CardDAV/CalDAV服务 —点击开启
开启后会得到一个授权码! –注意:这个一定要记住,一会用到
建立测试代码
public class Mail {
private static MimeMessage message;
public static void main(String[] args) throws MessagingException {
// Security.addProvider(new Provider());
final String SSL_FACTORY = "javax.net.ssl.SSLSocketFactory";
//QQ邮箱服务器
String smtpHost="smtp.qq.com";
//邮箱用户名,即QQ账号(自定义)
final String username = "syc582535560@foxmail.com";
//邮箱授权码(自定义)
final String password = "hafgyzlgfdzkbcdh";
//要发送到的邮箱(自定义)
String to = "2212444549@qq.com";
//自己的邮箱(自定义)
String from = "syc582535560@foxmail.com";
Transport transport;
Properties props = new Properties();
props.setProperty("mail.smtp.socketFactory.class", SSL_FACTORY);
props.setProperty("mail.smtp.socketFactory.fallback", "false");
props.setProperty("mail.smtp.port", "465");
props.setProperty("mail.smtp.socketFactory.port", "465");
props.setProperty("mail.smtp.auth", "true");
props.put("mail.smtp.host",smtpHost);
props.put("mail.smtp.username", username);
props.put("mail.smtp.password", password);
Session session = Session.getDefaultInstance(props, new Authenticator() {
//身份认证
protected PasswordAuthentication getPasswordAuthentication() {
return new PasswordAuthentication(username, password);
}
});
InternetAddress[] addresses = {new InternetAddress(to)};
message = new MimeMessage(session);
message.setFrom(new InternetAddress(from));
message.setRecipients(Message.RecipientType.TO,addresses);
message.setSubject("singhead数据库缺失的号码段");//发送标题(自定义)
message.setSentDate(new Date());
message.setText("singhead数据库缺失的号码段");//发送内容(自定义)
transport = session.getTransport("smtp");
transport.connect(smtpHost, username, password);
transport.send(message);
System.out.println("email has been sent");
}
}
写好测试代码之后,点击运行即可、
需下载mail.jar包
获取16位SMTP命令步骤
默认是关闭的 ,将他开启获取16位SMTP命令
点击进行验证获取16位SMTP命令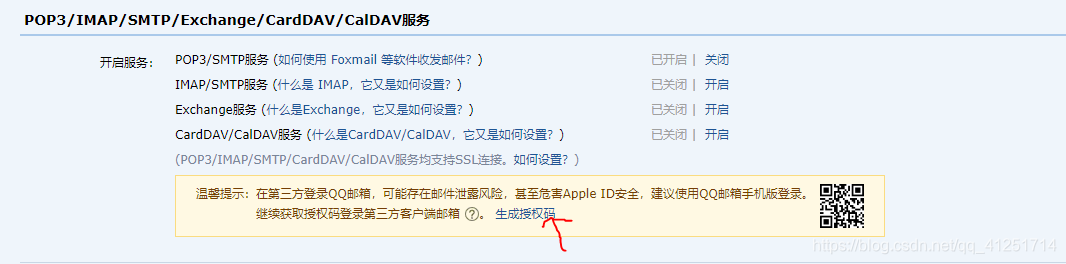
package com.zking.test;

import java.util.Properties;

import javax.mail.Authenticator;
import javax.mail.MessagingException;
import javax.mail.PasswordAuthentication;
import javax.mail.Session;
import javax.mail.Transport;
import javax.mail.internet.AddressException;
import javax.mail.internet.InternetAddress;
import javax.mail.internet.MimeMessage;
import javax.mail.internet.MimeMessage.RecipientType;

public class Yte {
	  public static void main(String[] args) throws AddressException,MessagingException {

	        // 创建Properties 类用于记录邮箱的一些属性
	        Properties props = new Properties();
	        // 表示SMTP发送邮件,必须进行身份验证
	        props.put("mail.smtp.auth", "true");
	        //此处填写SMTP服务器
	        props.put("mail.smtp.host", "smtp.qq.com");
	        //端口号,QQ邮箱端口587
	        props.put("mail.smtp.port", "587");
	        // 此处填写,写信人的账号
	        props.put("mail.user", "xxxxxxxxxx@qq.com");
	        // 此处填写16位STMP口令
	        props.put("mail.password", "xxxxxxxx");

	        // 构建授权信息,用于进行SMTP进行身份验证
	        Authenticator authenticator = new Authenticator() {

	            protected PasswordAuthentication getPasswordAuthentication() {
	                // 用户名、密码
	                String userName = props.getProperty("mail.user");
	                String password = props.getProperty("mail.password");
	                return new PasswordAuthentication(userName, password);
	            }
	        };
	        // 使用环境属性和授权信息,创建邮件会话
	        Session mailSession = Session.getInstance(props, authenticator);
	        // 创建邮件消息
	        MimeMessage message = new MimeMessage(mailSession);
	        // 设置发件人
	        InternetAddress form = new InternetAddress(props.getProperty("mail.user"));
	        message.setFrom(form);

	        // 设置收件人的邮箱
	        InternetAddress to = new InternetAddress("xxxxxxxxxx@qq.com");
	        message.setRecipient(RecipientType.TO, to);

	        // 设置邮件标题
	        message.setSubject("标题");

	        // 设置邮件的内容体
	        message.setContent("内容", "text/html;charset=UTF-8");

	        // 最后当然就是发送邮件啦
	        Transport.send(message);


	   }
}