一、安装部署nginx
1. 部署前先对nginx介绍下别嫌BB:
如果你听说或使用过Apache软件,那么很快就会熟悉Nginx软件,与Apache软件类似,
Nginx(“engine x”)是一个开源的,支持高性能、高并发的WWW服务器和代理服务软件。
它是由俄罗斯人lgor Sysoev开发的,最初被应用在俄罗斯的大型网站www.rambler.ru上。
后来作者将源代码以类BSD许可证的形式开源出来供全球使用。
Nginx可以运行在UNIX、Linux、BSD、Mac OS X、Solaris,以及Microsoft Windows等操作系统中
特征介绍:
· 支持高并发:能支持几万并发连接(特别是静态小文件业务环境)
· 资源消耗少:在3万并发连接下,开启10个Nginx线程消耗的内存不到200MB(WO CAO NB!!)
· 支持异步网络I/O事件模型epoll(Linux 2.6+) apache(select)
功能介绍:
1)作为Web服务软件(处理用户访问静态请求)
2)反向代理或负载均衡服务
3)前端业务数据缓存服务
nginx软件模型特点说明:
apache与nginx软件对比说明???
apache使用select模型
nginx使用epoll模型
举例说明:宿舍管理员
select模型版管理员 会一个一个房间查询人员
epoll模型版管理员 会进行检索后,直接找到需要找的人
举例说明:幼儿园阿姨
select模型版阿姨 会一个一个小朋友进行询问,确认哪个小朋友需要上厕所
epoll模型版阿姨 会告知想上厕所小朋友自觉站到响应位置
2.这里采用源码编译安装的方式安装
一个最lowB版的shell安装脚本
#!/bin/bash
. /etc/init.d/functions

tool_path=/server/tools
download_address=http://nginx.org/download/nginx-1.16.0.tar.gz

[ ! -d ${tool_path} ] && mkdir -p $tool_path
useradd www -s /sbin/nologin/ -M
yum install -y pcre-devel openssl-devel
if [ $? -eq 0 ];
then
	action "yum install success" /bin/true
else
	action "yum install failure" /bin/false
	exit 1
fi

cd $tool_path
wget $download_address
if [ $? -eq 0 ];
then
	action "download success" /bin/true
else
	action "download failure" /bin/false
	exit 1
fi

tar -xf nginx-1.16.0.tar.gz
if [ $? -eq 0 ];
then
	action "tar success" /bin/true
else
	action "tar failure" /bin/false
	exit 1
fi

cd nginx-1.16.0
./configure --prefix=/application/nginx-1.16.0/ --user=www --group=www --with-http_ssl_module --with-http_stub_status_module
if [ $? -eq 0 ];
then
	action "configure success" /bin/true
else
	action "configure failure" /bin/false
	exit 1
fi
make && make install
if [ $? -eq 0 ];
then
	action "makeinstall success" /bin/true
else
	action "makeinstall failure" /bin/false
	exit 1
fi
ls -s /application/nginx-1.16.0/ /application/nginx
ln -s /application/nginx-1.16.0/ /usr/bin/nginx

#启动Nginx服务
/usr/bin/nginx
ps -ef|grep nginx
2. 编写nginx配置文件
三个语法格式说明:
①. 大括号要成对出现
②. 每一行指令后面要用分号结尾
③. 每一个指令要放置在指定的区块中
01:简化配置文件(注释很多我们先简化下)
cd /application/nginx/conf/
grep -Ev "#|^$" nginx.conf.default >nginx.conf #简化nginx.conf
02. 实现编写一个网站页面(测试下)
vim /application/nginx/conf/nginx.conf

worker_processes  1;
events {
        worker_connections  1024;
    }
http {
       include       mime.types;
       default_type  application/octet-stream;
       sendfile        on;
        keepalive_timeout  65;
       server {
            listen       80;
            server_name  www.etiantian.org;
            location / {
                root   html/www; #站点根目录
                index  index.html index.htm;
            }
        }
    }
03. 如果要实现多个页面编写==多个虚拟主机,可以编写多个server模块
然后创建站点目录:
例如:mkdir -p /application/nginx/html/{www,bbs,blog}
server {
    listen       80;
    server_name  www.etiantian.org;
    location / {
        root   html/www;
        index  index.html index.htm;
    }
    }
    server {
        listen       80;
        server_name  bbs.etiantian.org;
        location / {
            root   html/bbs;
            index  index.html index.htm;
        }
    }
    server {
        listen       80;
        server_name  blog.etiantian.org;
        location / {
            root   html/blog;
            index  index.html index.htm;
        }
    }
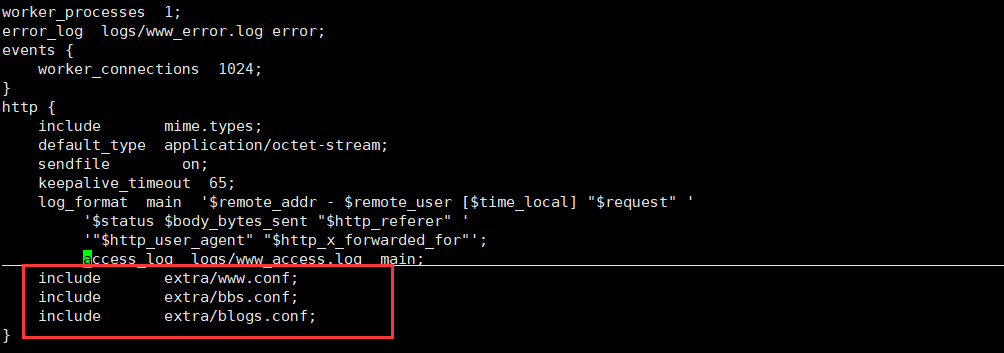
为了便于管理,每个站点的server模块可以分别编写在成子配置文件中,只需要在nginx.conf中 include进来就行了.................
04. 创建站点目录下首页文件:
例如:
for name in www bbs blog;do echo "10.0.0.7 $name.etiantian.org" >/application/nginx/html/$name/index.html;done
for name in www bbs blog;do cat /application/nginx/html/$name/index.html;done
10.0.0.7 www.etiantian.org
10.0.0.7 bbs.etiantian.org
10.0.0.7 blog.etiantian.org
05. 测试访问
浏览器访问测试:
注意:需要编写windows主机hosts文件,进行解析
命令行访问测试:
利用curl命令在linux系统中访问测试
注意:需要编写linux主机hosts文件,进行解析

这样就部署成功啦!!!
二. nginx日志信息
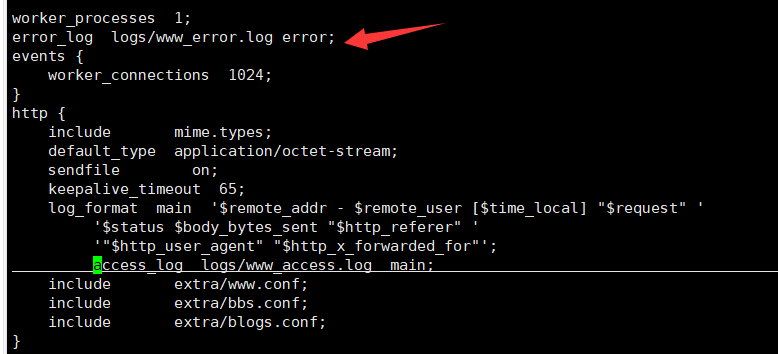
1. 错误日志
   Syntax:    error_log file [level];
   Default:
   error_log logs/error.log error;
   Context:    main, http, mail, stream, server, location
   #error_log  logs/error.log;
   #error_log  logs/error.log  notice;
   #error_log  logs/error.log  info;

   vim nginx.conf
   error_log  /tmp/error.log error;
例如:
补充说明:
===========================================================================================
错误日志的,默认情况下不指定也没有关系,因为nginx很少有错误日志记录的。
但有时出现问题时,是有必要记录一下错误日志的,方便我们排查问题。
error_log 级别分为 debug, info, notice, warn, error, crit 默认为crit
该级别在日志名后边定义格式如下:
error_log /your/path/error.log crit;
crit 记录的日志最少,而debug记录的日志最多。
如果nginx遇到一些问题,比如502比较频繁出现,但是看默认的error_log并没有看到有意义的信息,
那么就可以调一下错误日志的级别,当你调成error级别时,错误日志记录的内容会更加丰富
===========================================================================================
2. 访问日志(重点关注)
   log_format  main  '$remote_addr - $remote_user [$time_local] "$request" '   ---
   定义日志信息要记录的内容格式
                      '$status $body_bytes_sent "$http_referer" '
                      '"$http_user_agent" "$http_x_forwarded_for"';
   access_log  logs/access.log  main;                    --- 调用定义格式信息,生成访问日
   志
   $remote_addr       10.0.0.1           --- 访问客户端的源地址信息
   $remote_user          -               --- 访问客户端认证用户信息   ???
   [$time_local]                         --- 显示访问时间
   $request        GET / HTTP/1.1        --- 请求行信息
   $status              304              --- 状态码信息(304状态码利用缓存显示页面信息)
   $body_bytes_sent                      --- 服务端响应客户端的数据大小信息
   $http_referer                         --- 记录链接到网站的域名信息  ???
   $http_user_agent                      --- 用户访问网站客户端软件标识信息
                                             用户利用客户端浏览器测试访问时,win10默认浏览器会有
   异常问
   $http_x_forwarded_for                 --- ???  反向代理
   官方链接:http://nginx.org/en/docs/http/ngx_http_log_module.html#access_log
3. 对日志我们要进行切割,防止一个日志文件过大
我们利用shell脚本就可简单实现
[root@web01 scripts]# vim cut_log.sh
#!/bin/bash
data_info=$(date +%F-%H:%M)
mv /application/nginx/logs/www_access.log /application/nginx/logs/access.log.$data_info
/application/nginx/sbin/nginx -s reload
# cut nginx log cron
* */6 * * * /bin/sh /server/scripts/cut_log.sh &>/dev/null    #自定义定时触发