一、在setting中配置 私服的镜像,在mirrors标签中加上:
<!--第一步  配置私服的镜像-->
<mirror>
     <!--此处配置所有的构建均从私有仓库中下载 *代表所有,也可以写central -->
     <id>nexus</id>
     <mirrorOf>*</mirrorOf>
     <!-- url对应发私服的 Public Repositories -->
     <url>http://localhost:8081/nexus/content/groups/public/</url>
</mirror>
二、nexus工厂的配置,在profiles标签中加上:
<profile>
  <id>nexus</id>
    <!--所有请求均通过镜像 -->
    <repositories>
         <repository>
            <id>central</id>
            <url>http://central</url>
            <releases><enabled>true</enabled></releases>
            <snapshots><enabled>true</enabled></snapshots>
         </repository>
    </repositories>
    <pluginRepositories>
          <pluginRepository>
             <id>central</id>
             <url>http://central</url>
             <releases><enabled>true</enabled></releases>
             <snapshots><enabled>true</enabled></snapshots>
          </pluginRepository>
     </pluginRepositories>
</profile>
三、激活profile配置
<!--第三步  激活profile配置 -->
  <activeProfiles>
     <!--make the profile active all the time -->
     <activeProfile>nexus</activeProfile>
  </activeProfiles>
四、在pom.xml中配置
<repositories>
     <repository>
         <id>central</id>
         <url>http://localhost:8081/nexus/content/groups/public/</url>
         <releases><enabled>true</enabled></releases>
         <snapshots><enabled>true</enabled></snapshots>
     </repository>
</repositories>
<pluginRepositories>
     <pluginRepository>
         <id>central</id>
         <url>http://localhost:8081/nexus/content/groups/public/</url>
         <releases><enabled>true</enabled></releases>
         <snapshots><enabled>true</enabled></snapshots>
      </pluginRepository>
 </pluginRepositories>
前四步 maven私服已经搭建成功,后面步骤 是将 jar 上传到 私服
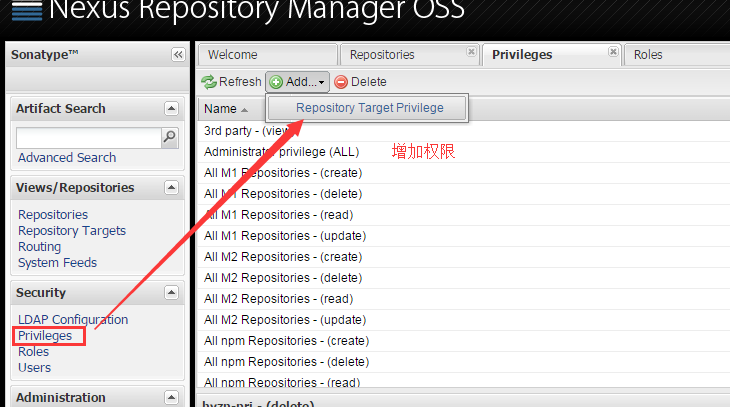
五、在nexus中配置权限
1.新建仓库,便于管理

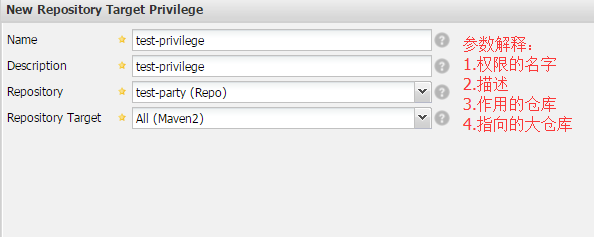
2.在Nexus中新建权限
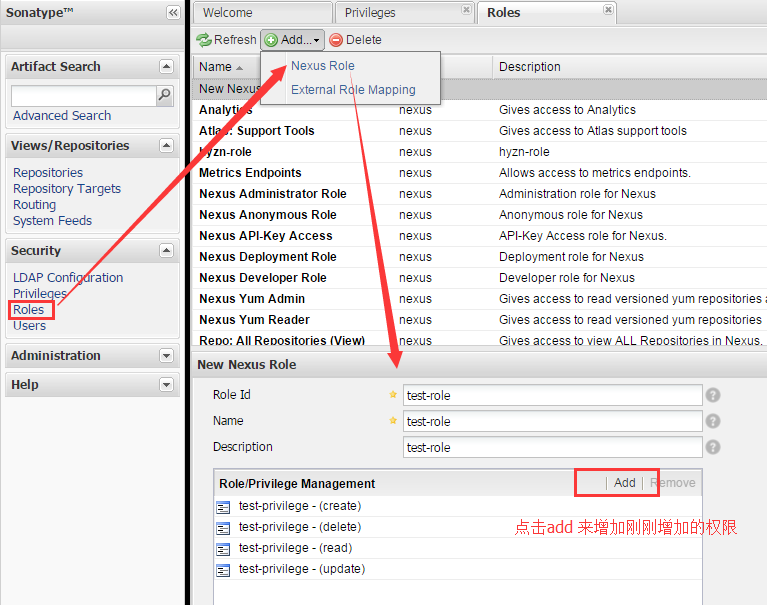
3.添加角色,并给角色授予权限
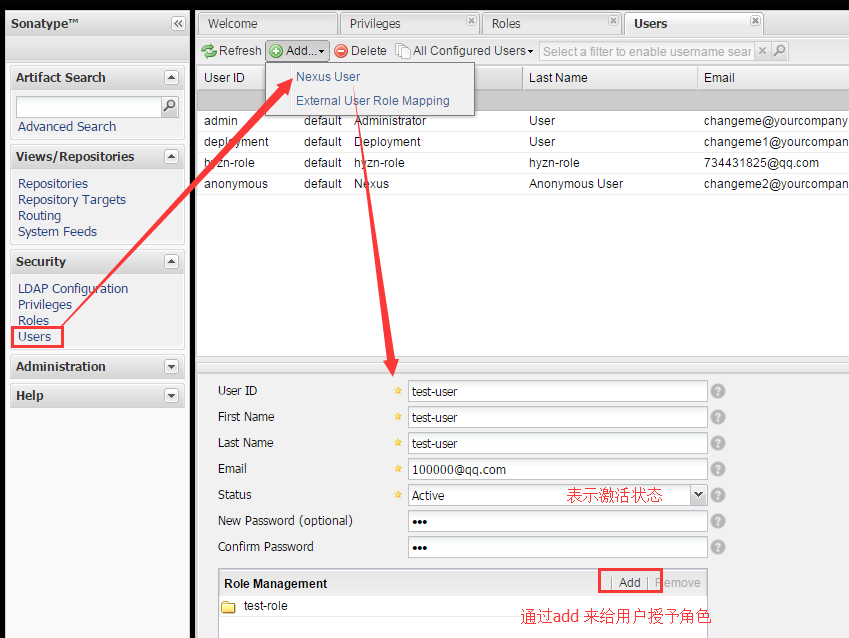
4.添加用户,并给用户授予角色
六、配置上传到私服,在pom中:
<distributionManagement>
    <repository>
        <id>test-party</id>
        <name>test-user</name>
        <url>http://localhost:8081/nexus/content/repositories/test-party</url>
    </repository>
</distributionManagement>
id 对应刚刚 新建的maven库的id,url对应刚刚新建的maven库的url,如下:

name对应刚刚新建的用户名:test-user
七、在pom.xml的servers标签中加上:
<server>
    <id>test-party</id>
  <username>test-user</username>
  <password>xbq</password>
</server>
八、执行deploy,发布到私服
选中项目,run as -- maven build ... ,在Goals中输入 deploy ,其他的不需要填写,执行Run,当看到控制台上 出现 BUILD SUCCESS,则成功!
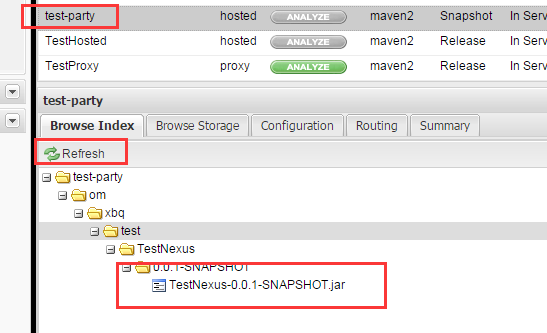
九、在nexus中查看是否发布上去
注意:更新jar遇到错误:
was cached in the local repository, resolution will not be reattempted until the update interval of nexus has elapsed or updates are forced
解决办法:去自己的.m2 文件夹下把 xxx.lastUpdated 文件全部删掉,重新运行maven,ok!
新建的maven工程默认是jdk1.5,怎么换成jdk1.7呢?
在profiles标签中加入:
    <profile>
        <id>jdk-1.7</id>
        <activation>
          <activeByDefault>true</activeByDefault>
          <jdk>1.7</jdk>
        </activation>
        <properties>
            <maven.compiler.source>1.7</maven.compiler.source>
            <maven.compiler.target>1.7</maven.compiler.target>
            <maven.compiler.compilerVersion>1.7</maven.compiler.compilerVersion>
        </properties>
    </profile>