git无法正常更新,大家请执行以下命令:
git config --global http.proxy http://10.10.XX.XXXX:8080
Visual Studio Code
格式:npm config set proxy http://用户名:密码@代理服务器IP:端口
npm config set registry https://registry.npm.taobao.org
npm config set proxy http://你的用户名:你的密码@你的代理服务器IP:你的端口
npm i certificate
java gradle.properties代理设置
systemProp.http.proxyHost=代理服务器IP
systemProp.http.proxyPort=端口
systemProp.http.proxyUser=用户名
systemProp.http.proxyPassword=密码
systemProp.http.nonProxyHosts=localhost|10.*.*.*|192.168.*.*
systemProp.https.proxyHost=代理服务器IP
systemProp.https.proxyPort=8080
systemProp.https.nonProxyHosts=localhost|10.*.*.*|192.168.*.*
systemProp.https.proxyUser=userid
systemProp.https.proxyPassword=userPassword
java在程序内部实通过代理访问网络资源
private void setProxy(StreamingConfigure streamingConfigure) {
System.setProperty("http.proxySet", "true");
System.setProperty("http.proxyHost", 你的代理服务器IP);
System.setProperty("http.proxyPort", 端口);
System.setProperty("http.proxyUserName", 代理用户名);
System.setProperty("http.proxyPassword", 代理密码);
// https proxy
System.setProperty("https.proxyHost", 你的代理服务器IP);
System.setProperty("https.proxyPort", 端口);
System.setProperty("https.proxyUserName", 代理用户名);
System.setProperty("https.proxyPassword", 代理密码);
// socks proxy
// System.getProperties().put("socksProxySet","true");
// System.getProperties().put("socksProxyHost",你的代理服务器IP);
// System.getProperties().put("socksProxyPort","1080");
System.setProperty("socksProxySet","true");
System.setProperty("socksProxyHost",你的代理服务器IP);
System.setProperty("socksProxyPort","1080");
}
Windows cmd 代理设置
注意:以管理员方式启动CMD窗口
set HTTP_PROXY=username:password@Ip:port
set HTTPS_PROXY=username:password@Ip:port
set HTTP_PROXY=myname:12345678http://10.10.71.100:8080
set HTTPS_PROXY=myname:12345678@https://10.10.71.100:8080
配置 WinHTTP 的代理设置
netsh winhttp import proxy source=ie
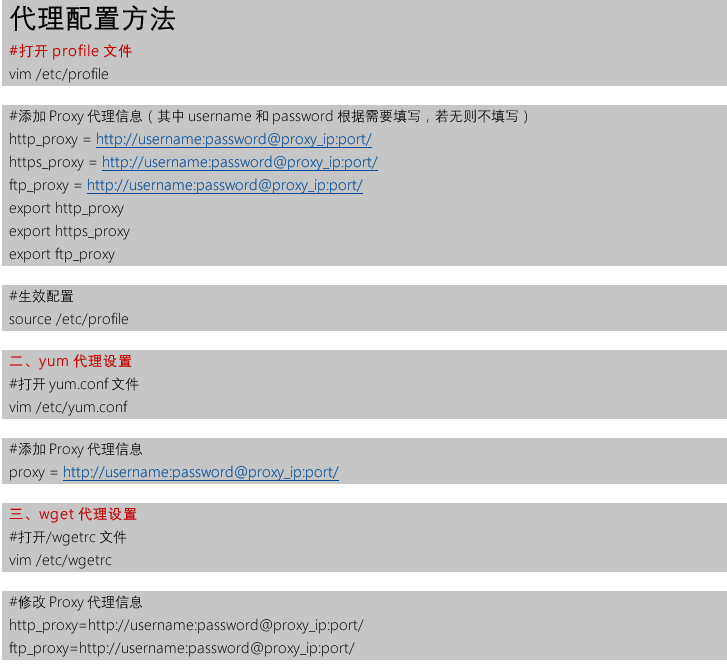
Linux下代理配置方法
#打开profile文件
vim /etc/profile
#添加Proxy代理信息(其中username和password根据需要填写,若无则不填写)
http_proxy = http://username:password@proxy_ip:port/
https_proxy = http://username:password@proxy_ip:port/
ftp_proxy = http://username:password@proxy_ip:port/
export http_proxy
export https_proxy
export ftp_proxy
#生效配置
source /etc/profile
二、yum代理设置
#打开yum.conf文件
vim /etc/yum.conf
#添加Proxy代理信息
proxy = http://username:password@proxy_ip:port/
三、wget代理设置
#打开/wgetrc文件
vim /etc/wgetrc
#修改Proxy代理信息
http_proxy=http://username:password@proxy_ip:port/
ftp_proxy=http://username:password@proxy_ip:port/
四、重启服务器
reboot