自己实现了Android的屏幕录制App。
用了MediaProjection类来作为源,MediaRecoder来捕捉,编码转换为本地视频。
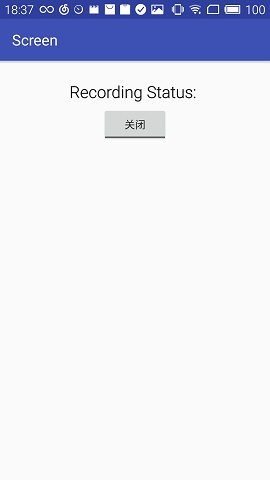
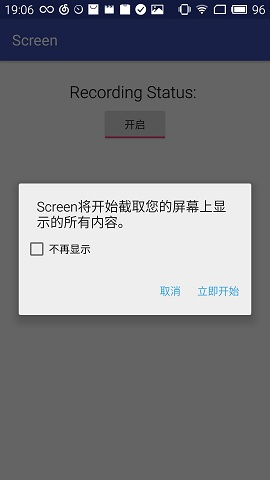
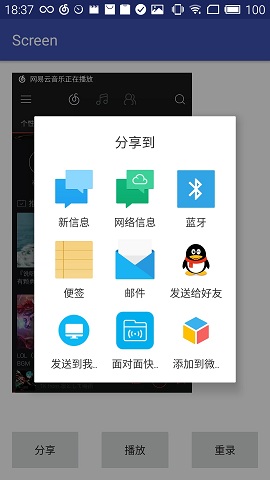
效果图:


主要是这段代码开始录像:
startActivityForResult(mProjectionManager.createScreenCaptureIntent(), REQUEST_CODE);//开始录像
录像结束后在回调函数中处理:
protected void onActivityResult(int requestCode, int resultCode, Intent data) {
    super.onActivityResult(requestCode, resultCode, data);

    if (requestCode != REQUEST_CODE) {
        Log.e(TAG, "Unknown request code: " + requestCode);
        return;
    }
    if (resultCode != RESULT_OK) {
        Toast.makeText(this,
                "Screen Cast Permission Denied", Toast.LENGTH_SHORT).show();
        mToggleButton.setChecked(false);
        return;
    }
  //应用最小化 后台运行
  Intent intent = new Intent(Intent.ACTION_MAIN);
  intent.addCategory(Intent.CATEGORY_HOME);
  intent.setFlags(Intent.FLAG_ACTIVITY_NEW_TASK);
  startActivity(intent);
    mMediaProjectionCallback = new MediaProjectionCallback();//回调类
    mMediaProjection = mProjectionManager.getMediaProjection(resultCode, data);
    mMediaProjection.registerCallback(mMediaProjectionCallback, null);//注册回调类
    mVirtualDisplay = createVirtualDisplay();
    mMediaRecorder.start();
}
回调处理的事情其实就是将录像的类全都关闭释放:
private class MediaProjectionCallback extends MediaProjection.Callback {
        @Override
        public void onStop() {
            if (mToggleButton.isChecked()) {
                mToggleButton.setChecked(false);
                mMediaRecorder.stop();
                mMediaRecorder.reset();
                Log.v(TAG, "Recording Stopped");
            }
            mMediaProjection = null;
            stopScreenSharing();
        }
    }
createVirtualDisplay()是我们自己定义的
/*
参数说明:
* 第一个参数:虚拟画面名称
* 第二个参数:虚拟画面的宽度
* 第三个参数:虚拟画面的高度
* 第四个参数:虚拟画面的标志
* 第五个参数:虚拟画面输出的Surface
* 第六个参数:虚拟画面回调接口
其中最重要的就是第五个参数,录制画面输出的地方,他这里介绍的是一个Surface类型,那么我们如果想操作录制之后的视频数据,就需要创建一个Surface类型即可。
1、如果想截屏,那么可以使用ImageReader类的getSurface方法获取
2、如果想录制视频进行编码,可以使用MediaRecorder类的getSurface方法获取
*/
private VirtualDisplay createVirtualDisplay() {
        return mMediaProjection.createVirtualDisplay("MainActivity",
                DISPLAY_WIDTH, DISPLAY_HEIGHT, mScreenDensity,
                DisplayManager.VIRTUAL_DISPLAY_FLAG_AUTO_MIRROR,
                /*surface是mediaRecorder的,以mediaprojection为源输出到surface,捕获*/
                mMediaRecorder.getSurface(), null /*Callbacks*/, null
                /*Handler*/);
    }
弄完之后我们跳到另一个Activity,显示录制完的视频的缩略图,并添加分享播放和重新录制功能。
显示视频缩略图:
public Bitmap getVideoThumbnail(String filePath) {
        Bitmap bitmap = null;
        MediaMetadataRetriever retriever = new MediaMetadataRetriever();
        try {
            retriever.setDataSource(filePath);
            bitmap = retriever.getFrameAtTime();
        }
        catch(IllegalArgumentException e) {
            e.printStackTrace();
        }
        catch (RuntimeException e) {
            e.printStackTrace();
        }
        finally {
            try {
                retriever.release();
            }
            catch (RuntimeException e) {
                e.printStackTrace();
            }
        }
        return bitmap;
    }
播放:
Intent intent = new Intent();
                intent.setAction(Intent.ACTION_VIEW);//主要是这里指定了ACTION

                File vedioFile = new File(Environment
                        .getExternalStoragePublicDirectory(Environment
                                .DIRECTORY_DOWNLOADS), "/video.mp4");
                Uri uri = Uri.parse(vedioFile.getAbsolutePath());
                intent.setDataAndType(uri,"video/*");
                startActivity(intent);
分享:
 Intent shareIntent = new Intent();
                shareIntent.setAction(Intent.ACTION_SEND);

                shareIntent.setType("audio/*");

                File vedioFile = new File(Environment
                        .getExternalStoragePublicDirectory(Environment
                                .DIRECTORY_DOWNLOADS), "/video.mp4");

                shareIntent.putExtra(Intent.EXTRA_STREAM, Uri.fromFile(vedioFile));

                //设置分享列表的标题,并且每次都显示分享列表
                startActivity(Intent.createChooser(shareIntent, "分享到"));