一.准备工作
1.下载spring工具插件,在STS官网找到与eclipse对应版本的下载链接地址,复制该地址打开eclipse里的Help菜单,选择Install new Software选项,将地址粘贴到work with输入框中,点击add按钮,此时Location输入框中出现粘贴的地址,确定后会出现如图选项,选中该4个,将左下角的自动更新勾去掉,点击下一步开始在线安装。
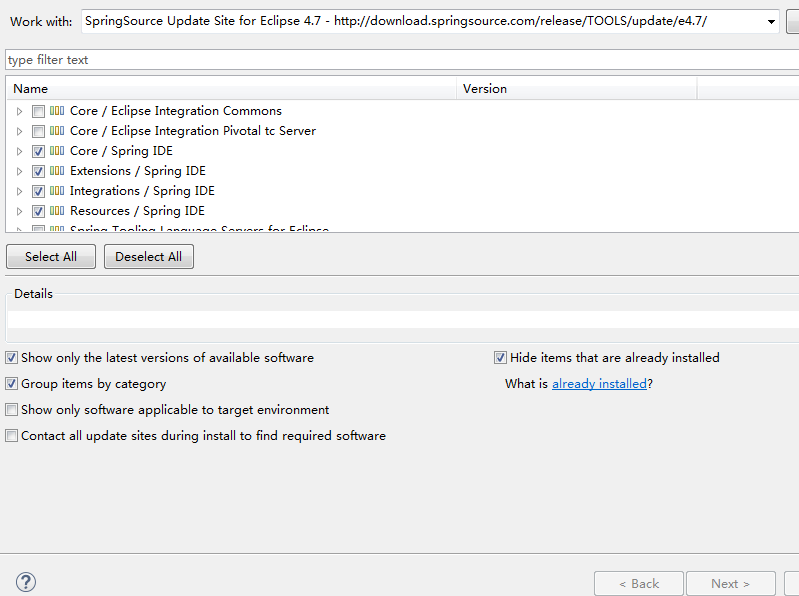
等系统加载完成后会要求自动重启软件,再次启动后会出现欢迎界面中的spring选项,说明安装完成。
引入spring框架所需要的21个jar包及commons-logging-1.2.jar包。
新建一个Spring Bean Configuration File 文件,在里面写spring的配置文件
二.spring简介
在spring出现前使用Enterprise java bean(EJB)框架,该框架复杂且破环类的结构。
Spring 创始人Rod Johnson, 包含的类有1400多个
Spring也是java代码, 里面运用了很多java中的相关技术, 比如反射, 注解, 网络通信等,
Spring并不是一门独立的语言, 实际上就是java语言写的一个封装
Spring能做的事情:
1, 方便解耦, 简化开发
2, AOP(Aspect Oriented Programming, 面向切面编程)的支持
3, 声明式事务的支持
4, 方便程序的测试
5, 方便集成各种优秀的框架(MyBatis, Hibernate, Shiro, AspectJ)
Spring的核心概念:
把所有需要的类都放到spring的线程池中,用的时候直接拿出,不需要new对象
BeanFactory
(Student)getBean("");----Object
1, IOC<Inversion of Control>, 控制反转:将对象的控制交给spring,由spring去管理。
DI<Dependency Injection>, 依赖注入:自动将对象注入到其他类中的成员变量类中。
通过IOC容器负责将依赖类进行创建, 拼接, 管理和获取。
BeanFactory是Spring的核心接口, 由它来实现Spring容器的核心内容。
2, AOP, 面向切面编程
搭建Spring环境
ApplicationContext ac = new FileSystemXmlApplicationContext():用于指定电脑中的文件,一般不用
ApplicationContext ac = new ClassPathXmlApplicationContext():客户端项目,一般多用这个;
ApplicationContext ac = new WebApplicationContext():动态网页项目;
三.通过spring进行属性注入
有三种注入方法:get/set方法注入;构造器(构造方法注入);接口注入(不常用);
代码示例:
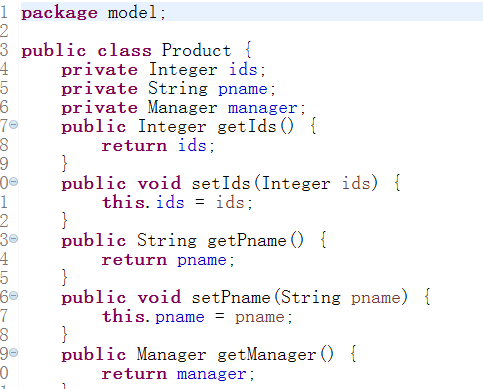
先构建两个类:manager类和product类

spring的配置文件
<?xml version="1.0" encoding="UTF-8"?>
<beans xmlns="http://www.springframework.org/schema/beans"
	xmlns:xsi="http://www.w3.org/2001/XMLSchema-instance"
	xmlns:p="http://www.springframework.org/schema/p"
	xsi:schemaLocation="http://www.springframework.org/schema/beans http://www.springframework.org/schema/beans/spring-beans.xsd">

	<bean id="manager" class="model.Manager"><!-- 将对象放到spring容器中,交由spring管理 -->
		<property name="ids" value="222"></property><!-- set注入,需要类中有严格的get/set方法,比较常用 -->
		<property name="mname" value="管理员"></property>
	</bean>
	<bean id="manager2" class="model.Manager">
		<constructor-arg index="0" value="123"></constructor-arg><!-- 构造方法注入,以构造方法的索引注入,需要带参数的构造方法 -->
		<constructor-arg index="1" value="管理员2"></constructor-arg>
	</bean>
	<bean id="manager3" class="model.Manager">
		<constructor-arg name="ids" value="123"></constructor-arg><!-- 第二种构造方法注入,需要空参构造方法 -->
		<constructor-arg name="mname" value="管理员3"></constructor-arg>
	</bean>
	<bean id="manager4" class="model.Manager" p:ids="1234" p:mname="管理员4" ><!-- 当在namespaces中勾选p标记时可以使用这种方法,与set方法效果一样,比较常用 -->
		<property name="plist"><!-- 一对多注入 -->
			<list><!--也可以直接在list里写bean标签 -->
				<ref bean="product"/>
				<ref bean="product1"/>
			</list>
		</property>
	</bean>
	<bean id="product" class="model.Product">
		<property name="ids" value="222"></property>
		<property name="pname" value="苹果"></property>
		<property name="manager" ref="manager4"></property><!-- 一对一注入,ref指引用了另一个类 -->
		<!-- <property name="manager" >第二种写法
			<ref bean="manager4"/>
		</property> -->
	</bean>
	<bean id="product1" class="model.Product">
		<property name="ids" value="333"></property>
		<property name="pname" value="香蕉"></property>
	</bean>
</beans>
JUnit test 类,用于测试程序
package Test;

import static org.junit.jupiter.api.Assertions.*;

import org.junit.jupiter.api.AfterEach;
import org.junit.jupiter.api.BeforeEach;
import org.junit.jupiter.api.Test;
import org.springframework.context.support.ClassPathXmlApplicationContext;

import model.Manager;
import model.Product;

class JunitTest {
	private ClassPathXmlApplicationContext c;// 定义spring成员变量

	@BeforeEach
	void setUp() throws Exception {
		c = new ClassPathXmlApplicationContext("beans.xml");// 加载配置文件放到spring容器中,路径从src下开始写
	}

	@AfterEach
	void tearDown() throws Exception {
		c.close();// 用完关闭该容器
	}

	@Test
	void test() {
		Manager m = (Manager) c.getBean("manager");// 控制反转,通过spring容器获取该对象
		m.setIds(12);// 可通过set方法给类的成员变量赋值
		m.setMname("151");
		System.out.println(m);
	}

}
其他属性
<?xml version="1.0" encoding="UTF-8"?>
<beans xmlns="http://www.springframework.org/schema/beans"
	xmlns:xsi="http://www.w3.org/2001/XMLSchema-instance"
	xmlns:p="http://www.springframework.org/schema/p"
	xsi:schemaLocation="http://www.springframework.org/schema/beans http://www.springframework.org/schema/beans/spring-beans.xsd"
	default-autowire="byName">
	<bean id="manager" class="model.Manager">
		<property name="ids" value="12"></property>
		<property name="mname" value ="管理员"></property>
	</bean>
	<bean id="product" class="model.Product" autowire="byName"><!-- 自动装配,根据成员变量名去找bean的id,如果找到,自动添加; -->
		<property name="ids" value="22"></property>
		<property name="pname" value ="西瓜"></property>
	</bean>
<!-- byType是根据class自动装配,default是根据beans标签里的属性值为准 -->
<!-- scope="singleton(单例) / prototype(原型)"//默认是单例,如果是原型则每次取都是不同的对象;-->
<!-- lazy-init="true" // 延迟加载,默认为false,如果设置为true则是在需要使用该对象时才去调用空参构造方法创建对象;-->
<!-- init-method="" destory-method=""//属性值为类里面的方法名,分别代表该对象初始化和销毁时调用的方法,这两个属性都不要与prototype一起使用,spring无法正确判断。-->
</beans>