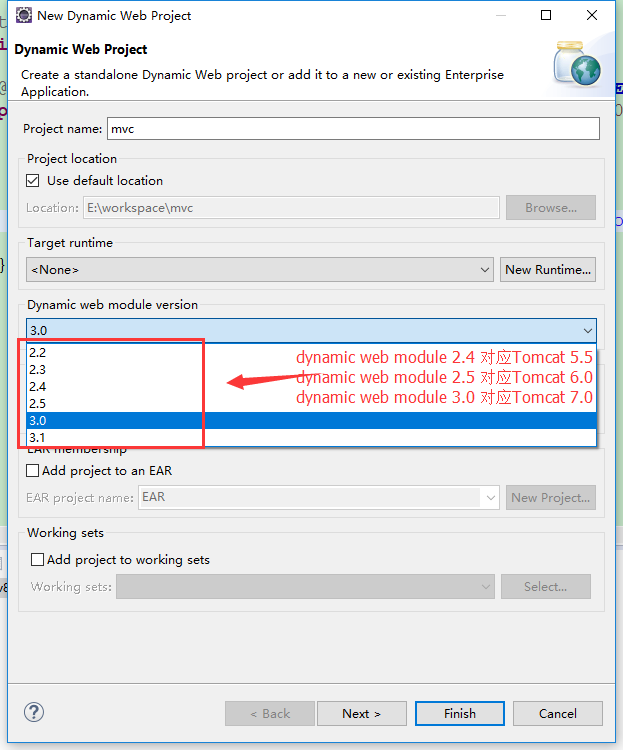
一、创建Web项目
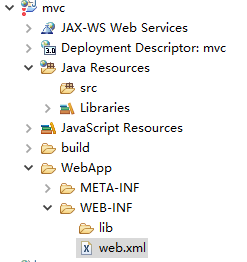
我用的eclipse,创建步骤:file=>New=>Other=>Web=>Dynamic Web project,按照操作创建一个完整的Web项目,下载对应的jar文件,复制到 lib文件夹下。
二、创建配置文件进行配置
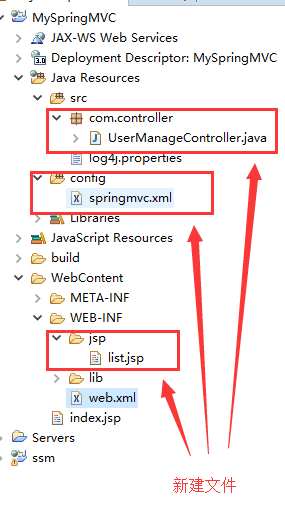
1、新建文件 :
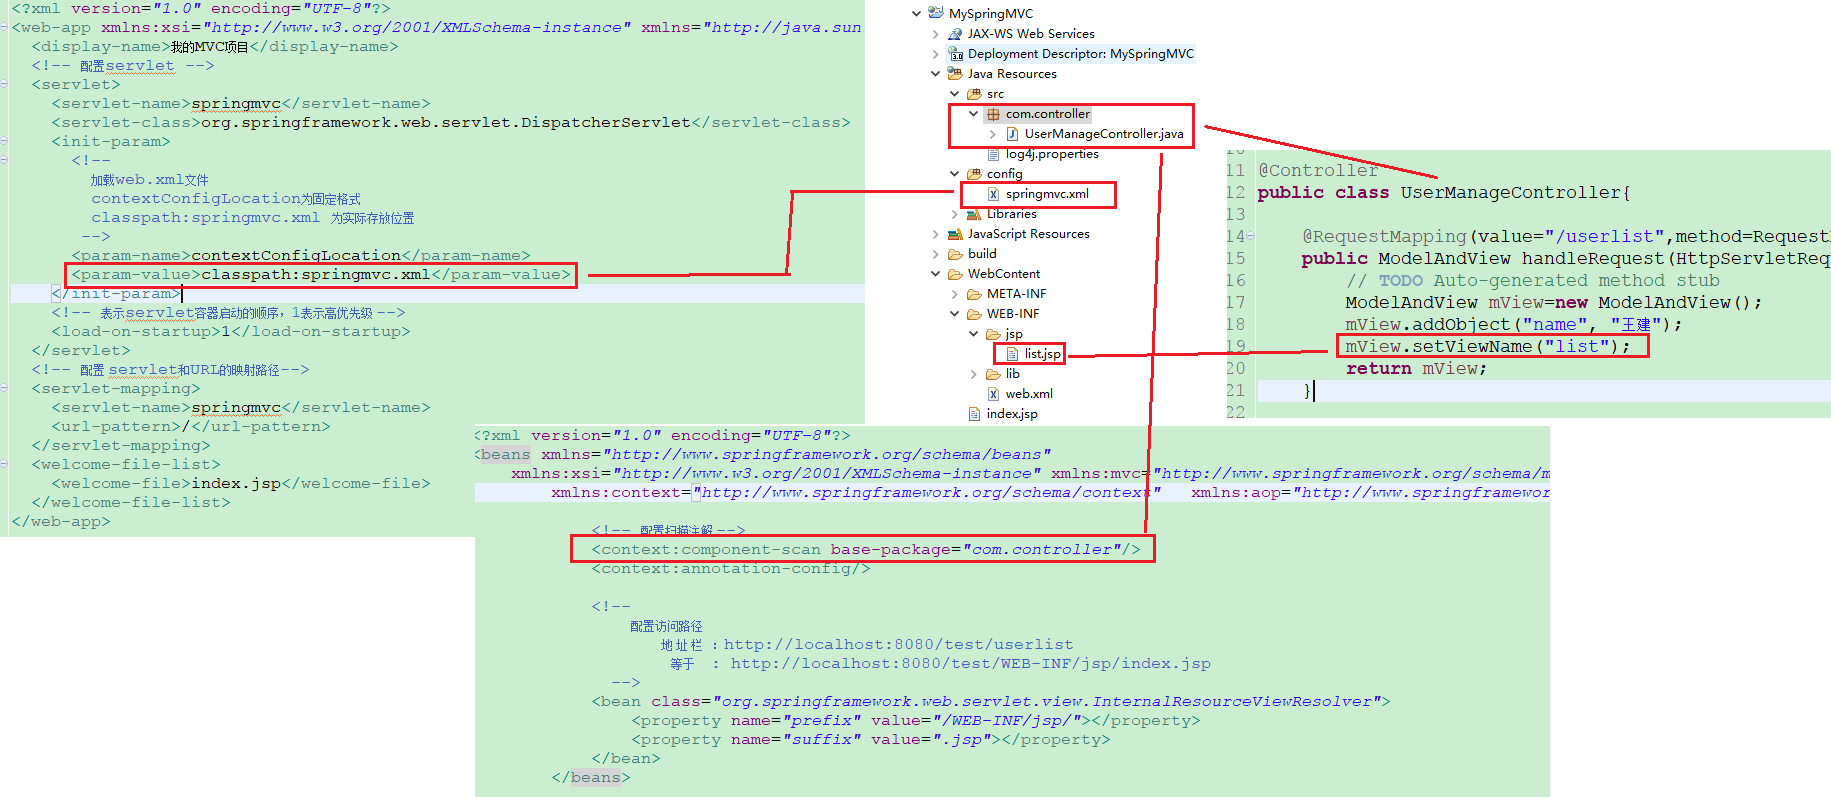
2、打开 web.xml文件进行配置


<?xml version="1.0" encoding="UTF-8"?>
<web-app xmlns:xsi="http://www.w3.org/2001/XMLSchema-instance" xmlns="http://java.sun.com/xml/ns/javaee" xsi:schemaLocation="http://java.sun.com/xml/ns/javaee http://java.sun.com/xml/ns/javaee/web-app_3_0.xsd" id="WebApp_ID" version="3.0">
  <display-name>我的MVC项目</display-name>
  <!-- 配置servlet -->
  <servlet>
    <servlet-name>springmvc</servlet-name>
    <servlet-class>org.springframework.web.servlet.DispatcherServlet</servlet-class>
    <init-param>
      <!--
          加载web.xml文件
          contextConfigLocation为固定格式
          classpath:springmvc.xml 为实际存放位置
       -->
      <param-name>contextConfigLocation</param-name>
      <param-value>classpath:springmvc.xml</param-value>
    </init-param>
    <!-- 表示servlet容器启动的顺序,1表示高优先级 -->
    <load-on-startup>1</load-on-startup>
  </servlet>
  <!-- 配置 servlet和URL的映射路径-->
  <servlet-mapping>
    <servlet-name>springmvc</servlet-name>
    <url-pattern>/</url-pattern>
  </servlet-mapping>
  <welcome-file-list>
    <welcome-file>index.jsp</welcome-file>
  </welcome-file-list>
</web-app>
3、配置 springmvc.xml,内容如下
<?xml version="1.0" encoding="UTF-8"?>
<beans xmlns="http://www.springframework.org/schema/beans"
    xmlns:xsi="http://www.w3.org/2001/XMLSchema-instance" xmlns:mvc="http://www.springframework.org/schema/mvc"
        xmlns:context="http://www.springframework.org/schema/context"
        xmlns:aop="http://www.springframework.org/schema/aop" xmlns:tx="http://www.springframework.org/schema/tx"
        xsi:schemaLocation="http://www.springframework.org/schema/beans
            http://www.springframework.org/schema/beans/spring-beans-3.2.xsd
            http://www.springframework.org/schema/mvc
            http://www.springframework.org/schema/mvc/spring-mvc-3.2.xsd
            http://www.springframework.org/schema/context
            http://www.springframework.org/schema/context/spring-context-3.2.xsd
            http://www.springframework.org/schema/aop
            http://www.springframework.org/schema/aop/spring-aop-3.2.xsd
            http://www.springframework.org/schema/tx
            http://www.springframework.org/schema/tx/spring-tx-3.2.xsd">

            <!-- 配置扫描注解 -->
            <context:component-scan base-package="com.controller"/>
               <context:annotation-config/>

            <!--
                配置访问路径
                          地 址 栏   :http://localhost:8080/test/userlist
                    等于    : http://localhost:8080/test/WEB-INF/jsp/index.jsp
              -->
            <bean class="org.springframework.web.servlet.view.InternalResourceViewResolver">
                <property name="prefix" value="/WEB-INF/jsp/"></property>
                <property name="suffix" value=".jsp"></property>
            </bean>
        </beans>
4、Controller代码
@Controller
public class UserManageController{

    @RequestMapping(value="/userlist",method=RequestMethod.GET)
    public ModelAndView handleRequest(HttpServletRequest arg0, HttpServletResponse arg1) throws Exception {
        // TODO Auto-generated method stub
        ModelAndView mView=new ModelAndView();
        mView.addObject("name", "王建");
        mView.setViewName("list");
        return mView;
    }

}
5、配置关系图
6、运行测试
运行以后再地址栏后面加上 /list,,访问成功。
参考文档 http://www.yiibai.com/spring_mvc/spring-mvc-tutorial-for-beginners.html