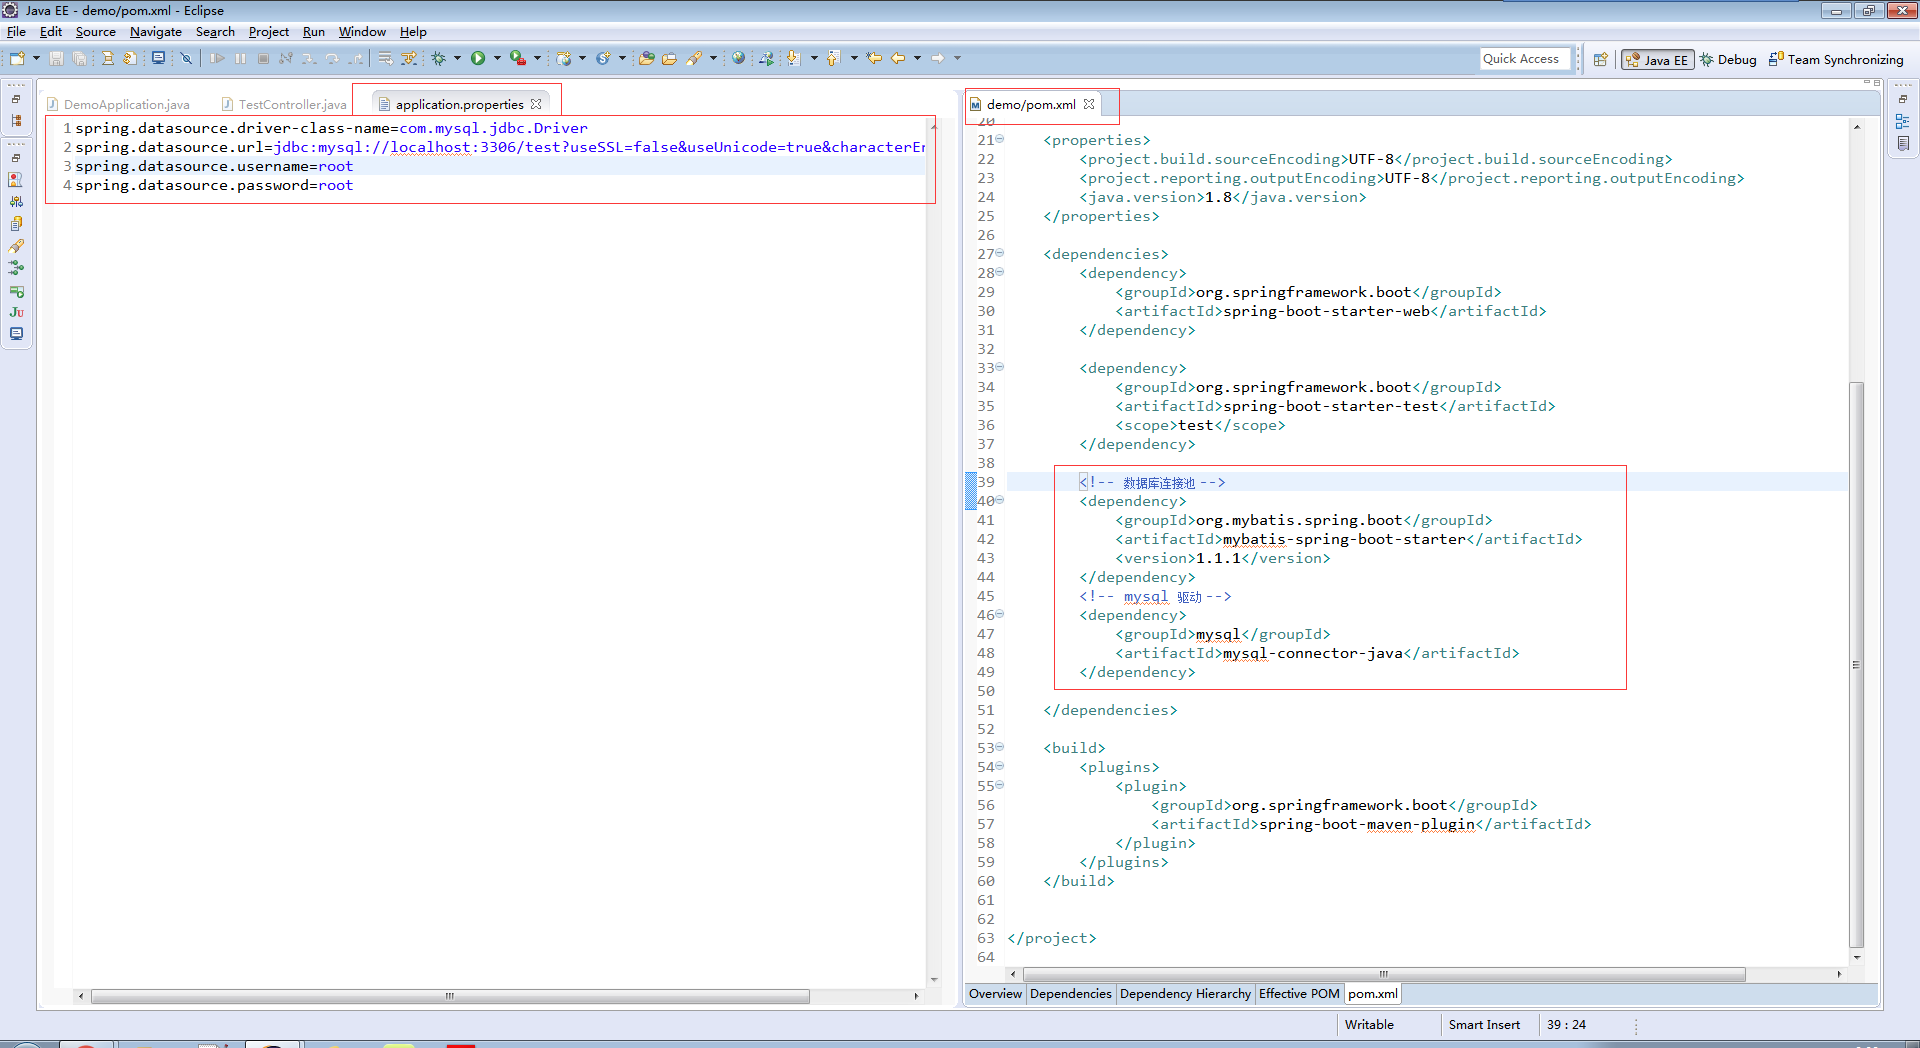
Spring Boot集成Mybatis非常简单,在之前搭建好的项目中加入Mybatis依赖的jar,在配置文件中加入数据库配置即可,如下图所示:

创建对应的Controller、Service、Dao等,代码如下:
User实体类:
package com.example.demo.entity;

public class User {

    private Long id;

    private String name;

    private int age;

    public Long getId()
    {
        return id;
    }

    public void setId(Long id)
    {
        this.id = id;
    }

    public String getName()
    {
        return name;
    }

    public void setName(String name)
    {
        this.name = name;
    }

    public int getAge()
    {
        return age;
    }

    public void setAge(int age)
    {
        this.age = age;
    }
}
Dao:
package com.example.demo.dao;

import java.util.List;

import org.apache.ibatis.annotations.Insert;
import org.apache.ibatis.annotations.Mapper;
import org.apache.ibatis.annotations.Result;
import org.apache.ibatis.annotations.Results;
import org.apache.ibatis.annotations.Select;

import com.example.demo.entity.User;

@Mapper
public interface UserDao {

    @Results({ @Result(property = "id", column = "id"), @Result(property = "name", column = "name"), @Result(property = "age", column = "age") })
    @Select("SELECT * FROM user WHERE age = #{age}")
    List<User> get(int age);

    @Insert("INSERT INTO user(id, name, age) VALUES (#{id}, #{name}, #{age})")
    void insert(User user);
}
UserService:
package com.example.demo.service;

import org.springframework.beans.factory.annotation.Autowired;
import org.springframework.stereotype.Service;

import com.example.demo.dao.UserDao;
import com.example.demo.entity.User;

@Service
public class UserService {

    @Autowired
    private UserDao userDao;

    public String show()
    {
        return "Hello World!";
    }

    public String insert(String name, int age)
    {
        User user = new User();
        user.setId(System.currentTimeMillis());
        user.setName(name);
        user.setAge(age);
        userDao.insert(user);
        return "Insert ( "" + name + "", age" + age + ") OK!";
    }
}
UserController:
package com.example.demo;

import org.springframework.beans.factory.annotation.Autowired;
import org.springframework.web.bind.annotation.RequestMapping;
import org.springframework.web.bind.annotation.RestController;

import com.example.demo.service.UserService;

@RestController
public class UserController {

    @Autowired
    private UserService userService;

    @RequestMapping(value = "/show")
    public String show()
    {
        return userService.show();
    }

    @RequestMapping(value = "/insert")
    public String insert(String name, int age)
    {
        return userService.insert(name, age);
    }
}
DemoApplication中加入扫描Mapper的注解,修改后的代码如下所示:
package com.example.demo;

import org.mybatis.spring.annotation.MapperScan;
import org.springframework.boot.SpringApplication;
import org.springframework.boot.autoconfigure.SpringBootApplication;

@SpringBootApplication
@MapperScan(basePackages = { "com.example.demo.dao" })
public class DemoApplication {

    public static void main(String[] args)
    {
        SpringApplication.run(DemoApplication.class, args);
    }
}
启动,访问:http://localhost:8080/insert?name=yyy&age=20 插入数据成功:

集成Mybatis完成。