7.1解压文件
注意,安装Grid时需要以grid用户身份执行,在那之前需要以root身份执行xhost+,即命令:
代码1
| [root@sgdb1~]# xhost+
[root@sgdb1~]# su - grid
[grid@sgdb1~]$ unzip /tmp/p10404530_112030_Linux-x86-64_3of7.zip
|
解压得到/tmp/grid文件夹
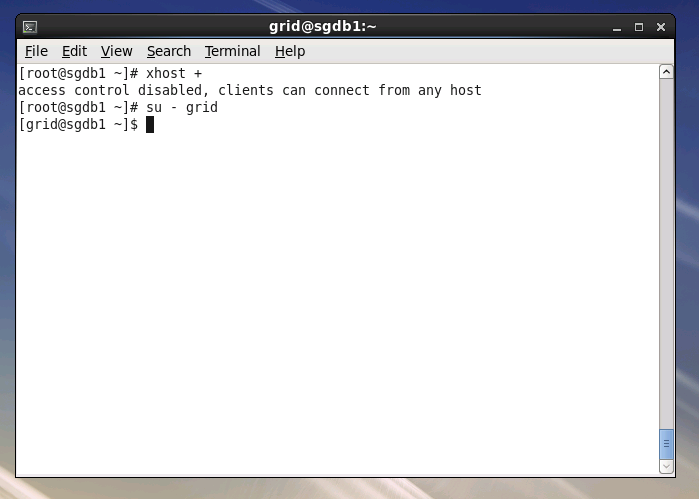
图1 执行xhost+
| [grid@sgdb1~]$ cd /tmp/grid
[grid@sgdb1~]$ ./runInstaller
|
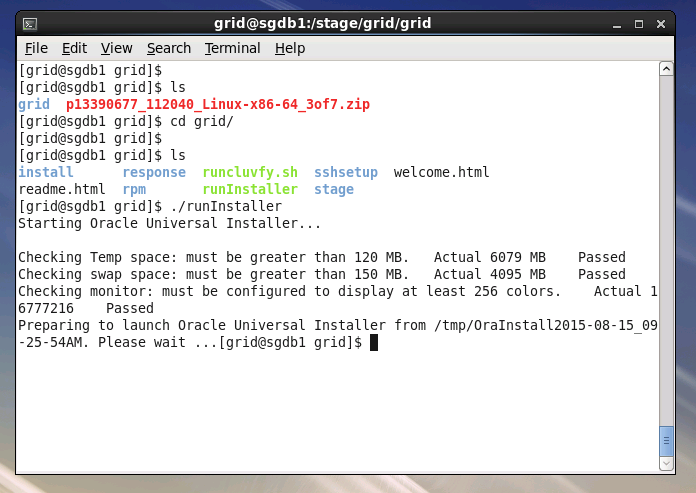
图2 执行runInstaller
7.2 跳过软件更新
选择【Skip software updates】,点击【Next】
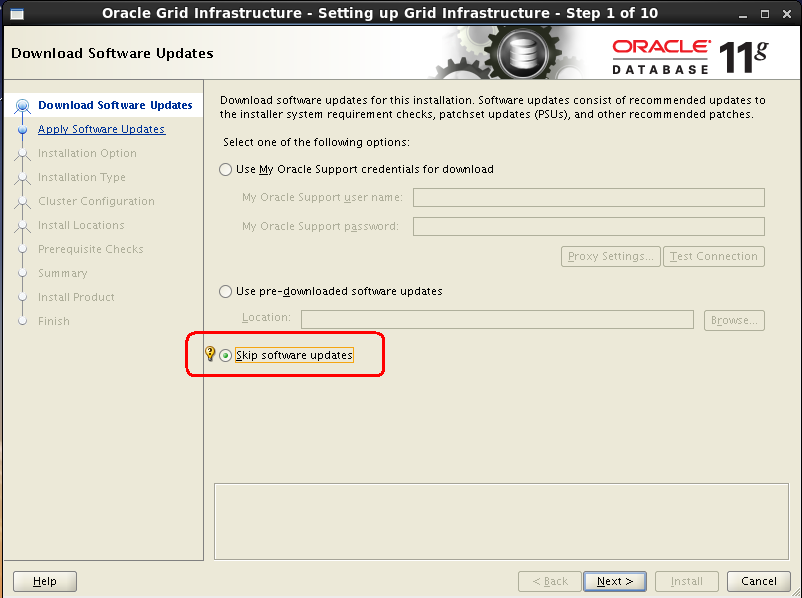
图3 跳过软件更新
7.3 Grid安装选项
选择【Install and configure oracle grid infrastructure for a cluster】,点击【Next】
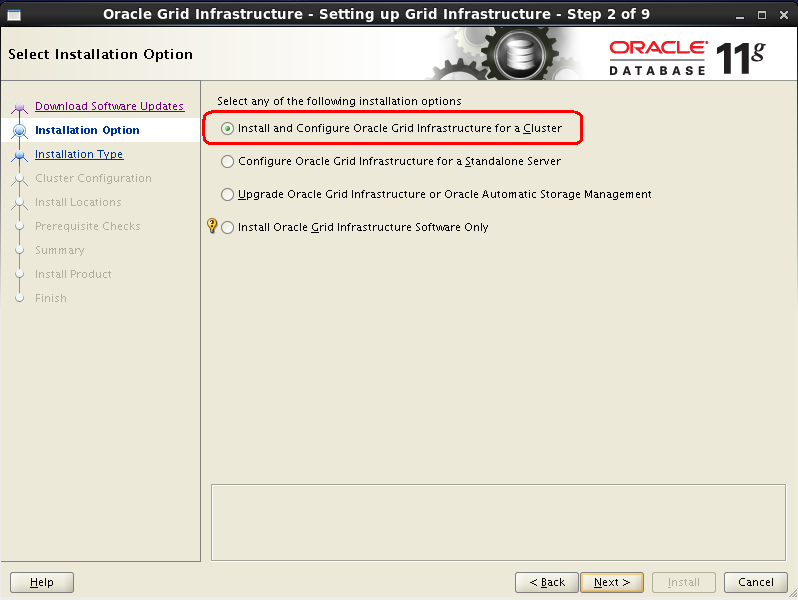
图4 Grid安装选项
7.4 Grid安装方式
选择【Advanced Installation】,选择高级安装方式,点击【Next】
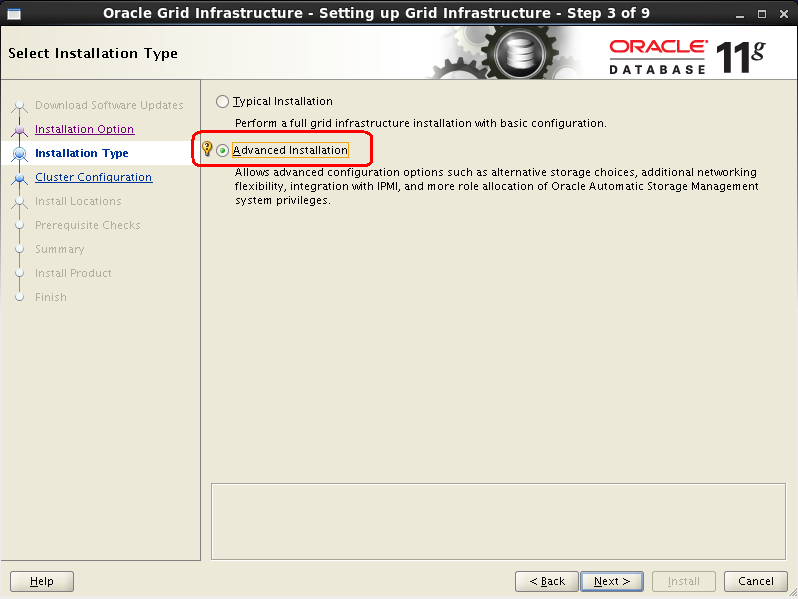
图5 Grid安装方式
7.5 Grid安装语言
在左侧选择【Simplified Chinese】加入到右侧中,点击【Next】
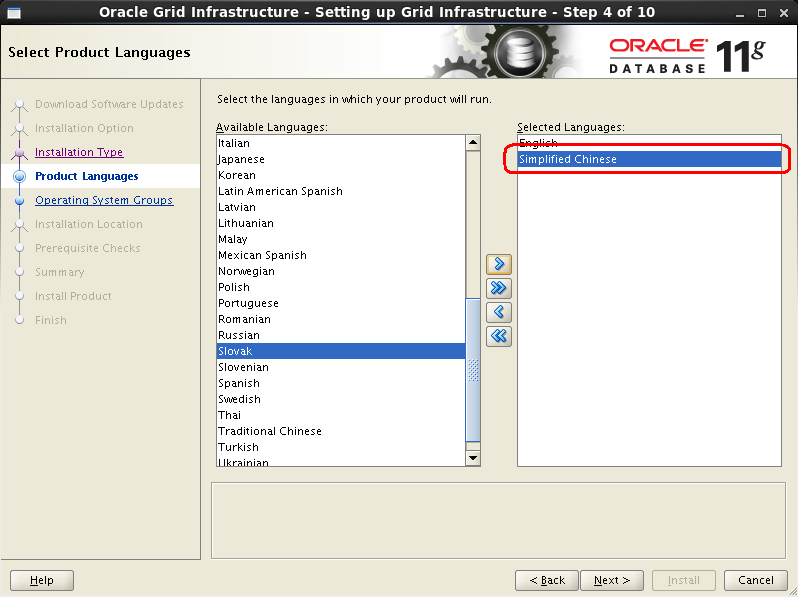
图6 Grid安装语言
7.6 设置SCAN IP
在SCAN Name中添加scan-ip对应的主机名,如不明确,可去/etc/hosts文件中查询
取消【Configure GNS】
点击【Next】
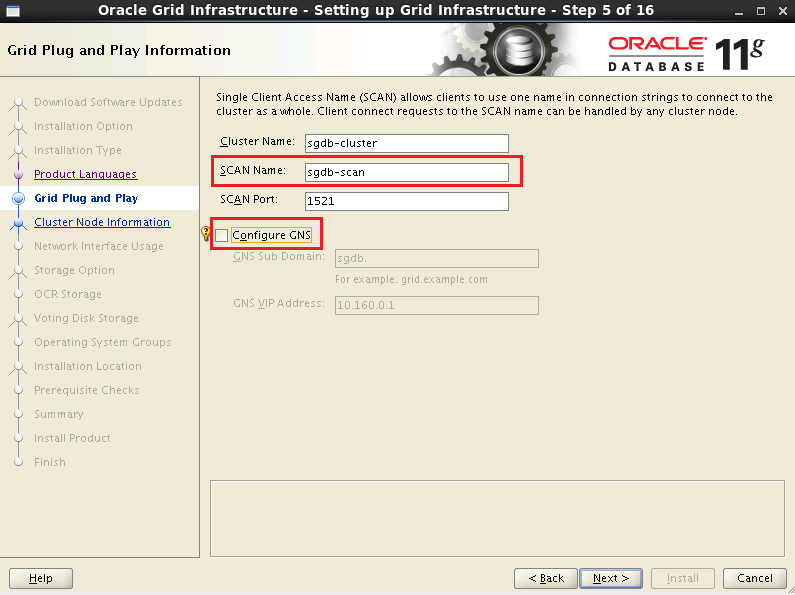
图7 设置SCAN Name
7.7 配置集群服务器SSH服务
默认情况下,一般只有sgdb1,需要手动添加sgdb2与sgdb2-vip(添加后要保证SSH Connectivity的正确性),点击【Add】按钮,添加节点
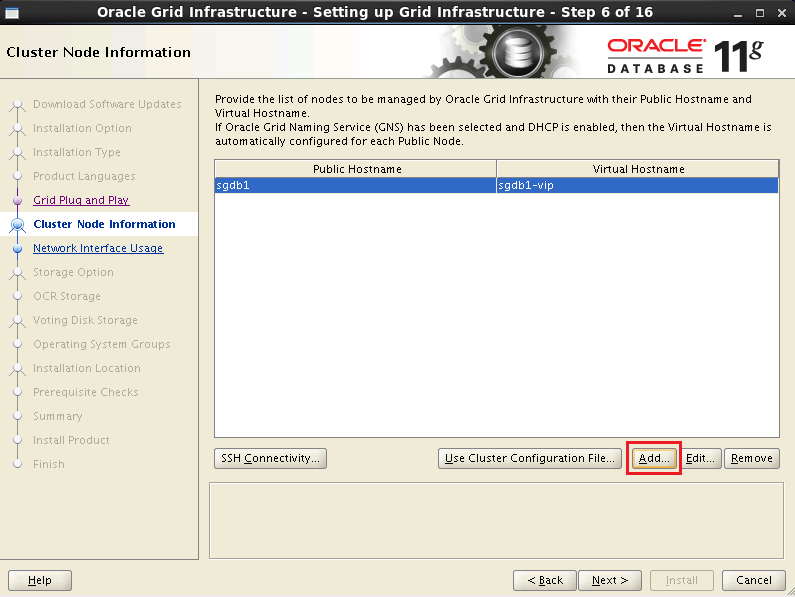
图8 配置集群服务器SSH服务
输入另外一个节点的相关主机名:sgdb2、sgdb2-vip,点击【OK】
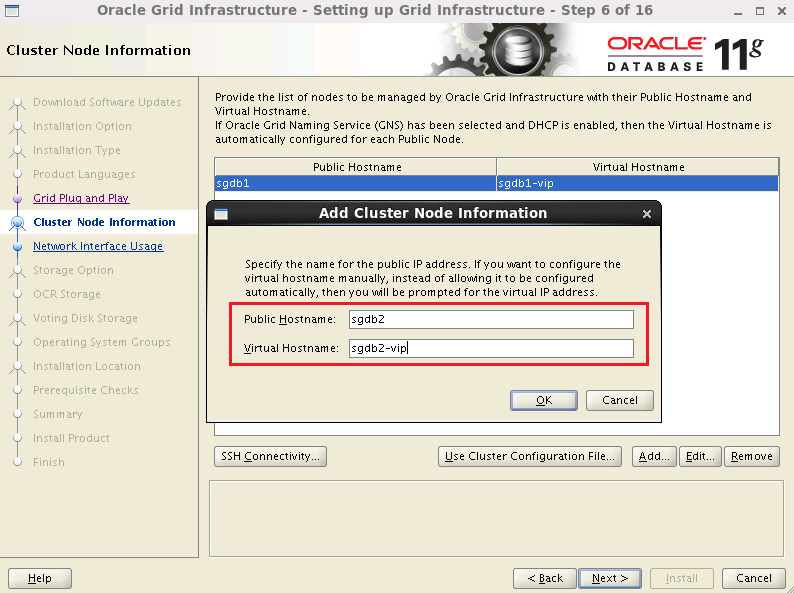
图9 配置集群服务器SSH服务
配置SSH属性,点击【SSH Connectivity】
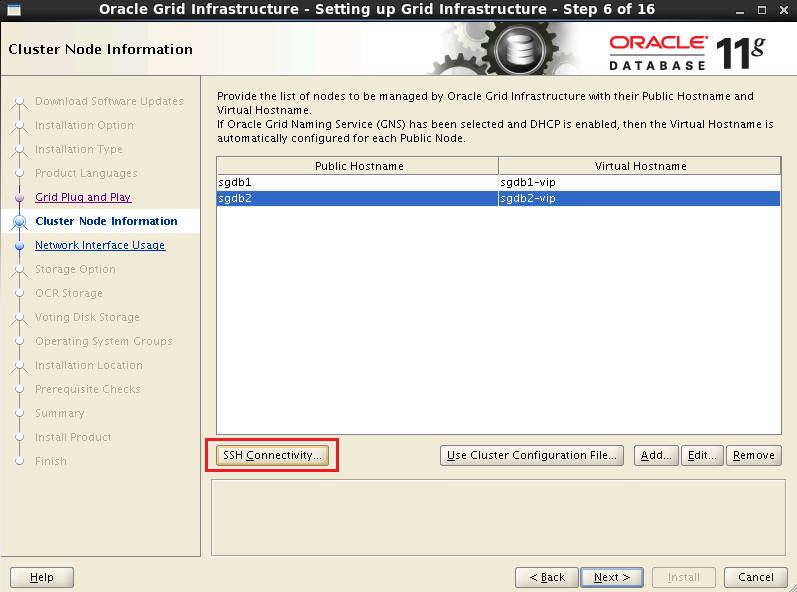
图10 配置集群服务器SSH服务
输入grid用户的密码,点击【Setup】按钮,建立互信
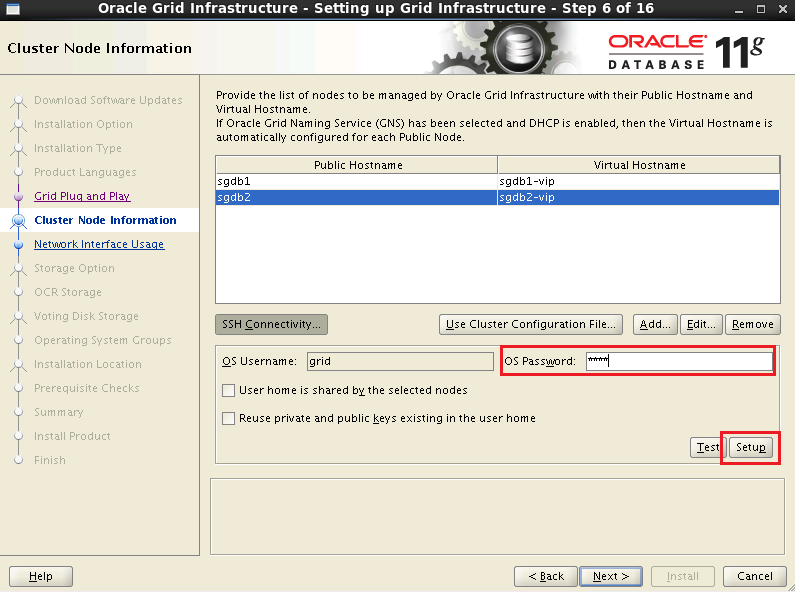
图11 配置集群服务器SSH服务
互信建立完毕,点击【OK】,点击【Next】
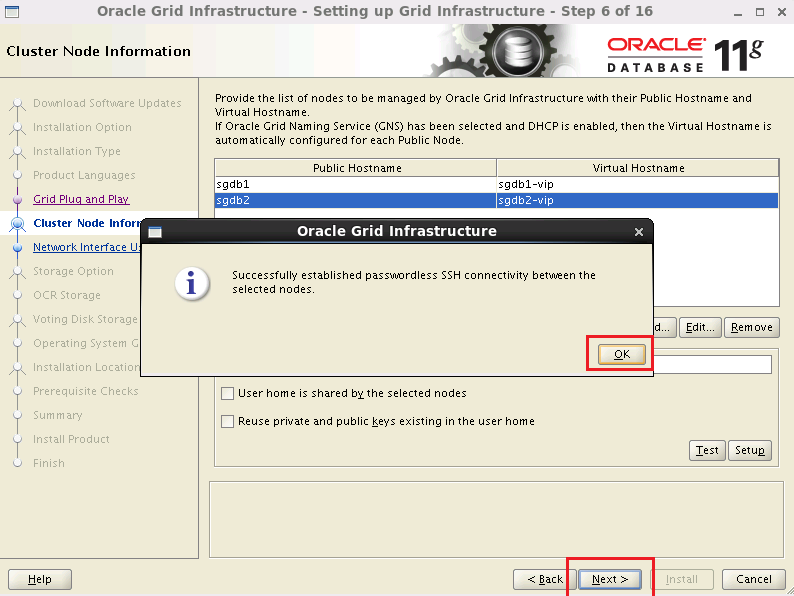
图12 配置集群服务器SSH服务
7.8 设置网络
确认网络,包括私网网段与公网网段,确认无误后,点击【Next】
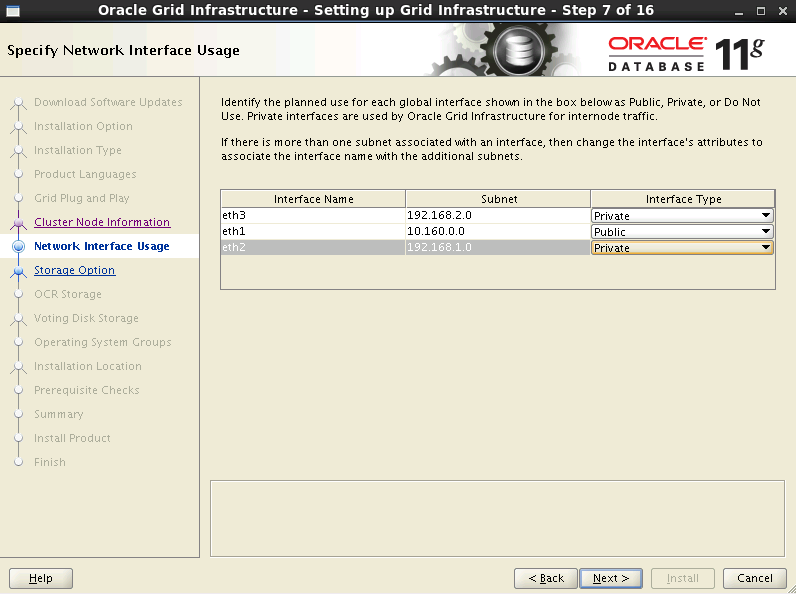
图13 设置网络
7.9 选择存储方式
选择【ASM】方式,点击【Next】
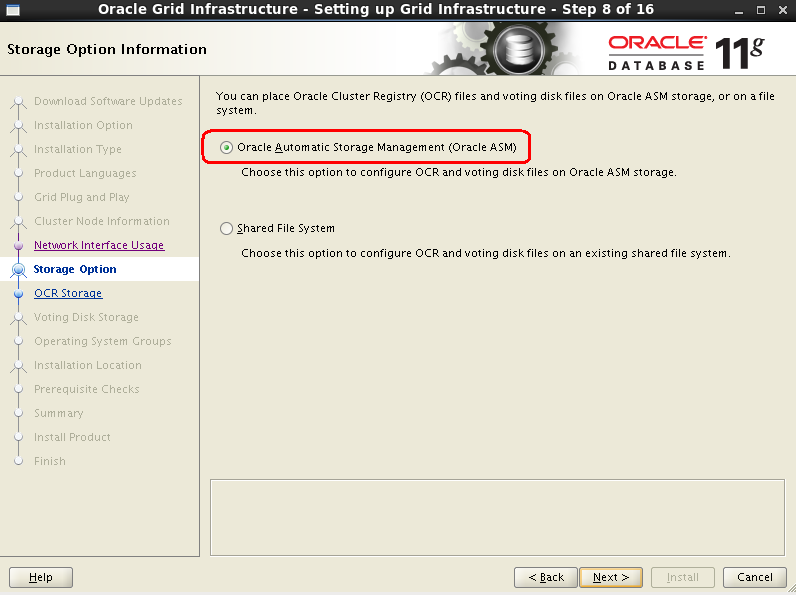
图14 选择存储方式
7.10 选择OCR+投票盘
输入磁盘组名称:BJ_SGDB_OCR;
冗余方式【Redundancy】- 选择【Extenal】(根据实际场景可选择High、Normal)
勾选投票盘/dev/asm-ocr,
点击【Next】
注意:如果使用ASM块设备方式,路径为/dev;如果使用裸设备方式,路径为/dev/raw/*;如果找不到磁盘,点击右下方的【Change Discovery Path】修改路径。
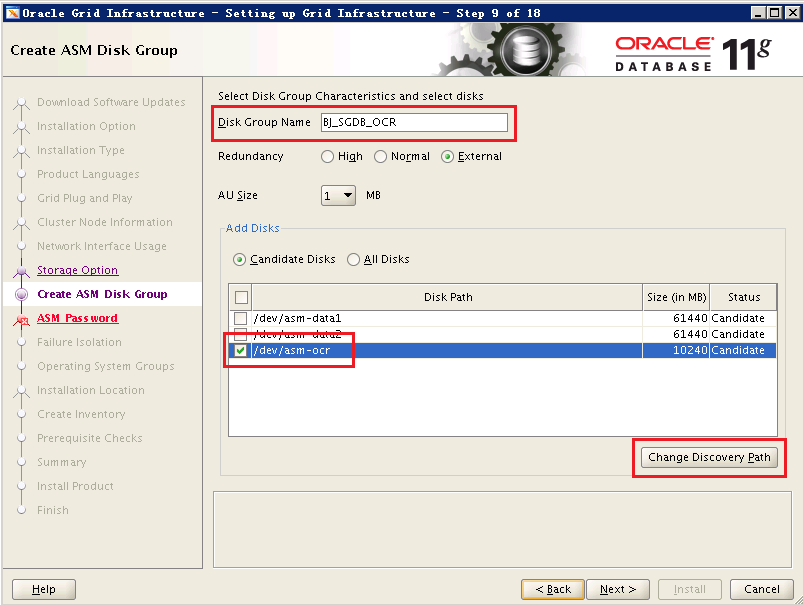
图15 选择投票盘
7.11 设置ASM管理用户密码
(密码一般为oracle),点击【Next】
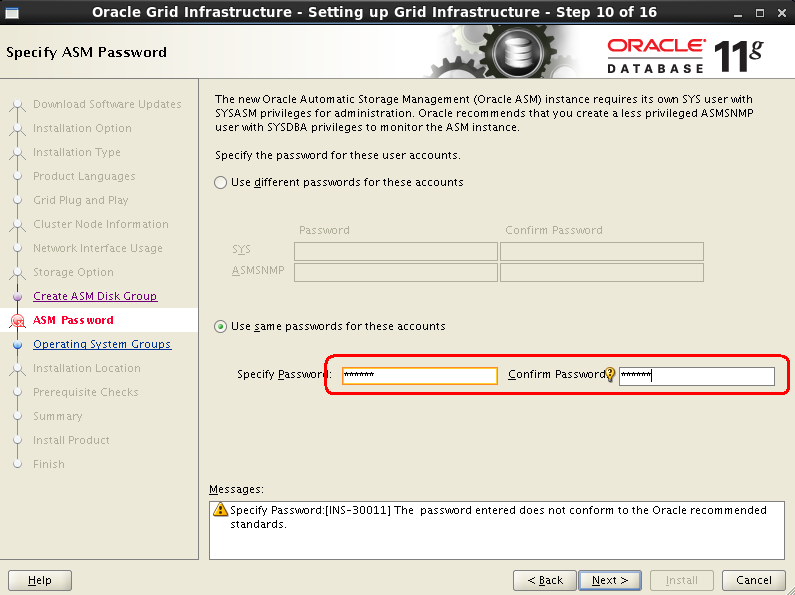
图16 设置ASM管理用户密码
点击【Yes】
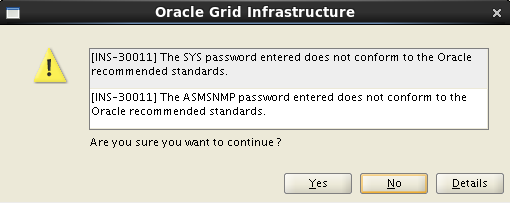
图17 设置ASM管理用户密码
7.12 设置IPM
勾选【Do not use intelligent platform management interface(IPMI)】(默认)
点击【Next】
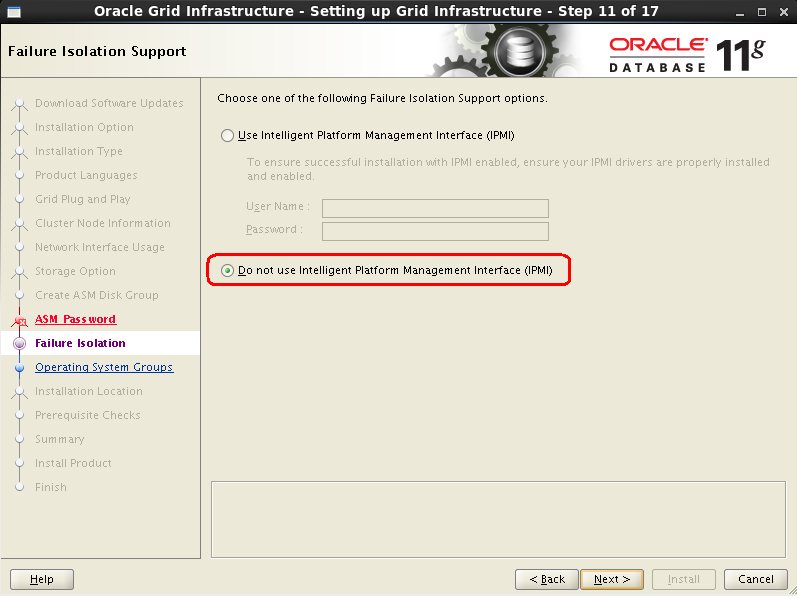
图18 设置IPMI
7.13 设置ASM管理用户与用户组
DBA 选择asmdba组
Operator 选择asmoper组
Adminstrator 选择asmadmin组
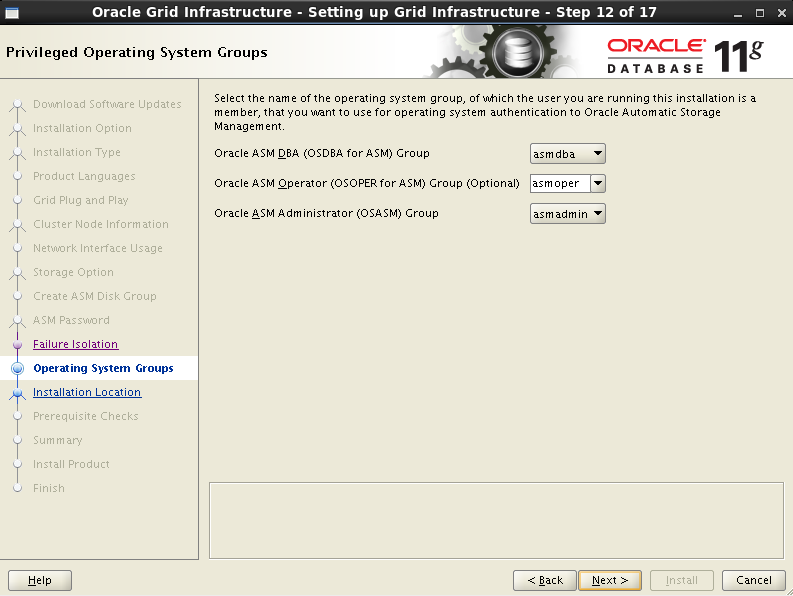
图19 ASM管理用户与组
7.14 设置Grid软件安装路径
一般由Grid用户的环境变量设置,默认即可。点击【Next】
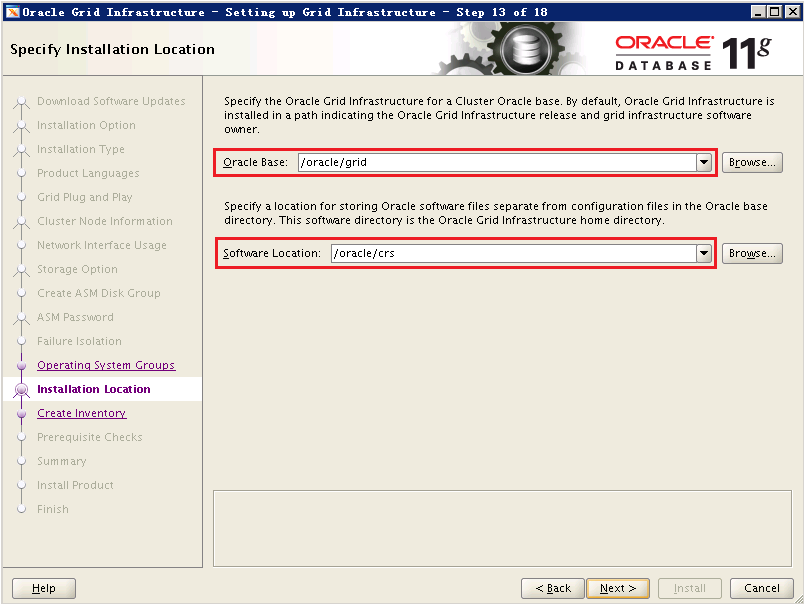
图20 设置Grid软件安装路径
7.15 设置oraInventory路径
(默认即可),点击【Next】
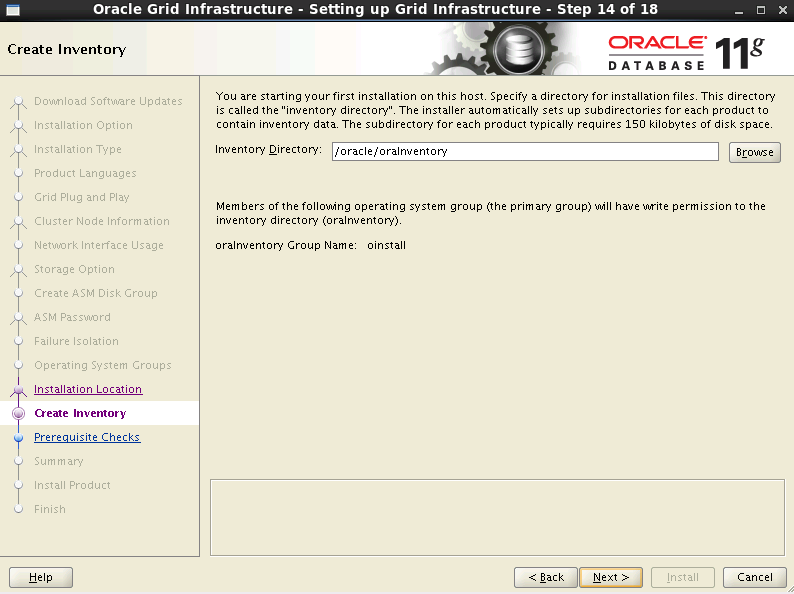
图21 设置oraInventory路径
7.16 执行安装前检查
有若干错误,没有关系,可以通过点击【Fix & Check Again】来解决
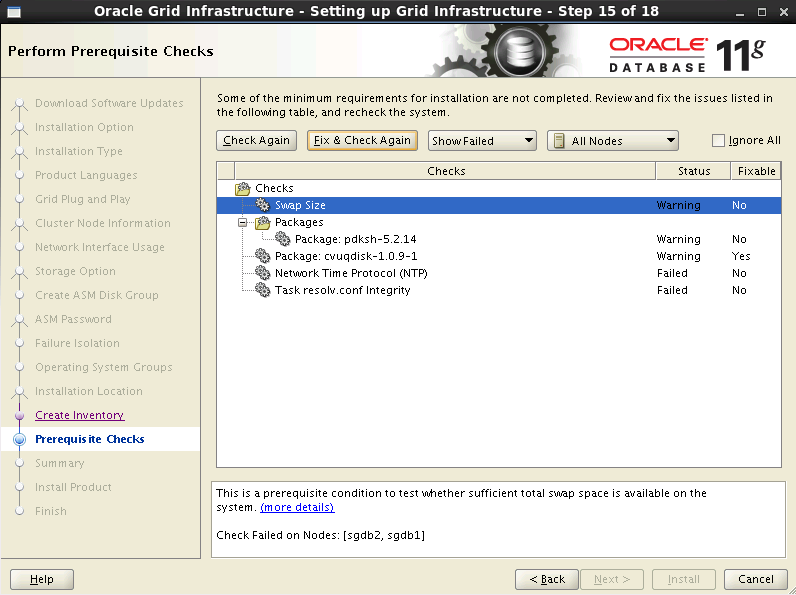
图22 执行安装前检查
此时将有对话框弹出,以root身份运行/tmp/CVU_11.2.0.4_grid/runfixup.sh,(sgdb1与sgdb2两台都需要执行)
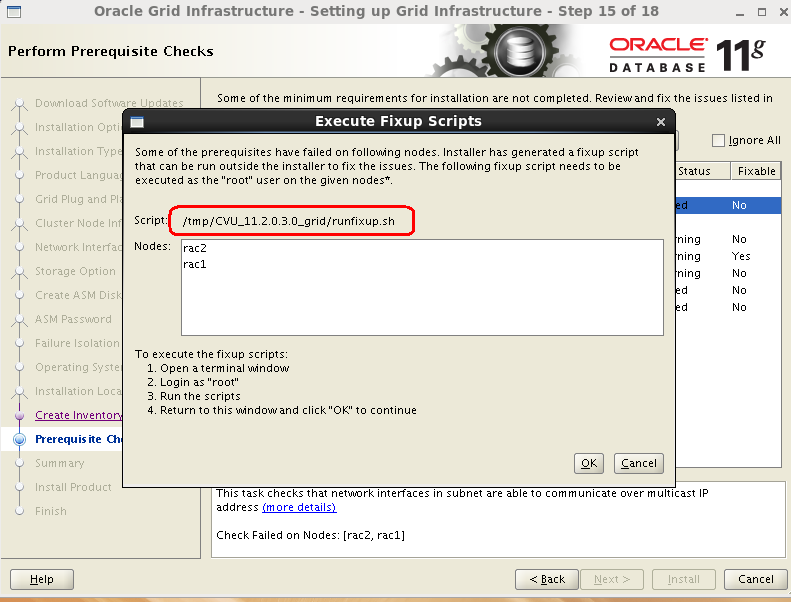
图23 执行自动fix脚本
代码22
| [root@sgdb1 CVU_11.2.0.4.0_grid]# ./runfixup.sh
Response file being used is :./fixup.response
Enable file being used is :./fixup.enable
Log file location: ./orarun.log
Installing Package /tmp/CVU_11.2.0.4.0_grid//cvuqdisk-1.0.9-1.rpm
Preparing... ########################################### [100%]
1:cvuqdisk ########################################### [100%]
|
代码23
| [root@sgdb2 CVU_11.2.0.4.0_grid]# ./runfixup.sh
Response file being used is :./fixup.response
Enable file being used is :./fixup.enable
Log file location: ./orarun.log
Installing Package /tmp/CVU_11.2.0.4.0_grid//cvuqdisk-1.0.9-1.rpm
Preparing... ########################################### [100%]
1:cvuqdisk ########################################### [100%]
|
执行完成后,点击【OK】
确认无特殊问题,点击【Ignore All】
点击【Next】
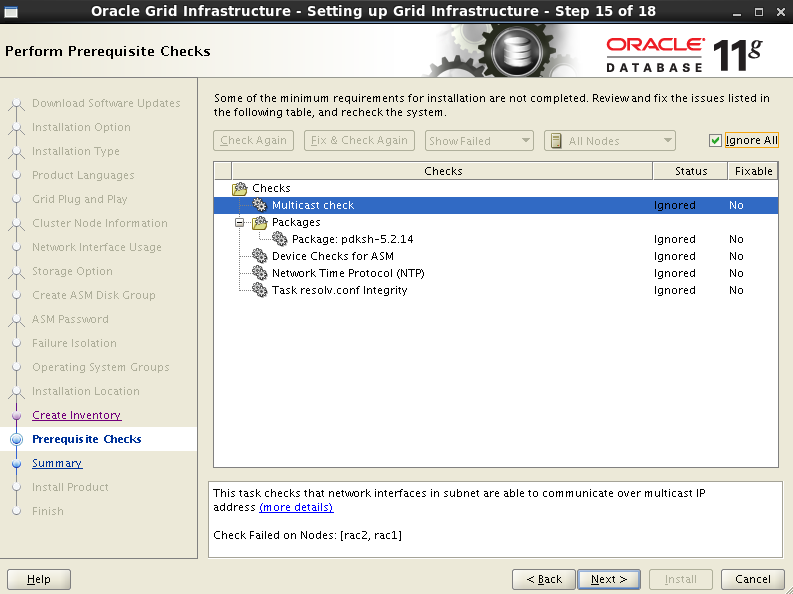
图24 再次执行检查
点击【Yes】
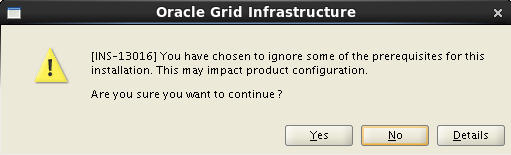
图25 确认忽略问题
7.17 安装信息统计
点击【Install】,开始安装
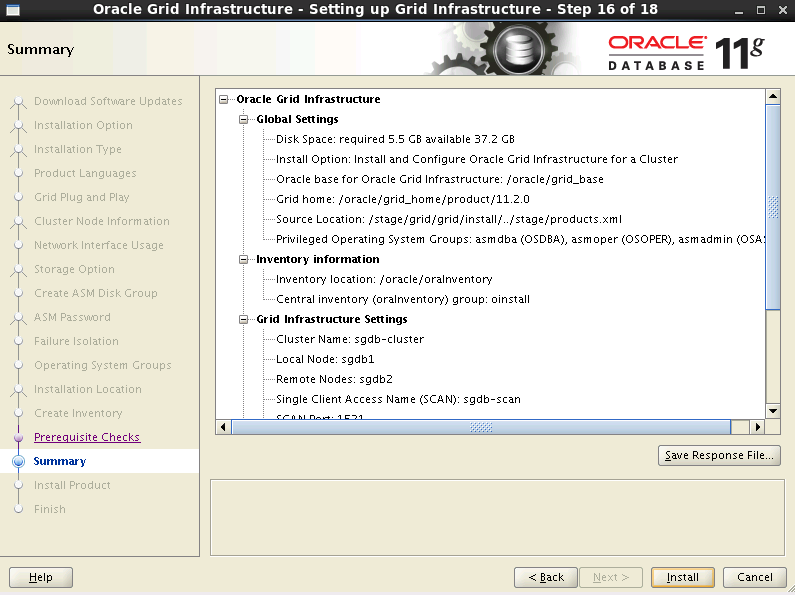
图26 安装前信息汇总
7.18 安装过程
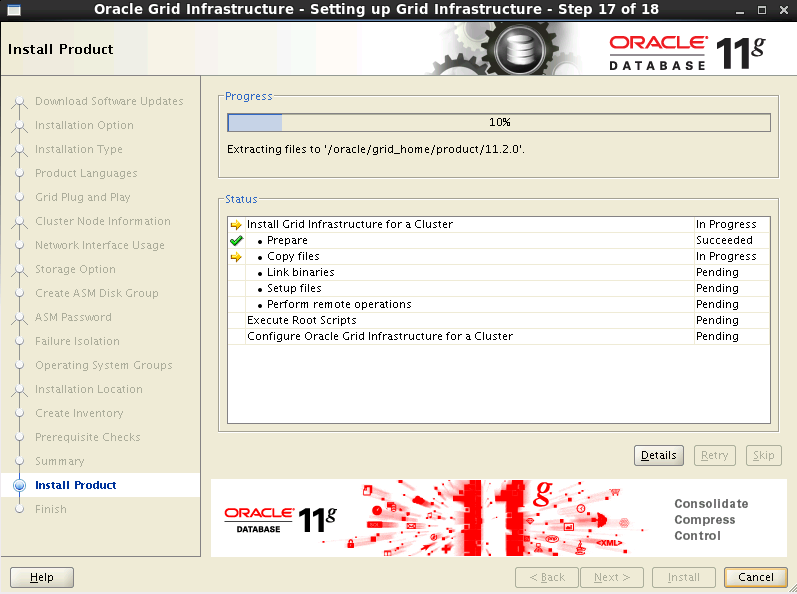
图27 安装过程
7.19 安装结束前,需要执行脚本
安装到最后阶段,需要以root身份执行这两个脚本,注意顺序一定不能错:
执行顺序为
SGDB1节点执行orainstRoot.sh
SGDB2节点执行orainstRoot.sh
SGDB1节点执行root.sh
SGDB2节点执行root.sh
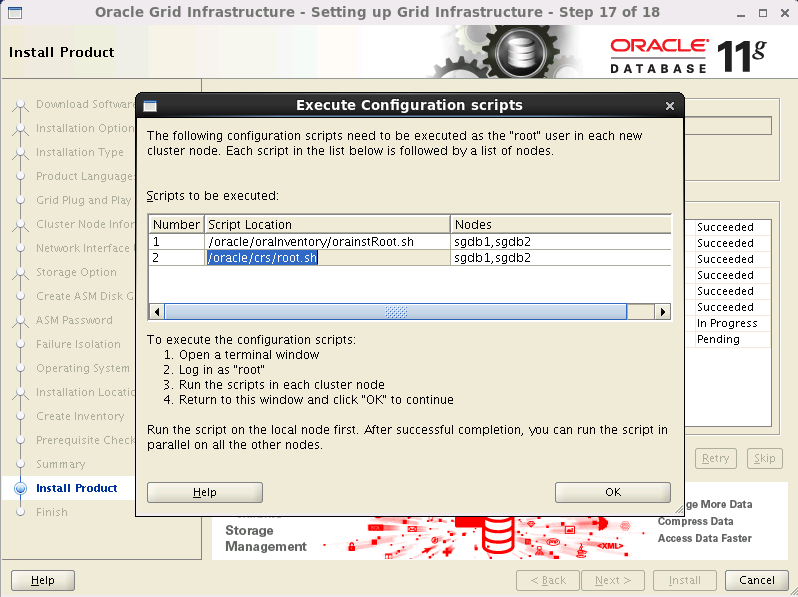
图28 安装过程中执行脚本
在执行之前,需要查看/oracle目录下的所有目录的属主和权限,如果权限不正确,下面步骤将执行错误
步骤一:SGDB1节点执行orainstRoot.sh
代码24
| [root@sgdb1 ~]# /oracle/oraInventory/orainstRoot.sh
Changing permissions of /oracle/oraInventory.
Adding read,write permissions for group.
Removing read,write,execute permissions for world.
Changing groupname of /oracle/oraInventory to oinstall.
The execution of the script is complete.
|
步骤二:SGDB2节点执行orainstRoot.sh
代码25
| [root@sgdb2 ~]# /oracle/oraInventory/orainstRoot.sh
Changing permissions of /oracle/oraInventory.
Adding read,write permissions for group.
Removing read,write,execute permissions for world.
Changing groupname of /oracle/oraInventory to oinstall.
The execution of the script is complete.
|
(3)步骤三: SGDB1节点执行root.sh
代码26
| [root@sgdb1 ~]# /oracle/crs/root.sh
Performing root user operation for Oracle 11g
The following environment variables are set as:
ORACLE_OWNER= grid
ORACLE_HOME= /oracle/crs
Enter the full pathname of the local bin directory: [/usr/local/bin]:
Copying dbhome to /usr/local/bin ...
Copying oraenv to /usr/local/bin ...
Copying coraenv to /usr/local/bin ...
Creating /etc/oratab file...
Entries will be added to the /etc/oratab file as needed by
Database Configuration Assistant when a database is created
Finished running generic part of root script.
Now product-specific root actions will be performed.
Using configuration parameter file: /oracle/crs/crs/install/crsconfig_params
Creating trace directory
User ignored Prerequisites during installation
Installing Trace File Analyzer
OLR initialization - successful
root wallet
root wallet cert
root cert export
peer wallet
profile reader wallet
pa wallet
peer wallet keys
pa wallet keys
peer cert request
pa cert request
peer cert
pa cert
peer root cert TP
profile reader root cert TP
pa root cert TP
peer pa cert TP
pa peer cert TP
profile reader pa cert TP
profile reader peer cert TP
peer user cert
pa user cert
Adding Clusterware entries to upstart
CRS-2672: Attempting to start 'ora.mdnsd' on 'sgdb1'
CRS-2676: Start of 'ora.mdnsd' on 'sgdb1' succeeded
CRS-2672: Attempting to start 'ora.gpnpd' on 'sgdb1'
CRS-2676: Start of 'ora.gpnpd' on 'sgdb1' succeeded
CRS-2672: Attempting to start 'ora.cssdmonitor' on 'sgdb1'
CRS-2672: Attempting to start 'ora.gipcd' on 'sgdb1'
CRS-2676: Start of 'ora.cssdmonitor' on 'sgdb1' succeeded
CRS-2676: Start of 'ora.gipcd' on 'sgdb1' succeeded
CRS-2672: Attempting to start 'ora.cssd' on 'sgdb1'
CRS-2672: Attempting to start 'ora.diskmon' on 'sgdb1'
CRS-2676: Start of 'ora.diskmon' on 'sgdb1' succeeded
CRS-2676: Start of 'ora.cssd' on 'sgdb1' succeeded
ASM created and started successfully.
Disk Group BJ_SGDB_DATA created successfully.
clscfg: -install mode specified
Successfully accumulated necessary OCR keys.
Creating OCR keys for user 'root', privgrp 'root'..
Operation successful.
CRS-4256: Updating the profile
Successful addition of voting disk 3766451fc40a4fb4bf5638920562eefe.
Successfully replaced voting disk group with +BJ_SGDB_DATA.
CRS-4256: Updating the profile
CRS-4266: Voting file(s) successfully replaced
## STATE File Universal Id File Name Disk group
-- ----- ----------------- --------- ---------
1. ONLINE 3766451fc40a4fb4bf5638920562eefe (/dev/asm-data1) [BJ_SGDB_DATA]
Located 1 voting disk(s).
CRS-2672: Attempting to start 'ora.BJ_SGDB_DATA.dg' on 'sgdb1'
CRS-2676: Start of 'ora.BJ_SGDB_DATA.dg' on 'sgdb1' succeeded
Configure Oracle Grid Infrastructure for a Cluster ... succeeded
|
步骤四:SGDB2节点执行root.sh
代码27
| [root@sgdb2 ~]# /oracle/crs/root.sh
Performing root user operation for Oracle 11g
The following environment variables are set as:
ORACLE_OWNER= grid
ORACLE_HOME= /oracle/crs
Enter the full pathname of the local bin directory: [/usr/local/bin]:
Copying dbhome to /usr/local/bin ...
Copying oraenv to /usr/local/bin ...
Copying coraenv to /usr/local/bin ...
Creating /etc/oratab file...
Entries will be added to the /etc/oratab file as needed by
Database Configuration Assistant when a database is created
Finished running generic part of root script.
Now product-specific root actions will be performed.
Using configuration parameter file: /oracle/crs/crs/install/crsconfig_params
Creating trace directory
User ignored Prerequisites during installation
Installing Trace File Analyzer OLR initialization - successful
Adding Clusterware entries to upstart
CRS-4402: The CSS daemon was started in exclusive mode but found an active CSS daemon on node sgdb1, number 1, and is terminating
An active cluster was found during exclusive startup, restarting to join the cluster
Configure Oracle Grid Infrastructure for a Cluster ... succeeded
|
意外情况:
代码28
| 执行/oracle/crs/root.sh报出:
Failed to create keys in the olr错误
问题原因是缺少包导致的,在节点上安装compat-libcap包
[root@sgdb2 # yum -y install compat-libcap*
执行以下命令,清空当前CRS的配置
[root@sgdb2 #perl /oracle/crs/crs/install/rootcrs.pl -verbose -deconfig -force
再次执行/oracle/crs/root.sh
|
7.20 Grid继续安装
如果上一步全部成功,则可以点击【OK】,继续完成安装
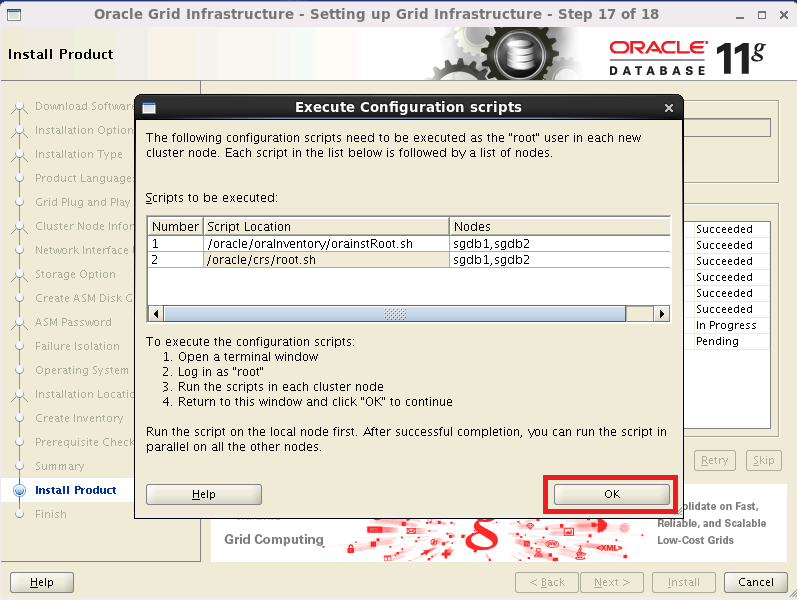
图29 点击OK继续安装
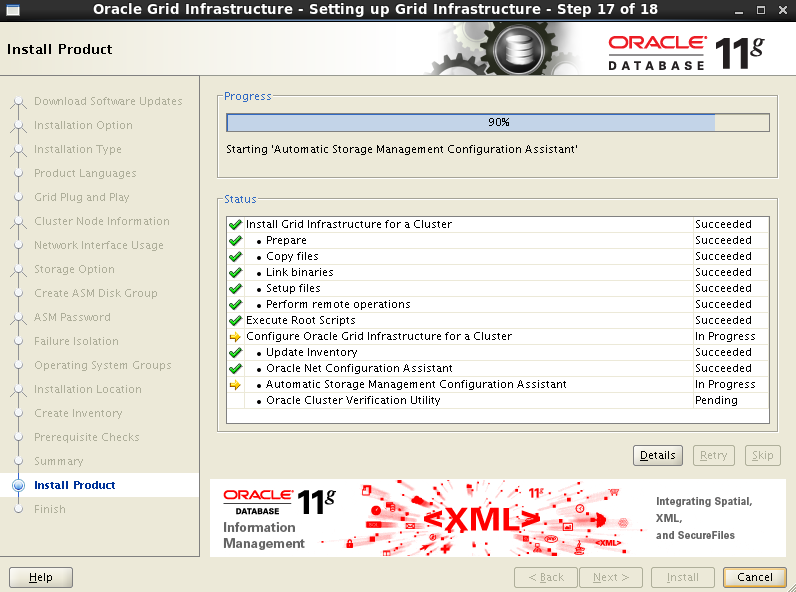
图30 继续安装
7.21 Grid完成安装
安装到100%的时候,会报错,直接点击【OK】即可:
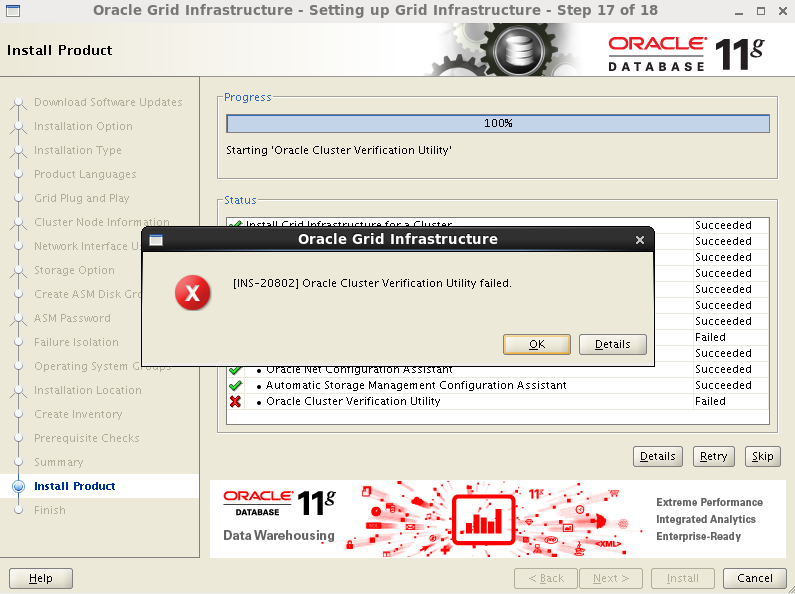
图31 报错信息
7.22 Grid安装完毕,有一项错误
错误为【Oracle Cluster Verification Utility Failed】,不影响集群的使用,点击【Close】
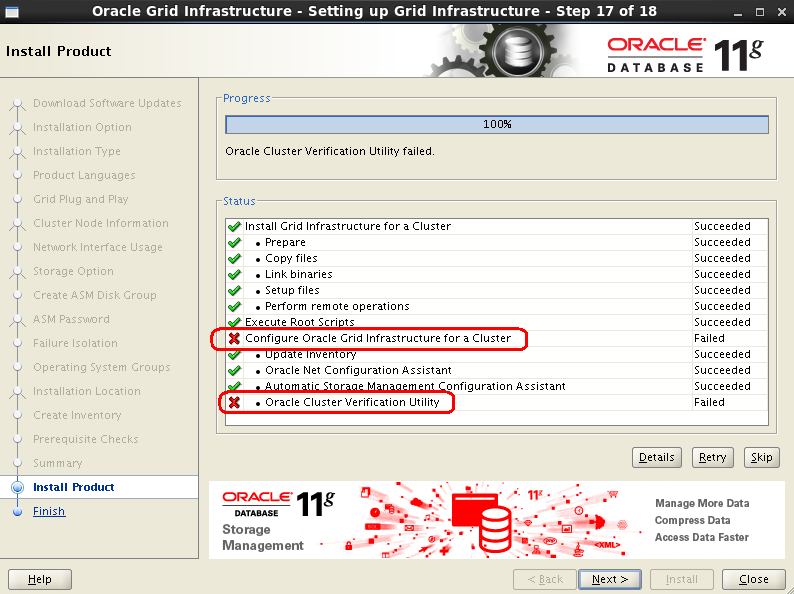
图32 安装完毕