上篇:vue基于vant的popup组件封装confirm弹框
为什么用到popup呢?主要是用到了其中的动画,其实这个动画可以通过transition标签实现
效果等同于前篇:
step:
1、components文件夹下新建MyConfirm文件夹,分别新建index.vue和index.js
index.vue:
<template>
  <transition name="my-confirm">
    <div class="confirm" v-if="isShow" @click="handleClose()">
      <div class="con_box" @click.stop="()=>{}">
        <h3>{{text.title}}</h3>
        <p>{{text.message}}</p>
        <div class="btn">
          <span @click.stop="handleClose()" v-if="text.btn.cancelText">{{text.btn.cancelText}}</span>
          <span @click.stop="handleOk()" v-if="text.btn.okText">{{text.btn.okText}}</span>
        </div>
      </div>
    </div>
  </transition>
</template>
<script>
export default {
  data() {
    return {
      isShow: false,
      text: {
        title: '提示',
        message: '确定删除此条信息?',
        btn: {
          okText: '确定1',
          cancelText: '取消1'
        }
      }
    }
  },
  methods: {
    handleClose() {
      console.log('关闭')
    },
    handleOk() {
      console.log('确定')
    }
  }
}
</script>
<style lang='less' scoped>
.confirm {
  background-color: rgba(0, 0, 0, 0.7);
  width: 100%;
  height: 100%;
  position: fixed;
  top: 0;
  .con_box {
    width: 270px;
    background: #ffffff;
    border-radius: 10px;
    position: absolute;
    top: 50%;
    left: 50%;
    transform: translate(-50%, -50%);
    line-height: 1;
    text-align: center;
    color: #4d5c82;
    padding: 15px;
    box-sizing: border-box;
    > h3 {
      font-size: 20px;
      margin-top: 10px;
      margin-bottom: 20px;
    }
    > p {
      font-size: 17px;
      margin-bottom: 30px;
    }
    .btn {
      display: flex;
      justify-content: space-between;
      > span {
        display: block;
        width: 114px;
        background-color: #e0e5f5;
        text-align: center;
        line-height: 44px;
        font-size: 17px;
      }
      > span:last-of-type {
        background-color: #1288fe;
        color: #ffffff;
      }
    }
  }
}
// 命名动画
.my-confirm-enter,
.my-confirm-leave-to {
  opacity: 0;
}
.my-confirm-enter-active,
.my-confirm-leave-active {
  transition: all 0.8s;
}
</style>
index.js:
import Vue from 'vue'
import confirm from './index.vue'
let confirmConstructor = Vue.extend(confirm)
let myConfirm = function (text) {
  return new Promise((resolve, reject) => {
    let confirmDom = new confirmConstructor({
      el: document.createElement('div')
    })
    document.body.appendChild(confirmDom.$el) // new一个对象,然后插入body里面
    confirmDom.text = text // 为了使confirm的扩展性更强,这个采用对象的方式传入,所有的字段都可以根据需求自定义
    confirmDom.isShow = true
    confirmDom.handleOk = function () {
      resolve()
      confirmDom.isShow = false
    }
    confirmDom.handleClose = function () {
      reject()
      confirmDom.isShow = false
    }
  })
}
export default myConfirm
2、main.js中引入并注册
// 自定义confirm
import myConfirm from './components/MyConfirm/index.js'
Vue.prototype.$confirm = myConfirm
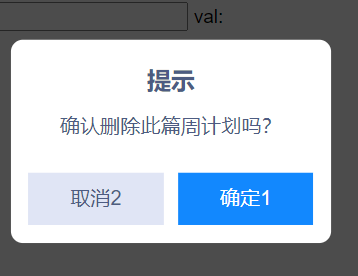
3、使用
      this.$confirm({
        title: '提示',
        message: '确认删除此篇周计划吗?',
        btn: {
          okText: '确定1',
          cancelText: '取消2'
        }
      })
        .then(() => {
          console.log('ok')
        })
        .catch(() => {
          console.log('no')
        })
注意:在index.vue中isShow的初始值为false,在index.js中将该值设置为true。否则会有个bug:显示的时候没有动画而关闭时有动画