前段时间看见ActionBar-PullToRefreshLibs用来刷新很好看,配合4.4以上支持的沉浸式效果更佳,于是便想配合沉浸式+ActionBar-PullToRefreshLibs做出一个效果,在自己的大神F2手机上看见没有问题,但是在三星note3上却出现了下拉actionbar刷新和actionbar错位的情况,非常郁闷。通过调试ActionBar-PullToRefreshLibs发现状态栏在设置沉浸式的时候在三星机器上的高度被抹了(rect.top=0),于是手动修改了ActionBar-PullToRefreshLibs的内部方法,实现了部分机器上的沉浸式+ActionBar-PullToRefreshLibs效果。修改原理是判断rect.top是否为0,如果为0就手动获取状态栏的高度给rect设置top,修改代码如下:
 1 protected void addHeaderViewToActivity(View headerView) {
 2         // Get the Display Rect of the Decor View
 3         mActivity.getWindow().getDecorView()
 4                 .getWindowVisibleDisplayFrame(mRect);
 5         if (mRect.top == 0)
 6             mRect.top = getStatusBarHeight(mActivity);
 7         // Honour the requested layout params
 8         int width = WindowManager.LayoutParams.MATCH_PARENT;
 9         int height = WindowManager.LayoutParams.WRAP_CONTENT;
10         ViewGroup.LayoutParams requestedLp = headerView.getLayoutParams();
11         if (requestedLp != null) {
12             width = requestedLp.width;
13             height = requestedLp.height;
14         }
15
16         // Create LayoutParams for adding the View as a panel
17         WindowManager.LayoutParams wlp = new WindowManager.LayoutParams(width,
18                 height, WindowManager.LayoutParams.TYPE_APPLICATION_PANEL,
19                 WindowManager.LayoutParams.FLAG_NOT_FOCUSABLE
20                         | WindowManager.LayoutParams.FLAG_NOT_TOUCHABLE
21                         | WindowManager.LayoutParams.FLAG_LAYOUT_IN_SCREEN,
22                 PixelFormat.TRANSLUCENT);
23         wlp.x = 0;
24         wlp.y = mRect.top;
25         wlp.gravity = Gravity.TOP;
26
27         // Workaround for Issue #182
28         headerView.setTag(wlp);
29         mActivity.getWindowManager().addView(headerView, wlp);
30     }
31
32     protected void updateHeaderViewPosition(View headerView) {
33         // Refresh the Display Rect of the Decor View
34         mActivity.getWindow().getDecorView()
35                 .getWindowVisibleDisplayFrame(mRect);
36         if (mRect.top == 0)
37             mRect.top = getStatusBarHeight(mActivity);
38         WindowManager.LayoutParams wlp = null;
39         if (headerView.getLayoutParams() instanceof WindowManager.LayoutParams) {
40             wlp = (WindowManager.LayoutParams) headerView.getLayoutParams();
41         } else if (headerView.getTag() instanceof WindowManager.LayoutParams) {
42             wlp = (WindowManager.LayoutParams) headerView.getTag();
43         }
44
45         if (wlp != null && wlp.y != mRect.top) {
46             wlp.y = mRect.top;
47             mActivity.getWindowManager().updateViewLayout(headerView, wlp);
48         }
49     }
添加获取状态栏高度的方法
 1 /**
 2      * 获取状态栏高度
 3      *
 4      * @return
 5      */
 6     protected int getStatusBarHeight(Context context) {
 7         int result = 0;
 8         int resourceId = context.getResources().getIdentifier(
 9                 "status_bar_height", "dimen", "android");
10         if (resourceId > 0) {
11             result = context.getResources().getDimensionPixelSize(resourceId);
12         }
13         return result;
14     }
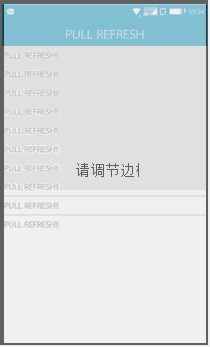
运行效果图如下:
需要注意的地方:actionbar我没有用开源的第三方组件,也没有用自带的actionbar,而是把隐藏了title在封装的基类中自定义布局的actionbar。