十六:自定义拦截器
参考文档
16.1 编写拦截器类
extends WebMvcConfigurerAdapter 并重写WebMvcConfigurerAdapter,如下:


 1 package com.wu.interceptor;
 2
 3 import javax.servlet.http.HttpServletRequest;
 4 import javax.servlet.http.HttpServletResponse;
 5
 6 import org.springframework.context.annotation.Configuration;
 7 import org.springframework.web.servlet.HandlerInterceptor;
 8 import org.springframework.web.servlet.ModelAndView;
 9 import org.springframework.web.servlet.config.annotation.InterceptorRegistry;
10 import org.springframework.web.servlet.config.annotation.WebMvcConfigurerAdapter;
11
12 @Configuration//声明这是一个配置
13 public class MyInterceptor extends WebMvcConfigurerAdapter {
14
15     @Override
16     public void addInterceptors(InterceptorRegistry registry) {
17         //以内部类的创建拦截器
18         HandlerInterceptor interceptor=new HandlerInterceptor() {
19
20             @Override
21             public boolean preHandle(HttpServletRequest arg0, HttpServletResponse arg1, Object arg2) throws Exception {
22                 System.out.println("自定义拦截器");
23                 //返回true时放行
24                 return true;
25             }
26
27             @Override
28             public void postHandle(HttpServletRequest arg0, HttpServletResponse arg1, Object arg2, ModelAndView arg3)
29                     throws Exception {
30             }
31
32             @Override
33             public void afterCompletion(HttpServletRequest arg0, HttpServletResponse arg1, Object arg2, Exception arg3)
34                     throws Exception {
35             }
36         };
37         //注册拦截器并设置拦截路径
38         registry.addInterceptor(interceptor).addPathPatterns("/**");
39     }
40
41 }
注意:需要在拦截器类上添加 @Configuration,声明这是一个配置类,还需要在启动类中需要扫描到该类,如以下所示:
 1 package com.wu.app;
 2
 3 import org.springframework.boot.SpringApplication;
 4 import org.springframework.boot.autoconfigure.SpringBootApplication;
 5
 6 //@EnableAutoConfiguration
 7 //@ComponentScan("com.wu.controller")//默认扫描的是当前包和当前包的子包
 8 @SpringBootApplication(scanBasePackages={"com.wu.controller","com.wu.interceptor"})
 9 public class SpringApplications {
10         //程序启动入口
11         public static void main(String []args){
12             SpringApplication.run(SpringApplications.class, args);
13         }
14 }
16.2 测试定义的拦截器是否生效
编写Controller类简单测试刚刚定义的拦截器是否有效,如下:
 1 package com.wu.controller;
 2
 3 import org.springframework.web.bind.annotation.RequestMapping;
 4 import org.springframework.web.bind.annotation.RestController;
 5
 6 @RestController
 7 public class TestController {
 8     @RequestMapping("/test")
 9     public String test(){
10         System.out.println("这是一个测试");
11         return "test";
12     }
13 }
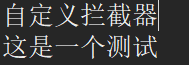
在控制台中可以看到输出顺序:
十七:全局异常处理器的简单实现
参考文档
17.1 编写异常处理器类
 1 package com.wu.controller;
 2
 3 import java.util.HashMap;
 4 import java.util.Map;
 5
 6 import org.springframework.web.bind.annotation.ExceptionHandler;
 7 import org.springframework.web.bind.annotation.RestControllerAdvice;
 8
 9 @RestControllerAdvice
10 public class GlobalExceptionHandler {
11     @ExceptionHandler(Exception.class)
12     public Map<String,Object> handleException(Exception e){
13         Map<String,Object> map=new HashMap<>();
14         map.put("errorCode","500");
15         map.put("Msg",e.toString());
16         return map;
17     }
18 }
17.2 编写测试类
 1 package com.wu.controller;
 2
 3 import org.springframework.web.bind.annotation.RequestMapping;
 4 import org.springframework.web.bind.annotation.RestController;
 5
 6 @RestController
 7 public class TestController {
 8     @RequestMapping("/test")
 9     public String test(){
10         int a=1/0;
11         return "test";
12     }
13 }
测试结果:
![]()
十八:SpringBoot中的异步调用
18.1 相关知识
参考文档:Java中的Future, Future接口
Future接口的作用:
- 代表异步计算的执行结果;
- 用于可取消的task;(比使用interrupt实现取消要方便 )
18.2在Service层中编写异步测试类
1 package com.wu.service;
2
3 import java.util.concurrent.Future;
4
5 public interface AsyncService {
6     Future<String> doTask1()throws Exception;
7     Future<String> doTask2()throws Exception;
8     Future<String> doTask3()throws Exception;
9 }
 1 package com.wu.service;
 2
 3 import java.util.Random;
 4 import java.util.concurrent.Future;
 5
 6 import org.springframework.scheduling.annotation.Async;
 7 import org.springframework.scheduling.annotation.AsyncResult;
 8 import org.springframework.stereotype.Service;
 9 @Service
10 public class AsyncServiceImp implements AsyncService {
11     @Async
12     @Override
13     public Future<String> doTask1() throws Exception {
14         System.out.println("任务一开始");
15         long start=System.currentTimeMillis();
16         Thread.sleep(new Random().nextInt(10000));
17         long end =System.currentTimeMillis();
18         System.out.println("任务一结束时间:"+(end-start)+"ms");
19         return new AsyncResult<String>("任务一结束");
20     }
21     @Async
22     @Override
23     public Future<String> doTask2() throws Exception {
24         System.out.println("任务二开始");
25         long start=System.currentTimeMillis();
26         Thread.sleep(new Random().nextInt(10000));
27         long end =System.currentTimeMillis();
28         System.out.println("任务二结束时间:"+(end-start)+"ms");
29         return new AsyncResult<String>("任务二结束");
30     }
31     @Async
32     @Override
33     public Future<String> doTask3() throws Exception {
34         System.out.println("任务三开始");
35         long start=System.currentTimeMillis();
36         Thread.sleep(new Random().nextInt(10000));
37         long end =System.currentTimeMillis();
38         System.out.println("任务三结束时间:"+(end-start)+"ms");
39         return new AsyncResult<String>("任务三结束");
40     }
41
42 }
 1 package com.wu.controller;
 2
 3 import java.util.concurrent.Future;
 4
 5 import org.springframework.beans.factory.annotation.Autowired;
 6 import org.springframework.web.bind.annotation.RequestMapping;
 7 import org.springframework.web.bind.annotation.RestController;
 8
 9 import com.wu.service.AsyncService;
10 import com.wu.service.AsyncServiceImp;
11
12 @RestController
13 public class TestController {
14     @Autowired
15     private AsyncService asyncService =new AsyncServiceImp();
16
17     @RequestMapping("/async")
18     public String testAsync() throws Exception{
19         long start=System.currentTimeMillis();
20         Future<String> task1 = asyncService.doTask1();
21         Future<String> task2 = asyncService.doTask2();
22         Future<String> task3 = asyncService.doTask3();
23         //判断三个任务是否结束
24         while(true){
25             if(task1.isDone()&&task2.isDone()&&task3.isDone()){
26                 break;
27             }
28             //当前线程停一会再判断
29             Thread.sleep(1000);
30         }
31         long end =System.currentTimeMillis();
32         return "总耗时:"+(end-start)+"ms";
33     }
34 }
 1 package com.wu.app;
 2
 3 import org.springframework.boot.SpringApplication;
 4 import org.springframework.boot.autoconfigure.SpringBootApplication;
 5 import org.springframework.scheduling.annotation.EnableAsync;
 6
 7
 8 @SpringBootApplication(scanBasePackages={"com.wu.controller","com.wu.service"})
 9 @EnableAsync//启用异步调用
10 public class SpringApplications {
11         //程序启动入口
12         public static void main(String []args){
13             SpringApplication.run(SpringApplications.class, args);
14         }
15 }
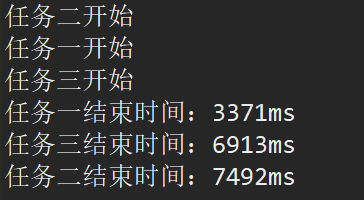
18.3 显示结果
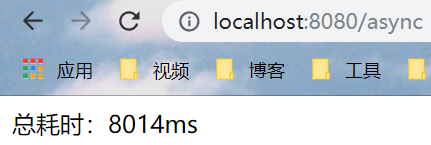
18.4 总结
在需要异步加载的方法上加上注解 @Async
在启动类中需要扫描相应的包,和启动异步调用 @EnableAsync
十九:SpringBoot整合Jsp
19.1 前言
SpringBoot官方不推荐使用Jsp,因为Jsp相对于一些模板引擎,性能较低,官方推荐使用Thymeleaf
19.2 创建war工程,并添加相应依赖
注意:SpringBoot整合Jsp需要创建的是war工程
 1 <project xmlns="http://maven.apache.org/POM/4.0.0" xmlns:xsi="http://www.w3.org/2001/XMLSchema-instance" xsi:schemaLocation="http://maven.apache.org/POM/4.0.0 http://maven.apache.org/xsd/maven-4.0.0.xsd">
 2   <modelVersion>4.0.0</modelVersion>
 3   <parent>
 4     <groupId>com.wu</groupId>
 5     <artifactId>SpringBoot_Parent</artifactId>
 6     <version>0.0.1-SNAPSHOT</version>
 7   </parent>
 8   <artifactId>SpringBoot_Child4</artifactId>
 9   <packaging>war</packaging>
10
11   <dependencies>
12       <dependency>
13           <groupId>org.springframework.boot</groupId>
14           <artifactId>spring-boot-starter-web</artifactId>
15       </dependency>
16
17      <!-- 添加servlet依赖模块 -->
18         <dependency>
19             <groupId>javax.servlet</groupId>
20             <artifactId>javax.servlet-api</artifactId>
21             <scope>provided</scope>
22         </dependency>
23         <!-- 添加jstl标签库依赖模块 -->
24         <dependency>
25             <groupId>javax.servlet</groupId>
26             <artifactId>jstl</artifactId>
27         </dependency>
28         <!--添加tomcat依赖模块.-->
29         <dependency>
30             <groupId>org.springframework.boot</groupId>
31             <artifactId>spring-boot-starter-tomcat</artifactId>
32             <scope>provided</scope>
33         </dependency>
34         <!-- 使用jsp引擎,springboot内置tomcat没有此依赖 -->
35         <dependency>
36             <groupId>org.apache.tomcat.embed</groupId>
37             <artifactId>tomcat-embed-jasper</artifactId>
38             <scope>provided</scope>
39         </dependency>
40
41    </dependencies>
42 </project>
1 spring.mvc.view.prefix=/
2 spring.mvc.view.suffix=.jsp
 1 package com.wu.controller;
 2
 3 import org.springframework.stereotype.Controller;
 4 import org.springframework.web.bind.annotation.RequestMapping;
 5
 6 @Controller
 7 public class TestJspController {
 8     @RequestMapping("/test")
 9     public String test(){
10         return "test";
11     }
12 }
 1 package com.wu.app;
 2
 3 import org.springframework.boot.SpringApplication;
 4 import org.springframework.boot.autoconfigure.SpringBootApplication;
 5 import org.springframework.scheduling.annotation.EnableAsync;
 6
 7
 8 @SpringBootApplication(scanBasePackages={"com.wu.controller"})
 9 public class SpringApplications {
10         //程序启动入口
11         public static void main(String []args){
12             SpringApplication.run(SpringApplications.class, args);
13         }
14 }
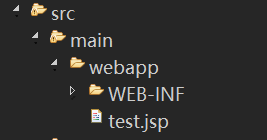
test.jsp文件所在位置:
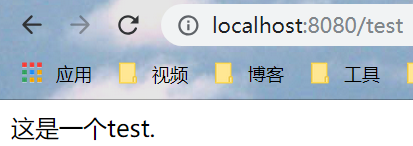
19.3 简单测试结果
二十:SpringBoot整合Freemarker
20.0 参考文档1 Freemarker基本语法入门
20.1 在pom.xml中加入相关依赖
1       <!-- Freemarker -->
2       <dependency>
3           <groupId>org.springframework.boot</groupId>
4           <artifactId>spring-boot-starter-freemarker</artifactId>
5       </dependency>
20.2 简单应用
SpringBoot默认读取的是src/main/resources/templates
如:
1 <html>
2 <head>
3 <title>Welcome!</title>
4 </head>
5 <body>
6 ${name}
7 </body>
8 </html>
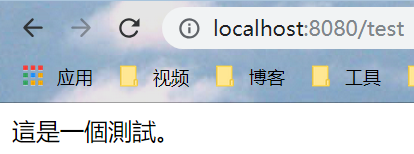
 1 package com.wu.controller;
 2
 3 import org.springframework.stereotype.Controller;
 4 import org.springframework.ui.Model;
 5 import org.springframework.web.bind.annotation.RequestMapping;
 6
 7 @Controller
 8 public class TestFreemarkerController {
 9     @RequestMapping("/test")
10     public String test(Model model){
11         model.addAttribute("name","這是一個測試。");
12         return "test";
13     }
14 }
记得在启动类中扫描相应的包,之后启动,结果如下:
20.3 SpringBoot与Freemarker相关的配置可以在application.properties配置
 1 # 是否允许HttpServletRequest属性覆盖(隐藏)控制器生成的同名模型属性。
 2 spring.freemarker.allow-request-override=false
 3 # 是否允许HttpSession属性覆盖(隐藏)控制器生成的同名模型属性。
 4 spring.freemarker.allow-session-override=false
 5 # 是否启用模板缓存。
 6 spring.freemarker.cache=false
 7 # 模板编码。
 8 spring.freemarker.charset=UTF-8
 9 # 是否检查模板位置是否存在。
10 spring.freemarker.check-template-location=true
11 # Content-Type value.
12 spring.freemarker.content-type=text/html
13 # 是否启用freemarker
14 spring.freemarker.enabled=true
15 # 设定所有request的属性在merge到模板的时候,是否要都添加到model中.
16 spring.freemarker.expose-request-attributes=false
17 # 是否在merge模板的时候,将HttpSession属性都添加到model中
18 spring.freemarker.expose-session-attributes=false
19 # 设定是否以springMacroRequestContext的形式暴露RequestContext给Spring’s macro library使用
20 spring.freemarker.expose-spring-macro-helpers=true
21 # 是否优先从文件系统加载template,以支持热加载,默认为true
22 spring.freemarker.prefer-file-system-access=true
23 # 设定模板的后缀.
24 spring.freemarker.suffix=.ftl
25 # 设定模板的加载路径,多个以逗号分隔,默认:
26 spring.freemarker.template-loader-path=classpath:/templates/
27 # 设定FreeMarker keys.
28 spring.freemarker.settings.template_update_delay=0
29 spring.freemarker.settings.default_encoding=UTF-8
30 spring.freemarker.settings.classic_compatible=true
31
32 SpringBoot整合Freemarker的相关属性配置
二十一:SpringBoot整合Thymeleaf
21.0 Thymeleaf的常用语法解析 参考文档2
21.1 在pom.xml中加入相关依赖
1      <!-- Thymeleaf -->
2       <dependency>
3          <groupId>org.springframework.boot</groupId>
4          <artifactId>spring-boot-starter-thymeleaf</artifactId>
5       </dependency>
21.2 简单应用
默认读取的是src/main/resources/templates/
如:
 1 <!DOCTYPE html>
 2 <html>
 3 <head>
 4 <meta charset="UTF-8">
 5 <title>Thymeleaf_Test</title>
 6 </head>
 7 <body>
 8 <span th:text="${name}"></span>
 9 </body>
10 </html>
 1 package com.wu.controller;
 2
 3 import org.springframework.stereotype.Controller;
 4 import org.springframework.ui.Model;
 5 import org.springframework.web.bind.annotation.RequestMapping;
 6
 7 @Controller
 8 public class TestThymeleafController {
 9     @RequestMapping("/test")
10     public String test(Model model){
11         model.addAttribute("name","这也是一个测试!");
12         return "test";
13     }
14 }
 1 #关闭thymeleaf缓存,开发时使用,否者不能实时显示
 2 spring.thymeleaf.cache=false
 3 #检查模板是否纯在,然后再呈现
 4 spring.thymeleaf.check-template-location=true
 5 #content-type的值
 6 spring.thymeleaf.content-type=text/html
 7 #启用MVC Thymeleaf视图分辨率
 8 spring.thymeleaf.enabled=true
 9 #编码格式
10 spring.thymeleaf.encoding=UTF-8
11 #前缀,此为默认
12 spring.thymeleaf.prefix=classpath:/templates/
13 #后缀,常用.html
14 spring.thymeleaf.suffix=.html
15 #模板编码,thymeleaf对html的标签约束非常严格,所有的标签必须有开有闭,比如<br></br>或者<br/>是可以的,但是<br>会报错,配置spring.thymeleaf.mode=LEGACYHTML5 目的就是为了解决这个问题,可以使页面松校验。
16 spring.thymeleaf.mode=LEGACYHTML5
在启动类中启动,查看

报错,原因:在全局配置中配置了spring.thymeleaf.mode=LEGACYHTML5,是非严格检查,需要加入nekohtml的依赖,如:
1       <!-- nekohtml -->
2       <dependency>
3           <groupId>net.sourceforge.nekohtml</groupId>
4           <artifactId>nekohtml</artifactId>
5           <version>1.9.15</version>
6       </dependency>
之后重新启动,查看结果如下:

二十二:SpringBoot实现定时任务调用
22.1 spring-boot-quartz 推荐参考
22.2 spring-boot-scheduler
编写任务类:
 1 package com.wu.job;
 2
 3 import org.springframework.scheduling.annotation.Scheduled;
 4 import org.springframework.stereotype.Component;
 5
 6 @Component
 7 public class MyJob {
 8     @Scheduled(fixedRate=2000)//每两秒执行一次
 9     public void run(){
10         System.out.println("执行作业");
11     }
12 }
在启动类中开启任务调度
 1 package com.wu.app;
 2
 3 import org.springframework.boot.SpringApplication;
 4 import org.springframework.boot.autoconfigure.SpringBootApplication;
 5 import org.springframework.scheduling.annotation.EnableAsync;
 6 import org.springframework.scheduling.annotation.EnableScheduling;
 7
 8
 9 @SpringBootApplication(scanBasePackages={"com.wu.job"})
10 @EnableScheduling//开启任务调度
11 public class SpringApplications {
12         //程序启动入口
13         public static void main(String []args){
14             SpringApplication.run(SpringApplications.class, args);
15         }
16 }
结果:每隔2秒打印一次(v_v)

注意:在需要定时任务调度的方法上添加@Scheduled 注解;在启动类上加上 @EnableScheduling 并扫描方法所在类的包