本文转载自:http://www.cnblogs.com/xiaochangwei/p/5399507.html
继上一篇webService入门之后,http://www.cnblogs.com/xiaochangwei/p/4969448.html ,现在我将我周六在家研究的结果公布出来
本次集成是基于之前已经搭建好的SpringMVC+mybatis+shiro的基础上进行的,看似很简单的集成,但是由于jar包冲突,搞了好久,牺牲周六休息时间奉上结果
代码文章末尾会给出下载地址的,请大家不用担心,这些都是我搭建的,还不是很完善,要用于商业项目请修改完善。
步骤:
① 首先在 http://cxf.apache.org/download.html 下载最新版本的CXF,我下载的是3.1.6
② 由于不maven项目,所以拷贝下载的cxf lib目录下的所有包到项目的lib路径下。(我在这里尝试一个个添加,后来jar包冲突了,改天优化下,找出最精简的jar包)
③ 写接口文件和接口的实现文件
接口文件如下,需要注意的是,接口文件上要添加@WebService注解,否则待会儿接口发布后,有这个服务,却没有可供调用的接口方法(自己各种条件下的尝试,不对请拍砖)
package com.xiaochangwei.web.service;

import javax.jws.WebParam;
import javax.jws.WebService;
import javax.jws.soap.SOAPBinding;
import javax.jws.soap.SOAPBinding.Style;

@WebService
@SOAPBinding(style = Style.RPC)
public interface WebserviceTest {

    public String getUserByName(@WebParam(name = "username") String username);

    public void setUser(String username);

    public boolean getuser(String name, String password);

    public boolean test3();
}
接口实现类如下,经测试,接口实现类不需要添加@WebService注解,当然添加了也没报错
package com.xiaochangwei.web.service.impl;

import com.xiaochangwei.web.service.WebserviceTest;

public class WebServiceTestImpl implements WebserviceTest {

    @Override
    public String getUserByName(String username) {
        return "Hello:" + username;
    }

    @Override
    public void setUser(String username) {
        System.out.println("username:" + username);
    }

    @Override
    public boolean getuser(String name, String password) {
        return false;
    }

    @Override
    public boolean test3() {
        return false;
    }

}
④ 修改web.xml文件,在末尾增加filter配置
<!-- cxf服务启动servlet -->
    <servlet>
        <servlet-name>CXFServlet</servlet-name>
        <servlet-class>org.apache.cxf.transport.servlet.CXFServlet</servlet-class>
        <load-on-startup>1</load-on-startup>
    </servlet>
    <servlet-mapping>
        <servlet-name>CXFServlet</servlet-name>
        <url-pattern>/webService/*</url-pattern>
    </servlet-mapping>
⑤ 在Spring配置文件,默认为applicationContext.xml中增加下列代码,需要注意的是:请加入xsd信息 注意加大加粗的字
<?xml version="1.0" encoding="UTF-8"?>
<beans xmlns="http://www.springframework.org/schema/beans"
    xmlns:context="http://www.springframework.org/schema/context"
    xmlns:xsi="http://www.w3.org/2001/XMLSchema-instance" xmlns:aop="http://www.springframework.org/schema/aop"
    xmlns:tx="http://www.springframework.org/schema/tx" xmlns:p="http://www.springframework.org/schema/p"
    xmlns:util="http://www.springframework.org/schema/util" xmlns:jdbc="http://www.springframework.org/schema/jdbc"
    xmlns:cache="http://www.springframework.org/schema/cache"
    xmlns:jaxws="http://cxf.apache.org/jaxws"
    xmlns:soap="http://cxf.apache.org/bindings/soap"
    xsi:schemaLocation="
    http://www.springframework.org/schema/context
    http://www.springframework.org/schema/context/spring-context.xsd
    http://www.springframework.org/schema/beans
    http://www.springframework.org/schema/beans/spring-beans.xsd
    http://www.springframework.org/schema/tx
    http://www.springframework.org/schema/tx/spring-tx.xsd
    http://www.springframework.org/schema/jdbc
    http://www.springframework.org/schema/jdbc/spring-jdbc.xsd
    http://www.springframework.org/schema/cache
    http://www.springframework.org/schema/cache/spring-cache.xsd
    http://www.springframework.org/schema/aop
    http://www.springframework.org/schema/aop/spring-aop.xsd
    http://www.springframework.org/schema/util
    http://www.springframework.org/schema/util/spring-util.xsd
    http://cxf.apache.org/bindings/soap
    http://cxf.apache.org/schemas/configuration/soap.xsd
    http://cxf.apache.org/jaxws
    http://cxf.apache.org/schemas/jaxws.xsd">

    <!-- 引入CXF配置文件,低版本还需引入其他两个文件 -->
    <import resource="classpath:META-INF/cxf/cxf.xml" />

    <!-- 配置方式1   注意:serviceClass为接口类并非实现类 -->
    <jaxws:server serviceClass="com.xiaochangwei.web.service.WebserviceTest" address="/webSerciceTest_service_jaxws"></jaxws:server>

    <!-- 配置方式2    注意:implementor为接口的具体实现类 -->
    <jaxws:endpoint implementor="com.xiaochangwei.web.service.impl.WebServiceTestImpl" address="/webSerciceTest_endpoint" ></jaxws:endpoint>
上面我提供了两种配置方式,请留意注意事项,
serviceClass : 配置的为接口定义类
implementor : 配置的为接口的实现类,且接口实现类上面不需要增加@WebService注解标签
⑥ 启动tomcat并测试,启动时留意控制台可以查看配置是否可供调用。
我的启动日志如下:
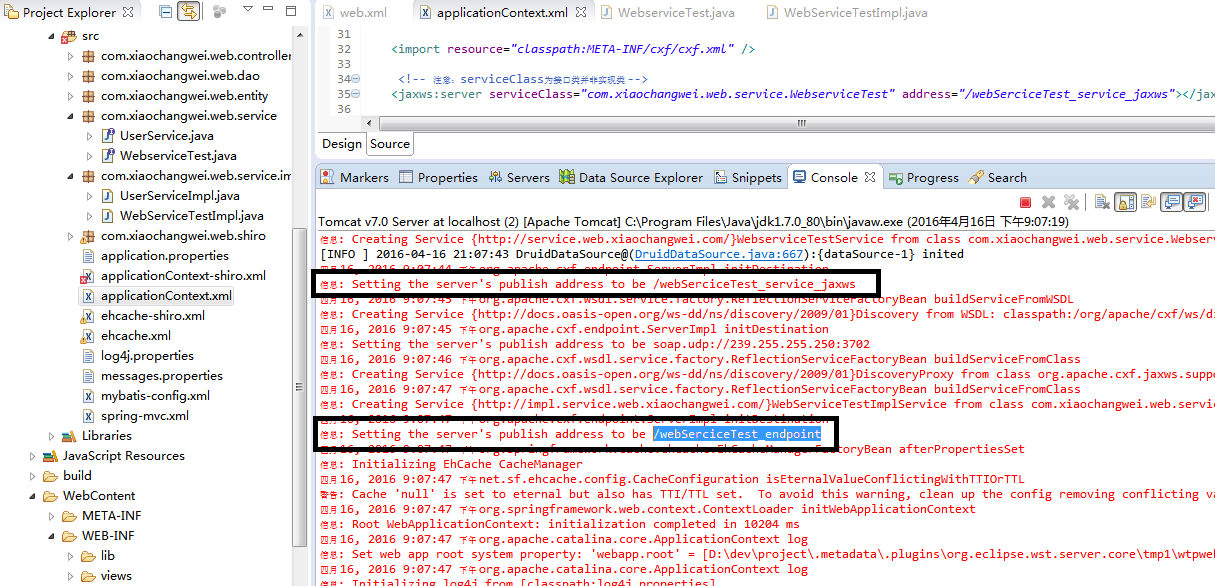
可以看到我们以两种方式配置的发布地址都成功了,现在打开浏览器进行测试,请注意后面加上?wsdl
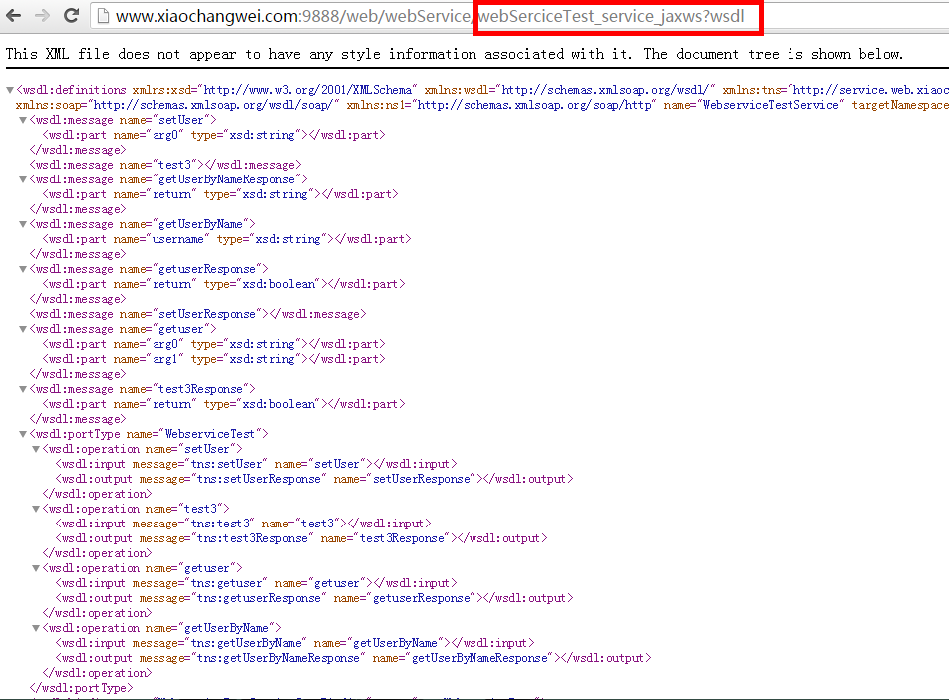
另一个和上面这个一样,就不再截图了。