前面我们已经实现了thymeleaf模板,其实freemarker和thymeleaf差不多,都可以取代JSP页面,实现步骤也差不多,我们来简单实现一下
引入pom.xml依赖如下
<dependency>
    <groupId>org.springframework.boot</groupId>
    <artifactId>spring-boot-starter-freemarker</artifactId>
</dependency>
创建Controller测试类
/**
 * @author pillarzhang
 * @date 2019-06-03
 */
@Controller
class FreemarkerController {
    @RequestMapping("/index")
    public String index(Model model){
        model.addAttribute("name","hello pillar");
        return "index";
    }
}
application.properties配置文件你可以选择不配置默认,也可以进行手动配置
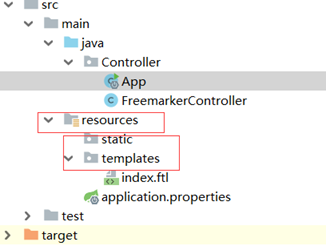
选择默认时配置路径一定要写对,src/main/resources static(js,css等静态文件),templates(页面路径)注意是ftl后缀
如果要自定义的话,可以在application.properties中设置如下等配置信息
spring.freemarker.charset=UTF-8
spring.freemarker.suffix=.ftl
spring.freemarker.content-type=text/html; charset=utf-8
spring.freemarker.template-loader-path=classpath:/templates
spring.mvc.static-path-pattern=/static/**
Index.ftl文件如下
<!DOCTYPE html>
<html lang="en">
<head>
    <meta charset="utf-8"/>
    <title>FreeMarker</title>
</head>
<body>
<h1>hello world</h1>
<h1 style="color: red">${name}</h1>
</body>
</html>
启动项目,输入地址http://localhost:8080/index显示如下则成功

详细配置文件
# 是否允许HttpServletRequest属性覆盖(隐藏)控制器生成的同名模型属性。
spring.freemarker.allow-request-override=false
# 是否允许HttpSession属性覆盖(隐藏)控制器生成的同名模型属性。
spring.freemarker.allow-session-override=false
# 是否启用模板缓存。
spring.freemarker.cache=false
# 模板编码。
spring.freemarker.charset=UTF-8
# 是否检查模板位置是否存在。
spring.freemarker.check-template-location=true
# Content-Type value.
spring.freemarker.content-type=text/html
# 是否启用freemarker
spring.freemarker.enabled=true
# 设定所有request的属性在merge到模板的时候,是否要都添加到model中.
spring.freemarker.expose-request-attributes=false
# 是否在merge模板的时候,将HttpSession属性都添加到model中
spring.freemarker.expose-session-attributes=false
# 设定是否以springMacroRequestContext的形式暴露RequestContext给Spring’s macro library使用
spring.freemarker.expose-spring-macro-helpers=true
# 是否优先从文件系统加载template,以支持热加载,默认为true
spring.freemarker.prefer-file-system-access=true
# 设定模板的后缀.
spring.freemarker.suffix=.ftl
# 设定模板的加载路径,多个以逗号分隔,默认:
spring.freemarker.template-loader-path=classpath:/templates/
# 设定FreeMarker keys.
spring.freemarker.settings.template_update_delay=0
spring.freemarker.settings.default_encoding=UTF-8
spring.freemarker.settings.classic_compatible=true
通过freemarker生成静态html
首先需要编写一个可以在普通类中获取到springbean的工具类SpringContextHolder
@Component
public class SpringContextHolder implements ApplicationContextAware {

    private static ApplicationContext appContext = null;

    /**
     * 通过name获取 Bean.
     *
     * @param name
     * @return
     */
    public static Object getBean(String name) {
        return appContext.getBean(name);

    }

    /**
     * 通过class获取Bean.
     *
     * @param clazz
     * @param <T>
     * @return
     */
    public static <T> T getBean(Class<T> clazz) {
        return appContext.getBean(clazz);
    }

    /**
     * 通过name,以及Clazz返回指定的Bean
     *
     * @param name
     * @param clazz
     * @param <T>
     * @return
     */
    public static <T> T getBean(String name, Class<T> clazz) {
        return appContext.getBean(name, clazz);
    }

    @Override
    public void setApplicationContext(ApplicationContext applicationContext) throws BeansException {
        if (appContext == null) {
            appContext = applicationContext;
        }
    }
}
然后编写一个生成静态html文件的工具类FreemarkerUtil
public class FreemarkerUtil {

    public static String parseTpl(String viewName, Map<String, Object> params) {
        Configuration cfg = SpringContextHolder.getBean(Configuration.class);
        String html = null;
        Template t = null;
        try {
            t = cfg.getTemplate(viewName + ".ftl");
            html = FreeMarkerTemplateUtils.processTemplateIntoString(t, params);
        } catch (IOException | TemplateException e) {
            e.printStackTrace();
        }
        return html;
    }
}
为了方便查看, 添加一个mapping
@RequestMapping("/createHtml")
@ResponseBody
public String createHtml(Model model){
    Map map = new LinkedHashMap<>();
    for (int i = 0; i < 5; i++) {
        map.put("key" + i, "value" + i);
    }
    model.addAttribute("list", Arrays.asList("string1", "string2", "string3", "string4", "string5", "string6"));
    model.addAttribute("map", map);
    model.addAttribute("name", "   htTps://wWw.zHyD.mE   ");
    model.addAttribute("htmlText", "<span style="color: red;font-size: 16px;">html内容</span>");
    model.addAttribute("num", 123.012);
    model.addAttribute("null", null);
    model.addAttribute("dateObj", new Date());
    model.addAttribute("bol", true);
    return FreemarkerUtil.parseTpl("index", model.asMap());
}
ok,访问/createHtml

到此为止,本篇已详细介绍了freemarker的使用方法。