基础篇
一、什么是Spring Actuator?
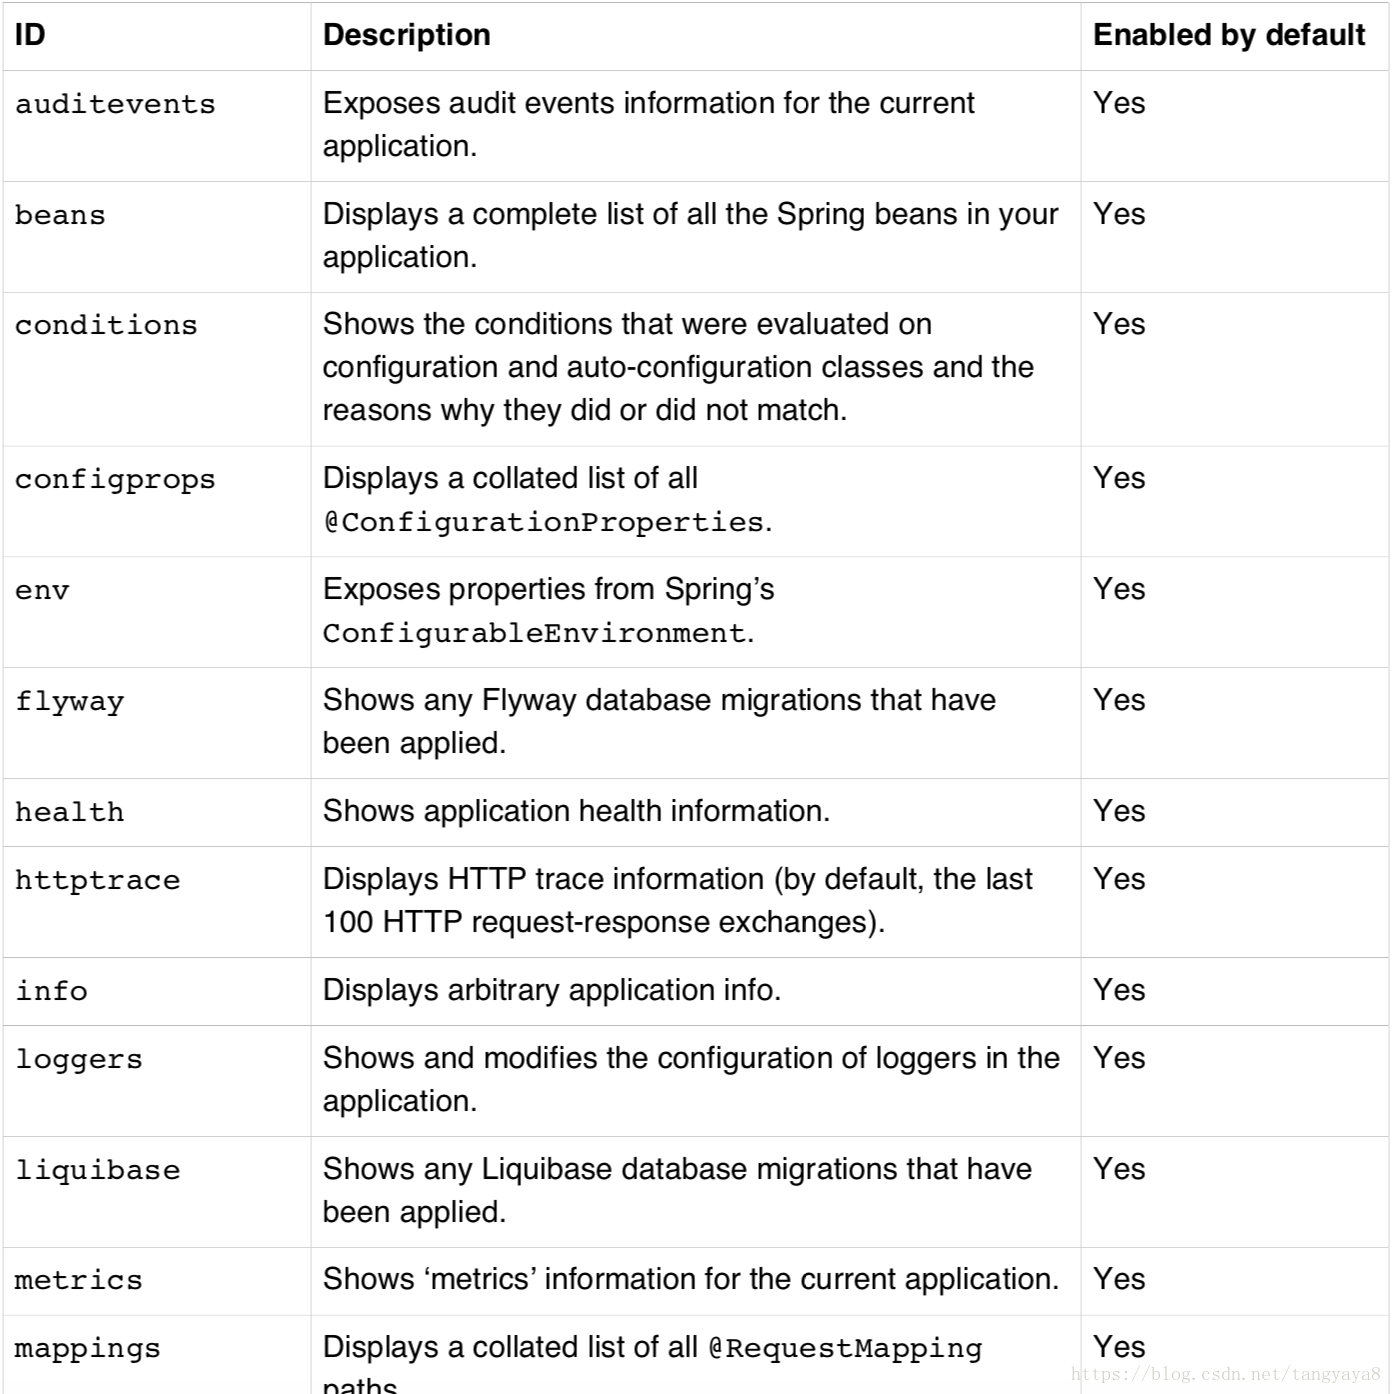
spring-boot-starter-actuator模块是一个spring提供的监控模块。我们在开运行发过程中,需要实时和定时监控服务的各项状态和可用性。Spring Boot的spring-boot-starter-actuator 模块(健康监控)功能提供了很多监控所需的接口,可以对应用系统进行配置查看、相关功能统计等。
二、代码实现
在maven的pom中引入:
<dependencies>
    <!--web组件-->
    <dependency>
        <groupId>org.springframework.boot</groupId>
        <artifactId>spring-boot-starter-web</artifactId>
    </dependency>
    <!--actuator-->
    <dependency>
        <groupId>org.springframework.boot</groupId>
        <artifactId>spring-boot-starter-actuator</artifactId>
    </dependency>
</dependencies>
在application.yml文件中加入:
server:
  port: 8080             #服务端口
spring:
  application:
    name: server-actuator
management:
  server:
    port: 8081           #actuator端口
  endpoints:
    web:
      base-path: /
      exposure:
        include: "*"
在浏览器输入:http://localhost:8081/health,可以得到一串JSON字符串,但是这种很明显不适合业务场景,所以在下面的提高篇中我将会介绍一种带有界面的组件。

提高篇:SpringBoot Admin(简称SBA)对SpringBoot实现界面化监控
一、什么是SBA?
SBA则是基于Actuator更加进化了一步,其是一个针对Actuator接口进行UI美化封装的监控工具。Spring Boot Admin 是一个管理和监控Spring Boot 应用程序的开源软件。每个应用都认为是一个客户端,通过HTTP或者使用 Eureka注册到admin server中进行展示,Spring Boot Admin UI部分使用AngularJs将数据展示在前端。
前端界面如下:


这样一个服务的运行情况就一目了然了
二、代码实现
(1)新建服务Actuator、Server01、Server02,其中Actuator服务作为管理服务管理着Server01与Server02服务。项目结构如下:

(2)在Actuator服务的pom.xml与application.yml文件中分别添加如下内容:
<dependencies>
  <!--web组件-->
  <dependency>
    <groupId>org.springframework.boot</groupId>
       <artifactId>spring-boot-starter-web</artifactId>
  </dependency>
  <!--actuator-->
  <dependency>
    <groupId>org.springframework.boot</groupId>
    <artifactId>spring-boot-starter-actuator</artifactId>
  </dependency>
  <!--SBA Server-->
  <dependency>
    <groupId>de.codecentric</groupId>
    <artifactId>spring-boot-admin-server</artifactId>
  </dependency>
  <!--SBA Server UI-->
  <dependency>
    <groupId>de.codecentric</groupId>
    <artifactId>spring-boot-admin-server-ui</artifactId>
  </dependency>
</dependencies>
server:
  port: 8080             #服务端口
spring:
  application:
    name: server-actuator
management:
  server:
    port: 8081            #actuator端口
  endpoints:
    web:
      base-path: /
      exposure:
        include: "*"
在启动类上添加@EnableAdminServer注解

(3)在Server01、Server02服务的pom.xml、application.yml文件中分别添加如下内容:
 <dependencies>
    <!--web组件-->
    <dependency>
        <groupId>org.springframework.boot</groupId>
        <artifactId>spring-boot-starter-web</artifactId>
    </dependency>
    <!--actuator-->
    <dependency>
        <groupId>org.springframework.boot</groupId>
        <artifactId>spring-boot-starter-actuator</artifactId>
    </dependency>
    <!--SBA Client-->
    <dependency>
        <groupId>de.codecentric</groupId>
        <artifactId>spring-boot-admin-starter-client</artifactId>
    </dependency>
</dependencies>
server:
  port: 9666
management:
 metrics:
  web:
    server:
      auto-time-requests: false
 endpoints:
  web:
    exposure:
      include: '*'
      exclude: env,beans
spring:
  boot:
    admin:
      client:
        url: http://localhost:8080  #这里是管理服务的网址
        instance: server01            #监控服务名称
  application:
    name: server01
这样将所有的项目启动就可以然后访问http://localhost:8080/即可得到监控界面