博客园美化打造你的专属博客
还在使用以前的浏览界面嘛?还在看那枯燥无味的博客嘛?
是时候给你的界面换换脸啦! 这么好的操作还不快学一手
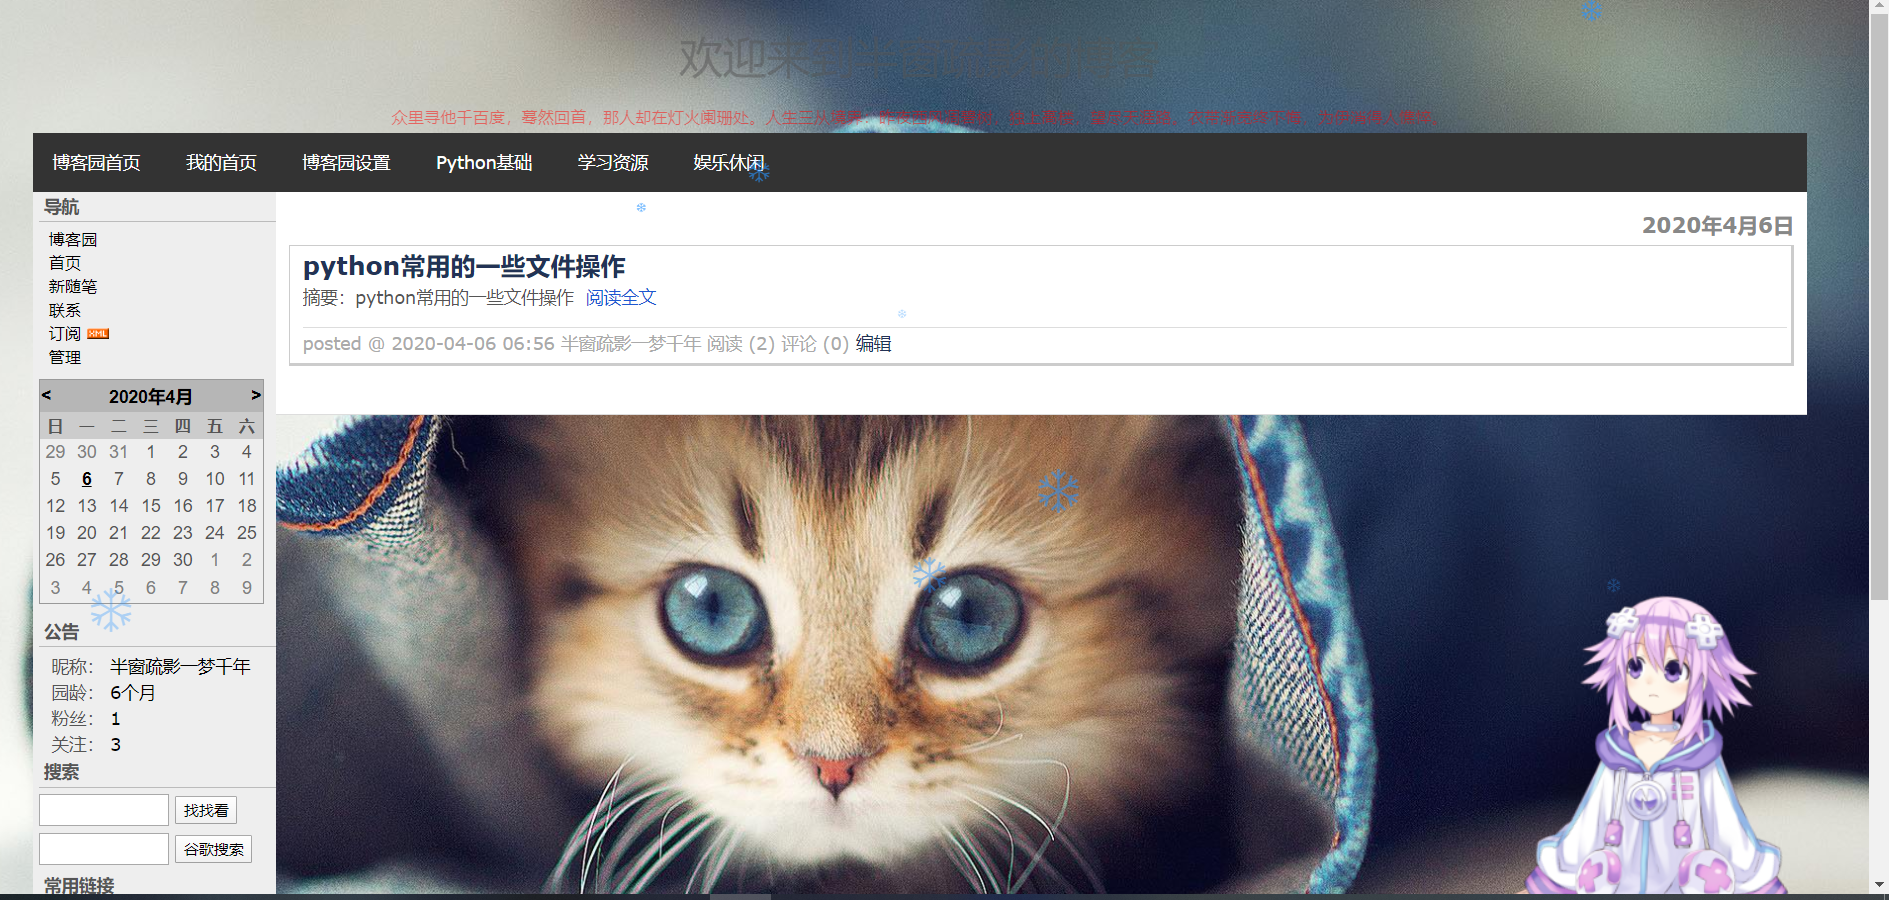
先给你们看一下最终效果(文章较少这不是重点,重点是炫 )
接下来我们就开始大闹一场了
你要定制,得先获取网站的JS(JavaScript)权限,你要在你的博客主页
点击--->设置--->博客设置 ---->下翻找到“申请JS权限”
然后你需要等一等权限审核通过,白天申请应该很快就通过了,如果时间比较长还没通过,你可以给博客园后台发给邮件去申请,发给contact@cnblogs.com 有了权限你就可以开始下面的定制了.
我就直接上干货啦,想要更加细节更加完美的可以去 这个大佬的博客园学一学(我就是在他那偷学的⁄(⁄ ⁄ ⁄ω⁄ ⁄ ⁄))
1我来教一下我们的背景图定制吧
注意:添加的位置是 页面定制 CSS 代码就是我们的第一个框
/* 定制博客背景图片,url里面是你的图片位置信息 */
body {
     background-color: #efefef;
     background-image:url(这里是你图片位置信息);
     background-repeat: no-repeat;
     background-attachment: fixed;
     background-position: center 0;
     background-size: cover;
    padding-top:0px;
  }
2然后是鼠标点击出现小爱心
注意:添加的位置是博客侧边栏公告(支持HTML代码) (支持 JS 代码)
<!-- 为页面添加爱心特效 -->
<script type="text/javascript">

(function(window,document,undefined){
    var hearts = [];

    window.requestAnimationFrame = (function(){
        return window.requestAnimationFrame ||
        window.webkitRequestAnimationFrame ||
        window.mozRequestAnimationFrame ||
         window.oRequestAnimationFrame ||
         window.msRequestAnimationFrame ||
         function (callback){
             setTimeout(callback,1000/60);
         }
    })();

    init();

    function init(){
        css(".heart{ 10px;height: 10px;position: fixed;background: #f00;transform: rotate(45deg);-webkit-transform: rotate(45deg);-moz-transform: rotate(45deg);}.heart:after,.heart:before{content: ''; inherit;height: inherit;background: inherit;border-radius: 50%;-webkit-border-radius: 50%;-moz-border-radius: 50%;position: absolute;}.heart:after{top: -5px;}.heart:before{left: -5px;}");
        attachEvent();
        gameloop();
    }

    function gameloop(){
        for(var i=0;i<hearts.length;i++){
            if(hearts[i].alpha <=0){
                document.body.removeChild(hearts[i].el);
                hearts.splice(i,1);
                continue;
             }

             hearts[i].y--;
             hearts[i].scale += 0.004;
             hearts[i].alpha -= 0.013;
             hearts[i].el.style.cssText = "left:"+hearts[i].x+"px;top:"+hearts[i].y+"px;opacity:"+hearts[i].alpha+";transform:scale("+hearts[i].scale+","+hearts[i].scale+") rotate(45deg);background:"+hearts[i].color;
        }

        requestAnimationFrame(gameloop);
    }

    function attachEvent(){
        var old = typeof window.onclick==="function" && window.onclick;
        window.onclick = function(event){
            old && old();
            createHeart(event);
        }
    }

    function createHeart(event){
        var d = document.createElement("div");
        d.className = "heart";
        hearts.push({
            el : d,
            x : event.clientX - 5,
            y : event.clientY - 5,
            scale : 1,
            alpha : 1,
            color : randomColor()
        });

        document.body.appendChild(d);
    }

    function css(css){
        var style = document.createElement("style");
        style.type="text/css";
        try{
            style.appendChild(document.createTextNode(css));
        }
        catch(ex){
            style.styleSheet.cssText = css;
        }

        document.getElementsByTagName('head')[0].appendChild(style);
    }

    function randomColor(){
        return "rgb("+(~~(Math.random()*255))+","+(~~(Math.random()*255))+","+(~~(Math.random()*255))+")";
    }

})(window,document);
</script>
3这是雪花飘落的动态js
注意:添加的位置是页脚 HTML 代码
想要更加细节更加完美的可以去 这个大佬的博客园学一学(我就是在他那偷学的⁄(⁄ ⁄ ⁄ω⁄ ⁄ ⁄))
我们还需要一个JQ文件和JQ的雪花插件,下载地址在这里
网盘链接:https://pan.baidu.com/s/1Kmn-aKHLVbI2FzwX4YU40g 提取码:9ddt
把这个压缩包解压后的两个文件,上传到博客园的文件里
把下面代码添加到页脚HTML代码,其中下面两个地址要换成自己文件地址
<!-- 添加动态背景雪花-->
<script src="https://blog-static cnblogs com/fils/Igjbky/waifu-tips js"> </script>
<script src= htts:/blog-static cnblogs. om/files/lgjbky//live2d js"> </script>
<script type=" text/javascript" >initModel)</script>
</body>
</html>
<script src= "自己的/jquery-1.7.1.min.js"> </script><!--1换成自己的-->
<script src= "自己的/jquery.snow.js"></script>      <!--2换成自己的-->
</script>
然后在下面复制以下代码
<script>
(function($){$.fn.snow=function(options){var $flake=$('<div id="flake" />').css({'position':'absolute','top':'-50px'}).html('❄'),documentHeight=$(document).height(),documentWidth=$(document).width(),defaults={minSize:10,maxSize:20,newOn:300,flakeColor:"#2894FF"},options=$.extend({},defaults,options);var interval=setInterval(function(){var startPositionLeft=Math.random()*documentWidth-100,startOpacity=0.5+Math.random(),sizeFlake=options.minSize+Math.random()*options.maxSize,endPositionTop=documentHeight-40,endPositionLeft=startPositionLeft-100+Math.random()*200,durationFall=documentHeight*10+Math.random()*5000;$flake.clone().appendTo('body').css({left:startPositionLeft,opacity:startOpacity,'font-size':sizeFlake,color:options.flakeColor}).animate({top:endPositionTop,left:endPositionLeft,opacity:0.2},durationFall,'linear',function(){$(this).remove()});},options.newOn);};})(jQuery);
$.fn.snow({ minSize: 5, maxSize: 50, newOn: 800, flakeColor: '#2894FF' }); </script>
4板娘是我最喜欢的 也是最有特色的 操作方法很简单
注意:添加的位置是页脚 HTML 代码
链接:https://pan.baidu.com/s/1AJ-q7uy6h5e9Z9SzL3wyFw
提取码:o1kf
下载完里面有四个文件,然后在你的页脚Html代码里添加以下代码,将文件同上传到博客园然后添加到下面
<!DOCTYPE html>
<html xmlns="http://www.w3.org/1999/xhtml">
<head>
    <meta http-equiv="Content-Type" content="text/html; charset=UTF-8" />
    <link rel="stylesheet" type="text/css" href="你上传的waifu1.css文件路径"/>
    <link rel="stylesheet" type="text/css" href="你上传的flat-ui.min1.css文件路径"/>
</head>
<body>
    <div class="waifu">
        <div class="waifu-tips"></div>
        <canvas id="live2d" width="280" height="250" class="live2d"></canvas>
        <div class="waifu-tool">
            <span class="fui-home"></span>
            <span class="fui-chat"></span>
            <span class="fui-eye"></span>
            <span class="fui-user"></span>
            <span class="fui-photo"></span>
            <span class="fui-info-circle"></span>
            <span class="fui-cross"></span>
        </div>
    </div>

    <script src="你上传的waifu-tips.js路径"></script>
    <script src="你上传的live2d.js路径"></script>
    <script type="text/javascript">initModel()</script>
</body>
</html>
好了我觉得这些操作可以惊艳我们的小伙伴啦,快去炫耀一番吧!!!
感谢两位大佬分享