微信小程序编写新闻阅读列表
不忘初心,方得始终;初心易得,始终难守。
本篇学习主要内容
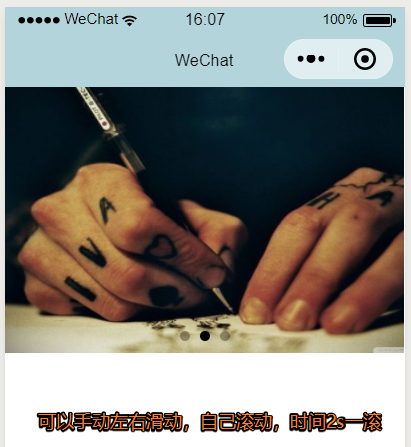
Swiper 组件(轮播图)
App.json 里的关于导航栏、标题的配置。
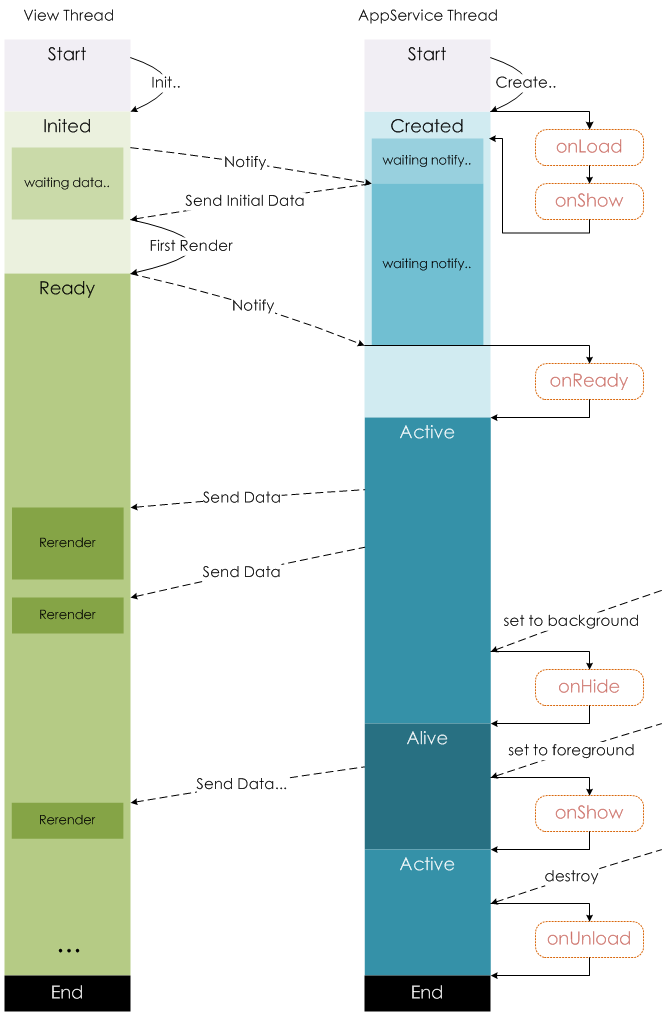
Page 页面与应用程序的生命周期
数据绑定(核心知识)
数据绑定的运算与逻辑
AppDate 区域介绍
事件与事件对象
缓存
列表渲染(核心知识)
Template 模板的使用(核心知识)
Swiper 组件(轮播图)
Swiper官方API文档:https://developers.weixin.qq.com/miniprogram/dev/component/swiper.html
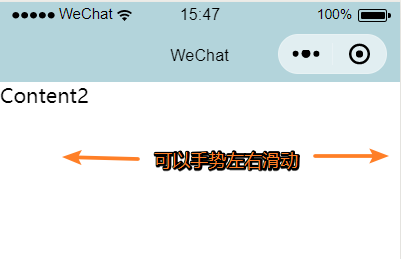
简单案例01
<view>
  <swiper>
    <swiper-item>Content1</swiper-item>
    <swiper-item>Content2</swiper-item>
    <swiper-item>Content3</swiper-item>
  </swiper>
</view>
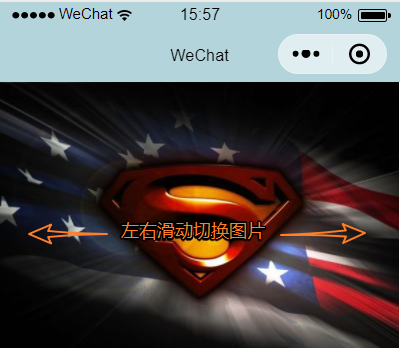
简单案例02
<view>
  <swiper  style='100%;height:500rpx'>
    <swiper-item>
      <image src='/images/01.jpg' style='100%;height500rpx'></image>
    </swiper-item>
    <swiper-item>
      <image src='/images/02.jpg' style='100%;height500rpx'></image>
    </swiper-item>
    <swiper-item>
      <image src='/images/03.jpg' style='100%;height500rpx'></image>
    </swiper-item>
  </swiper>
</view>
主要属性
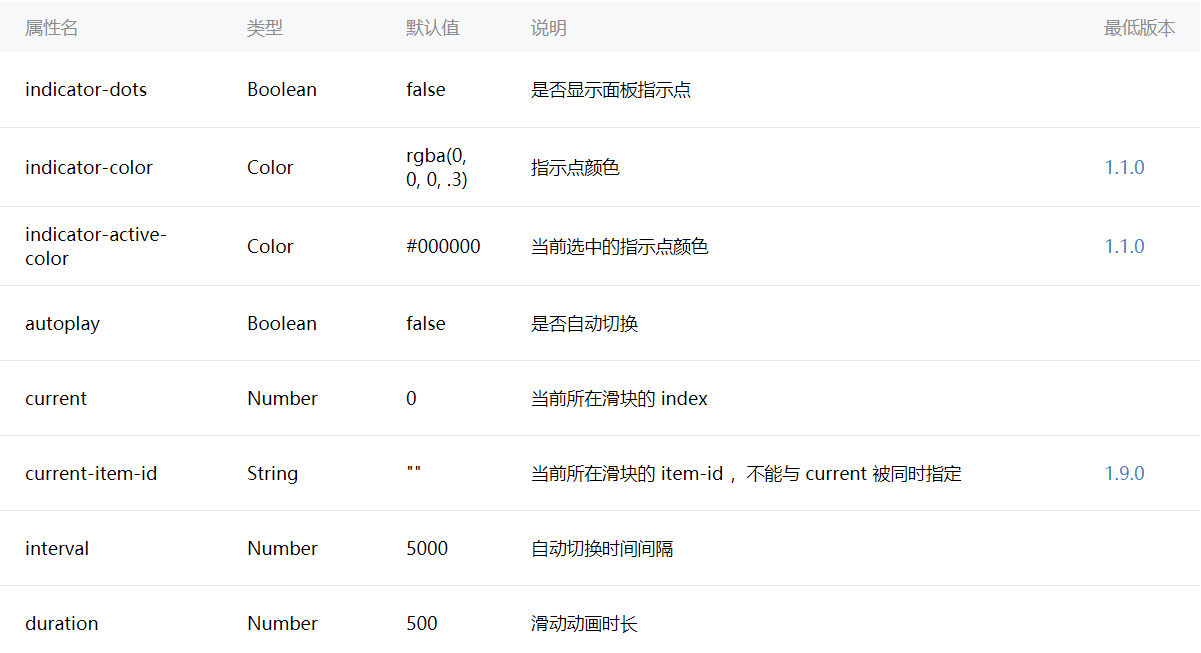
简单案例03
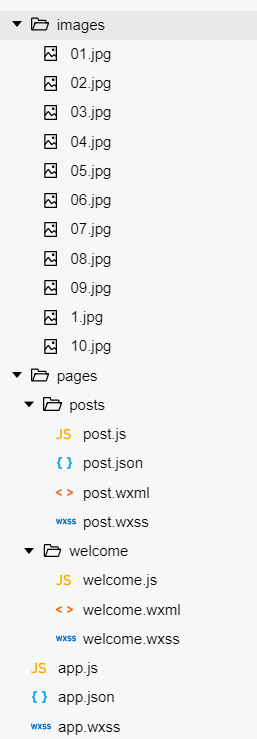
目录结构
app.json
{
  "pages": [
    "pages/posts/post",
    "pages/welcome/welcome"
  ],
  "window": {
    "backgroundTextStyle": "light",
    "navigationBarBackgroundColor": "#b3d4db",
    "navigationBarTitleText": "WeChat",
    "navigationBarTextStyle": "black"
  }
}
post.wxml
<view>
  <swiper indicator-dots='true' autoplay='true' interval='2000'>
    <swiper-item>
      <image src='/images/01.jpg'></image>
    </swiper-item>
    <swiper-item>
      <image src='/images/02.jpg'></image>
    </swiper-item>
    <swiper-item>
      <image src='/images/03.jpg'></image>
    </swiper-item>
  </swiper>
</view>
post.wxss
swiper{
  width:100%;
  height:500rpx;
}

swiper image{
  width:100%;
  height:500rpx;
}
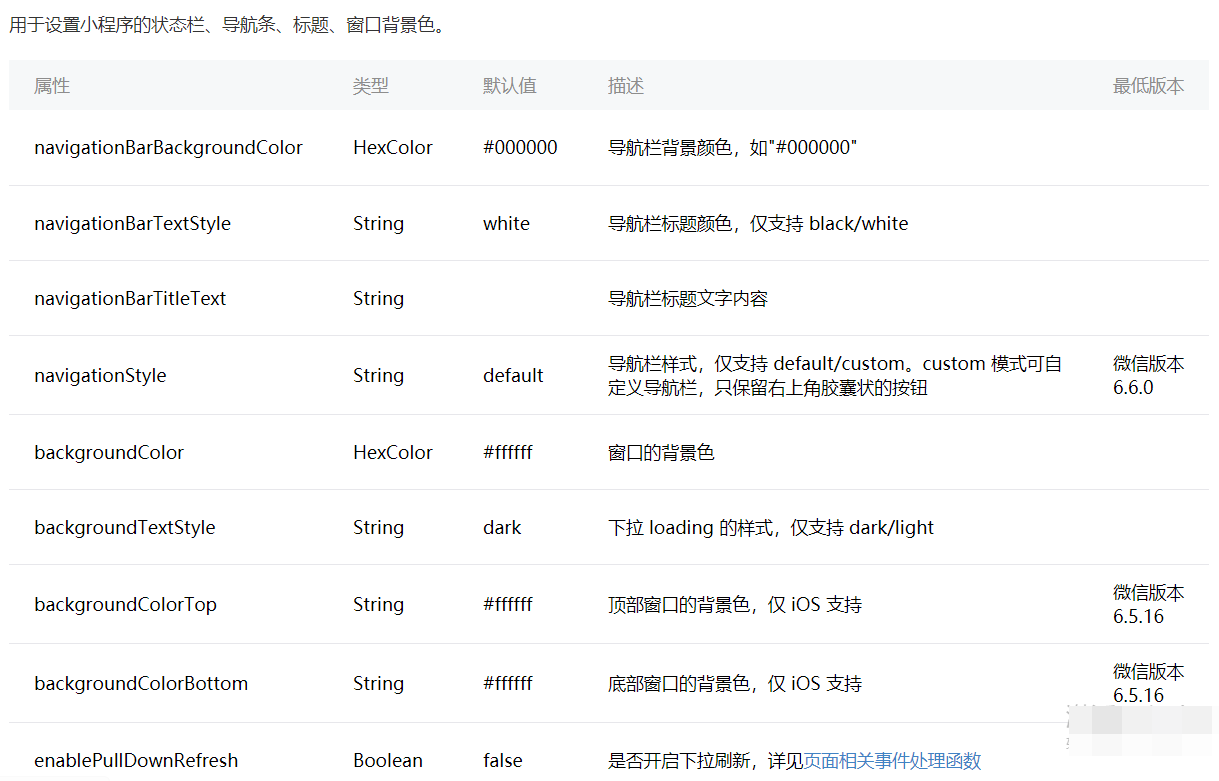
App.json 里的关于导航栏、标题的配置
官方API文档地址:https://developers.weixin.qq.com/miniprogram/dev/framework/config.html
主要属性
简单案例
post.json
{
    "navigationBarBackgroundColor": "#405f80",
    "navigationBarTitleText": "文与字"
}

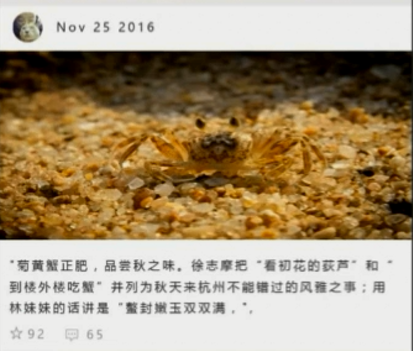
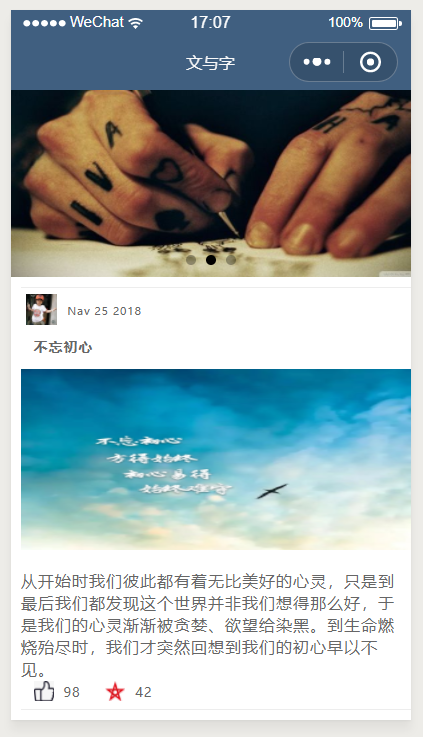
构建文章列表
案例代码
post.wxml
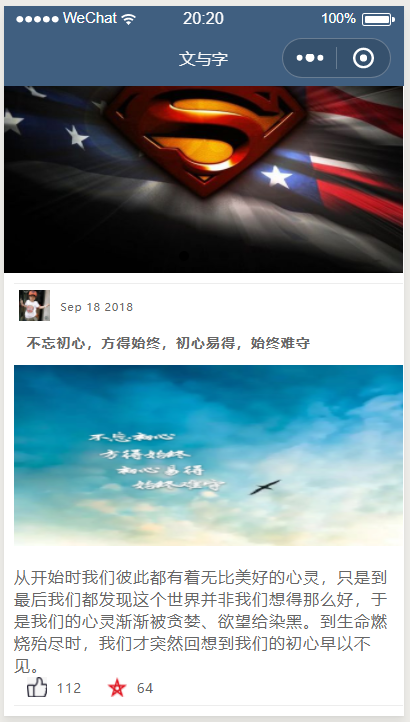
<view>
  <swiper indicator-dots='true' autoplay='true' interval='5000'>
    <swiper-item>
      <image src='/images/01.jpg'></image>
    </swiper-item>
    <swiper-item>
      <image src='/images/02.jpg'></image>
    </swiper-item>
    <swiper-item>
      <image src='/images/03.jpg'></image>
    </swiper-item>
  </swiper>

  <view class='post-container'>
    <view class='post-author-date'>
      <image src='/images/1.jpg' class='post-author'></image>
      <text class='post-date'>Nav 25 2018</text>
    </view>
    <text class='post-title'>不忘初心</text>
    <image class='post-image' src='/images/04.jpg'></image>
    <text class='post-content'>从开始时我们彼此都有着无比美好的心灵,只是到最后我们都发现这个世界并非我们想得那么好,于是我们的心灵渐渐被贪婪、欲望给染黑。到生命燃烧殆尽时,我们才突然回想到我们的初心早以不见。</text>
    <view class='post-like'>
      <image class='post-like-image' src='../../images/z.jpg'></image>
      <text class='post-like-font'>98</text>
     <image class='post-like-image' src='../../images/c.jpg'></image>
     <text class='post-like-font'>42</text>
    </view>
  </view>

</view>
post.wxss
swiper{
  width:100%;
  height:500rpx;
}

swiper image{
  width:100%;
  height:500rpx;
}

.post-container{
  display: flex;
  flex-direction: column;
  margin-top: 20rpx;
  margin-bottom: 40rpx;
  background-color: white;
  border-bottom: 1px solid #ededed;
  border-top: 1px solid #ededed;
  padding-bottom: 5px;
}

.post-author-date{
  /* margin-top: 10rpx;
  margin-bottom: 20rpx;
  margin-left: 10rpx; */
  margin: 10rpx 0 20rpx 10rpx;
}

.post-author{
  width: 60rpx;
  height: 60rpx;
  vertical-align: middle;
}

.post-date{
  margin-left: 20rpx;
  vertical-align: middle;
  margin-bottom: 5px;
  font-size:26rpx;
}

.post-title{
  font-size: 34rpx;
  font-weight: 600;
  color: 333;
  margin-bottom: 10px;
  margin-left: 10px;
}

.post-image{
  /* margin-left: 16px;  */
  width: 100%;
  height: 342rpx;
  margin: auto 0;
  margin-bottom: 15px;
}

.post-container{
  color: #666;
  font-weight: 28rpx;
  margin-bottom: 20rpx;
  margin-left: 20rpx;
  /* 文本间距 */
  letter-spacing: 2rpx;
  line-height: 40rpx;
}

.post-like{
  font-size: 13px;
  flex-direction: row;
  line-height: 16px;
  margin-left: 10px;
}

.post-like-image{
  height: 16px;
  width: 16px;
  margin-right: 8px;
  vertical-align: middle;
}

.post-like-font{
  /* 垂直居中 */
  vertical-align: middle;
  margin-right: 20px;
}
小程序 js 脚本文件
js 脚本文件page结构官方开发文档:https://developers.weixin.qq.com/miniprogram/dev/framework/app-service/page.html
js 文件添加 page 结构(生命周期)
post.js
Page({
  data: {
    String1
  },
  onLoad: function (options) {
    // 页面初始化,options为页面跳转所带来的参数
    String2
  },
  onReady: function () {
    // 页面渲染完成
    String3
  },
  onShow: function () {
    // 页面显示
    String4
  },
  onHide: function () {
    // 页面隐藏
    String5
  },
  onUnload: function () {
    // 页面关闭
    String6
  }
})
案例代码1
Page({
  data: {

  },

  // 自定义变量
  imgPath : "/images/...",

  // 自定义方法
  process:function(){

  },

  onLoad: function (options) {
    // 页面初始化,options为页面跳转所带来的参数
    console.log('onLoad') ;
  },
  onReady: function () {
    // 页面渲染完成
    console.log('onReady');
  },
  onShow: function () {
    // 页面显示
    console.log('onShow');
  },
  onHide: function () {
    // 页面隐藏
    console.log('onHide');
  },
  onUnload: function () {
    // 页面关闭
    console.log('onUnload');
  }
})
下图说明了 Page 实例的生命周期
小程序数据绑定语法
案例代码
Page({
  // 数据绑定
  data: {
    date:'Nav 11 2018',
    title:'不忘初心,方得始终',
  },

  // 自定义变量
  imgPath : "/images/...",

  // 自定义方法
  process:function(){

  },

  onLoad: function (options) {
    // 页面初始化,options为页面跳转所带来的参数
    console.log('onLoad') ;
  },
  onReady: function () {
    // 页面渲染完成
    console.log('onReady');
  },
  onShow: function () {
    // 页面显示
    console.log('onShow');
  },
  onHide: function () {
    // 页面隐藏
    console.log('onHide');
  },
  onUnload: function () {
    // 页面关闭
    console.log('onUnload');
  }
})
前端页面使用 {{ 双括号 }} 引用数据
    <view class='post-author-date'>
      <image src='/images/1.jpg' class='post-author'></image>
      <text class='post-date'>{{date}}</text>
    </view>
    <text class='post-title'>{{title}}</text>
    <image class='post-image' src='/images/04.jpg'></image>
使用数据绑定,修改我们之前写的代码
修改 post.wxml 文件代码
<view>
  <swiper vertical='true' indicator-dots='true' autoplay='true' interval='5000'>
    <swiper-item>
      <image src='/images/01.jpg'></image>
    </swiper-item>
    <swiper-item>
      <image src='/images/02.jpg'></image>
    </swiper-item>
    <swiper-item>
      <image src='/images/03.jpg'></image>
    </swiper-item>
  </swiper>

  <view class='post-container'>
    <view class='post-author-date'>
      <image src='{{author_img}}' class='post-author'></image>
      <text class='post-date'>{{date}}</text>
    </view>
    <text class='post-title'>{{title}}</text>
    <image class='post-image' src='/images/04.jpg'></image>
    <text class='post-content'>{{content}}</text>
    <view class='post-like'>
      <image class='post-like-image' src='../../images/z.jpg'></image>
      <text class='post-like-font'>{{view_num}}</text>
     <image class='post-like-image' src='../../images/c.jpg'></image>
     <text class='post-like-font'>{{collect_num}}</text>
    </view>
  </view>

</view>
修改 post.wxss 文件代码
Page({
  // 数据绑定
  data: {

  },

  // 自定义变量
  imgPath : "/images/...",

  // 自定义方法
  process:function(){

  },

  onLoad: function (options) {

    // 页面初始化,options为页面跳转所带来的参数
    // 向服务器请求数据
    var post_content1 = {
      date:"Sep 18 2018",
      title:'不忘初心,方得始终,初心易得,始终难守',
      content:'从开始时我们彼此都有着无比美好的心灵,只是到最后我们都发现这个世界并非我们想得那么好,于是我们的心灵渐渐被贪婪、欲望给染黑。到生命燃烧殆尽时,我们才突然回想到我们的初心早以不见。',
      view_num:'112',
      collect_num:'64',
      author_img:'/images/1.jpg',
    }
    this.setData(post_content1);

  },
  onReady: function () {
    // 页面渲染完成
    console.log('onReady');
  },
  onShow: function () {
    // 页面显示
    console.log('onShow');
  },
  onHide: function () {
    // 页面隐藏
    console.log('onHide');
  },
  onUnload: function () {
    // 页面关闭
    console.log('onUnload');
  }
})
数据绑定拓展
如果json格式字符串进行了嵌套,则小程序前端显示不出来。
解决办法:. 点出来。
案例:
  onLoad: function (options) {

    // 页面初始化,options为页面跳转所带来的参数
    // 向服务器请求数据
    var post_content1 = {
      date:"Sep 18 2018",
      title:'不忘初心,方得始终,初心易得,始终难守',
      content:'从开始时我们彼此都有着无比美好的心灵,只是到最后我们都发现这个世界并非我们想得那么好,于是我们的心灵渐渐被贪婪、欲望给染黑。到生命燃烧殆尽时,我们才突然回想到我们的初心早以不见。',
      view_num:'112',
      collect_num:'64',
      // 嵌套
      img:{
        post_img:'/images/04.jpg',
        author_img: '/images/1.jpg',
      },
    }
    this.setData(post_content1);
  },
<image src='{{img.author_img}}' class='post-author'></image>
<image class='post-image' src='{{img.post_img}}'></image>
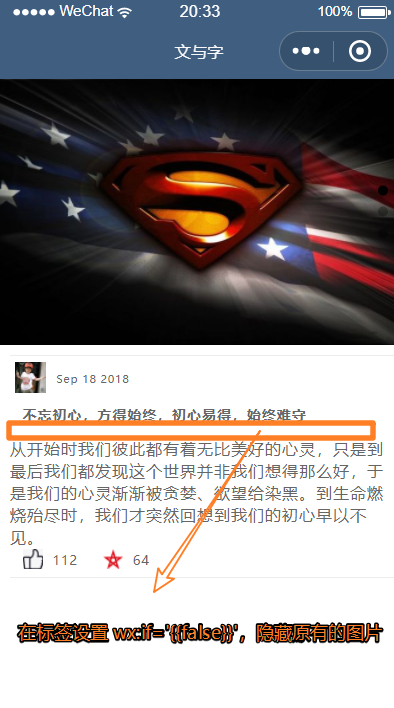
小程序标签隐藏
案例代码
<image wx:if='{{false}}' class='post-image' src='{{img.post_img}}'></image>
wx:if = ' {{ false }} ' false为隐藏。true为显示。false 为之前js文件最上方 data 绑定的 false:false (布尔值,不加引号)
双括号实现字符串的运算案例
<text class='post-date'>{{'hello' + date}}</text>
![]()
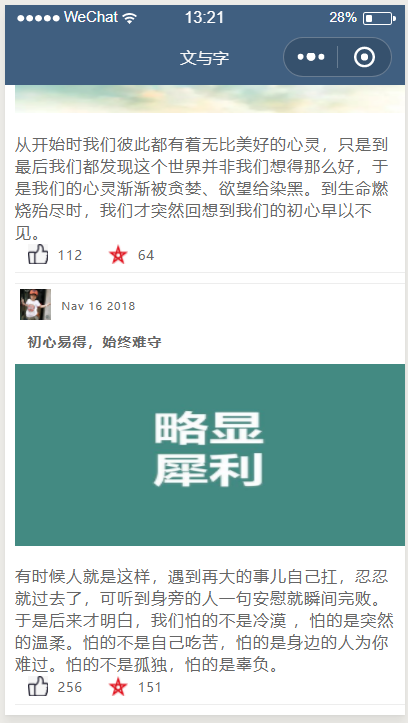
微信小程序新闻列表循环操作
再在小程序添加一组数据,和之前测试的那组数据可以连接成一个数组,代码如下。
post.js
Page({
  // 数据绑定
  data: {

  },

  // 自定义变量
  imgPath: "/images/...",

  // 自定义方法
  process: function() {

  },

  onLoad: function(options) {

    // 页面初始化,options为页面跳转所带来的参数
    // 向服务器请求数据

    var posts_content = [
    {
          date: "Sep 18 2018",
          title: '不忘初心,方得始终',
          content: '从开始时我们彼此都有着无比美好的心灵,只是到最后我们都发现这个世界并非我们想得那么好,于是我们的心灵渐渐被贪婪、欲望给染黑。到生命燃烧殆尽时,我们才突然回想到我们的初心早以不见。',
          view_num: '112',
          collect_num: '64',
          // 嵌套
          img: {
            post_img: '/images/04.jpg',
            author_img: '/images/1.jpg',
          },
          img_condition: true,
        },
        {
          date: "Nav 16 2018",
          title: '初心易得,始终难守',
          content: '有时候人就是这样,遇到再大的事儿自己扛,忍忍就过去了,可听到身旁的人一句安慰就瞬间完败。于是后来才明白,我们怕的不是冷漠 ,怕的是突然的温柔。怕的不是自己吃苦,怕的是身边的人为你难过。怕的不是孤独,怕的是辜负。',
          view_num: '256',
          collect_num: '151',
          // 嵌套
          img: {
            post_img: '/images/05.jpg',
            author_img: '/images/1.jpg',
          },
          img_condition: true,
        }
      ]

    this.setData(
      { posts_key: posts_content}
    );
  },

  onReady: function() {
    // 页面渲染完成
    console.log('onReady');
  },
  onShow: function() {
    // 页面显示
    console.log('onShow');
  },
  onHide: function() {
    // 页面隐藏
    console.log('onHide');
  },
  onUnload: function() {
    // 页面关闭
    console.log('onUnload');
  }
})
注意:再次关联data的时候需要修改之前的写法,需要关联一个对象。
{ posts_key: posts_content}
在 post.wxml 文件中,修改前端代码
<view>
  <swiper vertical='true' indicator-dots='true' autoplay='true' interval='5000'>
    <swiper-item>
      <image src='/images/01.jpg'></image>
    </swiper-item>
    <swiper-item>
      <image src='/images/02.jpg'></image>
    </swiper-item>
    <swiper-item>
      <image src='/images/03.jpg'></image>
    </swiper-item>
  </swiper>

  <block wx:for = "{{posts_key}}" wx:for-item = 'item'>
    <view class='post-container'>
      <view class='post-author-date'>
        <image src='{{item.img.author_img}}' class='post-author'></image>
        <text class='post-date'>{{item.date}}</text>
      </view>
      <text class='post-title'>{{item.title}}</text>
      <image wx:if='{{item.img_condition}}' class='post-image' src='{{item.img.post_img}}'></image>
      <text class='post-content'>{{item.content}}</text>
      <view class='post-like'>
        <image class='post-like-image' src='../../images/z.jpg'></image>
        <text class='post-like-font'>{{item.view_num}}</text>
        <image class='post-like-image' src='../../images/c.jpg'></image>
        <text class='post-like-font'>{{item.collect_num}}</text>
      </view>
    </view>
  </block>
</view>
将我们要循环的结构使用 <block></block> 标签包裹起来。
在 block 标签中设置循环操作:wx:for = "{{posts_key}}" 其中 posts_key 为js文件返回给前端的对象名称。
在 block 标签中设置获取posts_key对象的每一个元素:wx:for-item = 'item' 其中这句话可以省略。
还可以回去 posts_key 中元素的下标索引,即第几个元素:wx:for-index='idx'。
最后,修改给个展示元素的对应值,例如:{{item.img.author_img}}。由 posts_key 中每个元素item点出来。
微信小程序界面跳转
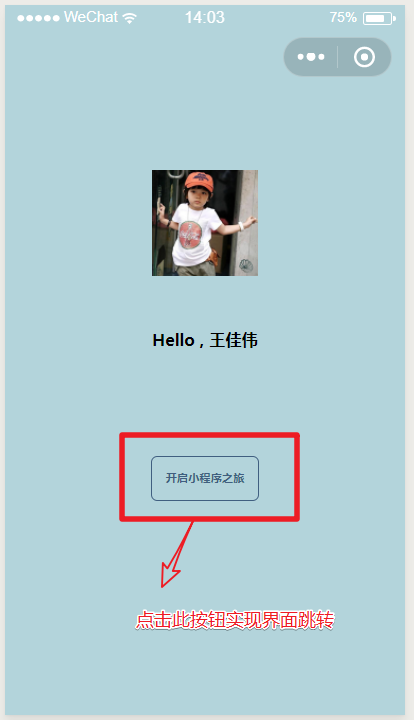
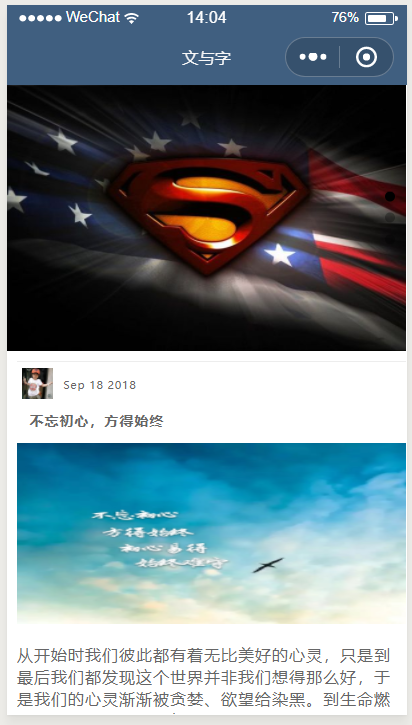
实现点击启动页面按钮‘开启小程序’跳转到我们刚刚写的新闻列表界面,即 从welcom界面跳转到post界面。
首先,我们需要去app.json文件,将小程序启动界面有我们之前测试的post启动修改为welcome界面启动。
app.json 文件 代码如下
{
  "pages": [
    "pages/welcome/welcome",
    "pages/posts/post"
  ],
  "window": {
    "navigationBarBackgroundColor": "#b3d4db"
  }
}
然后点击 ‘开启小程序之旅‘ 按钮跳转页面进入到新闻阅读界面。
在这个过程中需要用到事件和界面跳转。
微信小程序事件官方开发文档:https://developers.weixin.qq.com/miniprogram/dev/framework/view/wxml/event.html
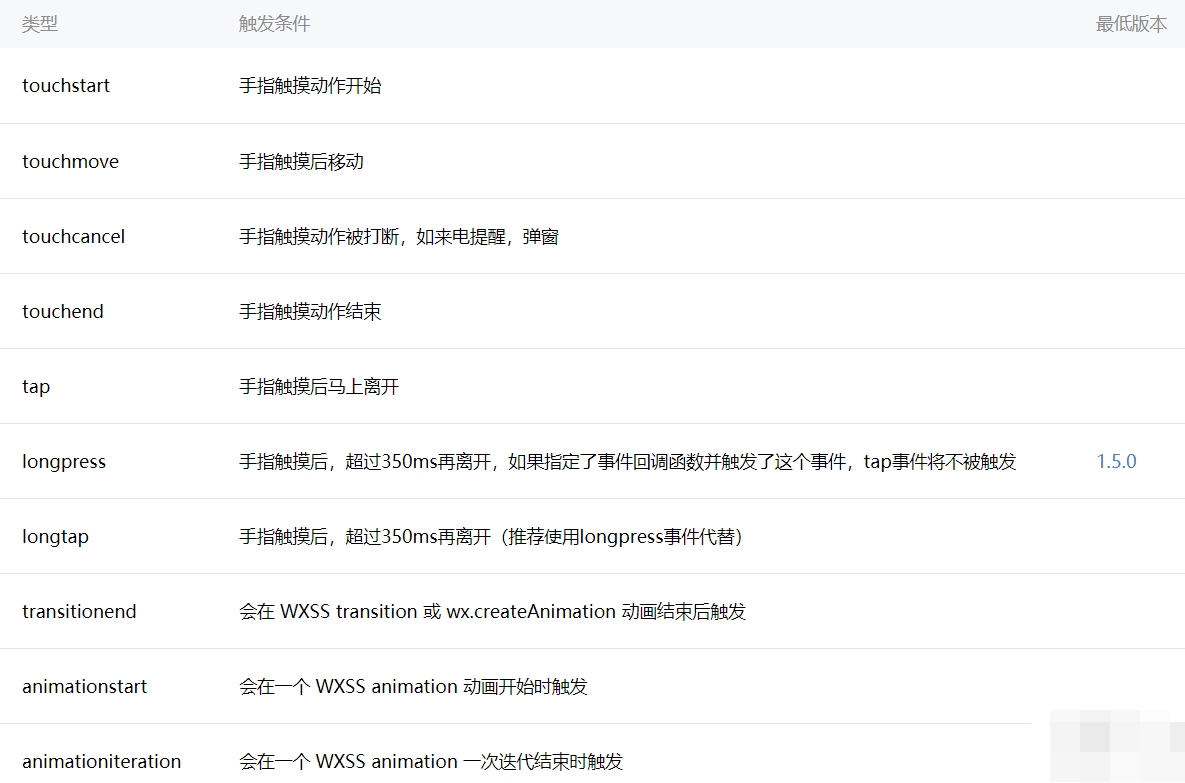
事件绑定注意事项:
在前端标签进行事件绑定的时候,需要在事件名称之前加bind或者catch 。
例如:我们为一个标签绑定一个 tap(手指触摸后马上离开) 事件
—— bindtap = “OnTap” 绑定的事件 = 事件触发函数。当发生tap事件之后,小程序马上去执行OnTap方法。
welcom.wxml文件代码:
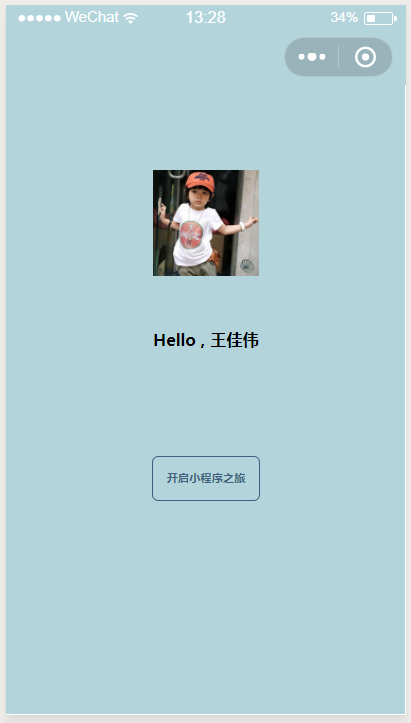
<!-- wxml 是编写小程序骨架的文件 -->
<!-- <div>一样的效果 -->
<view class='container'>
  <image class='user-avatar' src='/images/1.jpg'></image>
  <text class='user-name'>Hello , 王佳伟</text>
  <view class='moto-container' bindtap='OnTap'>
    <text class='moto'>开启小程序之旅</text>
  </view>
</view>
然后去 welcome.js文件中添加 OnTap 函数
Page({
  OnTap: function(event) {
    // 跳转页面,之前的界面保留但隐藏,可返回,进入子级界面
    // wx.navigateTo({
    //   url: '../posts/post',
    // });

    // 页面之间平行跳转,之前的页面被关闭,不可返回,进入同级界面
    wx.redirectTo({
      url: '../posts/post',
    });

    // 跳转界面
    // wx.navigateTo({
    //   // url 跳转的路径
    //   url:'String',
    //   success:function(){
    //     // 跳转成功时触发
    //   },
    //   fail:function(){
    //     // 跳转失败时触发
    //   },
    //   complete:function(){
    //     // 无论成功失败都触发
    //   },
    // });

  },

})
冒泡事件:在事件名称之前加bind的事件。点击子节点的触发事件,在子节点事件结束之后会再次触发父节点的触发事件。如果不想触发父节点的事件,则选择catch,而不是bind。