一、安装:
pip install dlib
二、使用:
1、进行人脸检测
# -- coding: utf-8 --
import dlib
import numpy as np
import cv2
import os

def rect_to_bb(rect):
    x = rect.left()
    y = rect.top()
    w = rect.right() - x
    h = rect.bottom() - y
    return (x, y, w, h)

def shape_to_np(shape, dtype="int"):
    order=[0,1,15,16,17,18,19,20,21,22,23,24,25,26]
    xx=[]
    yy=[]
    for i in order:
        xx.append(shape.part(i).x)
        yy.append(shape.part(i).y)

    xmin=min(xx)-50
    ymin=min(yy)-100
    xmax=max(xx)+50

    order=[4,5,6,7,8,9,10,11,12]
    xx=[]
    yy=[]
    for i in order:
        xx.append(shape.part(i).x)
        yy.append(shape.part(i).y)
    ymax=max(yy)
    #ymax=shape.part(33).y
    return xmin,ymin,xmax,ymax

detector = dlib.get_frontal_face_detector()
predictor = dlib.shape_predictor("./shape_predictor_68_face_landmarks.dat")
imgdir = '1.jpg'

wo_imag = cv2.imread(imgdir)
rects = detector(wo_imag, 1)
shapes = []
for (i, rect) in enumerate(rects):
        if i==0:
           shape = predictor(wo_imag, rect)
           (xmin, ymin, xmax, ymax) = shape_to_np(shape)
           if ymin<0:
              ymin=0
           if xmin<0:
              xmin=0
           if ymax>wo_imag.shape[0]:
              ymax=wo_imag.shape[0]
           if xmax>wo_imag.shape[1]:
              xmax=wo_imag.shape[1]
           wo_imag_face=wo_imag[ymin:ymax,xmin:xmax,:]
           cv2.imwrite('2.jpg', wo_imag_face)
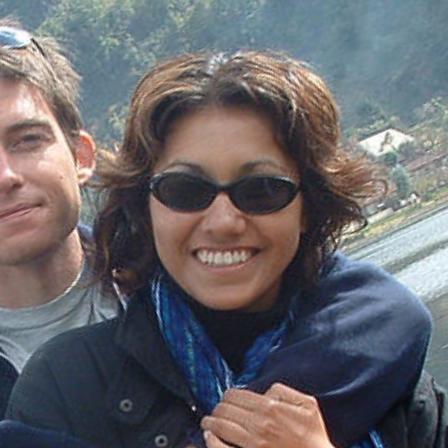
结果图像:

2、进行人脸对齐
# --coding:utf-8--
import cv2
import dlib
import numpy
import os

PREDICTOR_PATH ="/home/wjj/A_soft/dilb/shape_predictor_68_face_landmarks.dat"
SCALE_FACTOR = 1

detector = dlib.get_frontal_face_detector()
predictor = dlib.shape_predictor(PREDICTOR_PATH)

FACE_POINTS = list(range(17, 68))
MOUTH_POINTS = list(range(48, 61))

JAW_POINTS = list(range(0, 17))

RIGHT_BROW_POINTS = list(range(17, 22))
LEFT_BROW_POINTS = list(range(22, 27))

RIGHT_EYE_POINTS = list(range(36, 42))
LEFT_EYE_POINTS = list(range(42, 48))
NOSE_POINTS = list(range(27, 35))

POINTS1 = list(range(31, 35))
POINTS2 = list(range(48, 60))

ALIGN_POINTS = (POINTS1+POINTS2)

def transformation_from_points(points1, points2):
    points1 = points1.astype(numpy.float64)
    points2 = points2.astype(numpy.float64)
    c1 = numpy.mean(points1, axis=0)
    c2 = numpy.mean(points2, axis=0)
    points1 -= c1
    points2 -= c2
    s1 = numpy.std(points1)
    s2 = numpy.std(points2)
    points1 /= s1
    points2 /= s2
    U, S, Vt = numpy.linalg.svd(points1.T * points2)
    R = (U * Vt).T
    return numpy.vstack([numpy.hstack(((s2 / s1) * R,
                                       c2.T - (s2 / s1) * R * c1.T)),
                         numpy.matrix([0., 0., 1.])])

def get_landmarks(im):
    rects = detector(im, 1)
    #rects=rectss[0]
    if len(rects) > 1:
        rects=rects[0]
    #if len(rects) == 0:
    #    print ('NoFaces')
    return numpy.matrix([[p.x, p.y] for p in predictor(im, rects[0]).parts()])

def read_im_and_landmarks(fname):
    im = cv2.imread(fname, cv2.IMREAD_COLOR)
    im = cv2.resize(im, (im.shape[1] * SCALE_FACTOR,
                         im.shape[0] * SCALE_FACTOR))
    s = get_landmarks(im)
    return im, s

def deal_landmarks(landmarks):
    order=[37,38,39,40,41,42]
    im = cv2.imread(fname, cv2.IMREAD_COLOR)
    im = cv2.resize(im, (im.shape[1] * SCALE_FACTOR,
                         im.shape[0] * SCALE_FACTOR))
    s = get_landmarks(im)
    return im, s

def warp_im(im, M, dshape):
    output_im = numpy.zeros(dshape, dtype=im.dtype)
    cv2.warpAffine(im,
                   M[:2],
                   (dshape[1], dshape[0]),
                   dst=output_im,
                   borderMode=cv2.BORDER_TRANSPARENT,
                   flags=cv2.WARP_INVERSE_MAP)
    return output_im


w_img='w.jpg'
im1, landmarks1 = read_im_and_landmarks(w_img)

wo_img='wo.jpg'
im2, landmarks2 = read_im_and_landmarks(wo_img)

M = transformation_from_points(landmarks1[ALIGN_POINTS],landmarks2[ALIGN_POINTS])
#M = transformation_from_points(landmarks1,landmarks2)
warped_im2 = warp_im(im2, M, im1.shape)
cv2.imwrite('warped_im2.jpg', warped_im2)
效果: