C#(一沙框架) .net core3.1 SignalR 服务端推送消息至客户端的实现方法,用弹窗插件进行显示,非常美观实用
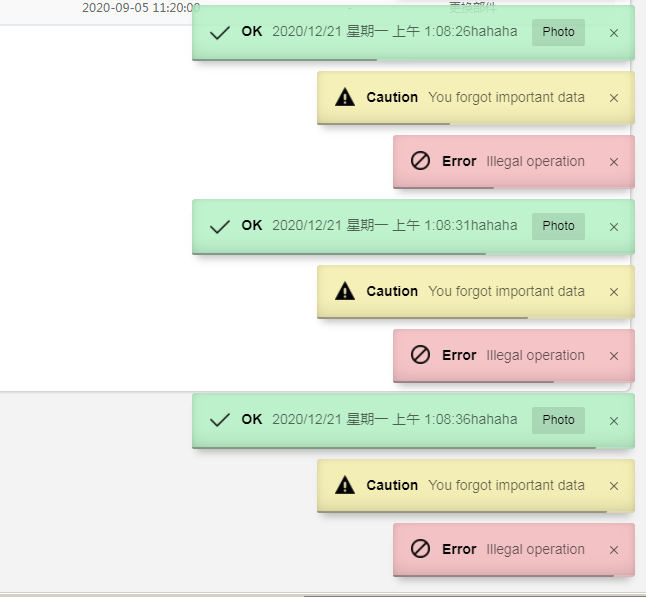
运行效果:
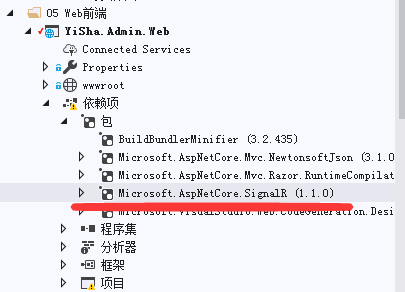
1、安装Microsoft.AspNetCore.SignalR(安装方法自行百度)
2、引入chat.js、signalr.js(请自行百度下载)

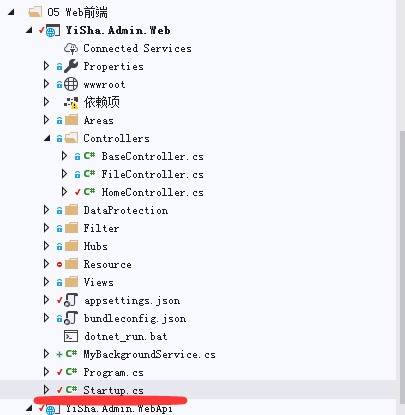
3、新建ChatHub.cs

ChatHub.cs代码:
using Microsoft.AspNetCore.SignalR;
using System.Threading.Tasks;

namespace YiSha.Admin.Web
{
    public class ChatHub : Hub
    {
        public async Task SendMessage(string msg)
        {
            await Clients.All.SendAsync("ReceiveMessage", msg);
        }
    }
}
4、服务端后台处理程序,新建MyBackgroundService.cs

MyBackgroundService.cs代码:
using Microsoft.Extensions.Hosting;
using System;
using System.Threading;
using System.Threading.Tasks;

namespace YiSha.Admin.Web
{
    public class PopupMessage : BackgroundService
    {
        protected override async Task ExecuteAsync(CancellationToken stoppingToken)
        {
            while (!stoppingToken.IsCancellationRequested)
            {
                try
                {
                    //需要执行的任务
                    var pm = new Controllers.HomeController(Controllers.HomeController.HC);//HC为Controller中定义的ChatHub的静态上下文变量
                    //弹窗消息处理
                    await pm.PopupMessage(DateTime.Now.ToString() + "hahaha");

                }
                catch (Exception ex)
                {
                    //LogHelper.Error(ex.Message);
                }
                await Task.Delay(5000, stoppingToken);//等待5秒
            }
        }
    }
}
5、前端页面(整个项目的首页index)

在index.cshtml中引入
<script src="~/yisha/js/SignalR/signalr.js"></script>

<script src="~/yisha/js/iziToast/iziToast.js" type="text/javascript"></script>
在index.cshtml的<script>中添加如下代码:(其中【对接收到的消息进行处理、显示】是弹窗消息插件调用方法,弹窗消息插件的其他细节在本文的最后给与详细介绍)
    var connection = new signalR.HubConnectionBuilder().withUrl("/chathub").build();

    connection.on("ReceiveMessage", function (data) {
        var encodedMsg = data.msg;//获取接收到的消息内容
        //对接收到的消息进行处理、显示
        iziToast.success({
            title: 'OK',
            message: encodedMsg,
            position: 'bottomRight',
            transitionIn: 'bounceInUp',
            //transitionIn: 'flipInX',fadeInDown
            transitionOut: 'flipOutX',
            // iconText: 'star',
            onOpen: function(){
                console.log('callback abriu! success');
            },
            onClose: function(){
                console.log("callback fechou! success");
            },
            buttons: [
            ['<button>Photo</button>', function (instance, toast) {

            }],
        ]
        });

        iziToast.warning({
            title: 'Caution',
            message: 'You forgot important data',
            position: 'bottomRight',
            transitionIn: 'bounceInUp',
            transitionOut: 'flipOutX'
        });

        iziToast.error({
            title: 'Error',
            message: 'Illegal operation',
            position: 'bottomRight',
            transitionIn: 'bounceInUp'
        });

    });
    connection.start().then(function () {
        //document.getElementById("sendButton").disabled = false;
    }).catch(function (err) {
        return console.error(err.toString());
    });

    async function start() {
        try {
            await connection.start({ transport: ['webSockets'] });
            console.log("connected");
        } catch (err) {
            console.log(err);
            setTimeout(() => start(), 5000);
        }
    };

    connection.onclose(async () => {
        start();
    });
6、index对应的controller

在index对应的controller中添加如下代码:
        #region SignalR
        public static IHubContext<ChatHub> HC;

        private IHubContext<ChatHub> _hubContext;

        public HomeController(IHubContext<ChatHub> hubContext)
        {
            this._hubContext = hubContext;
            HC = hubContext;
        }
        public async Task<IActionResult> PopupMessage(string message)
        {
            if (_hubContext == null) return Json(new { code = "0", msg = "" });
            await _hubContext.Clients.All.SendAsync("ReceiveMessage", new { msg = message });
            return Json(new { code = "success", msg = "发送成功" });
        }
        #endregion
7、修改startup.cs
在startup.cs的ConfigureServices中添加如下代码:
services.AddSignalR();
services.AddSingleton<Microsoft.Extensions.Hosting.IHostedService, PopupMessage>();
在startup.cs的Configure中添加如下代码:
            app.UseEndpoints(endpoints =>
            {
                endpoints.MapHub<ChatHub>("/chathub");

            });
至此,SignalR的整个处理过程就完成了
下面介绍一下前端消息弹窗插件的实现方法,非常美观实用(下载地址:https://www.jq22.com/jquery-info11777)
1、插件下载及导入项目

2、在index的模板中引入插件CSS
    <link rel="stylesheet" href="~/yisha/css/iziToast/iziToast.min.css">
    <link rel="stylesheet" href="~/yisha/css/iziToast/demo.css">
3、在index中引入插件js(参见上面第5步)
<script src="~/yisha/js/iziToast/iziToast.js" type="text/javascript"></script>
4、在index中调用弹窗显示方法(参见上面第5步)
        //对接收到的消息进行处理、显示
        iziToast.success({
            title: 'OK',
            message: encodedMsg,
            position: 'bottomRight',
            transitionIn: 'bounceInUp',
            //transitionIn: 'flipInX',fadeInDown
            transitionOut: 'flipOutX',
            // iconText: 'star',
            onOpen: function(){
                console.log('callback abriu! success');
            },
            onClose: function(){
                console.log("callback fechou! success");
            },
            buttons: [
            ['<button>Photo</button>', function (instance, toast) {

            }],
        ]
        });

        iziToast.warning({
            title: 'Caution',
            message: 'You forgot important data',
            position: 'bottomRight',
            transitionIn: 'bounceInUp',
            transitionOut: 'flipOutX'
        });

        iziToast.error({
            title: 'Error',
            message: 'Illegal operation',
            position: 'bottomRight',
            transitionIn: 'bounceInUp'
        });
此代码已测试成功,如果有问题请反馈,如果觉得对你有帮助请点击【推荐】谢谢!