4.1.3.微服务的核心之springboot重新认识【上】
3.1.springboot重新认识
3.1.1.springboot的前世今生
3.1.1.1.spring boot是什么?
从spring framework开始,核心功能:IOC/DI和MVC,AOP.
spring中bean自动注入,可以基于注解和xml配置方式。基于spring+spring mvc +mybatis,即ssm框架开发web项目。
往往需要进行多个文件配置。这个配置对于开发人员来说,也是繁重的工作量。
spring是个好人呀,它说,我看开发人员很辛苦啊,我准备开发一个新产品,把配置文件的工作也给做了。让开发人员
可以“零配置”搭建web项目。
spring团队,再一想,基于ssm开发,还需要在pom.xml中添加很多依赖,也很是消耗开发人员的时间呀。这个添加依赖的
工作,我们也来做了吧!于是,spring想出了starter思想,设计starter依赖包。开发时只要引入这个依赖包,spring开发的一些基本包
依赖就可以省事了。
spring 团队,在spring的基础上,开发了新产品springboot,在2014年发布1.0版本,它成为了一个更加轻量级的框架。
springboot就具有基本功能:零配置,starter封装依赖,main启动项目。
3.1.1.2.spring boot产生
在2014年发布1.0版本。
3.1.2.spring mvc项目构建与springboot构建web项目
3.1.2.1.基于ssm框架构建web项目流程
1.创建一个web项目工程【基于maven或gradle】
2.pom.xml中添加相关依赖,spring+mybatis+mysql+servlet+...
3.web.xml配置DispatcherServlet
4.创建spring-mvc.xml配置【配置自动扫描,注解驱动。。。】
5.创建Controller,及相关服务bean【添加spring-bean.xml配置。。。】
6.启动项目,发布到tomcat
这种流程,是每一个基于ssm开发web项目的通用模板。为了减少这个模板化创建过程,可以基于已经创建好的web项目结构,
手动创建一个maven项目骨架。
然后,通过命令行,输入基本参数,创建一个基本ssm项目模板。
1.基于ssm搭建简单的web工程demo
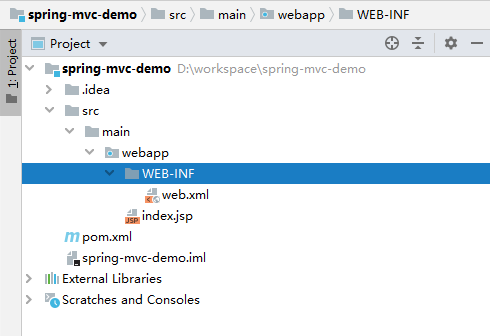
[1]使用maven的web骨架创建web工程
工程结构如下所示:
【2】pom.xml中添加相关依赖
spring相关依赖:
<dependency>
    <groupId>org.springframework</groupId>
    <artifactId>spring-core</artifactId>
    <version>${spring.version}</version>
  </dependency>
    <dependency>
      <groupId>org.springframework</groupId>
      <artifactId>spring-beans</artifactId>
      <version>${spring.version}</version>
    </dependency>
    <dependency>
      <groupId>org.springframework</groupId>
      <artifactId>spring-context</artifactId>
      <version>${spring.version}</version>
    </dependency>
    <dependency>
      <groupId>org.springframework</groupId>
      <artifactId>spring-web</artifactId>
      <version>${spring.version}</version>
    </dependency>
    <dependency>
      <groupId>org.springframework</groupId>
      <artifactId>spring-webmvc</artifactId>
      <version>${spring.version}</version>
    </dependency>
    <dependency>
      <groupId>org.springframework</groupId>
      <artifactId>spring-expression</artifactId>
      <version>${spring.version}</version>
    </dependency>
    <dependency>
      <groupId>org.springframework</groupId>
      <artifactId>spring-aop</artifactId>
      <version>${spring.version}</version>
    </dependency>
【2】修改web.xml,配置DispatcherServlet
<!DOCTYPE web-app PUBLIC
 "-//Sun Microsystems, Inc.//DTD Web Application 2.3//EN"
 "http://java.sun.com/dtd/web-app_2_3.dtd" >

<web-app>
  <display-name>Archetype Created Web Application</display-name>

  <servlet>
    <servlet-name>springmvc</servlet-name>
    <servlet-class>org.springframework.web.servlet.DispatcherServlet</servlet-class>
    <init-param>
      <param-name>contextConfigLocation</param-name>
      <param-value>classpath:dispatcher-servlet.xml</param-value>
    </init-param>
  </servlet>
  <servlet-mapping>
    <servlet-name>springmvc</servlet-name>
    <url-pattern>/</url-pattern>
  </servlet-mapping>
</web-app>
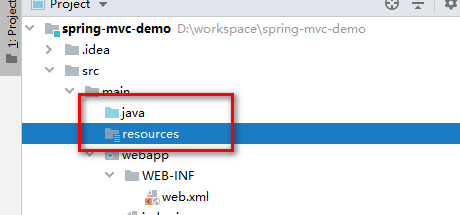
并且在resources资源目录下创建dispatcher-servlet.xml配置文件。
注意:
idea工具下使用maven搭建的新的web工程,默认是没有resources目录的。需要创建目录,如下所示。
然后,创建dispatcher-servlet.xml配置文件:
<?xml version="1.0" encoding="UTF-8"?>
<beans xmlns="http://www.springframework.org/schema/beans"
       xmlns:xsi="http://www.w3.org/2001/XMLSchema-instance"
       xmlns:context="http://www.springframework.org/schema/context"
       xmlns:mvc="http://www.springframework.org/schema/mvc"
       xmlns:aop="http://www.springframework.org/schema/aop"
       xsi:schemaLocation="http://www.springframework.org/schema/beans http://www.springframework.org/schema/beans/spring-beans.xsd
         http://www.springframework.org/schema/context http://www.springframework.org/schema/context/spring-context.xsd
         http://www.springframework.org/schema/mvc http://www.springframework.org/schema/context/spring-mvc.xsd
         http://www.springframework.org/schema/aop http://www.springframework.org/schema/context/spring-aop.xsd"
       default-autowire="byName">
    <context:component-scan base-package="com.wf"/>
    <context:annotation-config/>
    <!--开启注解驱动-->
    <mvc:annotation-driven/>
    <!--定义视图解析器-->
    <bean id="view" class="org.springframework.web.servlet.view.InternalResourceViewResolver">
        <property name="prefix" value="/WEB-INF/views"/>
        <property name="suffix" value="*.jsp"/>
    </bean>
</beans>
【3】编写controller类
package com.wf.controller;

import org.springframework.web.bind.annotation.GetMapping;
import org.springframework.web.bind.annotation.RestController;

/**
 * @ClassName HelloController
 * @Description 测试controller
 * @Author wf
 * @Date 2020/7/3 17:15
 * @Version 1.0
 */
@RestController
public class HelloController {
    @GetMapping("/test")
    public String test(){
        return "Hello World";
    }
}
【4】启动项目,发布到tomcat
需要添加一个tomcat,需要本地安装tomcat8.
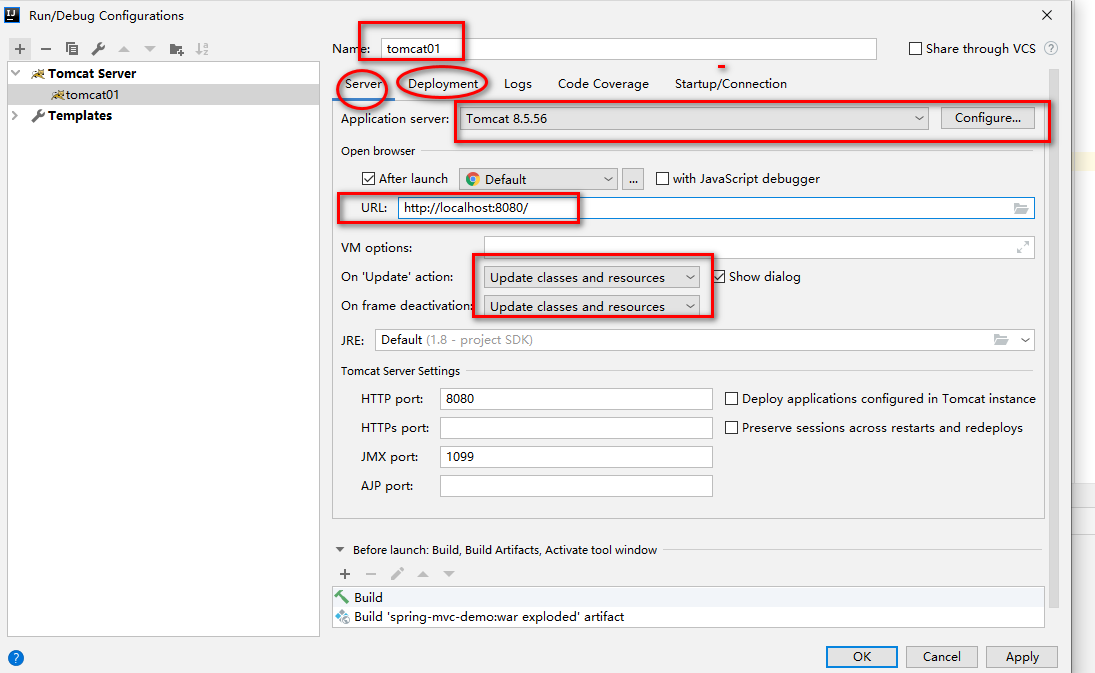
注意:application context表示项目根路径。【这里修改为/】
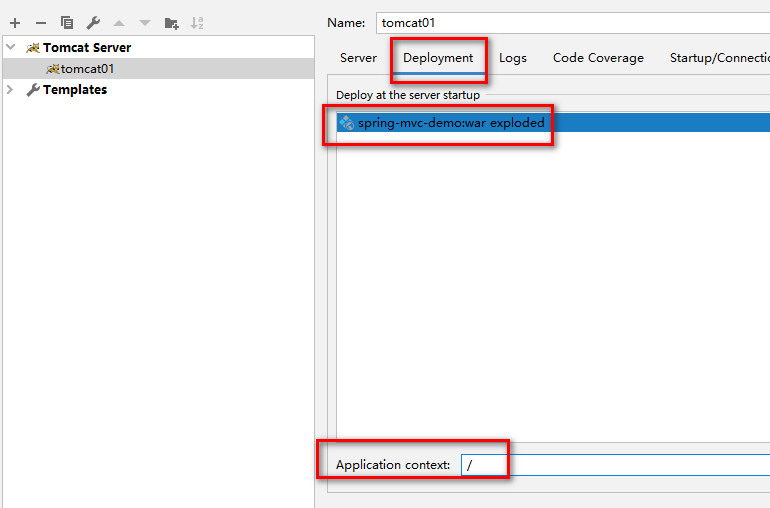
然后,页面访问,响应结果如下所示:
3.1.2.2.基于springboot构建web项目
1.使用idea的spring initialzr插件创建springboot项目
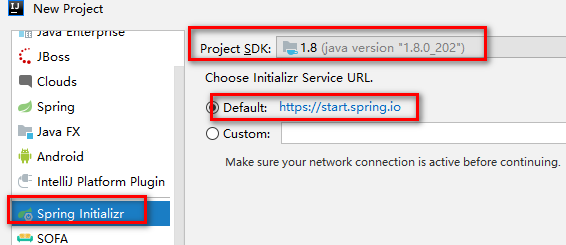
设置项目坐标:
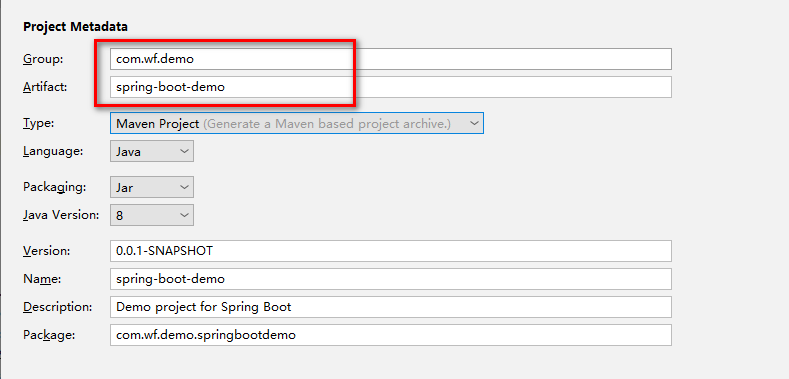
添加依赖,选择web--->Spring web,并设置spring boot版本,如下所示:

默认生成项目结构如下所示:

2.对比springboot项目与spring-web项目的区别
可以看到springboot是一个jar文件。并且提供统一的main启动入口。如下所示:
package com.wf.demo.springbootdemo;

import org.springframework.boot.SpringApplication;
import org.springframework.boot.autoconfigure.SpringBootApplication;

@SpringBootApplication
public class SpringBootDemoApplication {

    public static void main(String[] args) {
        SpringApplication.run(SpringBootDemoApplication.class, args);
    }

}
我们可以把Application类当成一个Controller,定义接口方法,如下所示:
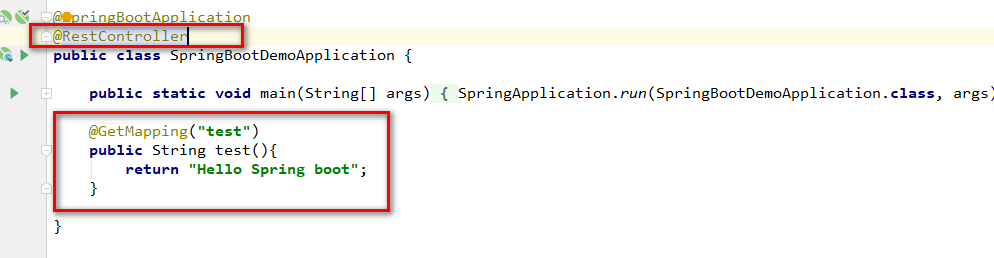
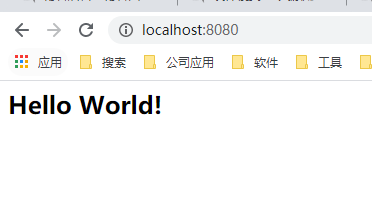
然后,启动main方法,浏览器访问:http://localhost:8080/test,响应结果如下所示:
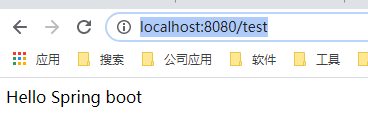
说明:
使用spring boot开发web项目是如此的简单。【啥东西都不用配置】
3.1.2.3.springboot再认识
通过springboot使用demo,我们了解springboot到底是一个什么样的东西。
它是一个约定优于配置,理念下的一个产品。
1.内置tomcat容器
我们看springboot项目的启动很简单,只需要运行main方法。当会把程序发布到容器中,它是如何实现呢?
其实它是内置tomcat容器。从项目启动日志来看,springboot2.3.1版本,内置tomcat版本为9.0.36.

它这个tomcat内置是如何实现的呢?
我们可以查看pom.xml文件,有一个spring-boot-starter-web依赖jar包,
<dependency>
    <groupId>org.springframework.boot</groupId>
    <artifactId>spring-boot-starter-web</artifactId>
</dependency>
只要添加这个依赖,就能内置tomcat.内部tomcat依赖jar如下:
 <dependency>
      <groupId>org.springframework.boot</groupId>
      <artifactId>spring-boot-starter-tomcat</artifactId>
      <version>2.3.1.RELEASE</version>
      <scope>compile</scope>
    </dependency>
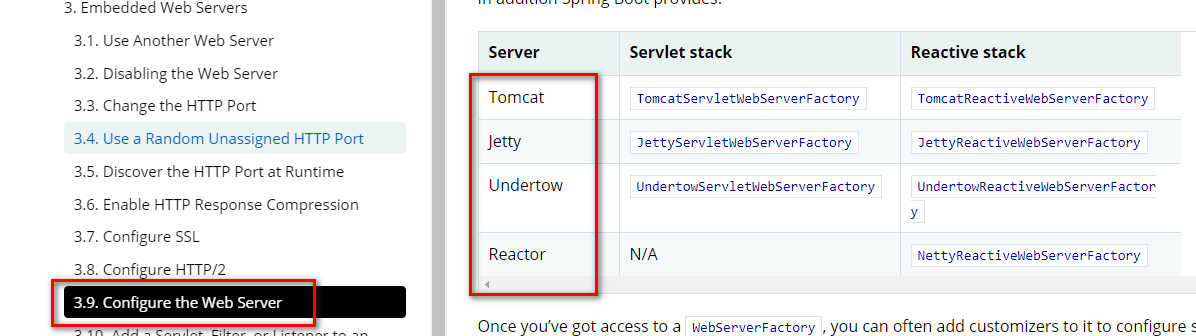
spring boot默认支持四种容器布署,可以通过官方文档查看:
https://docs.spring.io/spring-boot/docs/2.3.1.RELEASE/reference/html/howto.html#howto-configure-webserver
2.项目结构不同
默认提供配置文件application.properties
3.starter启动依赖
<parent>
    <groupId>org.springframework.boot</groupId>
    <artifactId>spring-boot-starter-parent</artifactId>
    <version>2.3.1.RELEASE</version>
    <relativePath/> <!-- lookup parent from repository -->
</parent>
<dependencies>
    <dependency>
        <groupId>org.springframework.boot</groupId>
        <artifactId>spring-boot-starter-web</artifactId>
    </dependency>

    <dependency>
        <groupId>org.springframework.boot</groupId>
        <artifactId>spring-boot-starter-test</artifactId>
        <scope>test</scope>
        <exclusions>
            <exclusion>
                <groupId>org.junit.vintage</groupId>
                <artifactId>junit-vintage-engine</artifactId>
            </exclusion>
        </exclusions>
    </dependency>
</dependencies>
3.1.3.springboot集成mybatis
springboot是一个web层框架,如果需要调用dao层服务。还是需要集成orm框架【如:mybatis】
当然,也可以使用spring jdbc组件。
3.1.3.1.集成mybatis方案
1.添加依赖
如:mybatis-starter,数据库mysql驱动包
<!--集成mybatis-->
        <dependency>
            <groupId>org.mybatis.spring.boot</groupId>
            <artifactId>mybatis-spring-boot-starter</artifactId>
            <version>2.1.2</version>
        </dependency>
        <dependency>
            <groupId>mysql</groupId>
            <artifactId>mysql-connector-java</artifactId>
        </dependency>
2.配置数据源
spring.datasource.username=root
spring.datasource.password=root
spring.datasource.url=jdbc:mysql://localhost:3306/test_springboot?useUnicode=true&characterEncoding=utf8&serverTimezone=CTT
spring.datasource.driver-class-name=com.mysql.cj.jdbc.Driver
3.mybatis相关类定义
可以基于反向工程生成,也使用在线生成工具,如下所示:
这里自己编写:
package com.wf.demo.springbootdemo.dao.mapper;

import com.wf.demo.springbootdemo.dao.pojo.User;
import org.apache.ibatis.annotations.Mapper;

/**
 * @ClassName UserMapper
 * @Description 用户服务接口
 * @Author wf
 * @Date 2020/7/6 12:15
 * @Version 1.0
 */
@Mapper
public interface UserMapper {
    int insert(User user);
}
package com.wf.demo.springbootdemo.service;

import com.wf.demo.springbootdemo.dao.pojo.User;

/**
 * @ClassName IUserService
 * @Description 用户服务
 * @Author wf
 * @Date 2020/7/6 12:26
 * @Version 1.0
 */
public interface IUserService {
    int insert(User user);
}
package com.wf.demo.springbootdemo.service;

import com.wf.demo.springbootdemo.dao.mapper.UserMapper;
import com.wf.demo.springbootdemo.dao.pojo.User;
import org.springframework.beans.factory.annotation.Autowired;
import org.springframework.stereotype.Service;

/**
 * @ClassName UserServiceImpl
 * @Description service实现
 * @Author wf
 * @Date 2020/7/6 12:27
 * @Version 1.0
 */
@Service
public class UserServiceImpl implements IUserService {
    @Autowired
    private UserMapper userMapper;
    @Override
    public int insert(User user) {
        return userMapper.insert(user);
    }
}
package com.wf.demo.springbootdemo.web;

import com.wf.demo.springbootdemo.dao.pojo.User;
import com.wf.demo.springbootdemo.service.IUserService;
import org.springframework.beans.factory.annotation.Autowired;
import org.springframework.beans.factory.annotation.Value;
import org.springframework.web.bind.annotation.GetMapping;
import org.springframework.web.bind.annotation.RestController;

/**
 * @ClassName HelloController
 * @Description 测试controller
 * @Author wf
 * @Date 2020/7/6 11:27
 * @Version 1.0
 */
@RestController
public class HelloController {
    //配置文件注入
//    @Value("Mic")
//    private String name;
    @Autowired
    private IUserService userService;

    @GetMapping("hello")
    public String test(){
        User user = new User();
        user.setId(18);
        user.setName("MIc");
        userService.insert(user);
        return "success";
    }
}
4.resources下定义mapper.xml文件
<?xml version="1.0" encoding="UTF-8" ?>
<!DOCTYPE mapper PUBLIC "-//mybatis.org//DTD Mapper 3.0//EN" "http://mybatis.org/dtd/mybatis-3-mapper.dtd" >

<mapper namespace="com.wf.demo.springbootdemo.dao.mapper.UserMapper">
    <sql id="table_name">
        t_user
    </sql>
    <sql id="insert_columns">
        id,
        name
    </sql>
    <sql id="insert_values">
        #{id},#{name}
    </sql>
    <insert id="insert" keyProperty="id" useGeneratedKeys="true">
        insert into
        <include refid="table_name"/>
        (
        <include refid="insert_columns"/>
        )
        values
        (
        <include refid="insert_values"/>
        )
    </insert>
</mapper>
5.修改配置
@Mapper是ibatis自定义注解,默认spring是无法扫描到自定义注解的。需要进行扫描处理。
解决方案:
可以基于spring中的扫描机制,在扫描注解时,去拦截@Mapper注解。
所以,在程序启动入口进行mapper扫描处理,如下所示:
@MapperScan("com.wf.demo.springbootdemo.dao.mapper")
public class SpringBootDemoApplication {
然后,配置mapper.xml文件路径:
mybatis.mapper-locations=classpath:*Mapper.xml
然后,本地新建数据库test_springboot,并创建t_user表。
CREATE TABLE `t_user` (
`id` int(11) NOT NULL AUTO_INCREMENT,
`name` varchar(255) DEFAULT NULL,
PRIMARY KEY (`id`)
) ENGINE=InnoDB DEFAULT CHARSET=utf8;
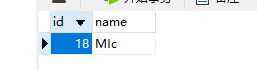
然后,运行main,页面进行请求:
然后,查看数据库是否插入成功?如下所示:
4.1.4.微服务的核心之springboot重新认识【下】
时长:60min
3.1.4.springboot与微服务
spring boot用于创建一个微服务项目,然后注册服务到注册中心。
3.1.5.springboot的特性
主要是四大核心机制:
》EnableAutoConfiguration 自动装配
》starter启动依赖,开箱即用
》Actuator监控
》Spring boot cli【可以基于groovy脚本快速创建项目】
3.1.6.spring注解驱动的发展过程
3.1.6.1.spring framework注解驱动的发展历程
1.spring1.X阶段
IOC功能实现:bean注入,最初使用xml配置的方式,如下所示:
<bean id="xxx" class="xxx"/>
通过这种方式,就能将bean注入IOC容器,然后通过getBean方法从IOC容器中获取bean实例。

这种基于xml配置的方式,有一个缺点,它会大量的依赖于配置文件。

下面在spring-mvc项目中,写一个测试示例:
<?xml version="1.0" encoding="UTF-8"?>
<beans xmlns="http://www.springframework.org/schema/beans"
       xmlns:xsi="http://www.w3.org/2001/XMLSchema-instance"
       xmlns:context="http://www.springframework.org/schema/context"
       xmlns:mvc="http://www.springframework.org/schema/mvc"
       xmlns:aop="http://www.springframework.org/schema/aop"
       xsi:schemaLocation="http://www.springframework.org/schema/beans http://www.springframework.org/schema/beans/spring-beans.xsd
         http://www.springframework.org/schema/context http://www.springframework.org/schema/context/spring-context.xsd
         http://www.springframework.org/schema/mvc http://www.springframework.org/schema/context/spring-mvc.xsd
         http://www.springframework.org/schema/aop http://www.springframework.org/schema/context/spring-aop.xsd"
       default-autowire="byName">
    <bean id="helloService" class="com.wf.service.HelloService"/>
</beans>
然后,定义Service类:
package com.wf.service;

/**
 * @ClassName HelloService
 * @Description service bean定义
 * @Author wf
 * @Date 2020/7/6 13:55
 * @Version 1.0
 */
public class HelloService {
}
定义测试类:
package com.wf.service;

import org.springframework.context.ApplicationContext;
import org.springframework.context.support.ClassPathXmlApplicationContext;

/**
 * @ClassName HelloServiceDemo
 * @Description service bean获取测试
 * @Author wf
 * @Date 2020/7/6 14:03
 * @Version 1.0
 */
public class HelloServiceDemo {
    public static void main(String[] args) {
        ApplicationContext context = new ClassPathXmlApplicationContext("classpath:spring-bean.xml");
        HelloService service = context.getBean(HelloService.class);
        System.out.println(service);
    }
}
测试结果如下:

说明:
HelloService 这个bean注入成功,并能从ioc容器中取得实例。
这里,使用xml配置方式,注入bean,管理bean,当配置变多,变得难以维护。
2.Spring2.X阶段
Spring2.5中引入注解驱动开发功能。如:
@Component,@Service,@Autowired,@Controller,@RequestMapping...
下面在spring-mvc项目中,以示例代码来说明,注解驱动开发的使用方式。
【1】创建Service类
package com.wf.service.annotation;

import org.springframework.stereotype.Component;

/**
 * @ClassName DemoServiceWithAnnotation
 * @Description 定义service bean
 * @Author wf
 * @Date 2020/7/6 14:16
 * @Version 1.0
 */
@Component
//@Service
public class DemoServiceWithAnnotation {
}
说明:
这里直接使用@Component注解注入bean,当然,也可以使用@Service注解。
【2】xml中配置注解扫描包路径
<!--注解扫描-->
<context:component-scan base-package="com.wf.service"/>
【3】测试bean实例获取
package com.wf.service.annotation;

import org.springframework.context.ApplicationContext;
import org.springframework.context.support.ClassPathXmlApplicationContext;

/**
 * @ClassName DemoServiceMain
 * @Description 测试bean获取
 * @Author wf
 * @Date 2020/7/6 14:21
 * @Version 1.0
 */
public class DemoServiceMain {
    public static void main(String[] args) {
        ApplicationContext context = new ClassPathXmlApplicationContext("classpath:spring-bean.xml");
        DemoServiceWithAnnotation bean = context.getBean(DemoServiceWithAnnotation.class);
        System.out.println(bean);
    }

}
测试结果如下所示:

说明:
这种注解驱动开发方式,只需要在xml中配置包扫描路径,即可扫描包下带注解的所有bean,并注入IOC容器。
使用起来,方便很多。
3.spring3.X阶段
提供了取代xml配置文件的注解@Configuration,声明某个bean为配置类,可以以java代码的方式进行配置。
这其实,是一种去xml化的发展趋势。
下面以示例代码,来说明java代码进行配置的使用方法。
【1】定义Service类
package com.wf.service.demo1;

/**
 * @ClassName DemoServiceWithConf
 * @Description bean 定义
 * @Author wf
 * @Date 2020/7/6 14:38
 * @Version 1.0
 */
public class DemoServiceWithConf {
}
注意:
这里没有声明注解。
【2】定义bean配置类
package com.wf.service.demo1;

import org.springframework.context.annotation.Bean;
import org.springframework.context.annotation.Configuration;

/**
 * @ClassName SpringConfiguration
 * @Description 配置类
 * @Author wf
 * @Date 2020/7/6 14:41
 * @Version 1.0
 */
@Configuration
public class SpringConfiguration {
    @Bean
    public DemoServiceWithConf demoServiceWithConf(){
        return new DemoServiceWithConf();
    }
}
【3】测试bean获取
package com.wf.service.demo1;

import org.springframework.context.ApplicationContext;
import org.springframework.context.annotation.AnnotationConfigApplicationContext;

/**
 * @ClassName DemoServiceMain
 * @Description 测试bean获取
 * @Author wf
 * @Date 2020/7/6 14:21
 * @Version 1.0
 */
public class DemoServiceMain {
    public static void main(String[] args) {
        ApplicationContext context = new AnnotationConfigApplicationContext(SpringConfiguration.class);
        DemoServiceWithConf bean = context.getBean(DemoServiceWithConf.class);
        System.out.println(bean);
    }

}
测试结果:

说明:
这里在配置类中,使用@Bean配置具体的某个bean。但是,如果我希望通过配置类,扫描所有的bean呢?应该怎么办呢?
这就要结合@ComponentScan和@Service注解使用。
代码修改如下:
修改配置类,代码如下:
package com.wf.service.demo1;

import org.springframework.context.annotation.Bean;
import org.springframework.context.annotation.ComponentScan;
import org.springframework.context.annotation.Configuration;

/**
 * @ClassName SpringConfiguration
 * @Description 配置类
 * @Author wf
 * @Date 2020/7/6 14:41
 * @Version 1.0
 */
@Configuration
@ComponentScan("com.wf.service.demo1")
public class SpringConfiguration {
//    @Bean
//    public DemoServiceWithConf demoServiceWithConf(){
//        return new DemoServiceWithConf();
//    }
}
定义Bean,添加@Service或@Component注解,如下所示:
package com.wf.service.demo1;

import org.springframework.stereotype.Service;

/**
 * @ClassName DemoServiceWithConf
 * @Description bean 定义
 * @Author wf
 * @Date 2020/7/6 14:38
 * @Version 1.0
 */
@Service
public class DemoServiceWithConf {
}
然后,运行测试类:

bean实例获取成功。
【4】依赖注入bean如何进行配置
service类定义:
package com.wf.service.demo2;

import com.wf.service.config.DemoServiceWithConf;

/**
 * @ClassName DemoServiceWithDependency
 * @Description 关于依赖注入bean
 * @Author wf
 * @Date 2020/7/6 14:59
 * @Version 1.0
 */
public class DemoServiceWithDependency {
    private DemoServiceWithConf demoServiceWithConf;
    //使用构造注入
    public DemoServiceWithDependency(DemoServiceWithConf demoServiceWithConf) {
        this.demoServiceWithConf = demoServiceWithConf;
    }

    public DemoServiceWithDependency() {
    }

    public void setDemoServiceWithConf(DemoServiceWithConf demoServiceWithConf) {
        this.demoServiceWithConf = demoServiceWithConf;
    }

    public DemoServiceWithConf getDemoServiceWithConf() {
        return demoServiceWithConf;
    }
}
配置类定义:
package com.wf.service.demo2;

import com.wf.service.config.DemoServiceWithConf;
import org.springframework.context.annotation.Bean;
import org.springframework.context.annotation.ComponentScan;
import org.springframework.context.annotation.Configuration;

/**
 * @ClassName SpringConfiguration
 * @Description 配置类
 * @Author wf
 * @Date 2020/7/6 14:41
 * @Version 1.0
 */
@Configuration
@ComponentScan("com.wf.service.demo1")
public class SpringConfiguration {
    @Bean
    public DemoServiceWithDependency demoServiceWithDependency(DemoServiceWithConf demoServiceWithConf){
        DemoServiceWithDependency demoServiceWithDependency = new DemoServiceWithDependency();
        demoServiceWithDependency.setDemoServiceWithConf(demoServiceWithConf);
        return demoServiceWithDependency;
    }
}
测试bean实例获取:
package com.wf.service.demo2;

import org.springframework.context.ApplicationContext;
import org.springframework.context.annotation.AnnotationConfigApplicationContext;

/**
 * @ClassName DemoServiceMain
 * @Description 测试bean获取
 * @Author wf
 * @Date 2020/7/6 14:21
 * @Version 1.0
 */
public class DemoServiceMain {
    public static void main(String[] args) {
        ApplicationContext context = new AnnotationConfigApplicationContext(SpringConfiguration.class);
        DemoServiceWithDependency bean = context.getBean(DemoServiceWithDependency.class);
        System.out.println(bean);
        System.out.println(bean.getDemoServiceWithConf());
    }

}
测试结果:

总结:
注解驱动的核心目的,是更加简单方便地装载bean.
@ComponentScan,会扫描@Service,@Controller,@Repository注解。
@Import注解,它相当于xml中<import resource="xxx"/>
下面通过示例代码,来说明@Import注解的使用及功能:
A.service类定义
package com.wf.service.demo3;

/**
 * @ClassName ImportService
 * @Description service bean定义
 * @Author wf
 * @Date 2020/7/6 15:20
 * @Version 1.0
 */
public class ImportService {
}
B.配置类定义
package com.wf.service.demo3;

import org.springframework.context.annotation.Bean;
import org.springframework.context.annotation.Configuration;

/**
 * @ClassName ImportConfiguration
 * @Description 配置类
 * @Author wf
 * @Date 2020/7/6 15:19
 * @Version 1.0
 */
@Configuration
public class ImportConfiguration {
    @Bean
//    @Scope
    public ImportService  importService(){
        return new ImportService();
    }
}
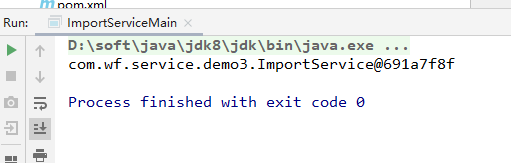
【3】测试bean获取
package com.wf.service.demo3;

import com.wf.service.demo2.SpringConfiguration;
import org.springframework.context.ApplicationContext;
import org.springframework.context.annotation.AnnotationConfigApplicationContext;

/**
 * @ClassName DemoServiceMain
 * @Description 测试bean获取
 * @Author wf
 * @Date 2020/7/6 14:21
 * @Version 1.0
 */
public class ImportServiceMain {
    public static void main(String[] args) {
        ApplicationContext context = new AnnotationConfigApplicationContext(SpringConfiguration.class);
        ImportService bean = context.getBean(ImportService.class);
        System.out.println(bean);
    }

}
注意:
ImportService是在自己的配置类中装配的,而这里使用springConfiguraion配置类加载。所以,是获取不到bean的。
为什么要用SpringConfiguration配置类来加载呢?
因为一般项目中,都会只用一个总的配置类来加载所有的bean,而不会对于每个配置类都自己来加载。
这里有两种解决方案:
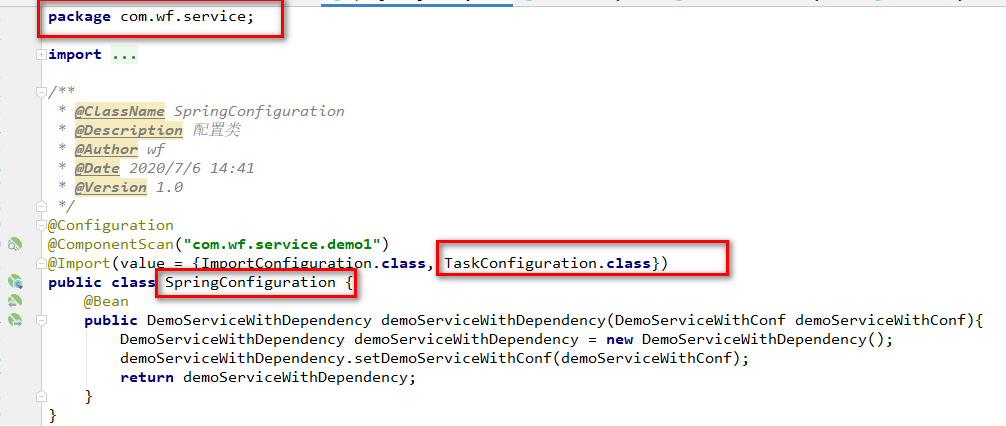
》传参多个配置类,如下所示:

》合并配置到总的配置类中,如下所示:
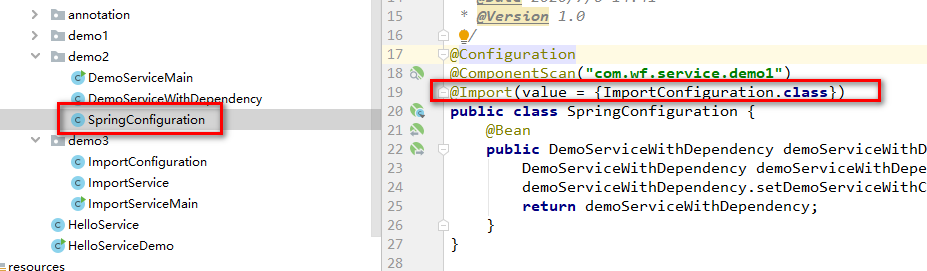
然后,基于总的配置类来加载:
package com.wf.service.demo3;

import com.wf.service.demo2.SpringConfiguration;
import org.springframework.context.ApplicationContext;
import org.springframework.context.annotation.AnnotationConfigApplicationContext;

/**
 * @ClassName DemoServiceMain
 * @Description 测试bean获取
 * @Author wf
 * @Date 2020/7/6 14:21
 * @Version 1.0
 */
public class ImportServiceMain {
    public static void main(String[] args) {
        ApplicationContext context = new AnnotationConfigApplicationContext(SpringConfiguration.class);
        ImportService bean = context.getBean(ImportService.class);
        System.out.println(bean);
    }

}
测试结果:
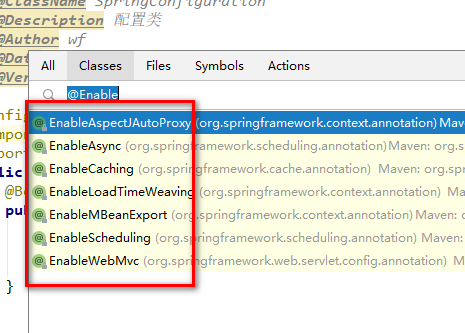
Enable模块驱动:
基于@EnableXXX模块驱动注解,如下所示:
通过注解驱动的发展,可以很方便地管理bean.如果我们希望在spring3.x模块下,集成redis需要如何做呢?
》创建一个配置类
》@Bean注解方式来声明一个bean【这个bean是一个第三方定义bean】
这个集成过程,还是比较复杂。spring索性就提供了Enable模块驱动。
使用@EnableXXX启动一个模块,把相关组件所需bean自动装配到ioc容器中。
下面通过,集成定时器,通过示例代码来说明:
A.xml中配置定时器bean
<?xml version="1.0" encoding="UTF-8"?>
<beans xmlns="http://www.springframework.org/schema/beans"
       xmlns:xsi="http://www.w3.org/2001/XMLSchema-instance"
       xmlns:context="http://www.springframework.org/schema/context"
       xmlns:task="http://www.springframework.org/schema/task"
       xsi:schemaLocation="http://www.springframework.org/schema/beans http://www.springframework.org/schema/beans/spring-beans-3.2.xsd
         http://www.springframework.org/schema/context http://www.springframework.org/schema/context/spring-context.xsd
         http://www.springframework.org/schema/task http://www.springframework.org/schema/task/spring-task-3.2.xsd"
       default-autowire="byName">

    <!--注解扫描-->
    <context:component-scan base-package="com.wf.service"/>

    <task:annotation-driven scheduler="scheduler"/>
    <!--通过开启注解驱动去扫描定时器任务执行-->
    <task:scheduler id="scheduler" pool-size="5"/>
</beans>
注意:
需要task的schema,及注解开启。
B.创建定时器bean
package com.wf.service.task;

import org.springframework.scheduling.annotation.Scheduled;
import org.springframework.stereotype.Service;

import java.util.Date;

/**
 * @ClassName TaskService
 * @Description 定时器bean
 * @Author wf
 * @Date 2020/7/6 16:20
 * @Version 1.0
 */
@Service
public class TaskService {
    @Scheduled(fixedRate = 3000)//每隔3秒钟执行一次
    public void reportCurrentTime(){
        System.out.println("current time:"+new Date());
    }
}
C.测试bean实例获取
package com.wf.service.task;

import org.springframework.context.ApplicationContext;
import org.springframework.context.support.ClassPathXmlApplicationContext;

/**
 * @ClassName TaskMain
 * @Description 测试bean获取
 * @Author wf
 * @Date 2020/7/6 16:23
 * @Version 1.0
 */
public class TaskMain {
    public static void main(String[] args) {
        ApplicationContext context = new ClassPathXmlApplicationContext("classpath:spring-task.xml");
        TaskService bean = context.getBean(TaskService.class);
        System.out.println(bean);
    }
}
测试结果如下:

下面使用Enable式配置类,实现定时器功能:
A.创建配置类
package com.wf.service.enabletask;

import org.springframework.context.annotation.ComponentScan;
import org.springframework.context.annotation.Configuration;
import org.springframework.scheduling.annotation.EnableScheduling;

/**
 * @ClassName TaskConfiguration
 * @Description 定时器配置类
 * @Author wf
 * @Date 2020/7/6 16:45
 * @Version 1.0
 */
@ComponentScan("com.wf.service.enabletask")
@EnableScheduling
@Configuration
public class TaskConfiguration {
}
注意:
这里使用@EnableScheduling注解,开启定时器模块。
B.创建定时器bean类
package com.wf.service.enabletask;

import org.springframework.scheduling.annotation.Scheduled;
import org.springframework.stereotype.Service;

import java.util.Date;

/**
 * @ClassName TaskService2
 * @Description service bean类
 * @Author wf
 * @Date 2020/7/6 16:46
 * @Version 1.0
 */
@Service
public class TaskService2 {
    @Scheduled(fixedRate = 3000)//每隔3秒钟执行一次
    public void reportCurrentTime(){
        System.out.println("current time:"+new Date());
    }
}
C.合并配置类到总配置类中
D.基于注解驱动方式获取bean实例
package com.wf.service.enabletask;

import com.wf.service.SpringConfiguration;
import org.springframework.context.ApplicationContext;
import org.springframework.context.annotation.AnnotationConfigApplicationContext;

/**
 * @ClassName TaskMain
 * @Description 测试bean获取
 * @Author wf
 * @Date 2020/7/6 16:23
 * @Version 1.0
 */
public class TaskMain {
    public static void main(String[] args) {
        ApplicationContext context = new AnnotationConfigApplicationContext(SpringConfiguration.class);
        TaskService2 bean = context.getBean(TaskService2.class);
        System.out.println(bean);
    }
}
得到一样的结果。
这种Enable模块驱动是如何实现的呢?下面来跟踪下源码,分析实现原理:
其实是AnnotationDrivenBeanDefinitionParser中parse方法在解析定时器配置。
下面debug调试xml方式定时器实现。先在AnnotationDrivenBeanDefinitionParser中设置断点如下所示:

当dubug启动main方法时,直接进入断点处。
可以看到首先会解析xml中配置的task:annotation-driven标签。这里获得mode为proxy【代理】,进入else分支

下面来看下Enable启动定时器的实现原理:
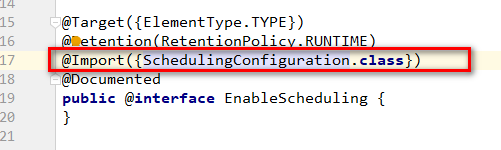
引入SchedulingConfiguration定时器配置类。
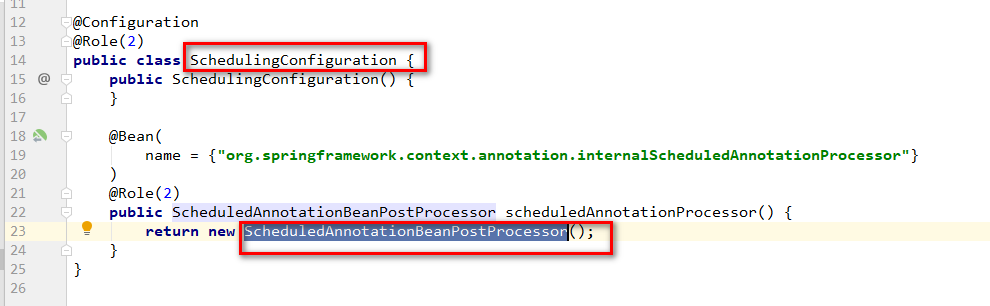
实现 ScheduledAnnotationBeanPostProcessor装配bean,两则实现方式是差不多的。