本示例用Spring MVC框架编写一个基于web的Hello World小程序,开发环境不多说,spring版本为spring-framework-4.3.4。
创建动态WEB工程HelloSpringMVC,并加入如下jar包:

在web.xml中配置DispatcherServlet:
 1 <?xml version="1.0" encoding="UTF-8"?>
 2 <web-app xmlns:xsi="http://www.w3.org/2001/XMLSchema-instance"
 3     xmlns="http://java.sun.com/xml/ns/javaee"
 4     xsi:schemaLocation="http://java.sun.com/xml/ns/javaee http://java.sun.com/xml/ns/javaee/web-app_3_0.xsd"
 5     id="WebApp_ID" version="3.0">
 6     <display-name>HelloSpringMVC</display-name>
 7     <servlet>
 8         <servlet-name>HelloSpringMVC</servlet-name>
 9         <servlet-class>org.springframework.web.servlet.DispatcherServlet</servlet-class>
10
11         <!-- 容器启动时加载这个类 -->
12         <load-on-startup>1</load-on-startup>
13     </servlet>
14
15     <servlet-mapping>
16         <servlet-name>HelloSpringMVC</servlet-name>
17         <url-pattern>/</url-pattern>
18     </servlet-mapping>
19
20
21 </web-app>
编写控制器类HelloController.java
 1 package com.young.springmvc.controller;
 2
 3 import org.springframework.stereotype.Controller;
 4 import org.springframework.ui.ModelMap;
 5 import org.springframework.web.bind.annotation.RequestMapping;
 6 import org.springframework.web.bind.annotation.RequestMethod;
 7
 8 @Controller
 9 @RequestMapping("/hello")
10 public class HelloController {
11
12   @RequestMapping(method = RequestMethod.GET)
13   public String printHello(ModelMap model) {
14     model.addAttribute("message", "Hello Spring MVC framework!");
15     return "hello";
16   }
17 }
编写默认spring配置文件[servlet-name]-servlet.xml:HelloSpringMVC-servlet.xml
 1 <?xml version="1.0" encoding="UTF-8"?>
 2 <beans xmlns="http://www.springframework.org/schema/beans"
 3    xmlns:context="http://www.springframework.org/schema/context"
 4    xmlns:xsi="http://www.w3.org/2001/XMLSchema-instance"
 5    xsi:schemaLocation="
 6    http://www.springframework.org/schema/beans
 7    http://www.springframework.org/schema/beans/spring-beans-3.0.xsd
 8    http://www.springframework.org/schema/context
 9    http://www.springframework.org/schema/context/spring-context-3.0.xsd">
10
11    <context:component-scan base-package="com.young" />
12
13    <bean class="org.springframework.web.servlet.view.InternalResourceViewResolver">
14       <property name="prefix" value="/WEB-INF/jsp/" />
15       <property name="suffix" value=".jsp" />
16    </bean>
17
18 </beans>
编写jsp文件 hello.jsp
 1 <%@ page language="java" pageEncoding="UTF-8"%>
 2 <!DOCTYPE html PUBLIC "-//W3C//DTD HTML 4.01 Transitional//EN" "http://www.w3.org/TR/html4/loose.dtd">
 3 <html>
 4 <head>
 5 <meta http-equiv="Content-Type" content="text/html; charset=ISO-8859-1">
 6 <title>Hello World</title>
 7 </head>
 8 <body>
 9     <h2>Hello, ${message}</h2>
10 </body>
11 </html>
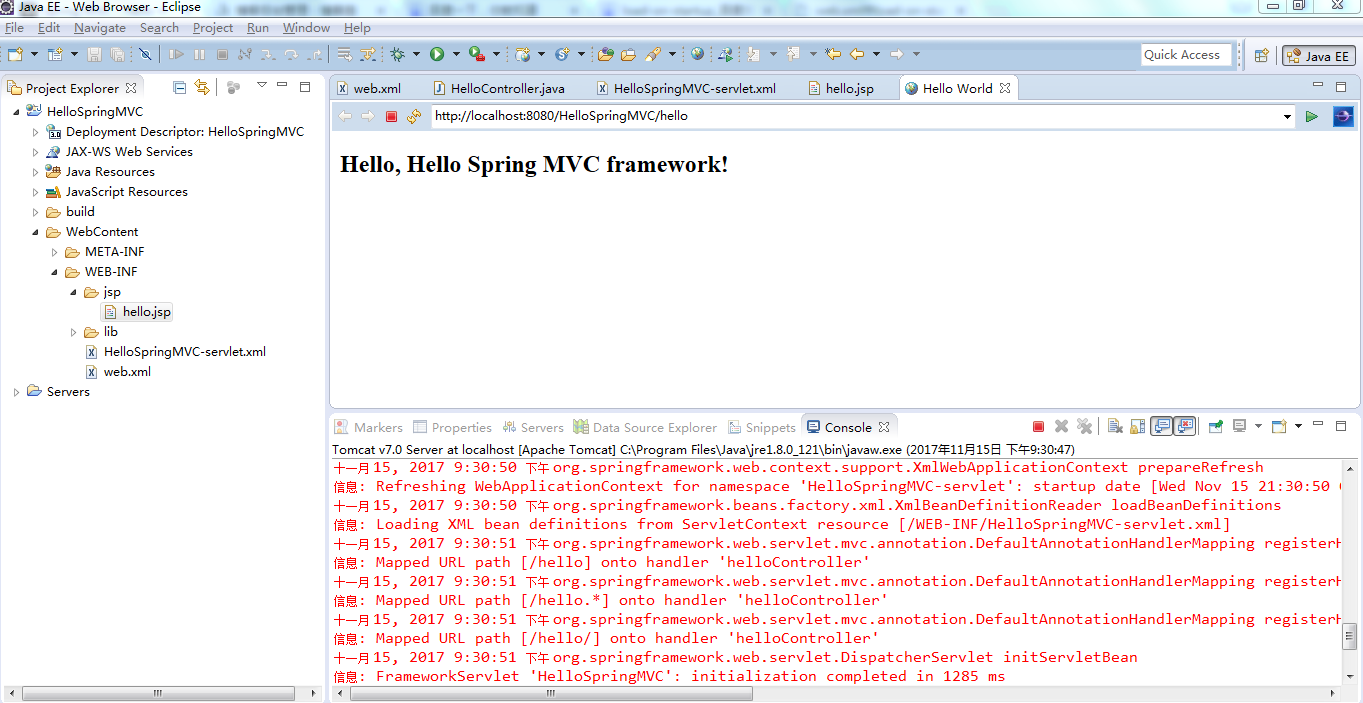
最后启动tomcat,并访问http://localhost:8080/HelloSpringMVC/hello
在该访问的URL中,HelloSpringMVC是应用程序名称,hello是在控制器中使用@RequestMapping(“/hello”)提到的虚拟子文件夹。