编写测试函数:
1. 一个项目的文件结构
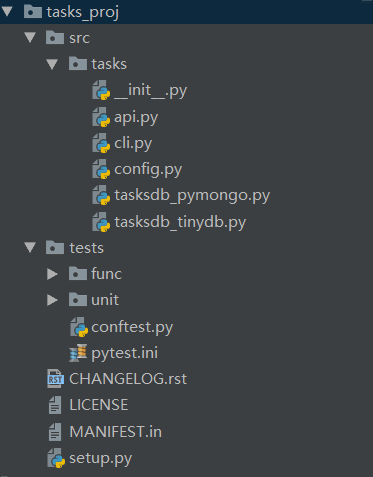
几个重要的文件,conftest.py pytest.ini __init__.py setup.py
pytest.ini 保存一些pytest在该项目下一些特性
conttest.py: pytest的本地插件库,包含hook函数和fixture函数
在test函数需要使用fixture的时候,是不需要import conftest的,直接使用;
2. 定义fixture
2.1 在当前文件定义fixture
2.2 在conftest定义fixture
@pytest.fixture(autouse=True)
def initialized_tasks_db(tmpdir):
"""Connect to db before testing, disconnect after."""
# Setup : start db
tasks.start_tasks_db(str(tmpdir), 'tiny')
yield # this is where the testing happens
# Teardown : stop db
tasks.stop_tasks_db()
备注: yield之前的代码将在测试运行之前运行,yield之后的代码将在测试运行之后执行
3. 跳过测试:在指定的函数前面加上装饰器 @pytest.nark.skip()
4. 运行测试子集: 目录作为pytest的参数 pytest tests/func
5. 运行单个测试文件: pytest -v 文件名称::函数名称////文件名称::类名::函数名称
6. 运行单个的测试类: pytest -v 文件名称::类名
7. 参数化测试:在函数前面加上装饰器 @pytest.mark.parametrize(参数),如果是给类加上装饰器,则这些数据会传递给所有的类方法
备注:我认为自动化脚本只是为了冒烟和工具而存在,并不适合做多参数的测试,所以不用深入看其用法