1.首先我们来解决一个问题
关于出现的An error happened during template parsing (template: "class path resource [templates/index.html]")报错
一般这种情况只出现在视图层,也就是我们的thymeleaf中的问题,跟java代码是没有关系的,然后我们进行排查
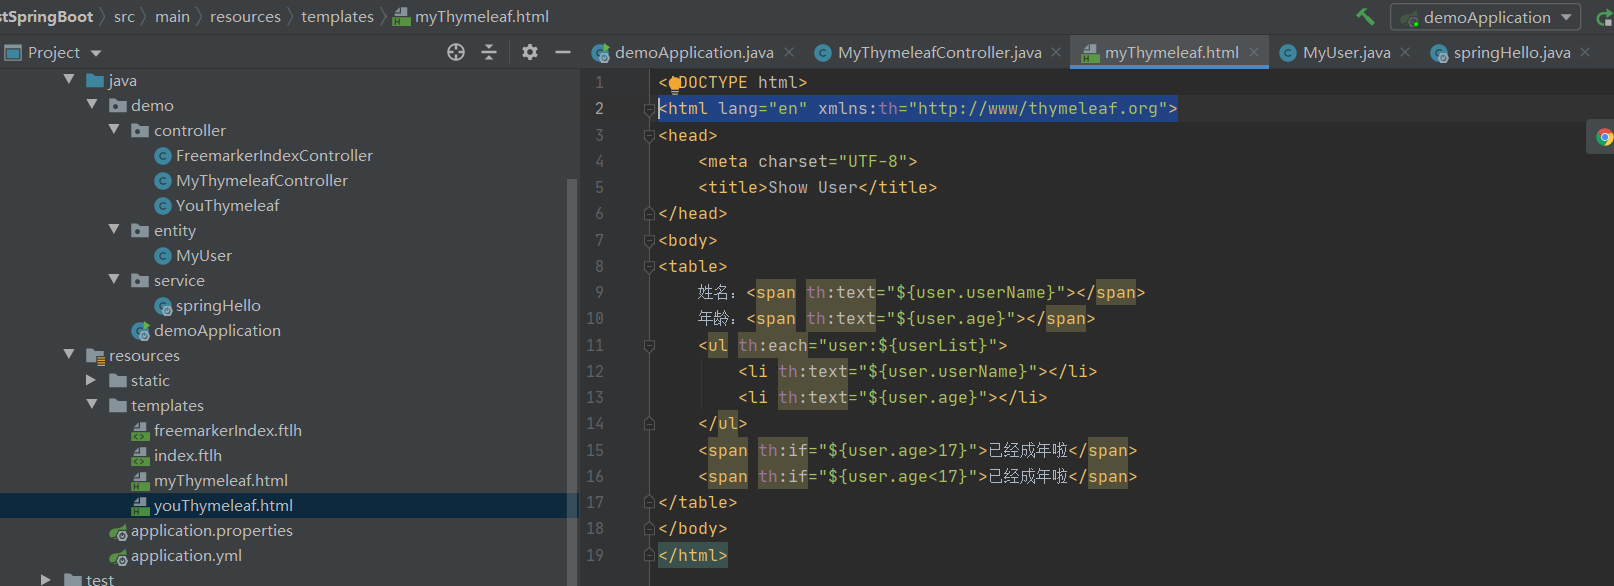
一般来说指定文件改成<html lang="en" xmlns:th="http://www/thymeleaf.org">只需要一个即可如果还存在问题则是视图层代码中的问题
2.我们直接给代码吧
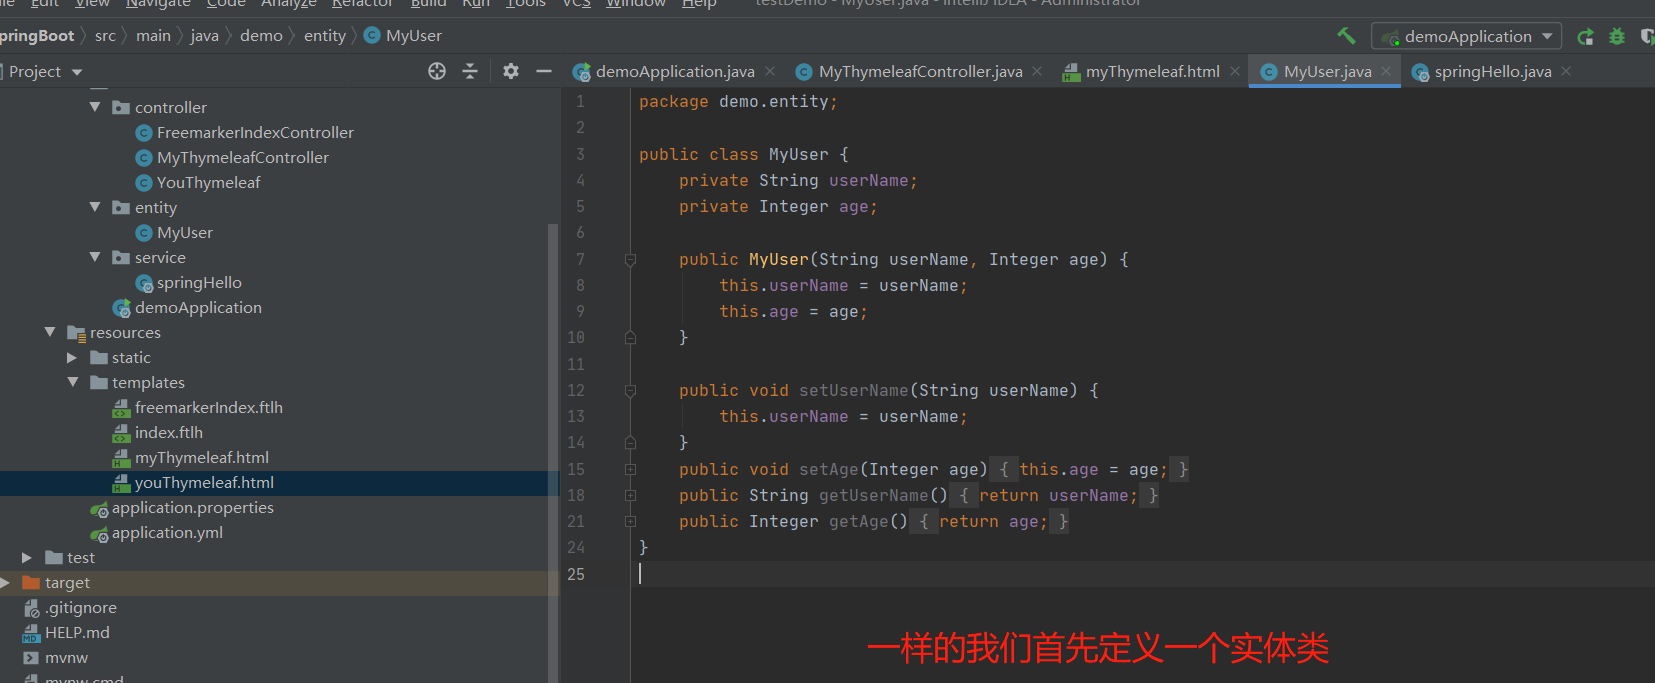
package demo.entity;

public class MyUser {
    private String userName;
    private Integer age;

    public MyUser(String userName, Integer age) {
        this.userName = userName;
        this.age = age;
    }

    public void setUserName(String userName) {
        this.userName = userName;
    }
    public void setAge(Integer age) {
        this.age = age;
    }
    public String getUserName() {
        return userName;
    }
    public Integer getAge() {
        return age;
    }
}

然后我们来编写controller层的接口
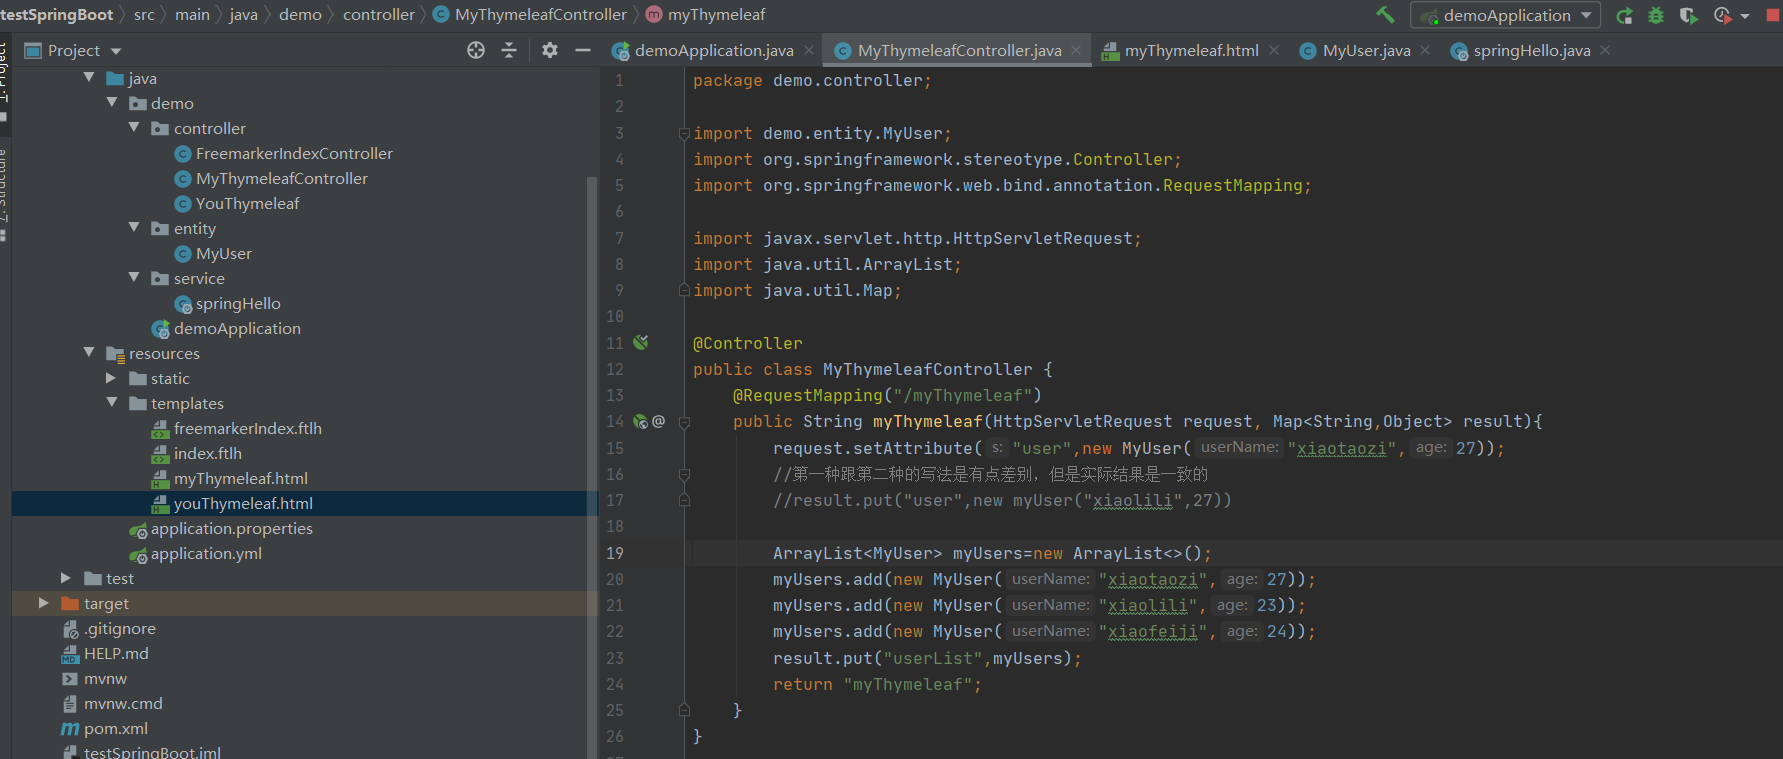
文件
package demo.controller;

import demo.entity.MyUser;
import org.springframework.stereotype.Controller;
import org.springframework.web.bind.annotation.RequestMapping;

import javax.servlet.http.HttpServletRequest;
import java.util.ArrayList;
import java.util.Map;

@Controller
public class MyThymeleafController {
    @RequestMapping("/myThymeleaf")
    public String myThymeleaf(HttpServletRequest request, Map<String,Object> result){
        request.setAttribute("user",new MyUser("xiaotaozi",27));
        //第一种跟第二种的写法是有点差别,但是实际结果是一致的
        //result.put("user",new myUser("xiaolili",27))

        ArrayList<MyUser> myUsers=new ArrayList<>();
        myUsers.add(new MyUser("xiaotaozi",27));
        myUsers.add(new MyUser("xiaolili",23));
        myUsers.add(new MyUser("xiaofeiji",24));
        result.put("userList",myUsers);
        return "myThymeleaf";
    }
}
<!DOCTYPE html>
<html lang="en" xmlns:th="http://www/thymeleaf.org">
<head>
    <meta charset="UTF-8">
    <title>Show User</title>
</head>
<body>
<table>
    姓名:<span th:text="${user.userName}"></span>
    年龄:<span th:text="${user.age}"></span>
    <ul th:each="user:${userList}">
        <li th:text="${user.userName}"></li>
        <li th:text="${user.age}"></li>
    </ul>
    <span th:if="${user.age>17}">已经成年啦</span>
    <span th:if="${user.age<17}">已经成年啦</span>
</table>
</body>
</html>
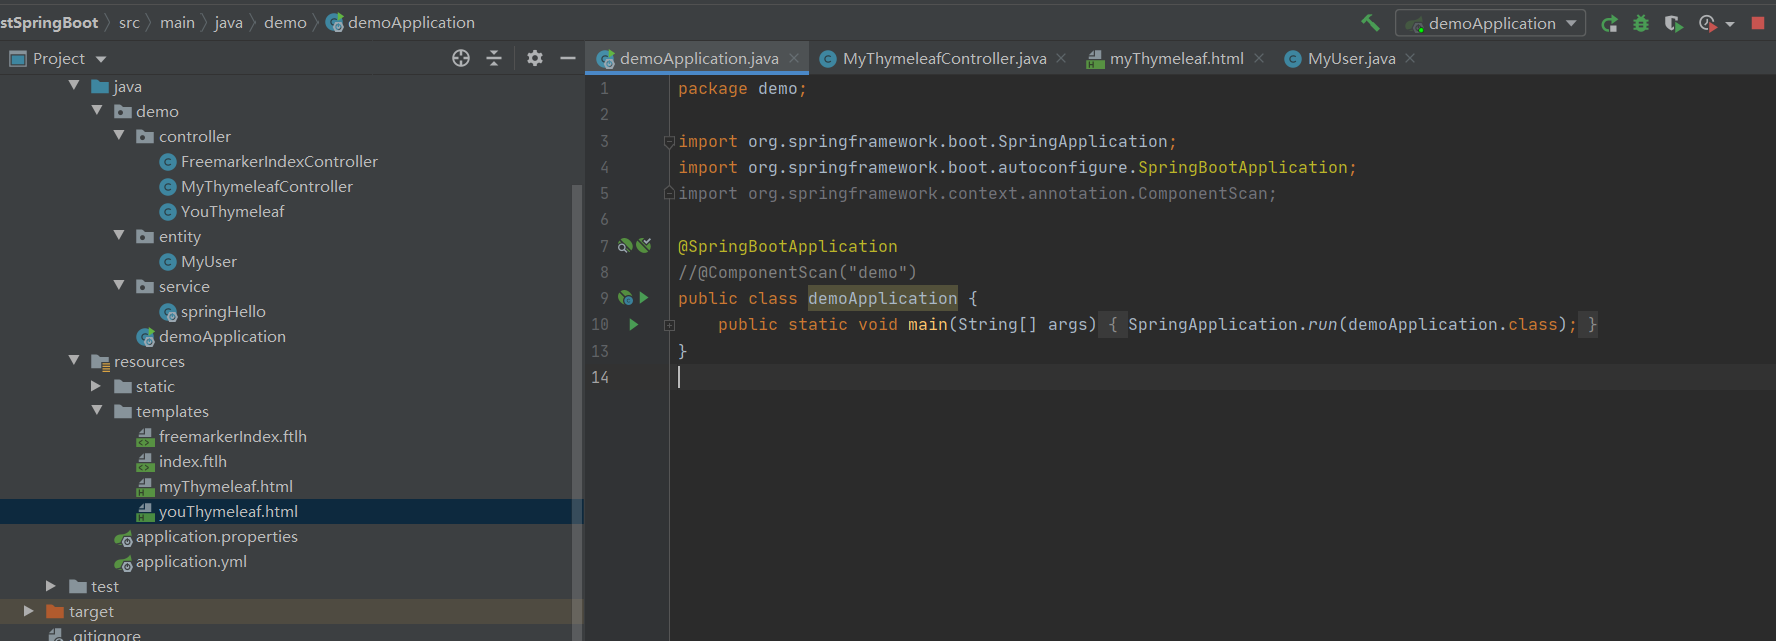
启动类
package demo;

import org.springframework.boot.SpringApplication;
import org.springframework.boot.autoconfigure.SpringBootApplication;
import org.springframework.context.annotation.ComponentScan;

@SpringBootApplication
//@ComponentScan("demo")
public class demoApplication {
    public static void main(String[] args){
        SpringApplication.run(demoApplication.class);
    }
}

把启动类启动之后我们来看看效果
