1.首先确认已安装django,nginx,uwsgi


pip install django
pip install uwsgi
2.利用命令uwsgi启动,在django项目下,django目录结构如下:
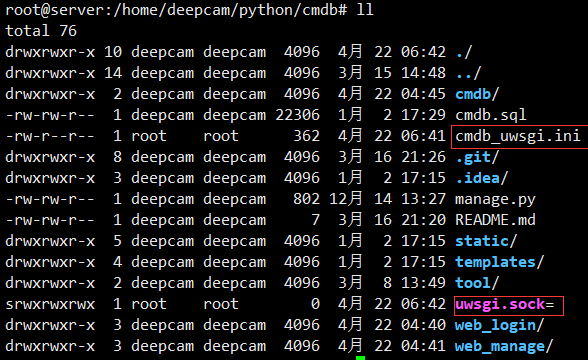
圈出来的文件是先不管,后面创建的或者配置文件生成的
3.命令测试启动
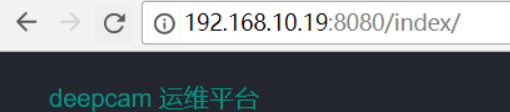
uwsgi --http 192.168.10.19:8080  --file cmdb/wsgi.py --static-map=/static=st
atic
参数说明:
--http 这个就和runserver一样指定IP 端口
--file 这个文件就里有一个反射,如果你在调用他的时候没有指定Web Server就使用默认的
-- static 做一个映射,指定静态文件
此时,访问http://192.168.10.19:8080/index,如图所示,表示项目启动成功
4.创建uwsgi.ini文件
vim cmdb_uwsgi.ini
[uwsgi]
#指定IP端口
http = 127.0.0.1:8080
#项目目录
chdir = /home/deepcam/python/cmdb/
#项目的app下的wsgi
module = cmdb.wsgi
#sock的文件路径
socket=/home/deepcam/python/cmdb/uwsgi.sock
#socket =127.0.0.1:8080   #用这个形式通过nginx访问django目前没有成功,有点坑
#启用主进程
master = true
#运行进程数
processes = 4
#线程数
threads = 2
#启用线程
enable-threads = True
#设置日志目录
daemonize = /var/log/uwsgi.log
#缓存大小
buffer-size = 21573
# 自动移除unix Socket和pid文件当服务停止的时候
vacuum = true
uid=root
gid=root
#指定静态文件
static-map=/static=/home/deepcam/python/cmdb/static
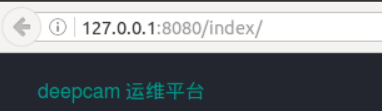
5.验证uwsgi.ini配置文件是否成功
启动项目

访问:127.0.0.1:8080/index,如正常则成功
6.配置nginx配置文件,我这是编译安装的nginx,在/usr/local/nginx
cd /usr/local/nginx
vim conf/nginx.conf
#user  nobody;
worker_processes  1;

#error_log  logs/error.log;
#error_log  logs/error.log  notice;
#error_log  logs/error.log  info;

#pid        logs/nginx.pid;


events {
    worker_connections  1024;
}


http {
    include       mime.types;
    default_type  application/octet-stream;

    #log_format  main  '$remote_addr - $remote_user [$time_local] "$request" '
    #                  '$status $body_bytes_sent "$http_referer" '
    #                  '"$http_user_agent" "$http_x_forwarded_for"';

    #access_log  logs/access.log  main;

    sendfile        on;
    #tcp_nopush     on;

    #keepalive_timeout  0;
    keepalive_timeout  65;

    #gzip  on;

    server {
        listen       80;
        server_name  localhost;

        #charset koi8-r;
        charset utf-8;
        #access_log  logs/host.access.log  main;

        location / {
            include uwsgi_params;  #主要添加这个
            uwsgi_connect_timeout 30;
            uwsgi_pass unix:/home/deepcam/python/cmdb/uwsgi.sock;  #主要这个
            index index.html index.htm;
            client_max_body_size 75M;
        }

        location /static {
            alias /home/deepcam/python/cmdb/static;
            index index.html index.htm;
        }
        #error_page  404              /404.html;

        # redirect server error pages to the static page /50x.html
        #
        error_page   500 502 503 504  /50x.html;
        location = /50x.html {
            root   html;
        }

        # proxy the PHP scripts to Apache listening on 127.0.0.1:80
        #
        #location ~ .php$ {
        #    proxy_pass   http://127.0.0.1;
        #}

        # pass the PHP scripts to FastCGI server listening on 127.0.0.1:9000
        #
        #location ~ .php$ {
        #    root           html;
        #    fastcgi_pass   127.0.0.1:9000;
        #    fastcgi_index  index.php;
        #    fastcgi_param  SCRIPT_FILENAME  /scripts$fastcgi_script_name;
        #    include        fastcgi_params;
        #}

        # deny access to .htaccess files, if Apache's document root
        # concurs with nginx's one
        #
        #location ~ /.ht {
        #    deny  all;
        #}
    }
    #    server_name  somename  alias  another.alias;

    #    location / {
    #        root   html;
    #        index  index.html index.htm;
    #    }
    #}


    # HTTPS server
    #
    #server {
    #    listen       443 ssl;
    #    server_name  localhost;

    #    ssl_certificate      cert.pem;
    #    ssl_certificate_key  cert.key;

    #    ssl_session_cache    shared:SSL:1m;
    #    ssl_session_timeout  5m;

    #    ssl_ciphers  HIGH:!aNULL:!MD5;
    #    ssl_prefer_server_ciphers  on;

    #    location / {
    #        root   html;
    #        index  index.html index.htm;
    #    }
    #}

}
7.验证是否正常访问127.0.0.1/index
启动nginx
./sbin/nginx    启动
./sbin/nginx -s stop  停止
./sbin/nginx -s reload 加载配置文件
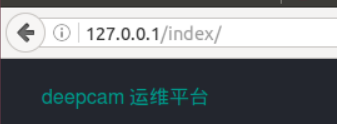
说明uwsgi+nginx+django结合成功了,如果不需要进行https访问那么下面就可以不做了
8.通过openssl生成证书
cd /usr/local/nginx
mkdir ssl
cd ssl
创建服务器私钥,长度1024位, des3加密算法的
openssl genrsa -des3 -out server.key 1024
创建签名请求证书.csr
openssl req -new -key server.key -out server.csr
在加载SSL支持的Nginx并使用上述私钥时除去必须的口令
cp server.key server.key.org

openssl rsa -in server.key.org -out server.key
标记证书使用上述私钥和CSR
openssl x509 -req -days 365 -in server.csr -signkey server.key -out server.crt
修改nginx.conf
 1 http {
 2     include       mime.types;
 3     default_type  application/octet-stream;
 4
 5     #log_format  main  '$remote_addr - $remote_user [$time_local] "$request" '
 6     #                  '$status $body_bytes_sent "$http_referer" '
 7     #                  '"$http_user_agent" "$http_x_forwarded_for"';
 8
 9     #access_log  logs/access.log  main;
10
11     sendfile        on;
12     #tcp_nopush     on;
13
14     #keepalive_timeout  0;
15     keepalive_timeout  65;
16
17     #gzip  on;
18
19     server {
20        #listen       80;
21         listen       443;
22         server_name  localhost;
23
24         #charset koi8-r;
25         charset utf-8;
26
27        ssl on;
28        ssl_certificate /usr/local/nginx/ssl/server.crt;
29        ssl_certificate_key /usr/local/nginx/ssl/server.key;
30         #access_log  logs/host.access.log  main;
31
32         location / {
33             include uwsgi_params;
34             uwsgi_connect_timeout 30;
35             uwsgi_pass unix:/home/deepcam/python/cmdb/uwsgi.sock;
36             index index.html index.htm;
37             client_max_body_size 75M;
38         }
验证https访问
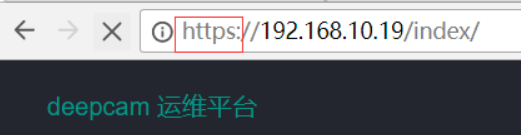
说明结合好了