1.下载qemu
https://qemu.weilnetz.de/w32/ 在里面找到qemu-w32-setup-20210810.exe 或者看对应64位系统安装包
下载
https://releases.linaro.org/components/kernel/uefi-linaro/16.02/release/

选择32/64位 qemu QEMU_EFI.fd
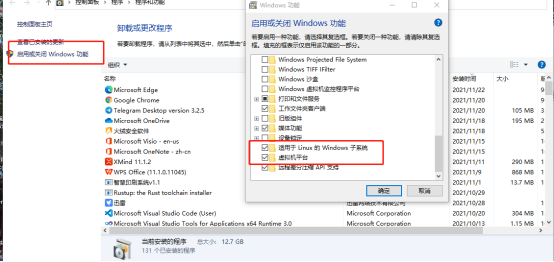
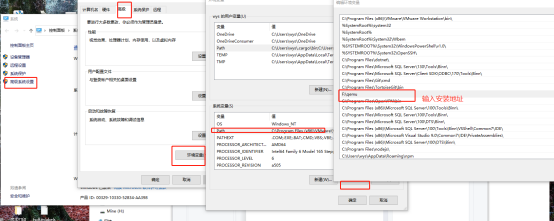
2.环境
3.命令:
arm:
qemu-img create 【自定义名称】.img 80G
安装:qemu-system-aarch64 -m 6333 -cpu cortex-a72 -smp 2,cores=2,threads=1,sockets=1 -M virt -bios QEMU_EFI.fd -net nic,model=pcnet -device nec-usb-xhci -device usb-kbd -device usb-mouse -device VGA -drive if=none,file=【镜像.iso】,id=cdrom,media=cdrom -device virtio-scsi-device -device scsi-cd,drive=cdrom -drive if=none,file=【自定义名称】.img,id=hd0 -device virtio-blk-device,drive=hd0
启动:
qemu-system-aarch64 -m 8192 -cpu cortex-a72 -smp 2,cores=2,threads=1,sockets=1 -M virt -bios QEMU_EFI.fd -device nec-usb-xhci -device usb-kbd -device usb-mouse -device VGA -device virtio-scsi-device -drive if=none,file=【自定义名称】.img,id=hd0 -device virtio-blk-device,drive=hd0
X86_64:
qemu-img create -f qcow2 自定义名称.qcow2 30G
安装
qemu-system-x86_64 -hda uos.qcow2 -m 512 -net nic,model=virtio -net user -cdrom uniontechos-desktop-20-professional-1030-fix_amd64.iso -vga std -boot strict=on -cpu Haswell-v3
启动
qemu-system-x86_64 -hda uos.qcow2 -m 512 -net nic,model=virtio -net user -vga std -boot strict=on -cpu Haswell-v3
qemu-system-x86_64(aarch) -cpu help 查看支持的架构