SkyWalking已经再微服务商城系列里使用了,本篇将介绍如何再Windows系统下安装并简单使用。
1.下载SkyWaling
本篇测试使用6.0版本:http://skywalking.apache.org/downloads/

如果只是简单测试我们无需任何修改,直接启用bin文件夹里的startup.bat,默认使用内存H2存储,等会换成ES,然后直接防卫localhost:8080:
安装 SkyAPM.DotNet.CLI:
dotnet tool install -g SkyAPM.DotNet.CLI
2.在.net core中使用SkyWalking:
创建.net core API项目SkyWalking_Practice,通过NuGet引用SkyAPM.Agent.AspNetCore(最新版SkyWalking已改名SkyAPM)。
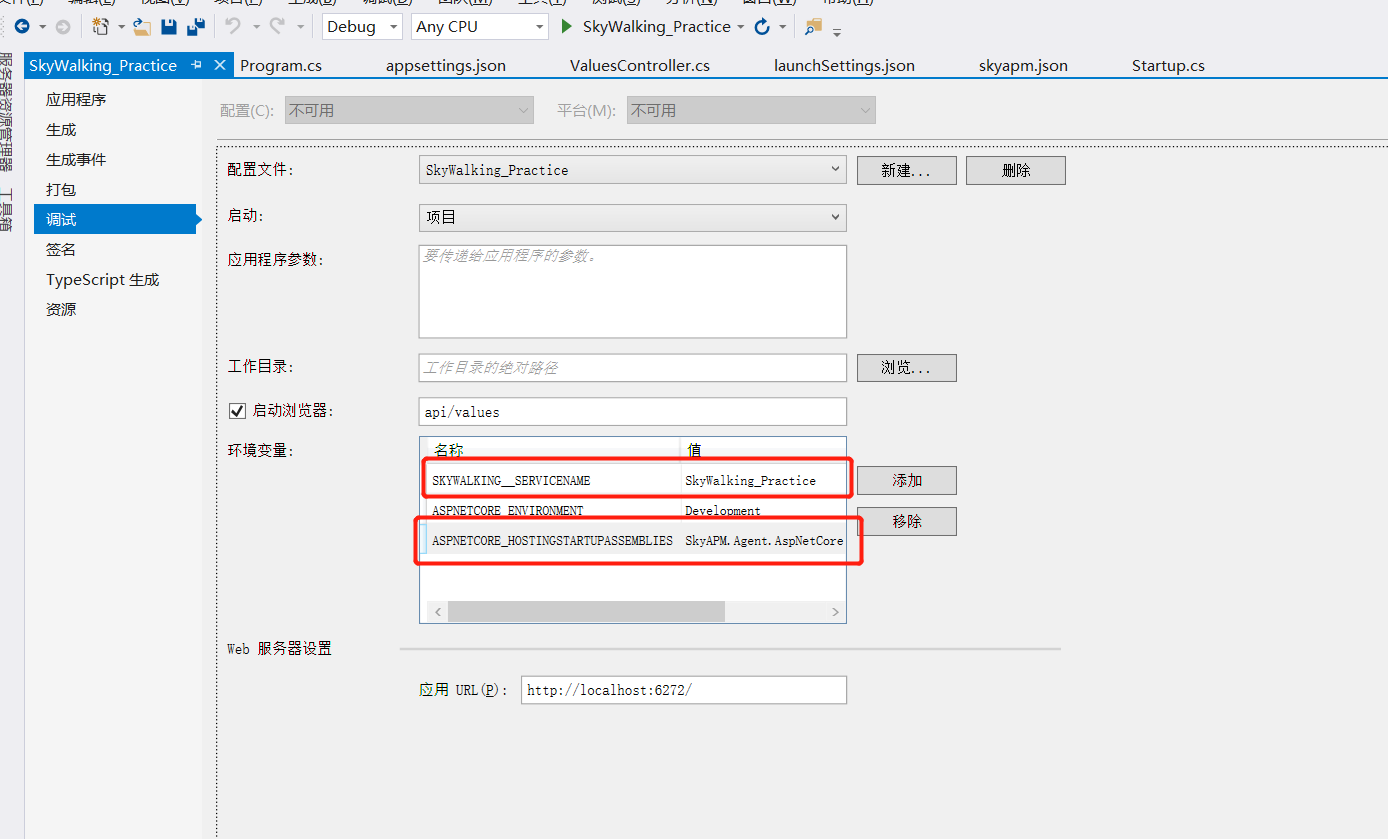
右键属性,在调试中添加环境变量:
ASPNETCORE_HOSTINGSTARTUPASSEMBLIES:SkyAPM.Agent.AspNetCore
SKYWALKING__SERVICENAME:SkyWalking_Practice(这里配置项目程序集名称)
然后我们就需要配置SkyWalking了,配置方式有两种,一种是在Startup.cs的ConfigureServices中配置相关信息,另一种是通过配置文件的方式,本篇将通过配置文件的方式来实现:
在CMD命令行中cd到项目文件根目录,使用如下命令自动生成Json配置文件(11800端口是其数据采上报端口):
dotnet skyapm config SkyWalking_Practice localhost:11800
命令执行成功后会自动生成:skyapm.json,可以根据实际情况进行更改调整。
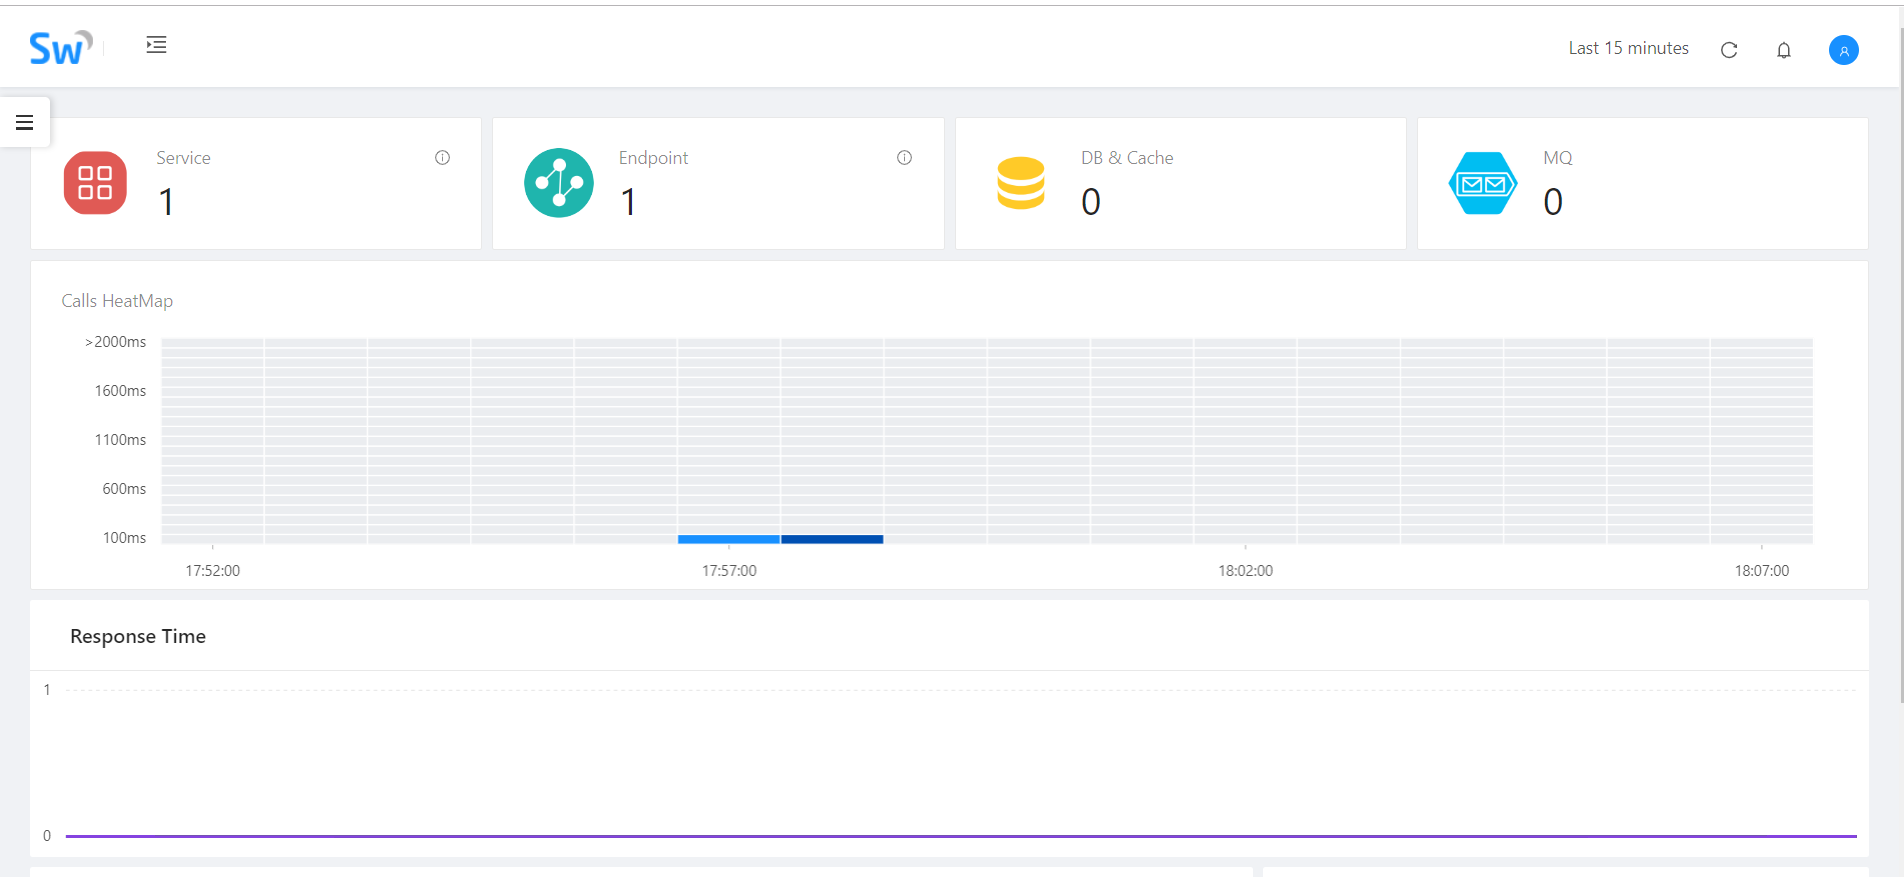
到这里配置环节就算完成了,我们可以直接运行当前项目,多访问几次后查看SkyWalking的UI,会看到对应访问数据:

配置ElasticSearch作为存储程序
Skying的不同版本对于ES的版本是有要求的,6.X的SkyWalking要求使用6.X的ES,首先我们需要下载ES:https://www.elastic.co/cn/downloads/elasticsearch
下载完成后修改config文件夹下的elasticsearch.yml配置文件:
cluster.name: mi

bootstrap.memory_lock: false

network.host: localhost

http.port: 9200
cluster.Name需要小写,之前大写报错。cluster.name需要和SkyWalking中的保持一致,默认CollectorDBCluster,大家可以自行修改。
贴一下完整配置当记录:
# ======================== Elasticsearch Configuration =========================
#
# NOTE: Elasticsearch comes with reasonable defaults for most settings.
#       Before you set out to tweak and tune the configuration, make sure you
#       understand what are you trying to accomplish and the consequences.
#
# The primary way of configuring a node is via this file. This template lists
# the most important settings you may want to configure for a production cluster.
#
# Please consult the documentation for further information on configuration options:
# https://www.elastic.co/guide/en/elasticsearch/reference/index.html
#
# ---------------------------------- Cluster -----------------------------------
#
# Use a descriptive name for your cluster:
#
cluster.name: mi
#
# ------------------------------------ Node ------------------------------------
#
# Use a descriptive name for the node:
#
#node.name: node-1
#
# Add custom attributes to the node:
#
#node.attr.rack: r1
#
# ----------------------------------- Paths ------------------------------------
#
# Path to directory where to store the data (separate multiple locations by comma):
#
#path.data: /path/to/data
#
# Path to log files:
#
#path.logs: /path/to/logs
#
# ----------------------------------- Memory -----------------------------------
#
# Lock the memory on startup:
#
bootstrap.memory_lock: false
#
# Make sure that the heap size is set to about half the memory available
# on the system and that the owner of the process is allowed to use this
# limit.
#
# Elasticsearch performs poorly when the system is swapping the memory.
#
# ---------------------------------- Network -----------------------------------
#
# Set the bind address to a specific IP (IPv4 or IPv6):
#
network.host: localhost
#
# Set a custom port for HTTP:
#
http.port: 9200
#
# For more information, consult the network module documentation.
#
# --------------------------------- Discovery ----------------------------------
#
# Pass an initial list of hosts to perform discovery when new node is started:
# The default list of hosts is ["127.0.0.1", "[::1]"]
#
#discovery.zen.ping.unicast.hosts: ["host1", "host2"]
#
# Prevent the "split brain" by configuring the majority of nodes (total number of master-eligible nodes / 2 + 1):
#
#discovery.zen.minimum_master_nodes:
#
# For more information, consult the zen discovery module documentation.
#
# ---------------------------------- Gateway -----------------------------------
#
# Block initial recovery after a full cluster restart until N nodes are started:
#
#gateway.recover_after_nodes: 3
#
# For more information, consult the gateway module documentation.
#
# ---------------------------------- Various -----------------------------------
#
# Require explicit names when deleting indices:
#
#action.destructive_requires_name: true
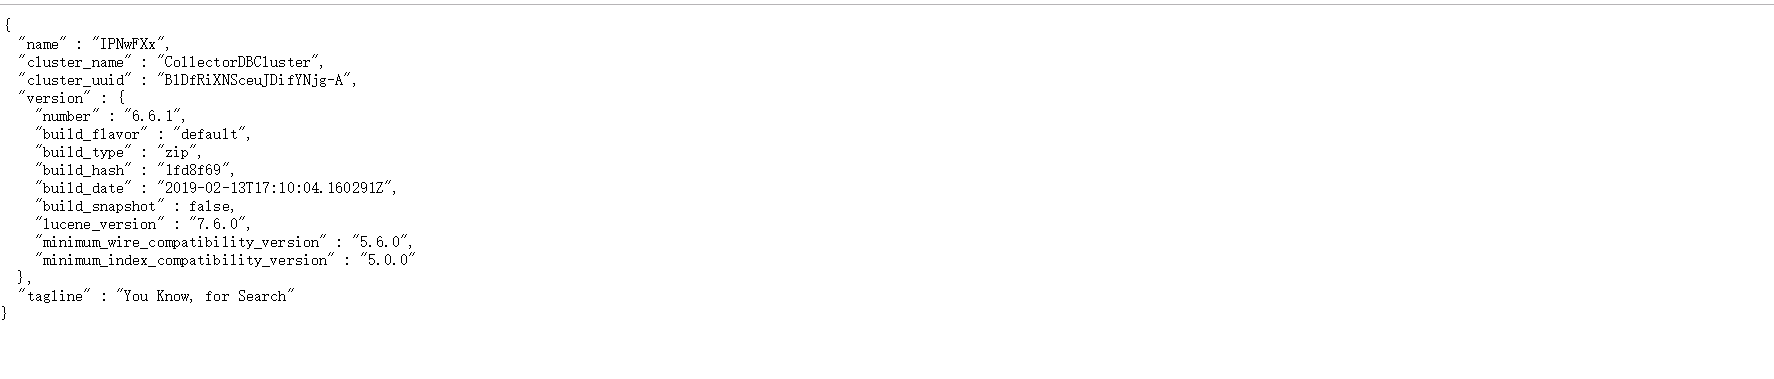
完成后启动ES,通过bin文件下的elasticsearch.bat启动,启动后访问 http://localhost:9200/:
ES启动之后我们需要修改下SkyWalking的配置以支持ES:
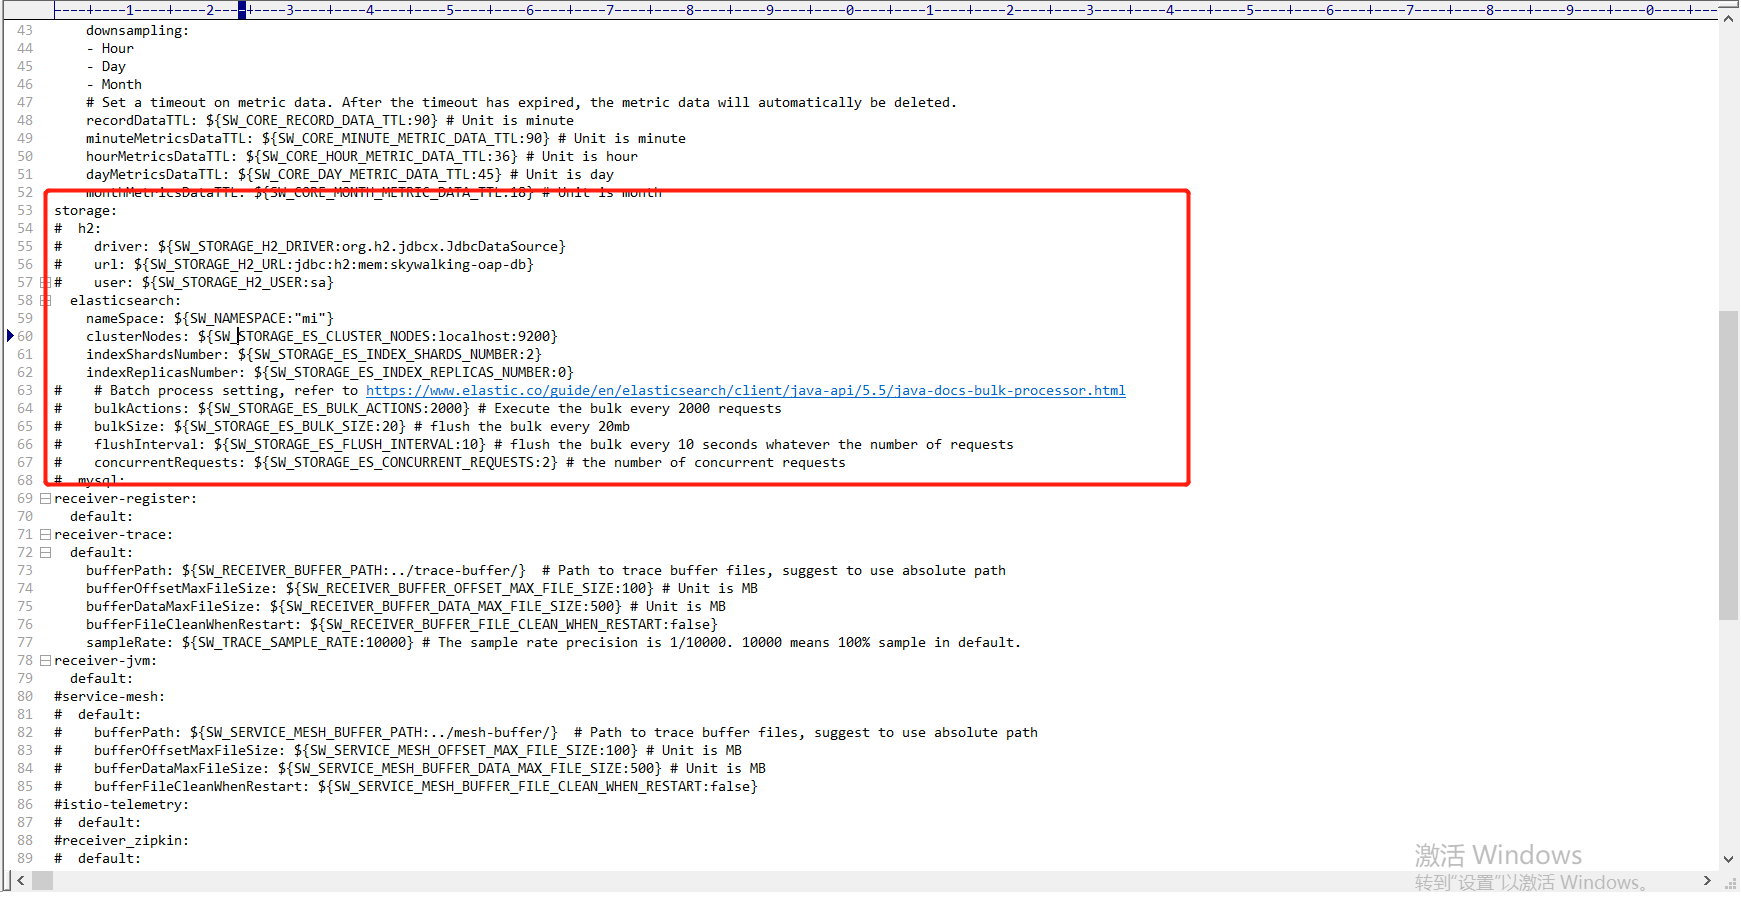
需要将nameSpace改成和ES中一致,这里也贴一下完整配置做个记录:
# Licensed to the Apache Software Foundation (ASF) under one
# or more contributor license agreements.  See the NOTICE file
# distributed with this work for additional information
# regarding copyright ownership.  The ASF licenses this file
# to you under the Apache License, Version 2.0 (the
# "License"); you may not use this file except in compliance
# with the License.  You may obtain a copy of the License at
#
#     http://www.apache.org/licenses/LICENSE-2.0
#
# Unless required by applicable law or agreed to in writing, software
# distributed under the License is distributed on an "AS IS" BASIS,
# WITHOUT WARRANTIES OR CONDITIONS OF ANY KIND, either express or implied.
# See the License for the specific language governing permissions and
# limitations under the License.

cluster:
  standalone:
  # Please check your ZooKeeper is 3.5+, However, it is also compatible with ZooKeeper 3.4.x. Replace the ZooKeeper 3.5+
  # library the oap-libs folder with your ZooKeeper 3.4.x library.
#  zookeeper:
#    nameSpace: ${SW_NAMESPACE:""}
#    hostPort: ${SW_CLUSTER_ZK_HOST_PORT:localhost:2181}
#    #Retry Policy
#    baseSleepTimeMs: ${SW_CLUSTER_ZK_SLEEP_TIME:1000} # initial amount of time to wait between retries
#    maxRetries: ${SW_CLUSTER_ZK_MAX_RETRIES:3} # max number of times to retry
#  kubernetes:
#    watchTimeoutSeconds: ${SW_CLUSTER_K8S_WATCH_TIMEOUT:60}
#    namespace: ${SW_CLUSTER_K8S_NAMESPACE:default}
#    labelSelector: ${SW_CLUSTER_K8S_LABEL:app=collector,release=skywalking}
#    uidEnvName: ${SW_CLUSTER_K8S_UID:SKYWALKING_COLLECTOR_UID}
#  consul:
#    serviceName: ${SW_SERVICE_NAME:"SkyWalking_OAP_Cluster"}
#     Consul cluster nodes, example: 10.0.0.1:8500,10.0.0.2:8500,10.0.0.3:8500
#    hostPort: ${SW_CLUSTER_CONSUL_HOST_PORT:localhost:8500}
core:
  default:
    restHost: ${SW_CORE_REST_HOST:0.0.0.0}
    restPort: ${SW_CORE_REST_PORT:12800}
    restContextPath: ${SW_CORE_REST_CONTEXT_PATH:/}
    gRPCHost: ${SW_CORE_GRPC_HOST:0.0.0.0}
    gRPCPort: ${SW_CORE_GRPC_PORT:11800}
    downsampling:
    - Hour
    - Day
    - Month
    # Set a timeout on metric data. After the timeout has expired, the metric data will automatically be deleted.
    recordDataTTL: ${SW_CORE_RECORD_DATA_TTL:90} # Unit is minute
    minuteMetricsDataTTL: ${SW_CORE_MINUTE_METRIC_DATA_TTL:90} # Unit is minute
    hourMetricsDataTTL: ${SW_CORE_HOUR_METRIC_DATA_TTL:36} # Unit is hour
    dayMetricsDataTTL: ${SW_CORE_DAY_METRIC_DATA_TTL:45} # Unit is day
    monthMetricsDataTTL: ${SW_CORE_MONTH_METRIC_DATA_TTL:18} # Unit is month
storage:
#  h2:
#    driver: ${SW_STORAGE_H2_DRIVER:org.h2.jdbcx.JdbcDataSource}
#    url: ${SW_STORAGE_H2_URL:jdbc:h2:mem:skywalking-oap-db}
#    user: ${SW_STORAGE_H2_USER:sa}
  elasticsearch:
    nameSpace: ${SW_NAMESPACE:"mi"}
    clusterNodes: ${SW_STORAGE_ES_CLUSTER_NODES:localhost:9200}
    indexShardsNumber: ${SW_STORAGE_ES_INDEX_SHARDS_NUMBER:2}
    indexReplicasNumber: ${SW_STORAGE_ES_INDEX_REPLICAS_NUMBER:0}
#    # Batch process setting, refer to https://www.elastic.co/guide/en/elasticsearch/client/java-api/5.5/java-docs-bulk-processor.html
#    bulkActions: ${SW_STORAGE_ES_BULK_ACTIONS:2000} # Execute the bulk every 2000 requests
#    bulkSize: ${SW_STORAGE_ES_BULK_SIZE:20} # flush the bulk every 20mb
#    flushInterval: ${SW_STORAGE_ES_FLUSH_INTERVAL:10} # flush the bulk every 10 seconds whatever the number of requests
#    concurrentRequests: ${SW_STORAGE_ES_CONCURRENT_REQUESTS:2} # the number of concurrent requests
#  mysql:
receiver-register:
  default:
receiver-trace:
  default:
    bufferPath: ${SW_RECEIVER_BUFFER_PATH:../trace-buffer/}  # Path to trace buffer files, suggest to use absolute path
    bufferOffsetMaxFileSize: ${SW_RECEIVER_BUFFER_OFFSET_MAX_FILE_SIZE:100} # Unit is MB
    bufferDataMaxFileSize: ${SW_RECEIVER_BUFFER_DATA_MAX_FILE_SIZE:500} # Unit is MB
    bufferFileCleanWhenRestart: ${SW_RECEIVER_BUFFER_FILE_CLEAN_WHEN_RESTART:false}
    sampleRate: ${SW_TRACE_SAMPLE_RATE:10000} # The sample rate precision is 1/10000. 10000 means 100% sample in default.
receiver-jvm:
  default:
#service-mesh:
#  default:
#    bufferPath: ${SW_SERVICE_MESH_BUFFER_PATH:../mesh-buffer/}  # Path to trace buffer files, suggest to use absolute path
#    bufferOffsetMaxFileSize: ${SW_SERVICE_MESH_OFFSET_MAX_FILE_SIZE:100} # Unit is MB
#    bufferDataMaxFileSize: ${SW_SERVICE_MESH_BUFFER_DATA_MAX_FILE_SIZE:500} # Unit is MB
#    bufferFileCleanWhenRestart: ${SW_SERVICE_MESH_BUFFER_FILE_CLEAN_WHEN_RESTART:false}
#istio-telemetry:
#  default:
#receiver_zipkin:
#  default:
#    host: ${SW_RECEIVER_ZIPKIN_HOST:0.0.0.0}
#    port: ${SW_RECEIVER_ZIPKIN_PORT:9411}
#    contextPath: ${SW_RECEIVER_ZIPKIN_CONTEXT_PATH:/}
query:
  graphql:
    path: ${SW_QUERY_GRAPHQL_PATH:/graphql}
alarm:
  default:
telemetry:
  none:
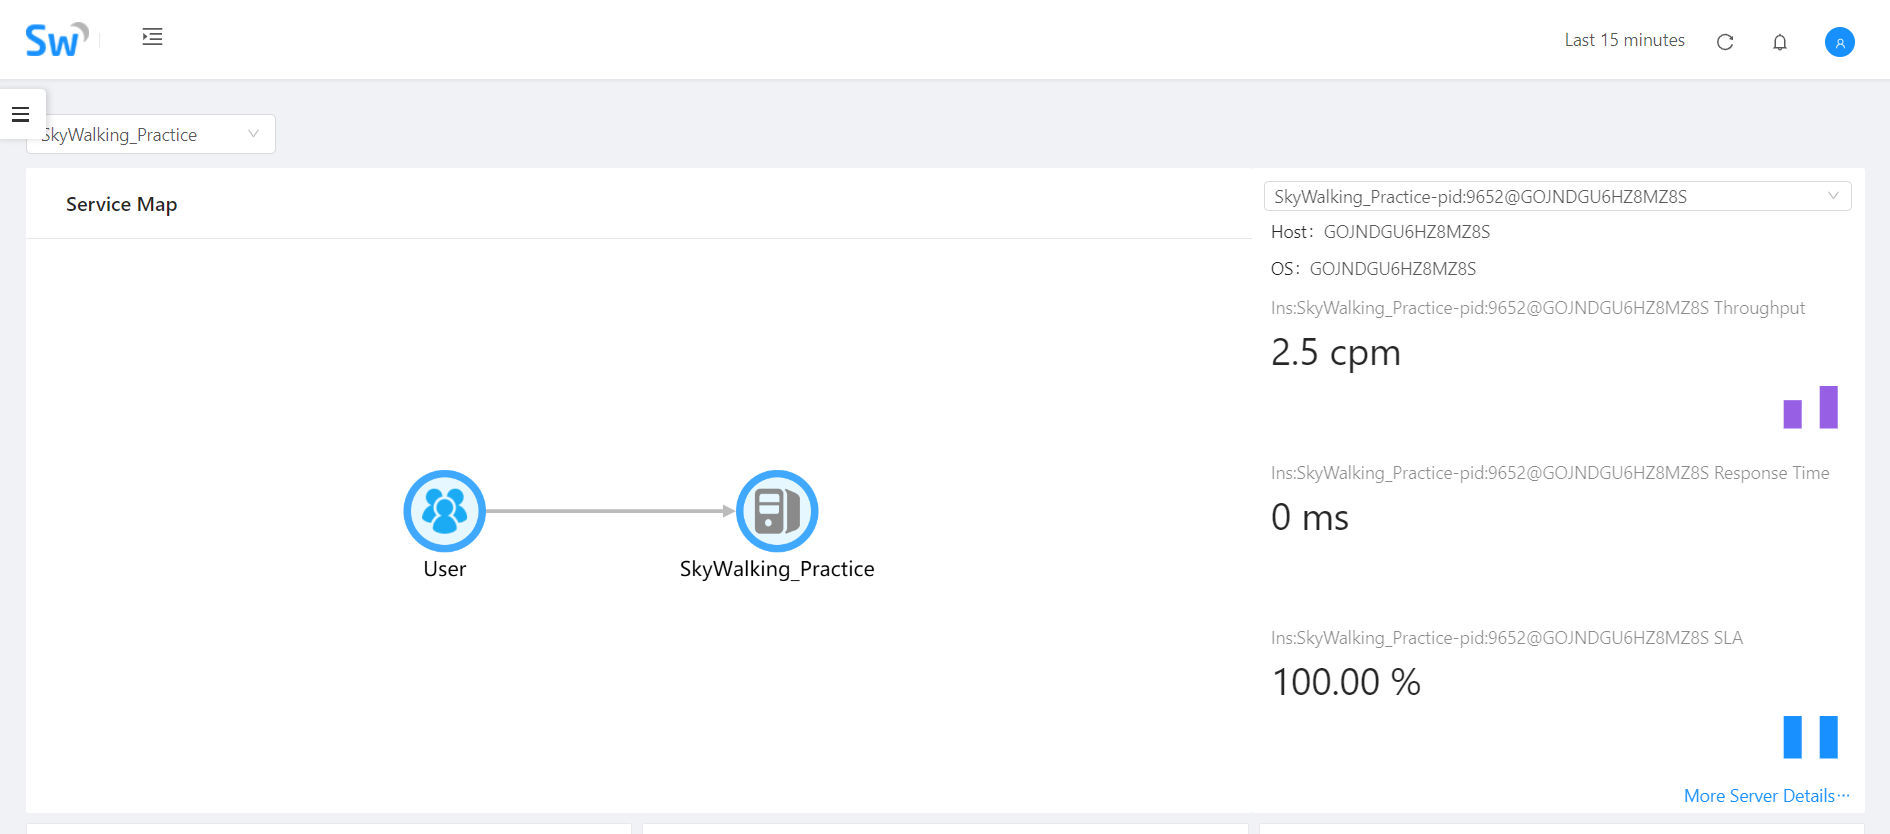
然后通过bin文件夹下的startup.bat批处理命令启动SkyWalking,然后访问http://localhost:8080能够出现UI界面则正常,然后启动我们的.net core API项目,出现数据:
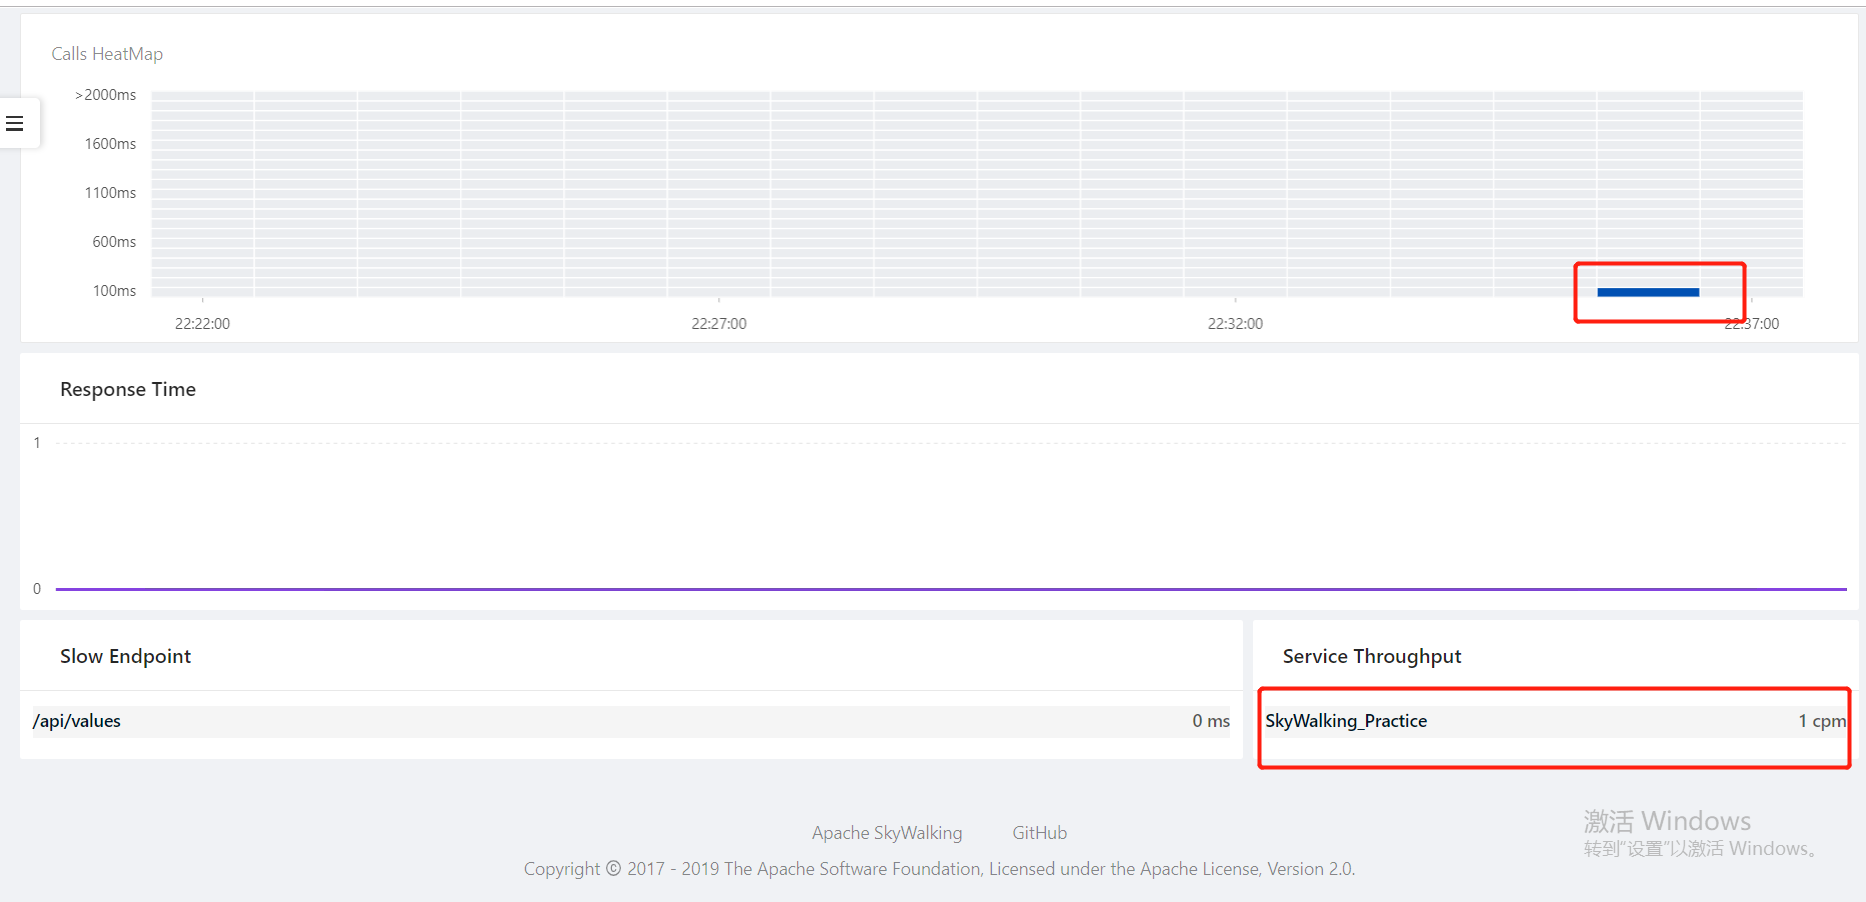

OK,到此完成。