继续上一次https://www.cnblogs.com/webor2006/p/12362753.html的OkHttp框架手写,上次已经将整个OkHttp的请求框架搭建好了,接下来就剩拦截器链这块的逻辑了,这块也是被人问得最多的,所以接下来自己手动实现整个机制透彻的攻克它。
拦截器链:
先来回呃一下我们要开始编写的入口代码:
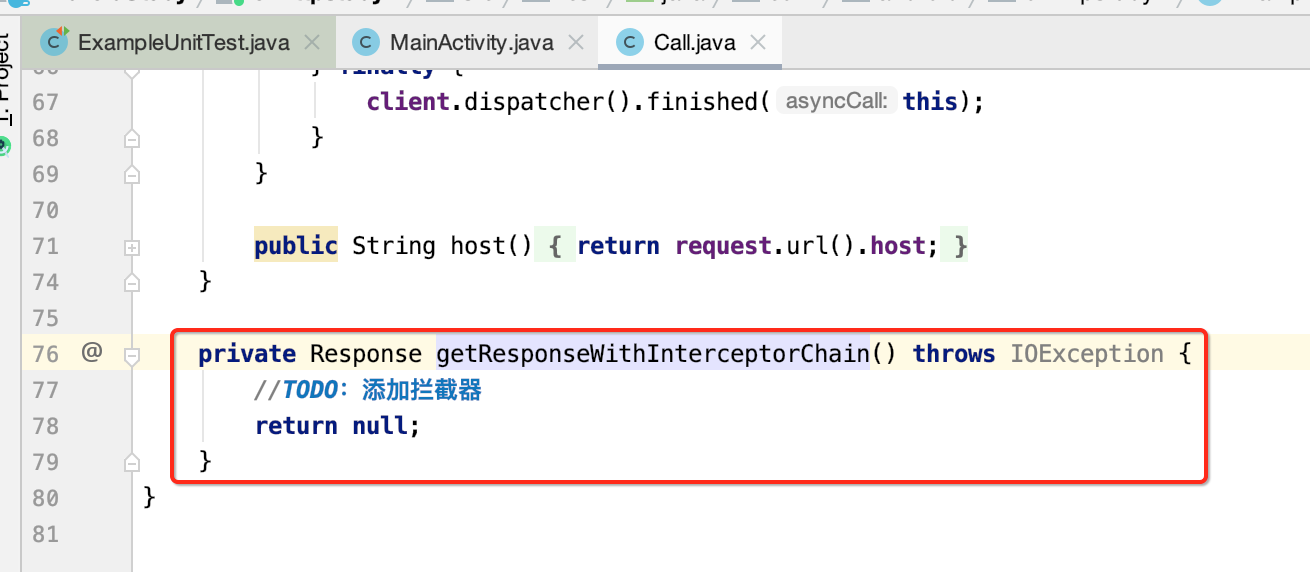
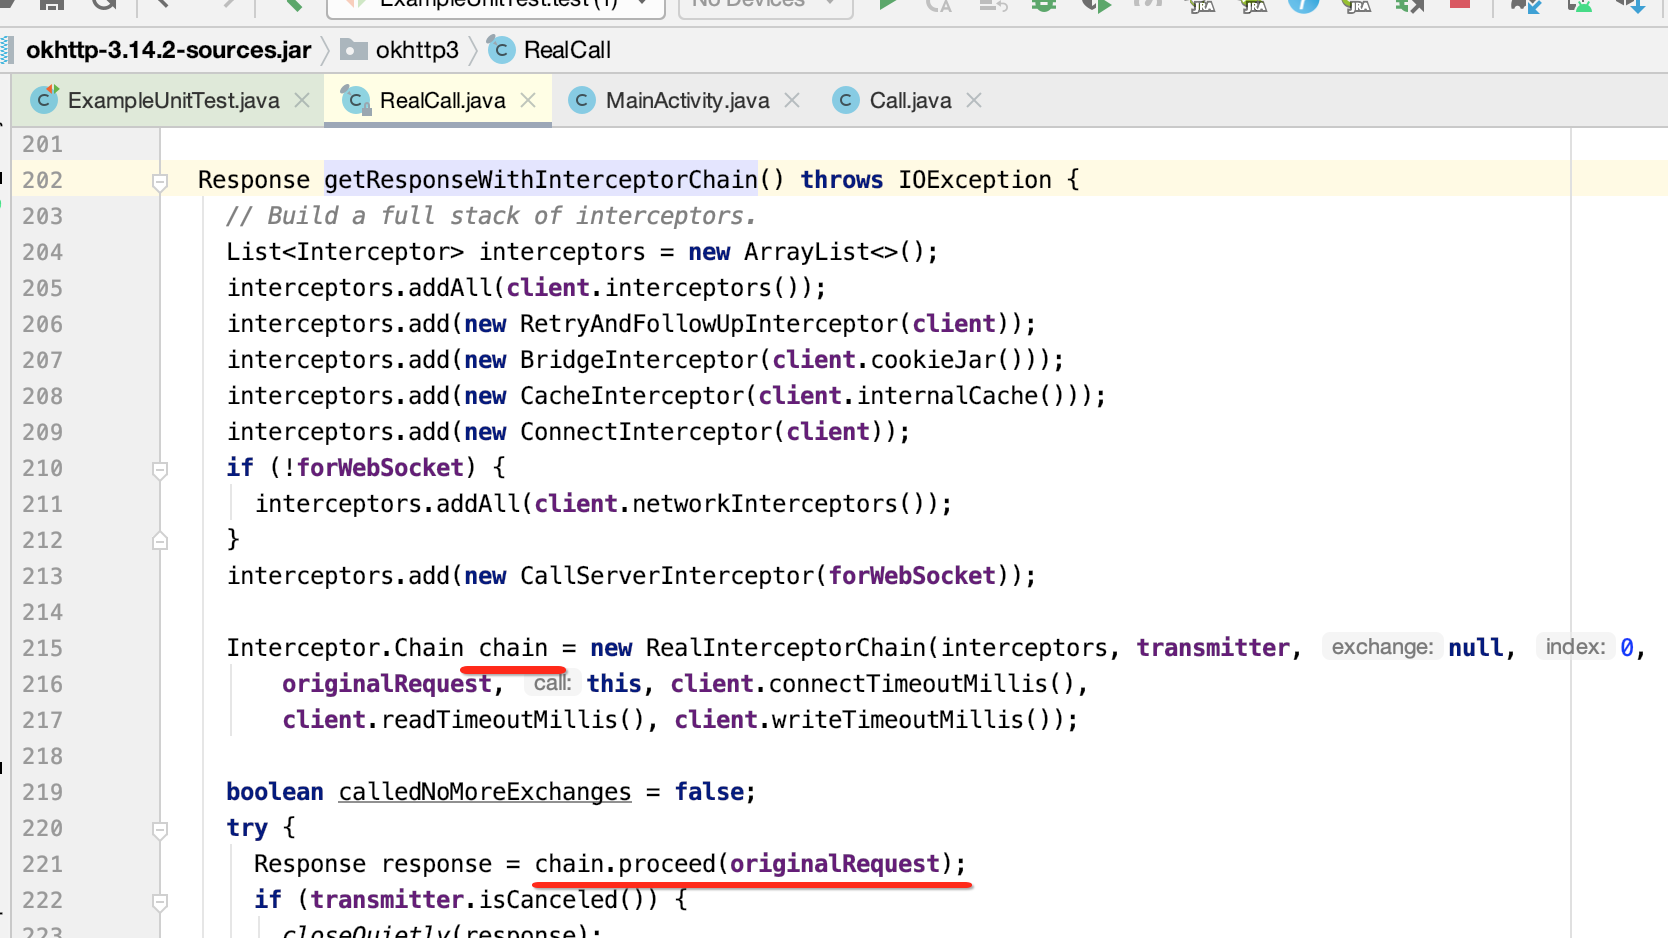
我们知道实现链式请求的核心就是有一个拦截器链的类,如源码所示:
接下来首先来建立它,具体拦截器先放一边,如下:
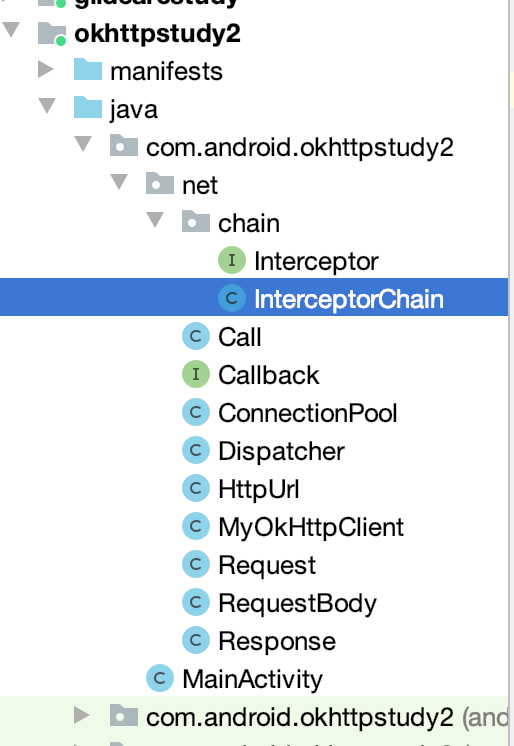
package com.android.okhttpstudy2.net.chain;

import com.android.okhttpstudy2.net.Call;
import com.android.okhttpstudy2.net.Response;

import java.io.IOException;
import java.util.List;

//拦截器链
public class InterceptorChain {
    final List<Interceptor> interceptors;
    final int index;
    final Call call;


    public InterceptorChain(List<Interceptor> interceptors, int index, Call call) {
        this.interceptors = interceptors;
        this.index = index;
        this.call = call;
    }

    public Response proceed() throws IOException {
        //TODO
        return null;
    }
}
接着咱们则可以使用一下它:
目前这个拦截器链中的代码只是搭了个架子,之后再来补充逻辑。
准备各大拦截器:
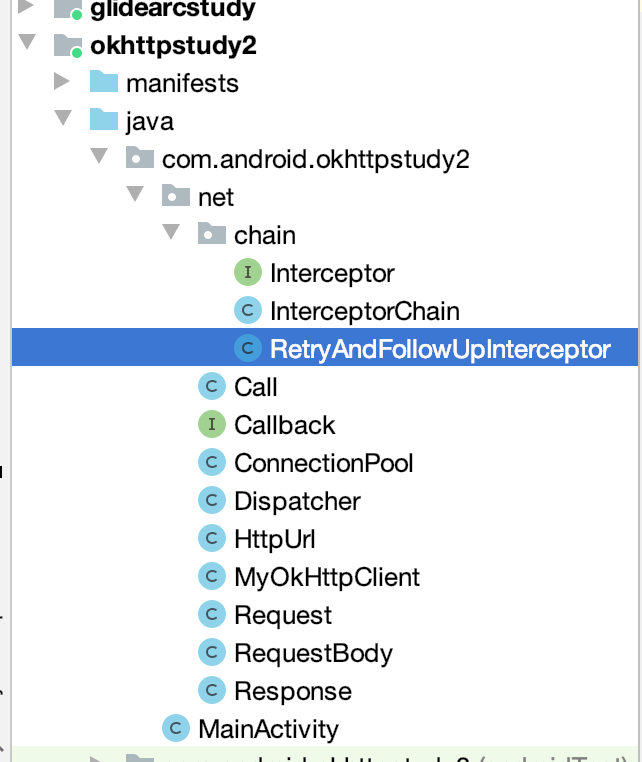
接下来则来新建个大经典拦截器了。
RetryAndFollowUpInterceptor:
首先在拦截器的接口中定义一个方法:
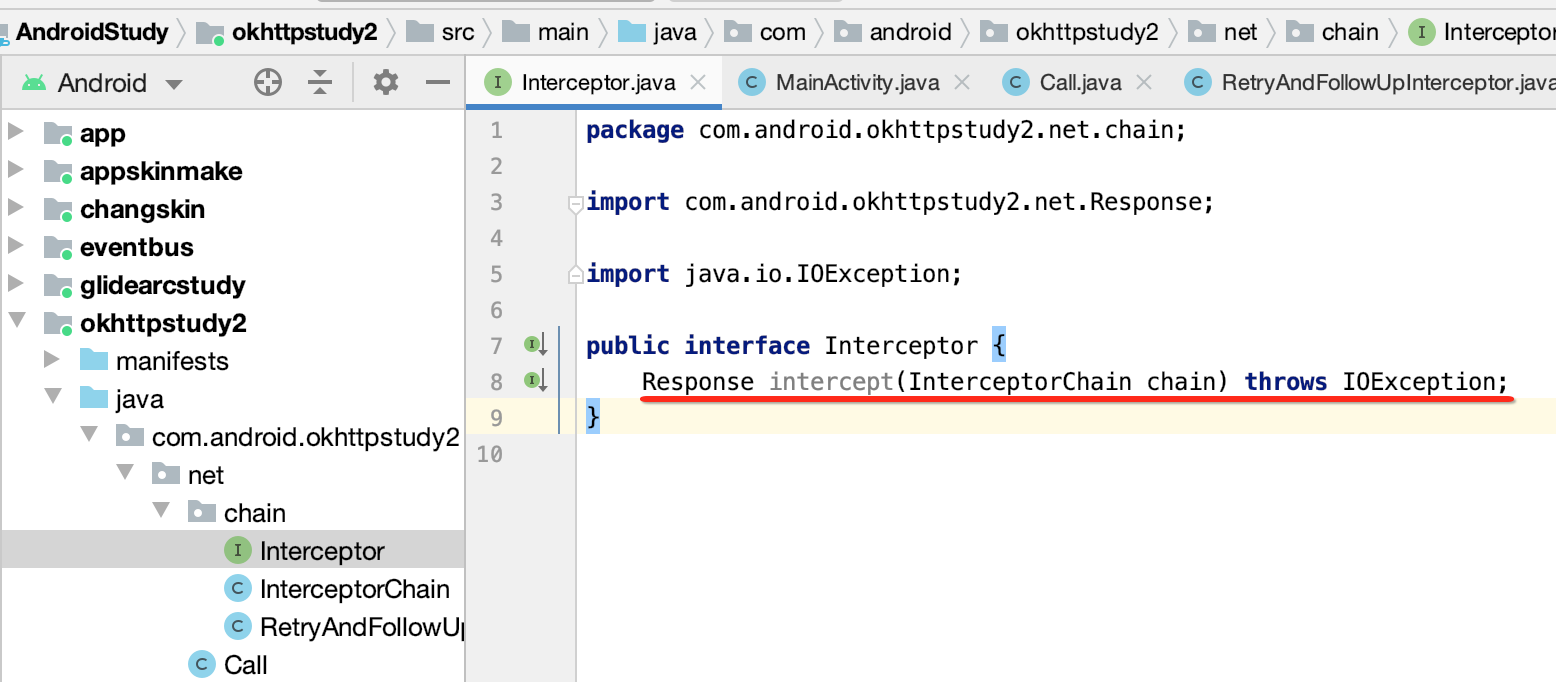
然后再来新建重试具体拦截器:
其内容比较简单,直接贴出来:
package com.android.okhttpstudy2.net.chain;

import android.util.Log;

import com.android.okhttpstudy2.net.Call;
import com.android.okhttpstudy2.net.Response;

import java.io.IOException;

public class RetryAndFollowUpInterceptor implements Interceptor {

    @Override
    public Response intercept(InterceptorChain chain) throws IOException {
        Log.e("cexo", "重试拦截器....");
        Call call = chain.call;
        IOException exception = null;
        for (int i = 0; i < chain.call.client().retrys(); i++) {
            if (call.isCanceled()) {
                throw new IOException("Canceled");
            }
            try {
                Response response = chain.proceed();
                return response;
            } catch (IOException e) {
                exception = e;
            }
        }
        throw exception;
    }
}
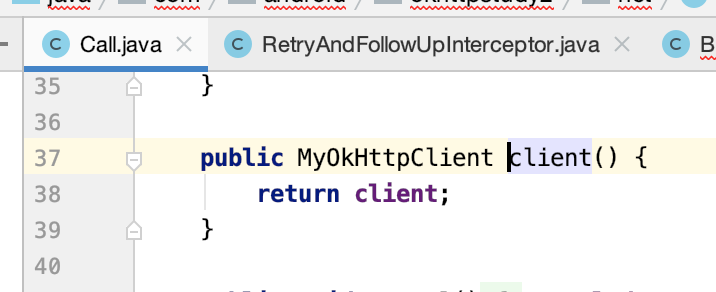
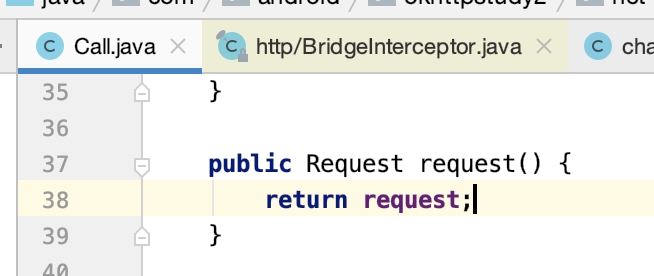
Call中得暴露一个上图标红的接口才行:
其中可以看到,如果往下执行拦截器链出现任何异常都会按重试次数进行处理:
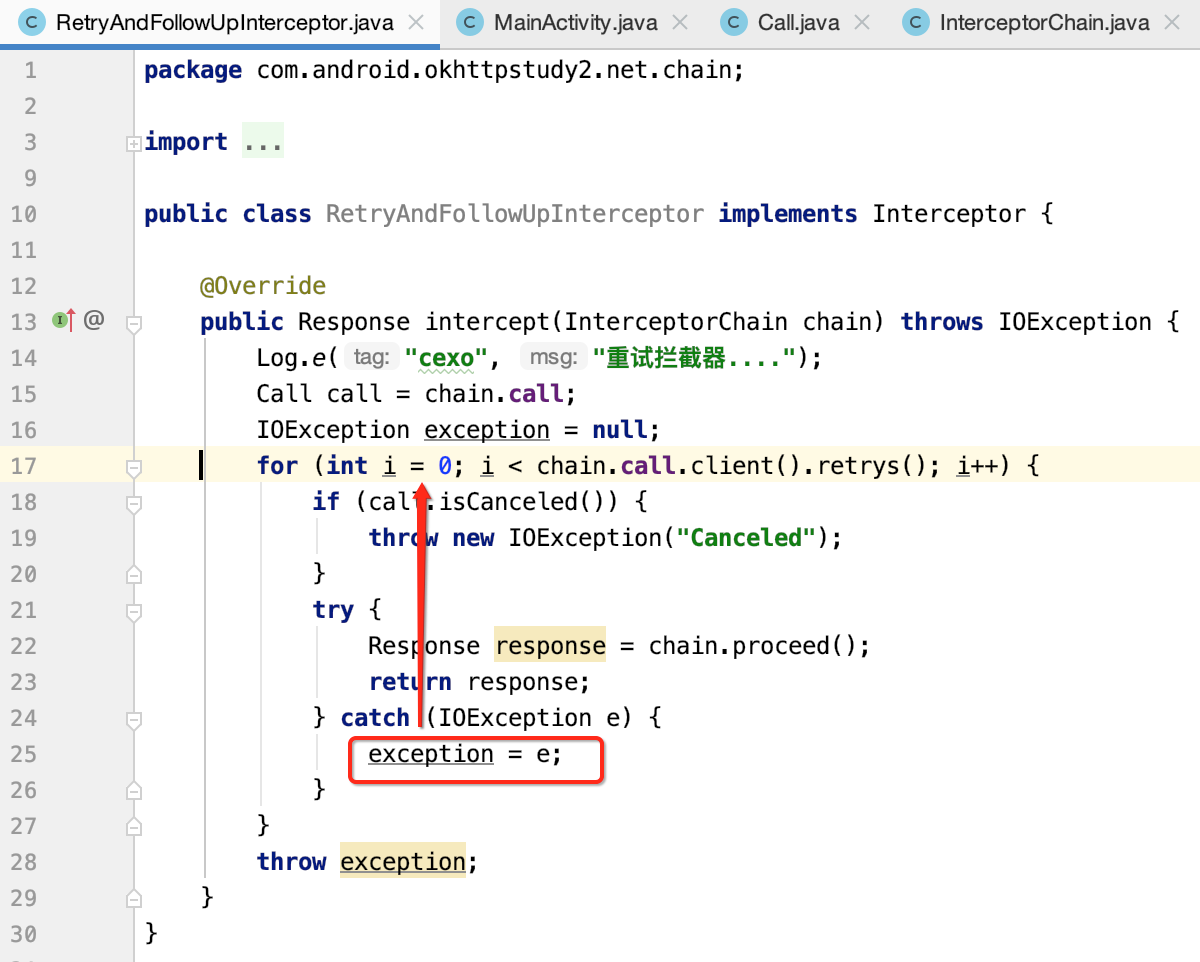
这就是这个拦截器的核心思想。
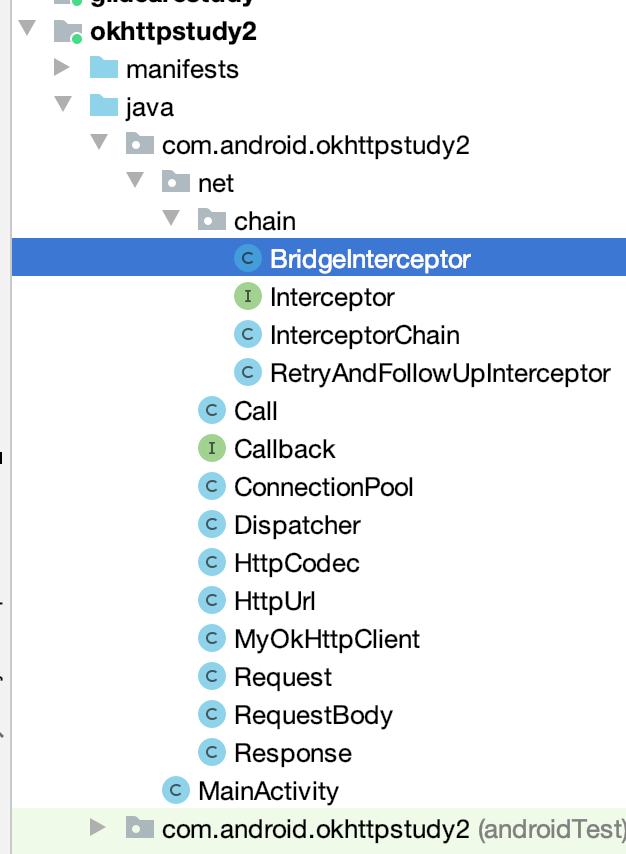
BridgeInterceptor:
接下来则是桥接拦截器了, 这里其实就是加一些请求头信息,逻辑简化一下,代码如下:
package com.android.okhttpstudy2.net.chain;

import android.util.Log;

import com.android.okhttpstudy2.net.HttpCodec;
import com.android.okhttpstudy2.net.Request;
import com.android.okhttpstudy2.net.Response;

import java.io.IOException;
import java.util.Map;

public class BridgeInterceptor implements Interceptor {

    @Override
    public Response intercept(InterceptorChain chain) throws IOException {
        Log.e("cexo", "桥接拦截器....");
        Request request = chain.call.request();
        Map<String, String> headers = request.headers();
        headers.put(HttpCodec.HEAD_HOST, request.url().getHost());
        headers.put(HttpCodec.HEAD_CONNECTION, HttpCodec.HEAD_VALUE_KEEP_ALIVE);
        if (null != request.body()) {
            String contentType = request.body().contentType();
            if (contentType != null) {
                headers.put(HttpCodec.HEAD_CONTENT_TYPE, contentType);
            }
            long contentLength = request.body().contentLength();
            if (contentLength != -1) {
                headers.put(HttpCodec.HEAD_CONTENT_LENGTH, Long.toString(contentLength));
            }
        }
        return chain.proceed();
    }
}
其中Call中又需要暴露个接口:
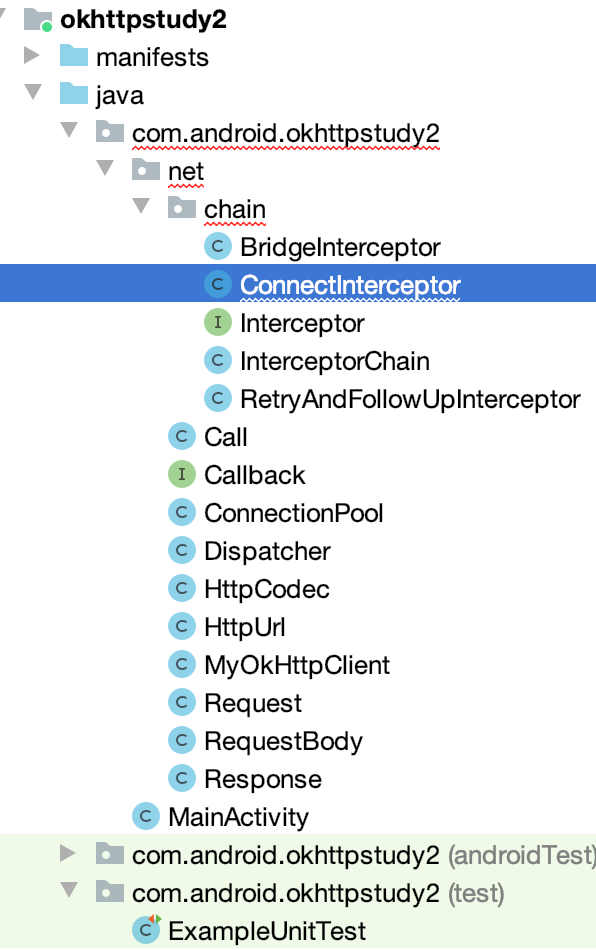
ConnectInterceptor:
第三个拦截器照理应该是缓存拦截器:

这里简单化,直接到连接拦截器了,有了请求头信息之后,则可以发起跟服务器的Socket连接了,如下:
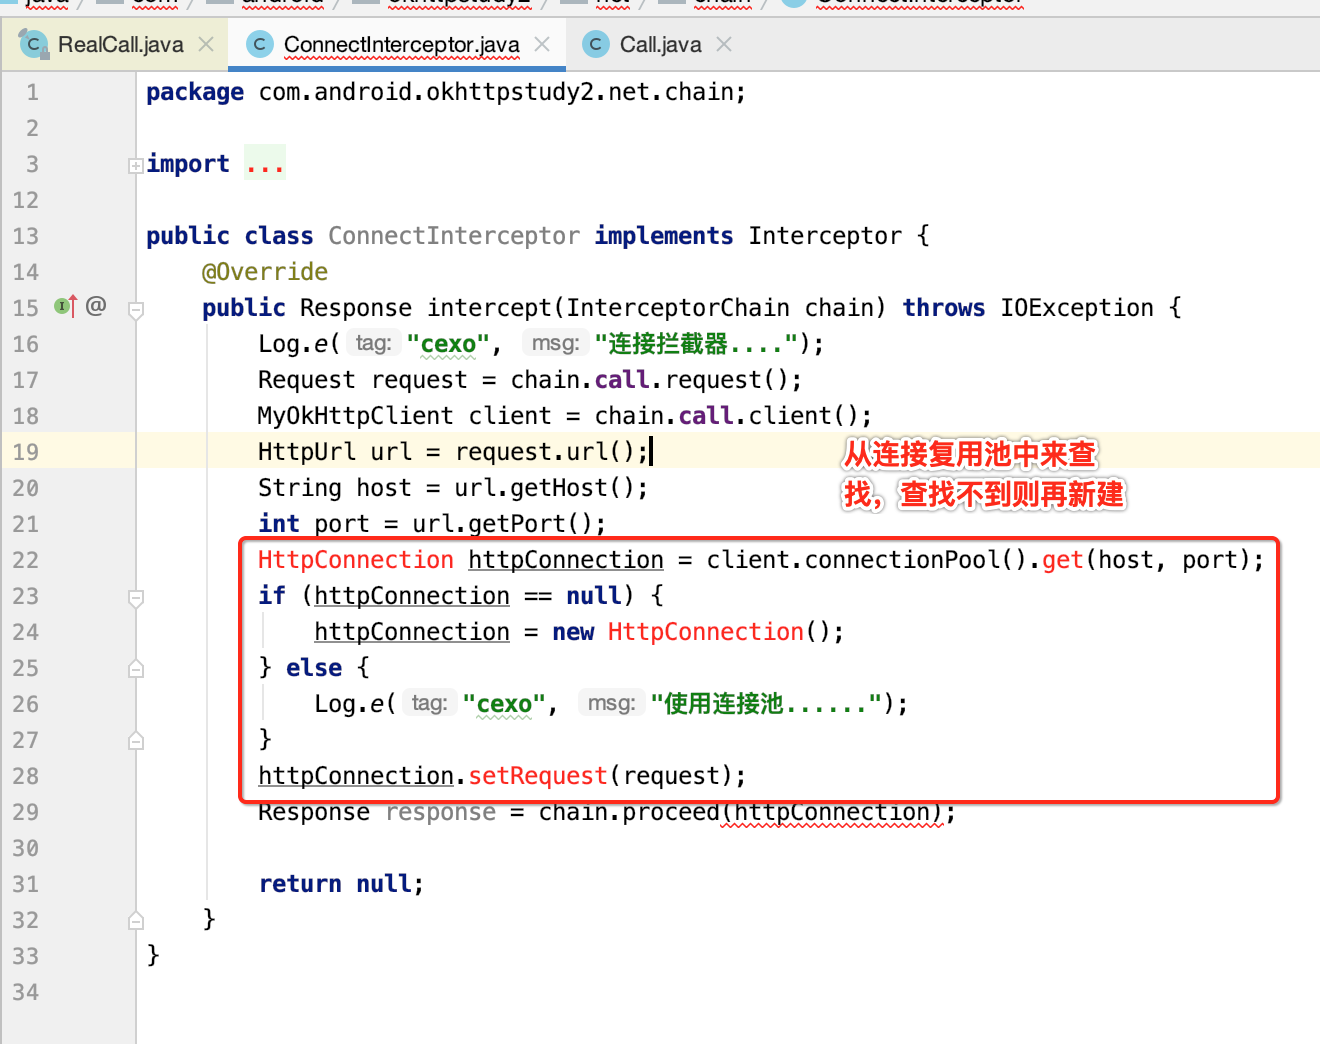
所以,先来新建一个HttpConnection类:
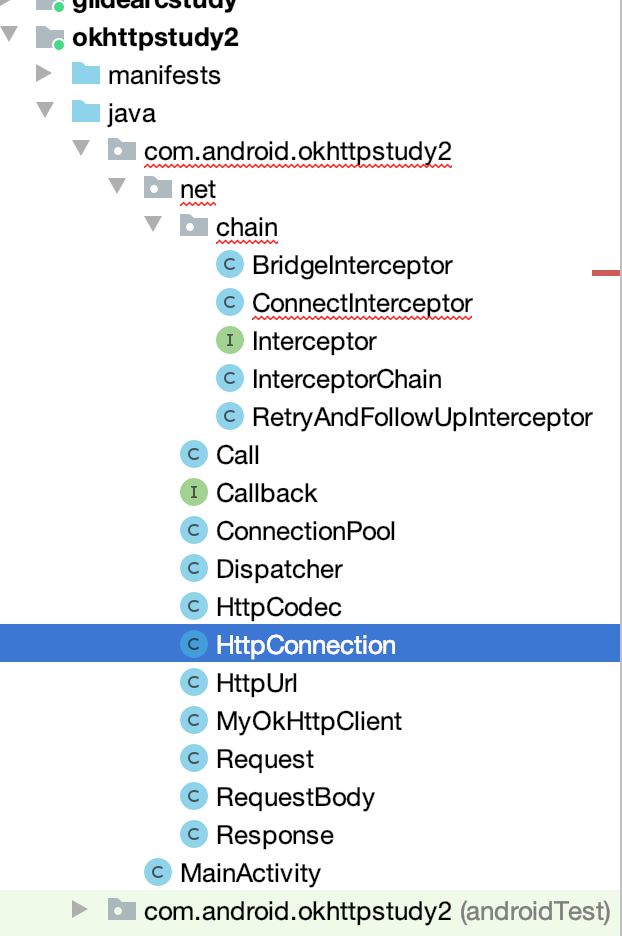
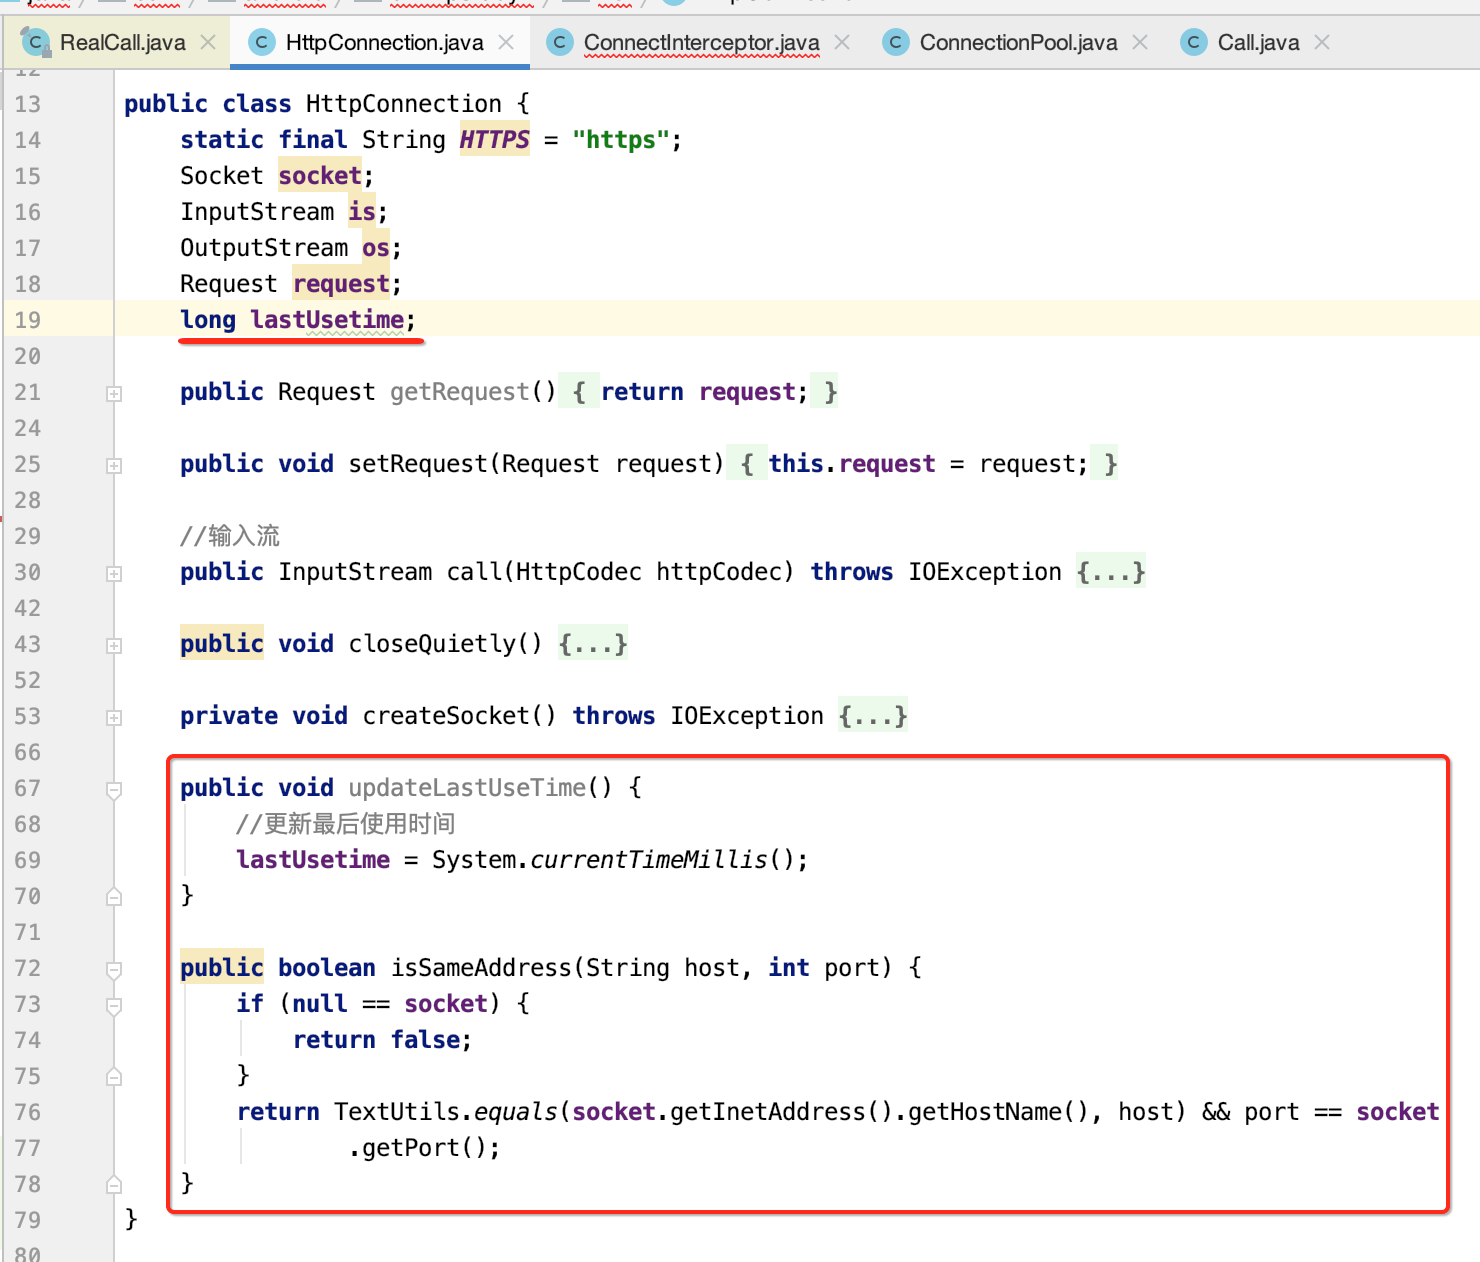
package com.android.okhttpstudy2.net;

import java.io.IOException;
import java.io.InputStream;
import java.io.OutputStream;
import java.net.InetSocketAddress;
import java.net.Socket;

import javax.net.ssl.SSLSocketFactory;

public class HttpConnection {
    static final String HTTPS = "https";
    Socket socket;
    InputStream is;
    OutputStream os;
    Request request;

    public Request getRequest() {
        return request;
    }

    public void setRequest(Request request) {
        this.request = request;
    }

    //输入流
    public InputStream call(HttpCodec httpCodec) throws IOException {

        try {
            createSocket();
            httpCodec.writeRequest(os, request);
            return is;
        }catch (Exception e){
            closeQuietly();
            throw new IOException(e);
        }

    }

    public void closeQuietly() {
        if(null != socket){
            try {
                socket.close();
            } catch (IOException e) {
                e.printStackTrace();
            }
        }
    }

    private void createSocket() throws IOException {
        if (null == socket || socket.isClosed()) {
            HttpUrl url = request.url();
            if(url.protocol.equalsIgnoreCase(HTTPS)){
                socket = SSLSocketFactory.getDefault().createSocket();
            } else {
                socket = new Socket();
            }
            socket.connect(new InetSocketAddress(url.host, url.port));
            os = socket.getOutputStream();
            is = socket.getInputStream();
        }
    }
}
这才是真正发起Socket连接的类,接下来则要完善一下连接复用池类:

这里面的代码有点多,也不细说了,基本也能看懂,贴出来:
package com.android.okhttpstudy2.net;


import android.util.Log;

import java.util.ArrayDeque;
import java.util.Deque;
import java.util.Iterator;
import java.util.concurrent.Executor;
import java.util.concurrent.SynchronousQueue;
import java.util.concurrent.ThreadFactory;
import java.util.concurrent.ThreadPoolExecutor;
import java.util.concurrent.TimeUnit;

/**
 * keep-alive 就是浏览器和服务端之间保持长连接,这个连接是可以复用的。在HTTP1.1中是默认开启的。
 * <p>
 * 连接的复用为什么会提高性能呢?
 * <p>
 * (一次响应的过程) 通常我们在发起http请求的时候首先要完成tcp的三次握手,然后传输数据,最后再释放连接
 * <p>
 * 如果在高并发的请求连接情况下或者同个客户端多次频繁的请求操作,无限制的创建会导致性能低下。
 * 如果使用keep-alive,在timeout空闲时间内,连接不会关闭,相同重复的request将复用原先的connection,
 * 减少握手的次数,大幅提高效率。(并非keep-alive的timeout设置时间越长,就越能提升性能。
 * 长久不关闭会造成过多的僵尸连接和泄露连接出现)
 */
public class ConnectionPool {

    /**
     * 每个连接的最大存活时间
     */
    private final long keepAliveDuration;

    //复用队列
    private final Deque<HttpConnection> connections = new ArrayDeque<>();

    private boolean cleanupRunning;

    public ConnectionPool() {
        this(1, TimeUnit.MINUTES);
    }

    public ConnectionPool(long keepAliveDuration, TimeUnit timeUnit) {
        //毫秒
        this.keepAliveDuration = timeUnit.toMillis(keepAliveDuration);
    }

    /**
     * 垃圾回收线程
     * 线程池,用来检测闲置socket并对其进行清理
     */
    private static ThreadFactory threadFactory = new ThreadFactory() {
        @Override
        public Thread newThread(Runnable runnable) {
            Thread result = new Thread(runnable, "DNHttpClient ConnectionPool");
            result.setDaemon(true);
            return result;
        }
    };


    private static final Executor executor = new ThreadPoolExecutor(0 /* corePoolSize */,
            Integer.MAX_VALUE /* maximumPoolSize */, 60L /* keepAliveTime */, TimeUnit.SECONDS,
            new SynchronousQueue<Runnable>(), threadFactory);

    private final Runnable cleanupRunnable = new Runnable() {
        @Override
        public void run() {
            while (true) {
                long waitTimes = cleanup(System.currentTimeMillis());
                if (waitTimes == -1) {
                    return;
                }
                if (waitTimes > 0) {
                    synchronized (ConnectionPool.this) {
                        try {
                            //调用某个对象的wait()方法能让当前线程阻塞,
                            // 并且当前线程必须拥有此对象的monitor(即锁)
                            ConnectionPool.this.wait(waitTimes);
                        } catch (InterruptedException ignored) {
                        }
                    }
                }
            }
        }
    };

    public HttpConnection get(String host, int port) {
        Iterator<HttpConnection> iterator = connections.iterator();
        while (iterator.hasNext()) {
            HttpConnection connection = iterator.next();
            //查连接是否复用( 同样的host )
            if (connection.isSameAddress(host, port)) {
                //正在使用的移出连接池
                iterator.remove();
                return connection;
            }
        }
        return null;
    }

    public void put(HttpConnection connection) {
        //执行检测清理
        if (!cleanupRunning) {
            cleanupRunning = true;
            executor.execute(cleanupRunnable);
        }
        connections.add(connection);
    }


    /**
     * 检查需要移除的连接返回下次检查时间
     */
    long cleanup(long now) {
        long longestIdleDuration = -1;
        synchronized (this) {
            for (Iterator<HttpConnection> i = connections.iterator(); i.hasNext(); ) {
                HttpConnection connection = i.next();
                //获得闲置时间 多长时间没使用这个了
                long idleDuration = now - connection.lastUsetime;
                //如果闲置时间超过允许
                if (idleDuration > keepAliveDuration) {
                    connection.closeQuietly();
                    i.remove();
                    Log.e("cexo", "移出连接池");
                    continue;
                }
                //获得最大闲置时间
                if (longestIdleDuration < idleDuration) {
                    longestIdleDuration = idleDuration;
                }
            }
            //下次检查时间
            if (longestIdleDuration >= 0) {
                return keepAliveDuration - longestIdleDuration;
            } else {
                //连接池没有连接 可以退出
                cleanupRunning = false;
                return longestIdleDuration;
            }
        }
    }
}
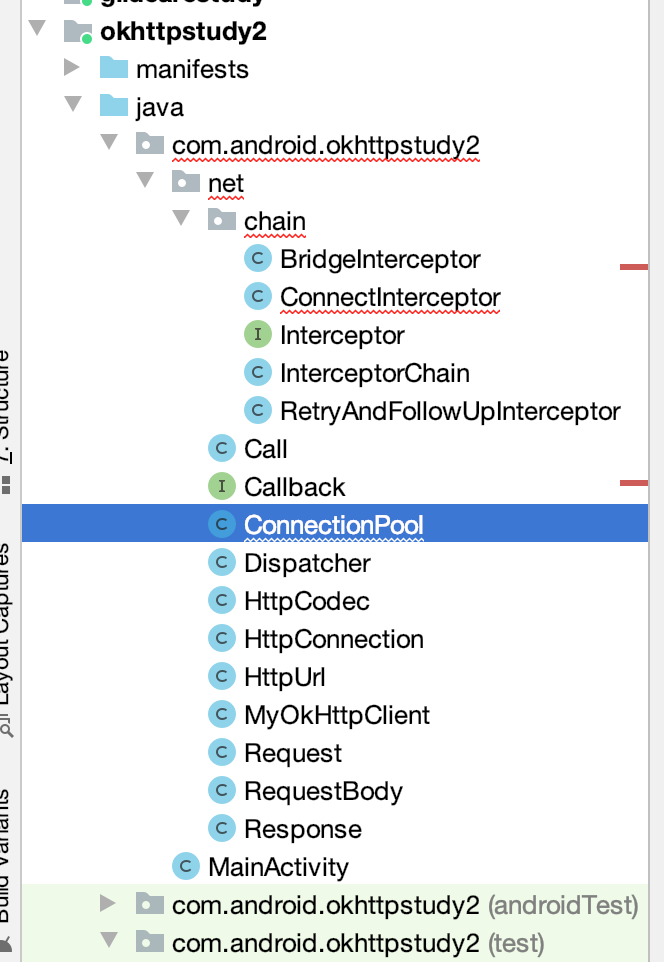
其中标红处是需要新定义的,如下:
其中可以看到连接池中有一个清理线程,它是做了一定的wait的延时才会进行清理的,而非连接立马就关闭,如上次所分析的那样:

然后就是获取和存放连接了,比较好懂,继续。

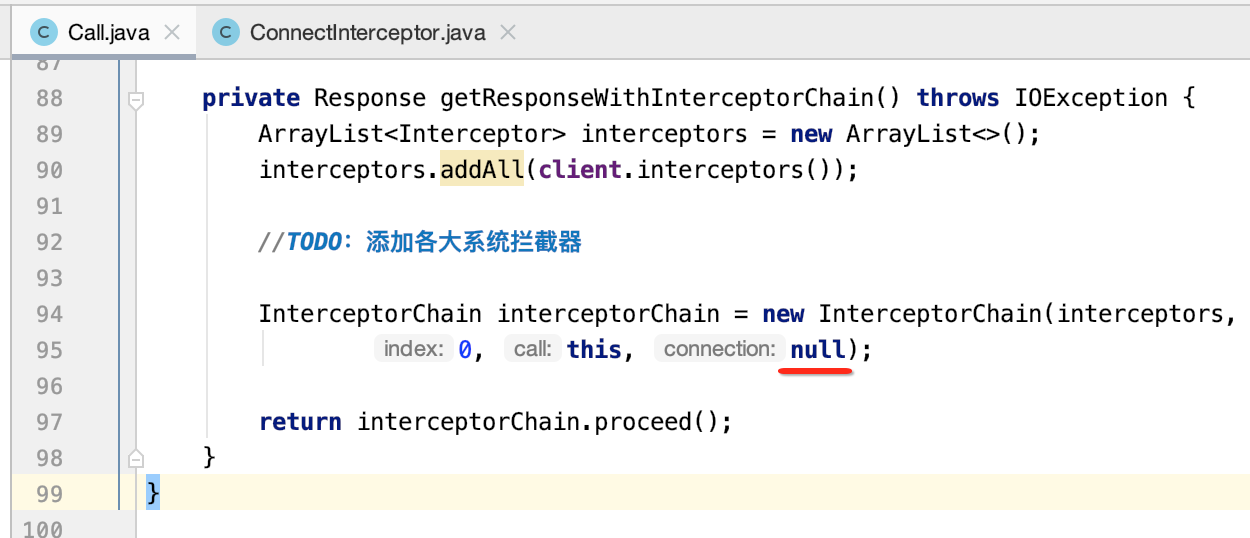
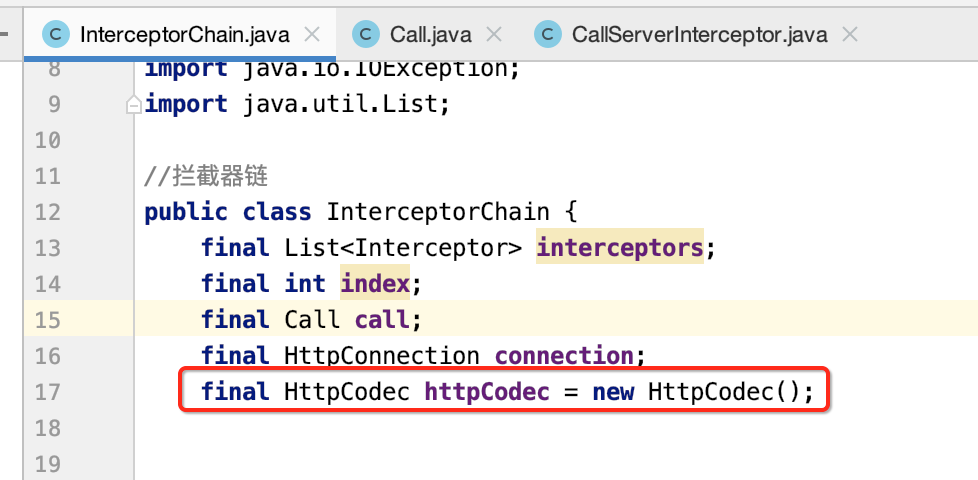
package com.android.okhttpstudy2.net.chain;

import com.android.okhttpstudy2.net.Call;
import com.android.okhttpstudy2.net.HttpConnection;
import com.android.okhttpstudy2.net.Response;

import java.io.IOException;
import java.util.List;

//拦截器链
public class InterceptorChain {
    final List<Interceptor> interceptors;
    final int index;
    final Call call;
    final HttpConnection connection;


    public InterceptorChain(List<Interceptor> interceptors, int index, Call call, HttpConnection connection) {
        this.interceptors = interceptors;
        this.index = index;
        this.call = call;
        this.connection = connection;
    }

    public Response proceed() throws IOException {
        return proceed(connection);
    }

    public Response proceed(HttpConnection connection)
            throws IOException {
        Interceptor interceptor = interceptors.get(index);
        InterceptorChain next = new InterceptorChain(interceptors, index + 1, call, connection);
        Response response = interceptor.intercept(next);
        return response;
    }
}
也就是每一次执行拦截器链时,都会先拿到当前index的拦截器,然后再新建一个index+1的新拦截器链,最终当参数传到当前拦截器当中,就形成了一个链了。构造增加了一个HttpConnection参数了,接下来则需要修改一下它的调用了,如下:
好,接下来还得进一步完善连接拦截器的逻辑,当处理完之后,如果判断此连接是一个长链接,则就需要将其加入到复用连接池中,如下:
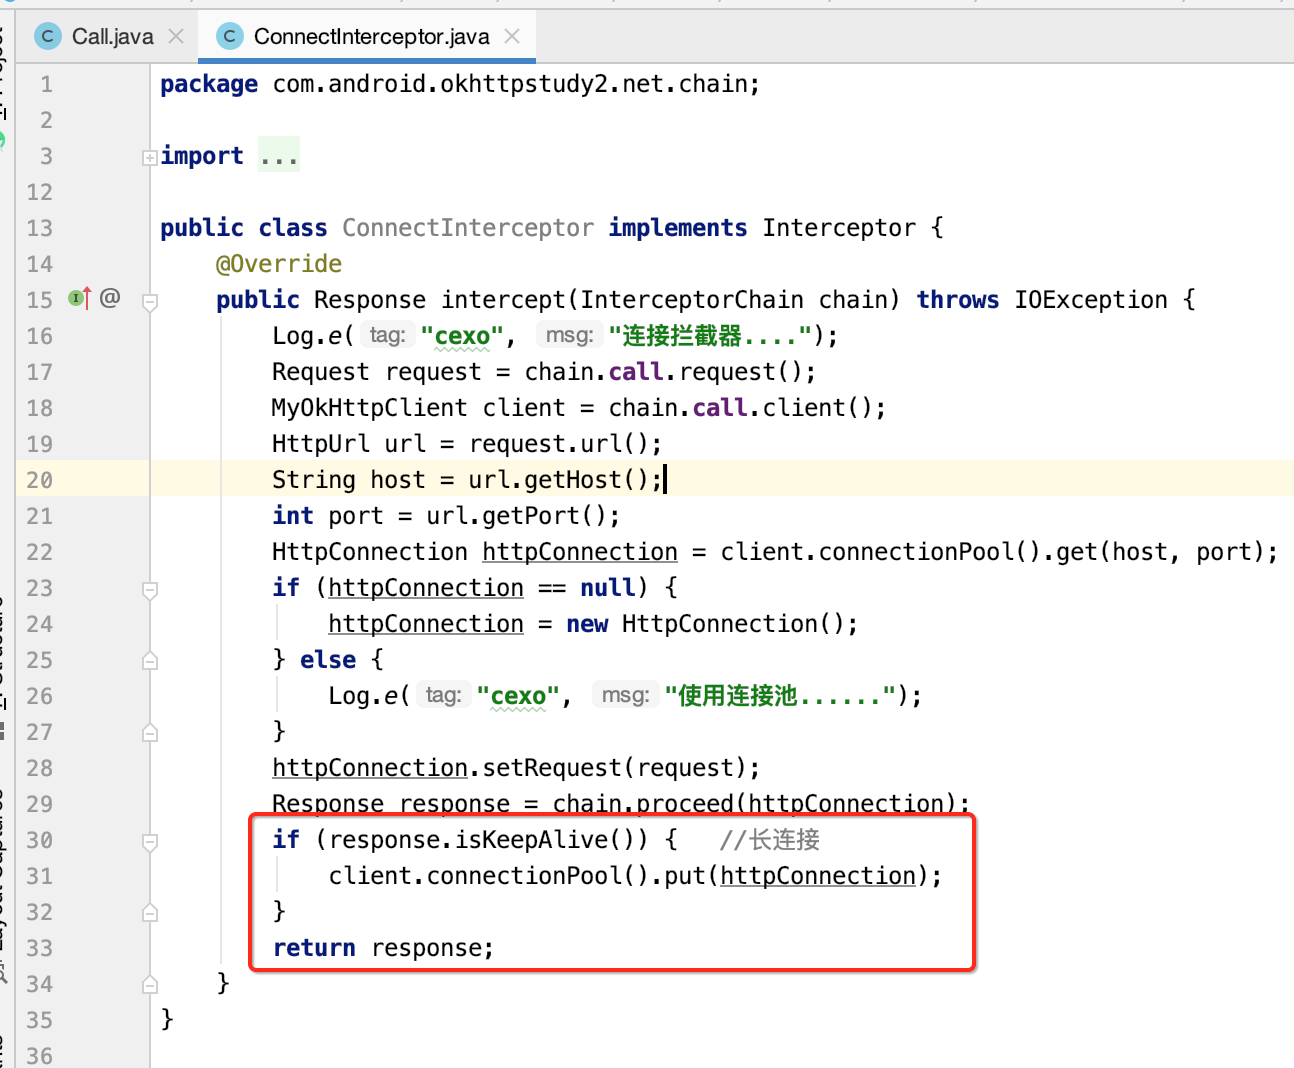
至此,关于连接拦截器的实现就到这了。
CallServerInterceptor:
Socket连接建立好之后接下来则就可以发起通讯啦,此时肯定需要用到解码器了,这一块也直接贴出代码了,细节一看就懂:
package com.android.okhttpstudy2.net.chain;

import android.util.Log;

import com.android.okhttpstudy2.net.HttpCodec;
import com.android.okhttpstudy2.net.HttpConnection;
import com.android.okhttpstudy2.net.Response;

import java.io.IOException;
import java.io.InputStream;
import java.util.Map;

public class CallServerInterceptor implements Interceptor{
    @Override
    public Response intercept(InterceptorChain chain) throws IOException {
        Log.e("cexo", "通信拦截器....");
        HttpCodec httpCodec = chain.httpCodec;
        HttpConnection connection = chain.connection;
        InputStream is = connection.call(httpCodec)
                ;
        //HTTP/1.1 200 OK 空格隔开的响应状态
        String readLine = httpCodec.readLine(is);

        Map<String, String> map = httpCodec.readHeaders(is);
        //是否保持连接
        boolean isKeepAlive = false;
        if(map.containsKey(HttpCodec.HEAD_CONNECTION)){
            isKeepAlive = map.get(HttpCodec.HEAD_CONNECTION).equalsIgnoreCase(HttpCodec.HEAD_VALUE_KEEP_ALIVE);
        }
        int contentLength = -1;
        if (map.containsKey(HttpCodec.HEAD_CONTENT_LENGTH)) {
            contentLength = Integer.valueOf(map.get(HttpCodec.HEAD_CONTENT_LENGTH));
        }
        //分块编码数据
        boolean isChunked = false;
        if (map.containsKey(HttpCodec.HEAD_TRANSFER_ENCODING)) {
            isChunked = map.get(HttpCodec.HEAD_TRANSFER_ENCODING).equalsIgnoreCase(HttpCodec
                    .HEAD_VALUE_CHUNKED);
        }

        String body = null;
        if(contentLength > 0){
            byte[] bytes = httpCodec.readBytes(is, contentLength);
            body = new String(bytes);
        } else if(isChunked){
            body = httpCodec.readChunked(is);
        }

        String[] split = readLine.split(" ");
        connection.updateLastUseTime();

        return new Response(Integer.valueOf(split[1]), contentLength, map, body, isKeepAlive);
    }
}
其中拦截器链上需要增加一个拼接头部信息的工具类HttpCodec,代码比较多,不多解释了:
package com.android.okhttpstudy2.net;

import java.io.IOException;
import java.io.InputStream;
import java.io.OutputStream;
import java.nio.ByteBuffer;
import java.util.HashMap;
import java.util.Map;


//拼接头部的工具类
public class HttpCodec {

    //回车和换行
    static final String CRLF = "
";
    static final int CR = 13;
    static final int LF = 10;
    static final String SPACE = " ";
    static final String VERSION = "HTTP/1.1";
    static final String COLON = ":";


    public static final String HEAD_HOST = "Host";
    public static final String HEAD_CONNECTION = "Connection";
    public static final String HEAD_CONTENT_TYPE = "Content-Type";
    public static final String HEAD_CONTENT_LENGTH = "Content-Length";
    public static final String HEAD_TRANSFER_ENCODING = "Transfer-Encoding";

    public static final String HEAD_VALUE_KEEP_ALIVE = "Keep-Alive";
    public static final String HEAD_VALUE_CHUNKED = "chunked";

    ByteBuffer byteBuffer;

    public HttpCodec() {
        //申请足够大的内存记录读取的数据 (一行)
        byteBuffer = ByteBuffer.allocate(10 * 1024);
    }

    public void writeRequest(OutputStream os, Request request) throws IOException {
        StringBuffer protocol = new StringBuffer();

        //请求行
        protocol.append(request.method());
        protocol.append(SPACE);
        protocol.append(request.url().file);
        protocol.append(SPACE);
        protocol.append(VERSION);
        protocol.append(CRLF);

        //http请求头
        Map<String, String> headers = request.headers();
        for (Map.Entry<String, String> entry : headers.entrySet()) {
            protocol.append(entry.getKey());
            protocol.append(COLON);
            protocol.append(SPACE);
            protocol.append(entry.getValue());
            protocol.append(CRLF);
        }
        protocol.append(CRLF);

        //http请求体 如果存在
        RequestBody body = request.body();
        if (null != body) {
            protocol.append(body.body());
        }

        //写出
        os.write(protocol.toString().getBytes());
        os.flush();
    }


    public Map<String, String> readHeaders(InputStream is) throws IOException {
        HashMap<String, String> headers = new HashMap<>();
        while (true) {
            String line = readLine(is);
            //读取到空行 则下面的为body
            if (isEmptyLine(line)) {
                break;
            }
            int index = line.indexOf(":");
            if (index > 0) {
                String name = line.substring(0, index);
                // ": "移动两位到 总长度减去两个("
")
                String value = line.substring(index + 2, line.length() - 2);
                headers.put(name, value);
            }
        }
        return headers;
    }


    public String readLine(InputStream is) throws IOException {
        try {
            byte b;
            boolean isMabeyEofLine = false;
            //标记
            byteBuffer.clear();
            byteBuffer.mark();
            while ((b = (byte) is.read()) != -1) {
                byteBuffer.put(b);
                // 读取到/r则记录,判断下一个字节是否为/n
                if (b == CR) {
                    isMabeyEofLine = true;
                } else if (isMabeyEofLine) {
                    //上一个字节是/r 并且本次读取到/n
                    if (b == LF) {
                        //获得目前读取的所有字节
                        byte[] lineBytes = new byte[byteBuffer.position()];
                        //返回标记位置
                        byteBuffer.reset();
                        byteBuffer.get(lineBytes);
                        //清空所有index并重新标记
                        byteBuffer.clear();
                        byteBuffer.mark();
                        String line = new String(lineBytes);
                        return line;
                    }
                    isMabeyEofLine = false;
                }
            }
        } catch (Exception e) {
            throw new IOException(e);
        }
        throw new IOException("Response Read Line.");
    }

    boolean isEmptyLine(String line) {
        return line.equals("
");
    }

    public byte[] readBytes(InputStream is, int len) throws IOException {
        byte[] bytes = new byte[len];
        int readNum = 0;
        while (true) {
            readNum += is.read(bytes, readNum, len - readNum);
            //读取完毕
            if (readNum == len) {
                return bytes;
            }
        }
    }


    public String readChunked(InputStream is) throws IOException {
        int len = -1;
        boolean isEmptyData = false;
        StringBuffer chunked = new StringBuffer();
        while (true) {
            //解析下一个chunk长度
            if (len < 0) {
                String line = readLine(is);
                line = line.substring(0, line.length() - 2);
                len = Integer.valueOf(line, 16);
                //chunk编码的数据最后一段为 0


                isEmptyData = len == 0;
            } else {
                //块长度不包括
  所以+2将
 读走
                byte[] bytes = readBytes(is, len + 2);
                chunked.append(new String(bytes));
                len = -1;
                if (isEmptyData) {
                    return chunked.toString();
                }
            }
        }
    }
}
其中在处理完之后,会更新一个当前连接的使用时间,也就是为了进行清理用的:

此时不木有调用chain.proceed()了,因为这是最后一个拦截器了,
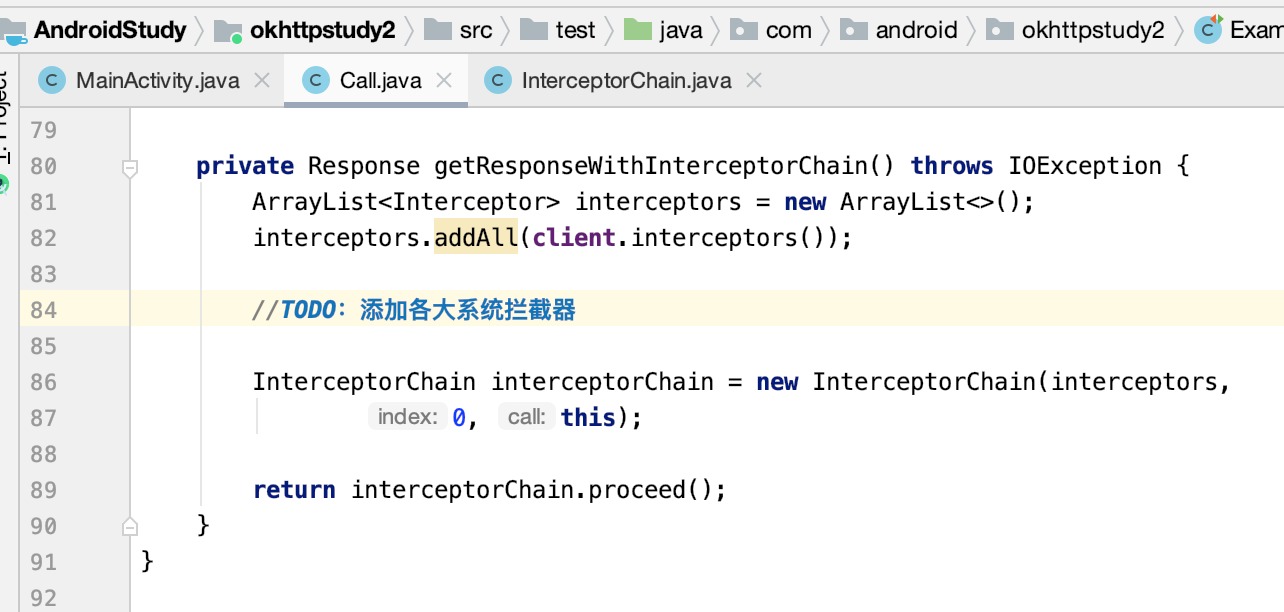
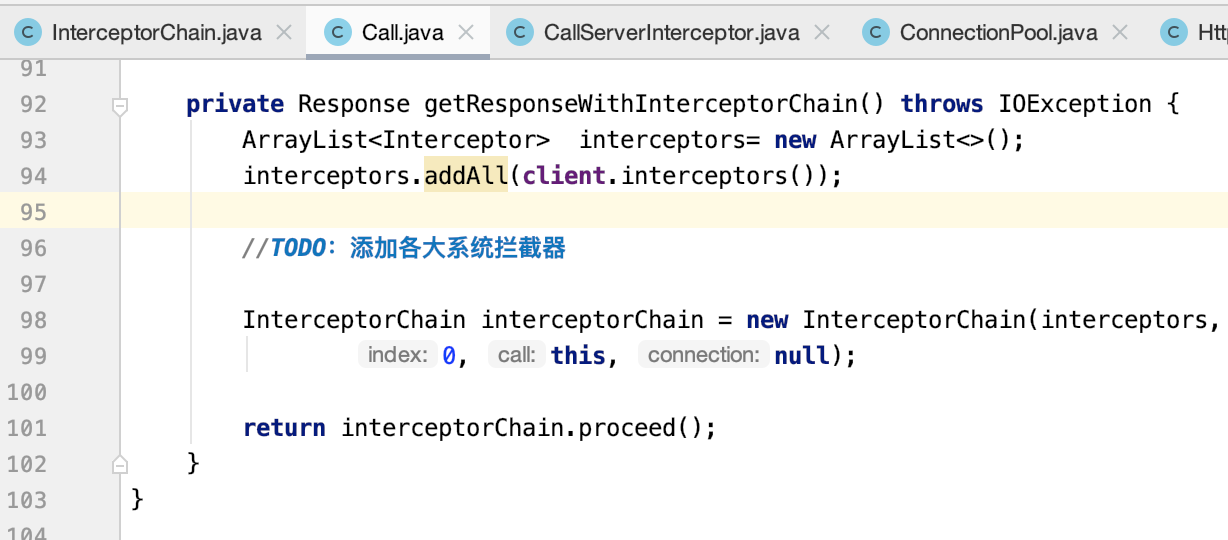
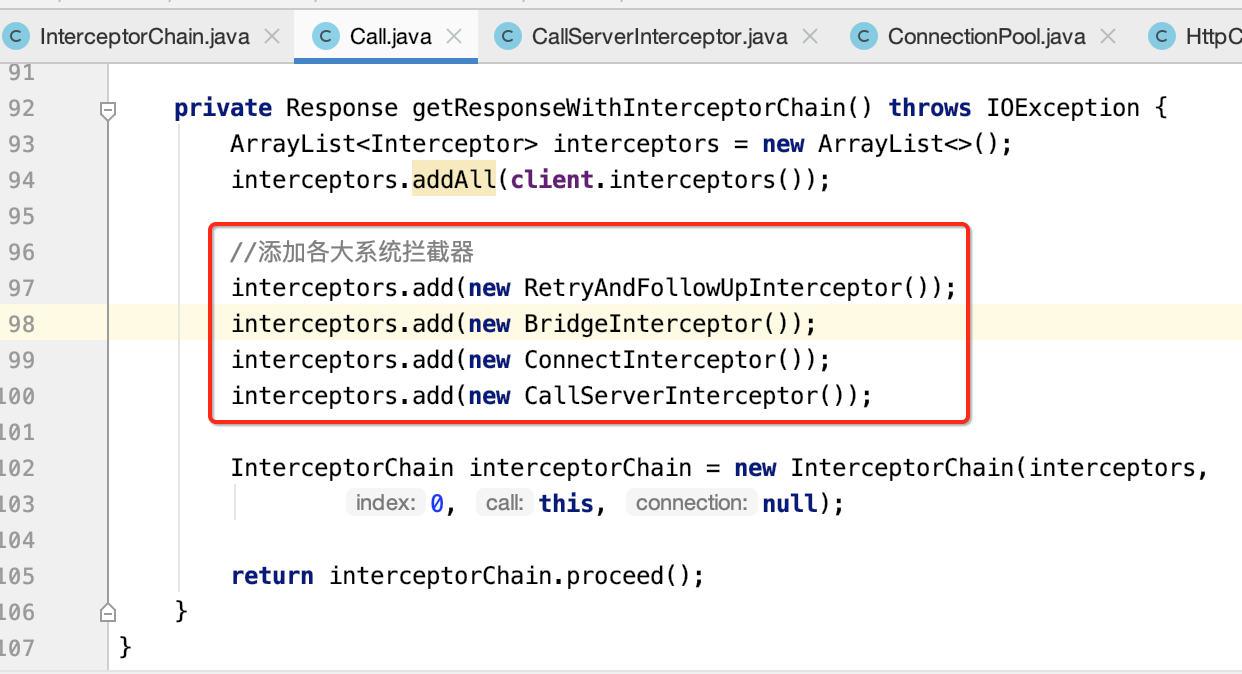
添加各大拦截器到拦截器链:
至此,上面已经准备好了各大拦截器了,接下来则在Call.getResponseWithInterceptorChain()中进行使用既可,如下:
至此,就完整的手动来撸了一遍整个OkHttp的核心流程,此时如果有人再问起让你讲讲OkHttp的核心原理,拦截器原理,我想自己应该能比以前更有自信的去面对了,这其实也就是踏实追求技术所带来的好处,学得越深,走得更远,当然自己还是处于慢爬爬的阶段,还没达到自己心中的那个高度,坚持~~