我们都知道一般的二微码都是以不同形式显示有的是登入,有的是网页,其实二维码只是一个字符串。到这里我们就有一个疑问那二维码是这样判断是网站或者是登入功能的呢?
其实这些判断部分,二维码生成器早就给你完成了,我们只需导入一个core-3.2.1.jar包就行。那接下来我们来做一个简单的小案例,进一步了解二维码。
一、新建项目
1、我们建一个名为"weima"的项目。
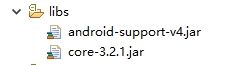
2、在该项目libs下导入一个core-3.2.1.jar包(注:下载地址:http://pan.baidu.com/s/1i5FiYXZ),你也可以在百度搜索。
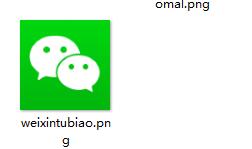
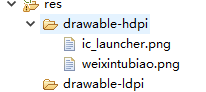
3、我们都发现常见的二维码中间有个小图片,所以我们先下载一张图片放入res下的drawable—hdpi处。
二、布局文件
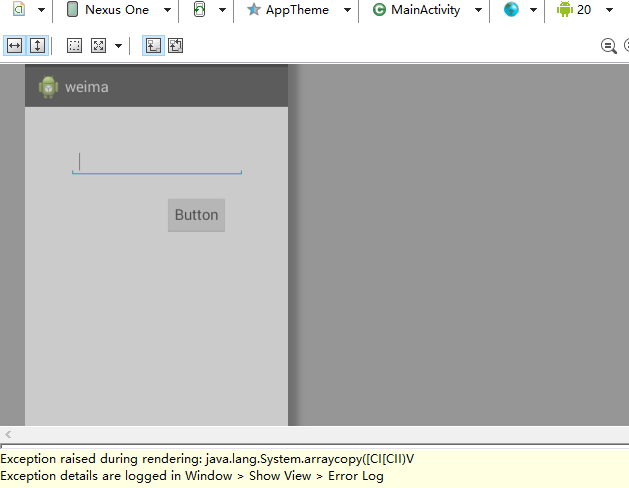
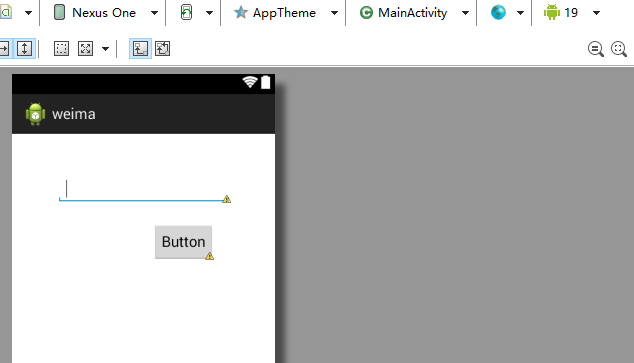
1、首先我们添加一个EditText输入框和一个Button按钮,一个ImageView控件用来显示二维码的图标。
2、当我们在输入框输入完数字或网址时,点击Button按钮后,就会在ImageView控件生成一个二维码。
3、当我们添加EditText,可能由于版本问题会出现无法点击界面,以下问题。
4、EditText由于版本问题所以要将版本调到19,调版本的在右上角安卓机器人图标处。
activity_main.xml文件:
<RelativeLayout xmlns:android="http://schemas.android.com/apk/res/android"
    xmlns:tools="http://schemas.android.com/tools"
    android:layout_width="match_parent"
    android:layout_height="match_parent"
    android:paddingBottom="@dimen/activity_vertical_margin"
    android:paddingLeft="@dimen/activity_horizontal_margin"
    android:paddingRight="@dimen/activity_horizontal_margin"
    android:paddingTop="@dimen/activity_vertical_margin"
    tools:context="com.example.weima.MainActivity" >

     <EditText
        android:id="@+id/editText1"
        android:layout_width="wrap_content"
        android:layout_height="wrap_content"
        android:layout_alignParentLeft="true"
        android:layout_alignParentTop="true"
        android:layout_marginLeft="38dp"
        android:layout_marginTop="33dp"
        android:ems="10" >

        <requestFocus />
    </EditText>

   <Button
        android:id="@+id/button1"
        android:layout_width="wrap_content"
        android:layout_height="wrap_content"
        android:layout_alignRight="@+id/editText1"
        android:layout_below="@+id/editText1"
        android:layout_marginRight="20dp"
        android:layout_marginTop="22dp"
        android:text="Button" />

    <ImageView
        android:id="@+id/imageView1"
        android:layout_width="wrap_content"
        android:layout_height="wrap_content"
        android:layout_alignLeft="@+id/editText1"
        android:layout_below="@+id/button1"
        android:layout_marginLeft="14dp"
        android:layout_marginTop="47dp" />

</RelativeLayout>
三、MainActivity的代码
MainActivity.java文件:
public class MainActivity extends Activity {

    private EditText ent;
    private Button btn;
    private ImageView img;
    private static final int IMAGE_HALFWIDTH = 35;//图片宽度值大小
    @Override
    protected void onCreate(Bundle savedInstanceState) {
        super.onCreate(savedInstanceState);
        setContentView(R.layout.activity_main);

        ent=(EditText)findViewById(R.id.editText1);
        img=(ImageView)findViewById(R.id.imageView1);
        btn=(Button)findViewById(R.id.button1);
        btn.setOnClickListener(new OnClickListener(){

            @Override
            public void onClick(View v) {
                // TODO Auto-generated method stub
                //取出字符串
                String entText=ent.getText().toString();
                Bitmap log=BitmapFactory.decodeResource(getResources(), R.drawable.weixintubiao);

                try {
                    Bitmap bm=createCode(entText,log,BarcodeFormat.QR_CODE);
                    img.setImageBitmap(bm);
                } catch (WriterException e) {
                    e.printStackTrace();
                }
            }});
    }

    public Bitmap createCode(String string,Bitmap mBitmap, BarcodeFormat format)throws WriterException
    {

        //Matrix,中文里叫矩阵,在图像处理方面,主要是用于平面的缩放、平移、旋转等操作。
        Matrix mat=new Matrix();
        float imgX=(float)2*IMAGE_HALFWIDTH/mBitmap.getWidth();
        float imgY=(float)2*IMAGE_HALFWIDTH/mBitmap.getHeight();
        mat.setScale(imgX,imgY);//设置缩放信息
        //将logo图片按martix设置的信息缩放
        mBitmap = Bitmap.createBitmap(mBitmap, 0, 0,mBitmap.getWidth(), mBitmap.getHeight(), mat, false);
        MultiFormatWriter writer=new MultiFormatWriter();
        Hashtable htable=new Hashtable();
        htable.put(EncodeHintType.CHARACTER_SET, "UTF-8");//设置字符编码
        //生成二维码矩阵信息
        BitMatrix matrix = writer.encode(string, format, 800, 800, htable);
        int width=matrix.getWidth();//矩阵宽度
        int height=matrix.getHeight();//矩阵高度
        int matW=width/2;
        int matH=height/2;
        int[] pixels = new int[width * height];//定义数组长度为矩阵高度*矩阵宽度,用于记录矩阵中像素信息
        for(int y=0;y<height;y++){//从行开始迭代矩阵
        for(int x=0;x<width;x++)//迭代列
        {
            if (x > matW - IMAGE_HALFWIDTH && x < matW + IMAGE_HALFWIDTH && y > matH - IMAGE_HALFWIDTH && y < matH + IMAGE_HALFWIDTH) {
                //该位置用于存放图片信息
                //记录图片每个像素信息
                pixels[y * width + x] = mBitmap.getPixel(x - matW+ IMAGE_HALFWIDTH, y - matH + IMAGE_HALFWIDTH);
            }
            else {
                if (matrix.get(x, y)) {
                    //如果有黑块点,记录信息
                    pixels[y * width + x] = 0xff000000;//记录黑块信息
                }
            }
        }
    }
        Bitmap bitmap = Bitmap.createBitmap(width, height,Bitmap.Config.ARGB_8888);
        // 通过像素数组生成bitmap
        bitmap.setPixels(pixels, 0, width, 0, 0, width, height);
        return bitmap;
    }


}
1、首先我们定义三个控件变量,通过R文件找到控件ID进行相关的操作,为Button控件添加的相关的onClick点击事件。
2、通过调用系统的Bitmap类对来对图片进行相关的操作。
3、通过createCode生成二维码并嵌入图标。
最终效果图:
