一:什么是springMVC
MVC,顾名思义,m就是model模型,包括处理业务、访问数据库以及封装数据实体类等,view视图层
负责和用户进行交互,就是展示给用户的部分,包括jsp页面,html等,c就是控制器,是controller层。
大致的访问流程是:
1:浏览器发送请求到服务器,然后服务器将请求分配给dispatcher分发器(在web.xml中配置)
2:然后dispatcher分发器调用handlerMapping将前台请求地址与controller控制器进行匹配,这里就要
用到handlerMapping组件
3:controller控制层调用handlerRequest方法处理请求,当然包括业务以及与数据库交互的部分,然后将
处理结果以及页面封装到ModelAndView对象中返回给核心分发器
4:然后分发器调用viewResolver组件将modelandview中返回的视图名称按照viewResolver进行拼接,得到
访问的视图,然后将数据填充到视图中
5:将jsp处理结果返回到浏览器展示
二:示例演示
下面通过示例来演示:
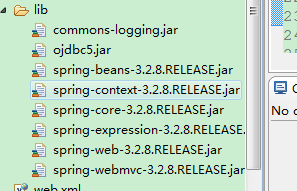
1:第一步配置环境,在lib中导入如下jar包
2:配置spring容器spring-mvc.xml
 1 <?xml version="1.0" encoding="UTF-8"?>
 2 <beans xmlns="http://www.springframework.org/schema/beans"
 3     xmlns:xsi="http://www.w3.org/2001/XMLSchema-instance" xmlns:context="http://www.springframework.org/schema/context"
 4     xmlns:jdbc="http://www.springframework.org/schema/jdbc" xmlns:jee="http://www.springframework.org/schema/jee"
 5     xmlns:tx="http://www.springframework.org/schema/tx" xmlns:jpa="http://www.springframework.org/schema/data/jpa"
 6     xmlns:util="http://www.springframework.org/schema/util" xmlns:mvc="http://www.springframework.org/schema/mvc"
 7     xsi:schemaLocation="
 8         http://www.springframework.org/schema/beans http://www.springframework.org/schema/beans/spring-beans-3.2.xsd
 9         http://www.springframework.org/schema/context http://www.springframework.org/schema/context/spring-context-3.2.xsd
10         http://www.springframework.org/schema/jdbc http://www.springframework.org/schema/jdbc/spring-jdbc-3.2.xsd
11         http://www.springframework.org/schema/jee http://www.springframework.org/schema/jee/spring-jee-3.2.xsd
12         http://www.springframework.org/schema/tx http://www.springframework.org/schema/tx/spring-tx-3.2.xsd
13         http://www.springframework.org/schema/data/jpa http://www.springframework.org/schema/data/jpa/spring-jpa-1.3.xsd
14         http://www.springframework.org/schema/util http://www.springframework.org/schema/util/spring-util-3.2.xsd
15         http://www.springframework.org/schema/mvc http://www.springframework.org/schema/mvc/spring-mvc-3.2.xsd">
16
17     <!-- 定义请求处理映射 -->
18     <bean id="handlerMapping" class="org.springframework.web.servlet.handler.SimpleUrlHandlerMapping">
19         <!-- 指定请求与controller对应关系 -->
20         <property name="mappings" ref="urlMappings"/>
21     </bean>
22
23     <!--定义映射关系 -->
24     <util:properties id="urlMappings">
25         <prop key="/hello.form">helloController</prop>
26     </util:properties>
27
28     <bean id="helloController" class="com.hlcui.controller.HelloController"></bean>
29
30     <!-- 定义viewResolver解析器-->
31     <bean id="viewResolver" class="org.springframework.web.servlet.view.InternalResourceViewResolver">
32         <property name="prefix" value="/WEB-INF/jsp/"/>
33         <property name="suffix" value=".jsp"/>
34     </bean>
35     </beans>
36
3:配置web.xml,dispatcher控制器在这里配置
 1 <?xml version="1.0" encoding="UTF-8"?>
 2 <web-app version="2.5"
 3     xmlns="http://java.sun.com/xml/ns/javaee"
 4     xmlns:xsi="http://www.w3.org/2001/XMLSchema-instance"
 5     xsi:schemaLocation="http://java.sun.com/xml/ns/javaee
 6     http://java.sun.com/xml/ns/javaee/web-app_2_5.xsd">
 7     <servlet>
 8         <servlet-name>springmvc</servlet-name>
 9         <servlet-class>org.springframework.web.servlet.DispatcherServlet</servlet-class>
10         <!-- 指定配置文件的位置 -->
11         <init-param>
12             <param-name>contextConfigLocation</param-name>
13             <param-value>classpath:spring-mvc.xml</param-value>
14         </init-param>
15         <load-on-startup>1</load-on-startup>
16     </servlet>
17     <servlet-mapping>
18         <servlet-name>springmvc</servlet-name>
19         <url-pattern>*.form</url-pattern>
20     </servlet-mapping>
21   <welcome-file-list>
22     <welcome-file>index.jsp</welcome-file>
23   </welcome-file-list>
24 </web-app>
4:HelloController类
 1 /**
 2  *
 3  */
 4 package com.hlcui.controller;
 5
 6 import javax.servlet.http.HttpServletRequest;
 7 import javax.servlet.http.HttpServletResponse;
 8
 9 import org.springframework.web.servlet.ModelAndView;
10 import org.springframework.web.servlet.mvc.Controller;
11
12 /**
13  * @author Administrator
14  *
15  */
16 public class HelloController implements Controller {
17
18     public ModelAndView handleRequest(HttpServletRequest request,
19             HttpServletResponse response) throws Exception {
20         System.out.println("处理业务逻辑!");
21         ModelAndView model = new ModelAndView("hello");
22         return model;
23     }
24
25 }
5:hello.jsp页面
 1 <%@ page language="java" import="java.util.*" pageEncoding="ISO-8859-1"%>
 2 <%
 3 String path = request.getContextPath();
 4 String basePath = request.getScheme()+"://"+request.getServerName()+":"+request.getServerPort()+path+"/";
 5 %>
 6
 7 <!DOCTYPE HTML PUBLIC "-//W3C//DTD HTML 4.01 Transitional//EN">
 8 <html>
 9   <head>
10     <base href="<%=basePath%>">
11
12     <title>My JSP 'hello.jsp' starting page</title>
13
14     <meta http-equiv="pragma" content="no-cache">
15     <meta http-equiv="cache-control" content="no-cache">
16     <meta http-equiv="expires" content="0">
17     <meta http-equiv="keywords" content="keyword1,keyword2,keyword3">
18     <meta http-equiv="description" content="This is my page">
19     <!--
20     <link rel="stylesheet" type="text/css" href="styles.css">
21     -->
22
23   </head>
24
25   <body>
26     This is my JSP page. <br>
27   </body>
28 </html>
6:启动服务器,然后通过浏览器访问
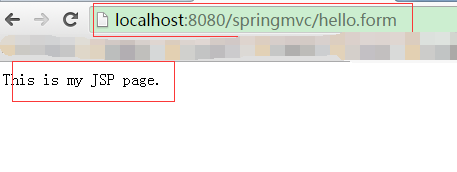
访问成功!
三:使用注解的方式对案例进行重构
1:在HelloController类中,可以使用@Controller注解在类上,替代实现Controller接口,需要在
spring容器中配置组件扫描:
1 <!-- 组件扫描 -->
2     <context:component-scan base-package="com.hlcui.controller"/>
3
2:在类上或者方法上使用@RequestMapping注解替换在spring容器中配置urlMapping映射bean
需要在spring容器中配置注解扫描:
1 <!-- RequestMapping映射配置 -->
2     <mvc:annotation-driven/>
3:修改后的类以及配置文件如下
1     <!-- 组件扫描 -->
2     <context:component-scan base-package="com.hlcui.controller"/>
3
4     <!-- RequestMapping映射配置 -->
5     <mvc:annotation-driven/>
 1 @Controller
 2 @RequestMapping("/web")
 3 public class HelloController {
 4
 5     @RequestMapping("/hello.form")
 6     public String execute(HttpServletRequest request,
 7             HttpServletResponse response) throws Exception {
 8         System.out.println("处理业务逻辑!");
 9         return "hello";
10     }
11
12 }
4:启动服务器,使用浏览器进行访问
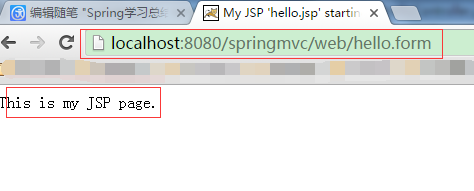
访问成功!