这里我们以最基础的xml配置的形式来解析,看一下spring启动流程的初始步骤:
一:使用spring
引入依赖:
		<dependency>
			<groupId>org.springframework</groupId>
			<artifactId>spring-context</artifactId>
			<version>${spring-context.version}</version>
		</dependency>
		<dependency>
			<groupId>ch.qos.logback</groupId>
			<artifactId>logback-classic</artifactId>
			<version>${logback-classic.version}</version>
		</dependency>
配置spring-context.xml文件,下面的properties和order-context的引入可以注释掉:
<?xml version="1.0" encoding="UTF-8"?>
<beans xmlns="http://www.springframework.org/schema/beans"
	   xmlns:xsi="http://www.w3.org/2001/XMLSchema-instance"
	   xmlns:context="http://www.springframework.org/schema/context"
	   xmlns:myname="http://www.lexueba.com/schema/user"
	   xmlns:p="http://www.springframework.org/schema/p"
	   xmlns:c="http://www.springframework.org/schema/c"
	   xmlns:aop="http://www.springframework.org/schema/aop"
	   xsi:schemaLocation="http://www.springframework.org/schema/beans http://www.springframework.org/schema/beans/spring-beans.xsd
		http://www.springframework.org/schema/context http://www.springframework.org/schema/context/spring-context.xsd
		http://www.lexueba.com/schema/user http://www.lexueba.com/schema/user.xsd http://www.springframework.org/schema/aop https://www.springframework.org/schema/aop/spring-aop.xsd">

	<!--配置扫描路径-->
	<context:component-scan base-package="com.hello"/>

	<myname:user id="customId" name="hello"/>

	<aop:aspectj-autoproxy/>

	<!-- 传统set注入用法
	<bean id="person" name="person1,person2,person3" class="com.hello.model.Person">
		<property name="id" value="123"></property>
		<property name="name" value="tom"></property>
	</bean>
	-->

	<!-- 自定义标签set属性注入-->
	<bean id="person" name="person1,person2,person3" class="com.hello.model.Person" p:id="1234" p:name="tomcat"/>

	<!--构造器注入-->
	<bean id="student1" class="com.hello.model.Student" c:_0="300" c:_1="400" primary="true">
		<!--
		<constructor-arg index="0" value="100"/>
		<constructor-arg index="1" value="200"/>
		-->
	</bean>

	<!--meta元数据设置-->
	<bean id="orderService" class="com.hello.model.OrderService">
		<meta key="test" value="testValue"></meta>
	</bean>

	<!--lookup-method标签可以动态的赋值bean,bean的值从teacher替换为student-->
	<bean id="userStudyService" class="com.hello.model.UserStudyService">
		<lookup-method name="getUser" bean="student1"></lookup-method>
	</bean>

	<bean id="teacher" class="com.hello.model.Teacher"/>

	<!--replaced-method标签可以摒弃原来的业务-->
	<bean id="cat" class="com.hello.model.Cat">
		<replaced-method name="sing" replacer="tomcat"/>
	</bean>

	<bean id="tomcat" class="com.hello.model.TomCat"/>

	<!--qualifier的作用等于给bean再起一个名字,注入的时候可以使用这个名字-->
	<bean id="testQualifier1" class="com.hello.model.TestQualifier">
		<property name="id" value="111"/>
		<qualifier type="org.springframework.beans.factory.annotation.Qualifier" value="qf"/>
	</bean>

	<bean id="testQualifier2" class="com.hello.model.TestQualifier">
		<property name="id" value="222"/>
	</bean>

	<!--factory-bean的用法-->
	<bean id="myFactoryBean" class="com.hello.model.MyFactoryBean"/>
	<bean id="user" factory-bean="myFactoryBean" factory-method="user"/>

	<!--导入其他模块的配置文件-->
	<import resource="order-context.xml"/>

	<!--加载properties配置文件-->
	<context:property-placeholder location="classpath*:*.properties" />

</beans>
测试代码:
public class TestSpringContext {
	public static void main(String[] args) {
		ClassPathXmlApplicationContext context = new ClassPathXmlApplicationContext("spring-context.xml");
		System.out.println("person: "+context.getBean("person3"));
		System.out.println("student: "+context.getBean("student1"));
		System.out.println("orderService: "+context.getBean("orderService"));

		UserStudyService userStudyService = (UserStudyService)context.getBean("userStudyService");
		userStudyService.doStudy();

		Cat cat = context.getBean(Cat.class);
		cat.sing();

		Teacher teacher = context.getBean(Teacher.class);
		teacher.study();

		User user = (User)context.getBean("hello");
		System.out.println(user);

		Child child = (Child)context.getBean("child");
		System.out.println("child: "+child);

		context.getBean(TestAutowiredModel.class).print();

		context.getBean("myFactoryBeanDemo");

		TestAopService testAopService = context.getBean(TestAopService.class);
		testAopService.test();

	}
}
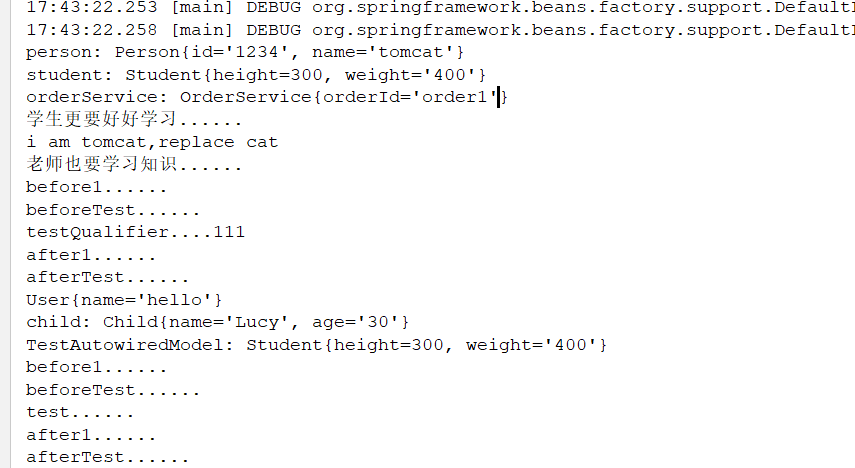
看日志可以spring容器已经正常启动,对象以及对象之间的依赖关系已经交给spring容器维护
二:基于xml配置的加载流程分析
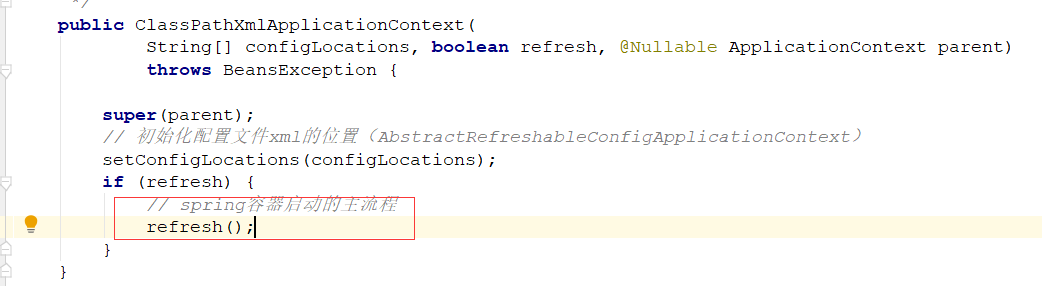
这条语句执行完,spring容器就已经启动完成了,下面我们来看一下,入参就是xml配置文件:
ClassPathXmlApplicationContext context = new ClassPathXmlApplicationContext("spring-context.xml");
有一个setConfigLocations方法,入参就是上面的xml文件路径,
	public ClassPathXmlApplicationContext(
			String[] configLocations, boolean refresh, @Nullable ApplicationContext parent)
			throws BeansException {

		super(parent);
		// 初始化配置文件xml的位置(AbstractRefreshableConfigApplicationContext)
		setConfigLocations(configLocations);
		if (refresh) {
			// spring容器启动的主流程
			refresh();
		}
	}
	public void setConfigLocations(@Nullable String... locations) {
		if (locations != null) {
			Assert.noNullElements(locations, "Config locations must not be null");
			this.configLocations = new String[locations.length];
			for (int i = 0; i < locations.length; i++) {
				this.configLocations[i] = resolvePath(locations[i]).trim();
			}
		}
		else {
			this.configLocations = null;
		}
	}
维护到了AbstractRefreshableConfigApplicationContext的属性上:

回过头来看刚才的创建ApplicationContext对象的构造方法,spring容器的主要逻辑都是在这里:
进如refresh,实际上这个是父类AbstractApplicationContext中的方法:
public void refresh() throws BeansException, IllegalStateException {
		synchronized (this.startupShutdownMonitor) {
			// Prepare this context for refreshing.
			// 准备刷新spring上下文,可以不看
			prepareRefresh();

			// Tell the subclass to refresh the internal bean factory.
			// 1:创建beanFactory工厂 2:解析xml文件,扫描注解 生成beanDefinition对象 3:注册到beanDefinitionRegistry缓存中
			ConfigurableListableBeanFactory beanFactory = obtainFreshBeanFactory();

			// Prepare the bean factory for use in this context.
			// beanFactory 的一些准备工作,可以不看
			prepareBeanFactory(beanFactory);

			try {
				// Allows post-processing of the bean factory in context subclasses.
				// 钩子方法,由子类实现
				postProcessBeanFactory(beanFactory);

				// Invoke factory processors registered as beans in the context.
				// 注册beanFactoryPostProcessor对象
				invokeBeanFactoryPostProcessors(beanFactory);

				// Register bean processors that intercept bean creation.
				// 注册beanPostProcessor实例,在bean创建的时候实现拦截
				registerBeanPostProcessors(beanFactory);

				// Initialize message source for this context.
				initMessageSource();

				// Initialize event multicaster for this context.
				initApplicationEventMulticaster();

				// Initialize other special beans in specific context subclasses.
				onRefresh();

				// Check for listener beans and register them.
				registerListeners();

				// Instantiate all remaining (non-lazy-init) singletons.
				/**
				 * 在之前已经实例化了BeanFactoryPostProcessor以及beanPostProcessor
				 * 下面开始实例化剩下的所有非懒加载的单例对象
 				 */
				finishBeanFactoryInitialization(beanFactory);

				// Last step: publish corresponding event.
				finishRefresh();
			}

			catch (BeansException ex) {
				if (logger.isWarnEnabled()) {
					logger.warn("Exception encountered during context initialization - " +
							"cancelling refresh attempt: " + ex);
				}

				// Destroy already created singletons to avoid dangling resources.
				destroyBeans();

				// Reset 'active' flag.
				cancelRefresh(ex);

				// Propagate exception to caller.
				throw ex;
			}

			finally {
				// Reset common introspection caches in Spring's core, since we
				// might not ever need metadata for singleton beans anymore...
				resetCommonCaches();
			}
		}
	}
我们这里挑选重要的步骤进行分析,不重要的方法直接跳过了
这一节主要看一下这个方法,从英文看,是让子类刷新内部的bean工厂
			// Tell the subclass to refresh the internal bean factory.
			// 1:创建beanFactory工厂 2:解析xml文件,扫描注解 生成beanDefinition对象 3:注册到beanDefinitionRegistry缓存中
			ConfigurableListableBeanFactory beanFactory = obtainFreshBeanFactory();
	protected ConfigurableListableBeanFactory obtainFreshBeanFactory() {
		refreshBeanFactory();
		return getBeanFactory();
	}
我们看一下refreshBeanFactory,这个方法是钩子方法,在AbstractApplicationContext中并没有实现,而是交给子类实现:

调到了AbstractRefreshableApplicationContext,这个判断如果beanFactory存在,就销毁实例,关闭工厂,然后重新创建一个beanFactory
	protected final void refreshBeanFactory() throws BeansException {
		//如果beanFactory存在,就销毁实例,关闭工厂
		if (hasBeanFactory()) {
			destroyBeans();
			closeBeanFactory();
		}
		try {
			// 创建一个beanFactory工厂容器
			DefaultListableBeanFactory beanFactory = createBeanFactory();
			beanFactory.setSerializationId(getId());
			customizeBeanFactory(beanFactory);
			// 加载xml配置文件
			loadBeanDefinitions(beanFactory);
			synchronized (this.beanFactoryMonitor) {
				this.beanFactory = beanFactory;
			}
		}
		catch (IOException ex) {
			throw new ApplicationContextException("I/O error parsing bean definition source for " + getDisplayName(), ex);
		}
	}
加载xml配置,把beanFactory作为入参传入
			// 加载xml配置文件
			loadBeanDefinitions(beanFactory);
调用到AbstractXmlApplicationContext,这个类继承了AbstractRefreshableConfigApplicationContext类,这个类就是刚才setConfigLocation方法所在的类:
	protected void loadBeanDefinitions(DefaultListableBeanFactory beanFactory) throws BeansException, IOException {
		// Create a new XmlBeanDefinitionReader for the given BeanFactory.
		// 为beanFactory创建一个xmlBean的解析器
		XmlBeanDefinitionReader beanDefinitionReader = new XmlBeanDefinitionReader(beanFactory);

		// Configure the bean definition reader with this context's
		// resource loading environment.
		beanDefinitionReader.setEnvironment(this.getEnvironment());
		beanDefinitionReader.setResourceLoader(this);
		beanDefinitionReader.setEntityResolver(new ResourceEntityResolver(this));

		// Allow a subclass to provide custom initialization of the reader,
		// then proceed with actually loading the bean definitions.
		initBeanDefinitionReader(beanDefinitionReader);
		// 加载xml配置
		loadBeanDefinitions(beanDefinitionReader);
	}
然后将xml解析的任务委托给了XmlBeanDefinitionReader对象来操作,调用loadBeanDefinitions
	protected void loadBeanDefinitions(XmlBeanDefinitionReader reader) throws BeansException, IOException {
		Resource[] configResources = getConfigResources();
		if (configResources != null) {
			reader.loadBeanDefinitions(configResources);
		}
		// 在第一步classPathXmlApplicationContext构造器中,已经初始化了configLocation
		String[] configLocations = getConfigLocations();
		if (configLocations != null) {
			// xml的阅读器加载xml配置文件
			reader.loadBeanDefinitions(configLocations);
		}
	}
委托给reader来解析 reader.loadBeanDefinitions()
	public int loadBeanDefinitions(String... locations) throws BeanDefinitionStoreException {
		Assert.notNull(locations, "Location array must not be null");
		int count = 0;
		// 如果有多个xml文件,会循环解析,我们这里只有一个xml配置文件
		for (String location : locations) {
			count += loadBeanDefinitions(location);
		}
		return count;
	}
Xml解析器将xml所在的路径location,封装成一个资源文件Resource,然后调用loadBeanDefinitions(resources)
	public int loadBeanDefinitions(String location, @Nullable Set<Resource> actualResources) throws BeanDefinitionStoreException {
		ResourceLoader resourceLoader = getResourceLoader();
		if (resourceLoader == null) {
			throw new BeanDefinitionStoreException(
					"Cannot load bean definitions from location [" + location + "]: no ResourceLoader available");
		}

		if (resourceLoader instanceof ResourcePatternResolver) {
			// Resource pattern matching available.
			try {
				// 首先把location路径封装成一个资源文件
				Resource[] resources = ((ResourcePatternResolver) resourceLoader).getResources(location);
				int count = loadBeanDefinitions(resources);
				if (actualResources != null) {
					Collections.addAll(actualResources, resources);
				}
				if (logger.isTraceEnabled()) {
					logger.trace("Loaded " + count + " bean definitions from location pattern [" + location + "]");
				}
				return count;
			}
			catch (IOException ex) {
				throw new BeanDefinitionStoreException(
						"Could not resolve bean definition resource pattern [" + location + "]", ex);
			}
		}
		else {
			// Can only load single resources by absolute URL.
			// 这个Resource仅仅能够加载单个的绝对路径的xml配置文件
			Resource resource = resourceLoader.getResource(location);
			int count = loadBeanDefinitions(resource);
			if (actualResources != null) {
				actualResources.add(resource);
			}
			if (logger.isTraceEnabled()) {
				logger.trace("Loaded " + count + " bean definitions from location [" + location + "]");
			}
			return count;
		}
	}

接着向下看,上一步将resouce包装成可编码的EncodedResource对象,下面的方法,从资源Resource中拿到输入流InputStream,维护到InputSource中,然后调用doLoaderBeanDefinitions解析
	public int loadBeanDefinitions(EncodedResource encodedResource) throws BeanDefinitionStoreException {
		Assert.notNull(encodedResource, "EncodedResource must not be null");
		if (logger.isTraceEnabled()) {
			logger.trace("Loading XML bean definitions from " + encodedResource);
		}

		Set<EncodedResource> currentResources = this.resourcesCurrentlyBeingLoaded.get();
		if (currentResources == null) {
			currentResources = new HashSet<>(4);
			this.resourcesCurrentlyBeingLoaded.set(currentResources);
		}
		if (!currentResources.add(encodedResource)) {
			throw new BeanDefinitionStoreException(
					"Detected cyclic loading of " + encodedResource + " - check your import definitions!");
		}
		try {
			// 从resource资源中获取输入流
			InputStream inputStream = encodedResource.getResource().getInputStream();
			try {
				InputSource inputSource = new InputSource(inputStream);
				if (encodedResource.getEncoding() != null) {
					inputSource.setEncoding(encodedResource.getEncoding());
				}
				// 加载beanDefinition
				return doLoadBeanDefinitions(inputSource, encodedResource.getResource());
			}
			finally {
				inputStream.close();
			}
		}
		catch (IOException ex) {
			throw new BeanDefinitionStoreException(
					"IOException parsing XML document from " + encodedResource.getResource(), ex);
		}
		finally {
			currentResources.remove(encodedResource);
			if (currentResources.isEmpty()) {
				this.resourcesCurrentlyBeingLoaded.remove();
			}
		}
	}
将inputSource对象解析成Documet对象,具体的解析细节先不看
	protected int doLoadBeanDefinitions(InputSource inputSource, Resource resource)
			throws BeanDefinitionStoreException {

		try {
			// 将输入流解析为Document文件
			Document doc = doLoadDocument(inputSource, resource);
			int count = registerBeanDefinitions(doc, resource);
			if (logger.isDebugEnabled()) {
				logger.debug("Loaded " + count + " bean definitions from " + resource);
			}
			return count;
		}
    }
解析为document对象,之后就要注册beanDefinition了,在spring的加载过程中,BeanDefinition是一个重要的数据结构,它是在创建对象之前,对象数据的一种存在形式
xml —— beanDefinition ——bean 从xml配置bean ,到解析xml创建 beanDefinition , 到从beanDefinition实例为 bean对象,这是一个流程。

docoment对象的解析过程委托给了BeanDefinitionDocumentReader对象来完成:
	public int registerBeanDefinitions(Document doc, Resource resource) throws BeanDefinitionStoreException {
		BeanDefinitionDocumentReader documentReader = createBeanDefinitionDocumentReader();
		int countBefore = getRegistry().getBeanDefinitionCount();
		// 解析document文件,然后注册registerBeanDefinitions
		documentReader.registerBeanDefinitions(doc, createReaderContext(resource));
		return getRegistry().getBeanDefinitionCount() - countBefore;
	}
	public void registerBeanDefinitions(Document doc, XmlReaderContext readerContext) {
		this.readerContext = readerContext;
		// 注册beanDefinition,将document中root元素传入
		doRegisterBeanDefinitions(doc.getDocumentElement());
	}
委托给document的解析器,入参为document的根元素,就是spring-context.xml的beans元素:
	protected void doRegisterBeanDefinitions(Element root) {
		// Any nested <beans> elements will cause recursion in this method. In
		// order to propagate and preserve <beans> default-* attributes correctly,
		// keep track of the current (parent) delegate, which may be null. Create
		// the new (child) delegate with a reference to the parent for fallback purposes,
		// then ultimately reset this.delegate back to its original (parent) reference.
		// this behavior emulates a stack of delegates without actually necessitating one.
		BeanDefinitionParserDelegate parent = this.delegate;
		this.delegate = createDelegate(getReaderContext(), root, parent);

		if (this.delegate.isDefaultNamespace(root)) {
			String profileSpec = root.getAttribute(PROFILE_ATTRIBUTE);
			if (StringUtils.hasText(profileSpec)) {
				String[] specifiedProfiles = StringUtils.tokenizeToStringArray(
						profileSpec, BeanDefinitionParserDelegate.MULTI_VALUE_ATTRIBUTE_DELIMITERS);
				// We cannot use Profiles.of(...) since profile expressions are not supported
				// in XML config. See SPR-12458 for details.
				if (!getReaderContext().getEnvironment().acceptsProfiles(specifiedProfiles)) {
					if (logger.isDebugEnabled()) {
						logger.debug("Skipped XML bean definition file due to specified profiles [" + profileSpec +
								"] not matching: " + getReaderContext().getResource());
					}
					return;
				}
			}
		}

		// 这里有两个钩子方法,典型的模板设计,由子类去实现
		preProcessXml(root);
		// 具体的解析document对象,注册beanDefinition的逻辑在这里实现
		parseBeanDefinitions(root, this.delegate);
		postProcessXml(root);

		this.delegate = parent;
	}
具体的解析工作在parseBeanDefinition中,在这里就是具体解析默认标签和自定义标签的流程。
	protected void parseBeanDefinitions(Element root, BeanDefinitionParserDelegate delegate) {
		//判断根元素的命名空间是否为空或者是 xmlns="http://www.springframework.org/schema/beans"
		if (delegate.isDefaultNamespace(root)) {
			NodeList nl = root.getChildNodes();
			for (int i = 0; i < nl.getLength(); i++) {
				Node node = nl.item(i);
				if (node instanceof Element) {
					Element ele = (Element) node;
					if (delegate.isDefaultNamespace(ele)) {
						// 解析默认标签,例如:bean
						parseDefaultElement(ele, delegate);
					}
					else {
						 // 解析自定义标签 例如:context
						delegate.parseCustomElement(ele);
					}
				}
			}
		}
		else {
			delegate.parseCustomElement(root);
		}
	}
总结:这一节主要是启动spring流程的第一步,解析配置文件,当然我们这里是以xml配置的方式分析,也可能是注解配置的方法,后续再来分析注解方式。
1:创建applicationContext对象,将xml文件的路径维护到AbstractRefreshableApplicationContext的属性上
2:refresh启动spring流程,这里是spring启动的核心流程
3:第一步 obtainBeanFactory ,这这个方法里,会创建bean工厂,加载xml文件,委托给XmlBeanDefinitionReader解析
4:XmlBeanDefinitionReader 将xml字符串路径封装为Resource对象,再转为InputStream流,最后把输入流生成Document对象,然后委托给BeanDefinitionDocumentReader解析。
下面一节来分析一下解析默认标签