目标
主机的浏览器使用服务器端宿主机中的docker容器中的jupyter notebook, 从而能够使用docker容器中的开发环境(这里主要是python的开发环境)
整体思路
docker容器中的端口和宿主机的端口做映射 --> 主机使用宿主机的ip和对应的端口
步骤
使用docker 命令建立container
docker run -p 7777:8888 [other options]
# 这里的7777可以自己选择, 8888是jupyter notebook默认的端口,最好用这个
-p 是端口的映射,即让宿主机7777端口映射docker容器的8888端口
在container里安装jupyter notebook
如果container中没有jupyter notebook中,则下载jupyter notebook(有则忽略)
pip install jupyter notebook
# 可以使用清华镜像加速下载
# pip install --default-timeout=100 -i https://pypi.tuna.tsinghua.edu.cn/simple jupyter notebook
配置远程访问jupyter
生成密码
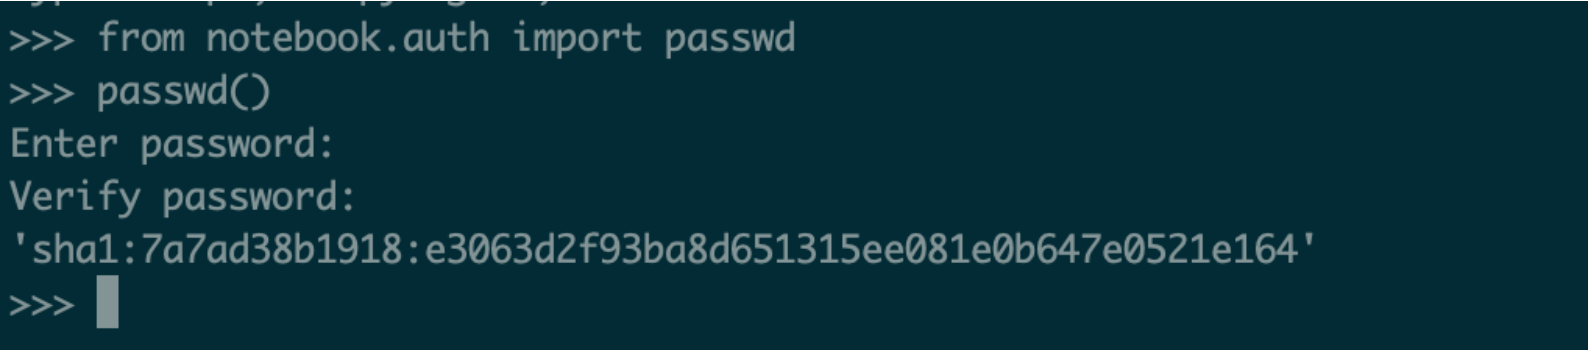
进入python交互模式,然后再python交互模式中分别输入
>>> from notebook.auth import passwd
>>> passwd()
输入完成后设定一个密码,会生成一个sha1的秘钥会有如下的结果
把秘钥保存下来,退出python交互。
生成jupyter notebook的配置文件
jupyter notebook --generate-config
这时候会生成配置文件,在 ~/.jupyter/jupyter_notebook_config.py
修改配置文件
vim  ~/.jupyter/jupyter_notebook_config.py
# 没有vim的话要自己先安装个vim
加上如下内容,其中sha1那一串秘钥是上面生成的那一串
c.NotebookApp.ip='*'
c.NotebookApp.password = u'sha1:41e4da01dde4:e820dc9c0398eda2dc9323c9e4a51ea1228166a2'
c.NotebookApp.open_browser = False
c.NotebookApp.port =8888
打开jupyter notebook
jupyter notebook --allow-root
主机访问jupyter notebook
浏览器中输入:
1.<宿主机IP>:7777
2.输入上述你自己设置的密码

'''
例子如下:
10.1.69.64:7777
123456
'''
保存docker成新的镜像
docker commit [容器ID] [镜像名]
参考链接: