项目来自唐老师猫狗识别项目及数据集。
项目具体实施步骤:
1.读取猫狗数据训练集500+500。
2.对读取的图片进行处理,处理成统一大小格式,分好标签。
3.shuffle一下,将猫狗数据掺杂混合,尽可能随机。
4.采用CNN网络训练测试。
具体代码如下:
1.读取训练集。
import pandas as pd
import numpy as np
import os
import glob
import matplotlib.pyplot as plt
import cv2 as cv2
images = []
labels = []
img_names = []
cls = []
train_path="training_data"
classes = ['dogs','cats']
num_classes = len(classes)
image_size=128
print('Going to read training images')
for fields in classes:
    index = classes.index(fields)
    print('Now going to read {} files (Index: {})'.format(fields, index))
    path = os.path.join(train_path, fields, '*g')
    files = glob.glob(path)
    print(len(files))
    for fl in files:
        image = cv2.imread(fl)
        image = cv2.resize(image, (image_size, image_size),0,0, cv2.INTER_LINEAR)
        image = image.astype(np.float32)
        image = np.multiply(image, 1.0 / 255.0)
        images.append(image)
        label = np.zeros(len(classes))
        label[index] = 1.0
        labels.append(label)
        flbase = os.path.basename(fl)
        img_names.append(flbase)
        cls.append(fields)
images = np.array(images)
labels = np.array(labels)
img_names = np.array(img_names)
cls = np.array(cls)
2.训练数据集。
from tensorflow import keras
from tensorflow.keras.models import Sequential
from tensorflow.keras.layers import Dense,Dropout,Flatten,Conv2D,MaxPool2D
from tensorflow.keras import Input
from sklearn.model_selection import train_test_split
from sklearn.utils import shuffle
from tensorflow.keras.regularizers import l1
#数据集处理
images,labels=shuffle(images,labels)
X_train, X_test, y_train, y_test=train_test_split(images,labels)
model = Sequential()
# 第一个卷积层,32个卷积核,大小5x5,卷积模式SAME,激活函数relu,输入张量的大小
model.add(Conv2D(filters= 6, kernel_size=(3,3), padding='valid',kernel_regularizer=l1(0.1),activation='tanh',input_shape=(128,128,3)))
# model.add(Conv2D(filters= 32, kernel_size=(3,3), padding='valid', activation='relu'))
# 池化层,池化核大小2x2
model.add(MaxPool2D(pool_size=(2,2)))
# 随机丢弃四分之一的网络连接,防止过拟合
model.add(Dropout(0.5))
model.add(Conv2D(filters= 6, kernel_size=(3,3), padding='Same', activation='tanh'))
# model.add(Conv2D(filters= 6, kernel_size=(3,3), padding='Same', activation='tanh'))
model.add(MaxPool2D(pool_size=(2,2), strides=(2,2)))
model.add(Dropout(0.5))
# 全连接层,展开操作,
model.add(Flatten())
# 添加隐藏层神经元的数量和激活函数
# model.add(Dense(120, activation='tanh'))
model.add(Dropout(0.5))
# model.add(Dense(84, activation='tanh'))
# 输出层
model.add(Dense(2, activation='softmax'))
model.compile(loss='categorical_crossentropy',
              optimizer='adam',
              metrics=['accuracy'])
model.fit(images,labels,validation_split=0.2,batch_size=128,epochs=50)
#模型存储
mp = "model_3_1625.h5"
model.save(mp)
#模型评价
model.evaluate(X_test,y_test)
训练过程反馈如下:

评价结果:

实验心得(小白):
1.validation数据集,最好的评价指标达到0.64,随着epoch训练的增多,明显出现过拟合的现象,准确率很多有小于0.5。
2.为了减少过拟合的影响,加入了正则化L1项目与dropout,有一些小的提升。
3.针对optimizer,...............
4.针对batch_size,设置了32,128,100,batch_size设置的小,训练accuracy上下浮动,不会一直增加
问题:
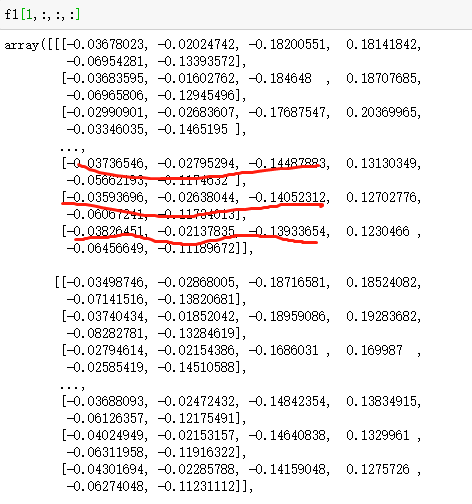
1.查看第一层次卷积之后的结果
from tensorflow.keras import backend as K
layer_1 = K.function([model.layers[0].input], [model.layers[1].output])#第一个 model.layers[0],不修改,表示输入数据;第二个model.layers[you wanted],修改为你需要输出的层数的编号
f1 = layer_1([images])[0]#只修改inpu_image
# #第一层卷积后的特征图展示,输出是(1,149,149,32),(样本个数,特征图尺寸长,特征图尺寸宽,特征图个数)
# for _ in range(32):
#             show_img = f1[:, :, :, _]
#             show_img.shape = [63,63,3]
#             plt.subplot(4, 8, _ + 1)
#             plt.imshow(show_img, cmap='gray')
#             plt.axis('off')
# plt.show()
model.layers[0].input:128*128*3
model.layers[1].output:63*63*6

a.问什么会是6?
b.查看中间层结果,为什么会出现负值?
结果查看:
plt.figure(figsize=(15, 6.5))
x_axis=range(500)
y_axis_data1=history.history["accuracy"]
y_axis_data2=history.history["val_accuracy"]
plt.plot(x_axis, y_axis_data1, color='red', label="accuracy")
plt.plot(x_axis, y_axis_data2, color='blue', label="val_accuracy")
plt.hlines(0.65, 0, 500,color="red")#横线
plt.hlines(0.7, 0, 500,color="red")#横线
plt.hlines(0.6, 0, 500,color="red")#横线
plt.show()
