作业一:nginx服务
1)二进制安装nginx包


yum install epel-release -y 先安装epel-release

再查看yum源中已经安装上了epel相关文件
 中间省去了一些安装进度细节(系统自动安装过程)
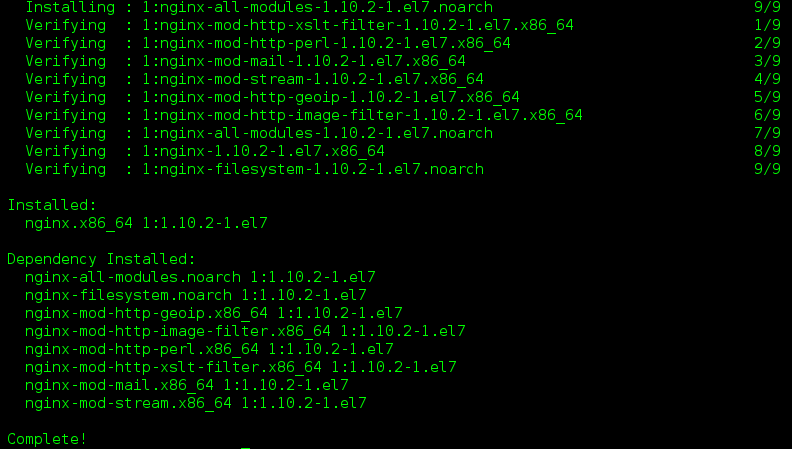
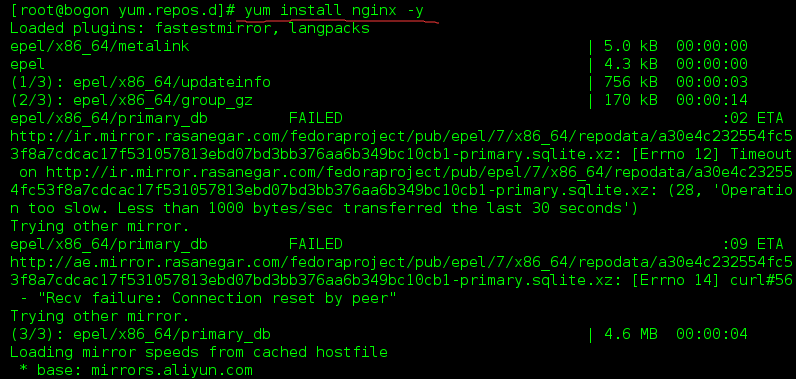
yum install nginx -y 使用yum源安装nginx
2)作为web服务修改配置文件,让配置生效,并且验证配置

配置nginx.conf文件(系统貌似都有了)

mkdir /usr/share/nginx/html/a/b/ -p 在改目录下创建/a/b目录

echo 'welecome oldboy' > /usr/share/nginx/html/a/b/c.txt 在/b目录下创建c.txt并写入welecome oldboy

systemctl start nginx 启动nginx

systemctl status nginx 查看nginx启动没有
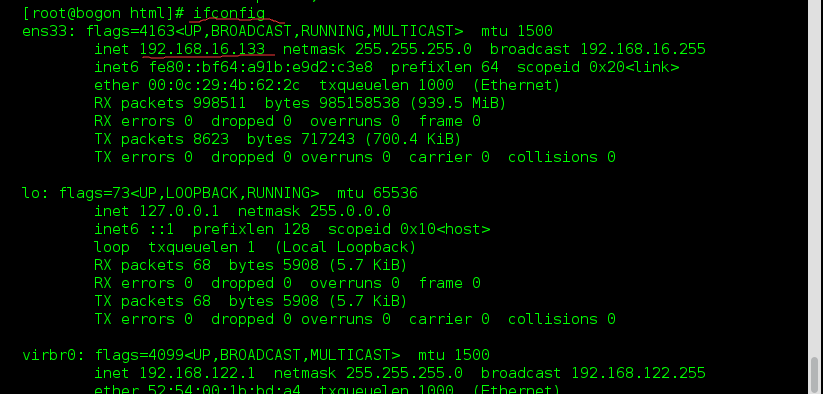
ifconfig 找到自己机子的IP地址
 验证
验证
 验证结果:出了问题
在地址栏输入验证,发现会发现卡在那里,验证结果是有问题,原因是存在防火墙
 那么我们要关闭防火墙
systemctl stop firewalld 关闭防火墙
引申:systemctl disable firewalld 开机不启动防火墙(这是更粗暴的方式关闭防火墙,也是一种方式)
 再次验证,就可以了!
在输入网址,就可以看到之前创建的目下的welecome oldboy
总结步骤:

1)yum install epel-release -y    安装需要的文件epel-release

2)yum install nginx -y     安装nginx

3)vim /etc/nginx/nginx.conf    配置文件(系统有默认)

       root   /usr/share/nginx/html

4)mkdir /usr/share/nginx/html/a/b/ -p     在改目录下创建/a/b目录

5)echo 'welecome oldboy' > /usr/share/nginx/html/a/b/c.txt       在/b目录下创建c.txt并写入welecome oldboy

6)systemctl  start(或者restart) nginx    启动nginx

   systemctl status   查看nginx的安装状况是否成功启动

7)测试:这里是用自己的ip地址测试(ifconfig找自己的ip地址)

    http://192.168.16.133:80/a/b/c.txt

8)发现测试有问题,原因:防火墙(这一步其实应该在前面就该做好,做好初始化的环境,这里方便学习发现并解决这个问题)

9)关闭防火墙:systemctl stop firewalld

      systemctl disable firewalld 开机不启动防火墙(这是更粗暴的方式关闭防火墙,也是一种方式)

10)再测试,OK
作业二:nfs服务
1)二进制安装nfs
yum install rpcbind nfs-utils -y
2)作为共享存储挂载在三台web的网站根目录下
nfs服务端 192.168.16.133
web01 192.168.16.180
web02 192.168.16.181
web03 192.168.16.182
nfs服务端[root@proxy ~]# cat /etc/exports/share 192.168.16.0/24(rw,sync,fsid=0)[root@proxy ~]# mkdir /share[root@proxy ~]# chmod o+w /share[root@proxy ~]# cat /etc/exports/share 192.168.16.0/24(rw,sync,fsid=0)[root@proxy ~]# mkdir /share[root@proxy ~]# chmod o+w /share[root@proxy ~]# systemctl start rpcbind.service[root@proxy ~]# systemctl start nfs-server.service[root@proxy ~]# echo "192.168.16.133 proxy" >>/etc/hosts[root@proxy ~]# exportfs/share 192.168.16.0/24[root@proxy ~]# showmount -eExport list for proxy:/share 192.168.16.180/24,192.168.16.181/24,192.168.16.182/24web01 设置[root@bogon ~]# yum install rpcbind nfs-utils -y[root@web01 ~]# systemctl start rpcbind.service[root@web01 ~]# systemctl start nfs-server.service[root@web01 ~]# showmount -e 192.168.16.133Export list for 192.168.16.133:/share 192.168.16.180/24,192.168.16.181/24,192.168.16.182/24[root@web01 ~]# mount -t nfs 192.168.16.133:/share /usr/share/nginx/html/[root@web01 ~]# df -h文件系统 容量 已用 可用 已用% 挂载点/dev/mapper/cl-root 18G 4.6G 13G 26% /devtmpfs 473M 0 473M 0% /devtmpfs 489M 0 489M 0% /dev/shmtmpfs 489M 7.1M 482M 2% /runtmpfs 489M 0 489M 0% /sys/fs/cgroup/dev/sda1 509M 169M 341M 34% /boottmpfs 98M 0 98M 0% /run/user/0192.168.16.133:/share 18G 5.0G 13G 29% /usr/share/nginx/htmlweb02 设置[root@bogon ~]# yum install rpcbind nfs-utils -y[root@web02 ~]# systemctl start rpcbind.service[root@web02 ~]# systemctl start nfs-server.service[root@web02 ~]# showmount -e 192.168.16.133Export list for 192.168.16.133:/share 192.168.16.180/24,192.168.16.181/24,192.168.16.182/24[root@web01 ~]# mount -t nfs 192.168.16.133:/share /usr/share/nginx/html/[root@web02 ~]# mount -t nfs 192.168.16.133:/share /usr/share/nginx/html/[root@web02 ~]# df -h文件系统 容量 已用 可用 已用% 挂载点/dev/mapper/cl-root 18G 4.6G 13G 26% /devtmpfs 473M 0 473M 0% /devtmpfs 489M 0 489M 0% /dev/shmtmpfs 489M 7.1M 482M 2% /runtmpfs 489M 0 489M 0% /sys/fs/cgroup/dev/sda1 509M 169M 341M 34% /boottmpfs 98M 0 98M 0% /run/user/0192.168.16.133:/share 18G 5.0G 13G 29% /usr/share/nginx/htmlweb03 设置[root@bogon ~]# yum install rpcbind nfs-utils -y[root@web03 ~]# systemctl start rpcbind.service[root@web03 ~]# systemctl start nfs-server.service[root@web03~]# showmount -e 192.168.16.133Export list for 192.168.16.133:/share 192.168.16.180/24,192.168.16.181/24,192.168.16.182/24[root@web01 ~]# mount -t nfs 192.168.16.133:/share /usr/share/nginx/html/[root@web02 ~]# mount -t nfs 192.168.16.133:/share /usr/share/nginx/html/[root@web03 ~]# df -h文件系统 容量 已用 可用 已用% 挂载点/dev/mapper/cl-root 18G 4.6G 13G 26% /devtmpfs 473M 0 473M 0% /devtmpfs 489M 0 489M 0% /dev/shmtmpfs 489M 7.1M 482M 2% /runtmpfs 489M 0 489M 0% /sys/fs/cgroup/dev/sda1 509M 169M 341M 34% /boottmpfs 98M 0 98M 0% /run/user/0192.168.16.133:/share 18G 5.0G 13G 29% /usr/share/nginx/html
3)实现,在任意一台web上修改的结果,其余两台都可以看到
[root@proxy share]# echo "Nginx" >/share/index.html[root@web01 html]# cat /usr/share/nginx/html/index.htmlNginx[root@web02~]# cat /usr/share/nginx/html/index.htmlNginx[root@web03~]# cat /usr/share/nginx/html/index.htmlNginx作业三:nginx反向代理三台web
proxy 192.168.16.133
web01 192.168.16.180
web02 192.168.16.181
web03 192.168.16.182
web01设置
[root@web01~]#yum install nginx -y
[root@web01~]#echo 'web01' > /usr/share/nginx/html/index.html
[root@web01~]#systemctl start nginx.service
[root@web01~]#curl 192.168.16.180
web02设置
[root@web02~]#yum install nginx -y
[root@web02~]#echo 'web02' > /usr/share/nginx/html/index.html
[root@web02~]#systemctl start nginx.service
[root@web02~]#curl 192.168.16.181
web03设置
[root@web03~]#yum install nginx -y
[root@web03~]#echo 'web03' > /usr/share/nginx/html/index.html
[root@web03~]#systemctl start nginx.service
[root@web03~]#curl 192.168.16.182
proxy设置
[root@proxy~]#vim /etc/nginx/nginx.conf
http {
upstream web{
server 192.168.16.180;
server 192.168.16.181;
server 192.168.16.182;
}
server {
listen 80;
location / {
proxy_pass http://web;
}
}
}
[root@proxy~]#systemctl reload nginx.service
1)实现基于轮询的方式调度三台web,并验证结果
http {
upstream pythonweb {
server 192.168.16.180;
server 192.168.16.181;
server 192.168.16.182;
}
server {
listen 80;
location / {
proxy_pass http://pythonweb;
}
}
}
2)实现基于权重的方式调度三台web,并验证结果
http {
upstream pythonweb {
server 192.168.16.180 weight=3;
server 192.168.16.181;
server 192.168.16.182;
}
server {
listen 80;
location / {
proxy_pass http://pythonweb;
}
}
}
3)实现基于hash的方式调用三台web,并验证结果
http {
upstream pythonweb {
ip_hash;
server 192.168.16.180 ;
server 192.168.16.181;
server 192.168.16.182;
}
server {
listen 80;
location / {
proxy_pass http://pythonweb;
}
}
}
作业四:nginx反向代理+三台web+nfs共享存储实现集群配置
web01[root@web01 html]# tail -f /var/log/nginx/access.log192.168.16.133 - - [20/Mar/2017:23:15:25 +0800] "GET / HTTP/1.0" 304 0 "-" "Mozilla/4.0 (compatible; MSIE 7.0; Windows NT 6.1; Win64; x64) AppleWebKit/537.36 (KHTML, like Gecko) Chrome/56.0.2924.87 Safari/537.36" "-"web02[root@web02 html]# tail -f /var/log/nginx/access.log192.168.16.133- - [20/Mar/2017:23:15:26 +0800] "GET / HTTP/1.0" 200 21 "-" "Mozilla/4.0 (compatible; MSIE 7.0; Windows NT 6.1; Win64; x64) AppleWebKit/537.36 (KHTML, like Gecko) Chrome/56.0.2924.87 Safari/537.36" "-"web03[root@web02 html]# tail -f /var/log/nginx/access.log192.168.16.133- - [20/Mar/2017:23:15:28 +0800] "GET / HTTP/1.0" 200 21 "-" "Mozilla/4.0 (compatible; MSIE 7.0; Windows NT 6.1; Win64; x64) AppleWebKit/537.36 (KHTML, like Gecko) Chrome/56.0.2924.87 Safari/537.36" "-"作业五:源码安装nginx,并按照作业一描述的那样去测试使用
[root@web01 html]#yum remove nginx
[root@web01 html]#useradd -s /sbin/nologin -M www[root@web01 html]#yum -y install pcre pcre-devel openssl openssl-devel[root@web01 html]#wget http://nginx.org/download/nginx-1.10.3.tar.gz[root@web01 ~]# tar xf nginx-1.10.3.tar.gz[root@web01 nginx-1.10.3]# cd nginx-1.10.3/[root@web01 nginx-1.10.3]#./configure --prefix=/usr/local/nginx --user=www --group=www --with-http_ssl_module --with-http_stub_status_module --with-file-aio --with-stream[root@web01]#make && make install[root@web01~]#/usr/local/nginx/sbin/nginx -t[root@web01~]#nginx: the configuration file /usr/local/nginx/conf/nginx.conf syntax is ok[root@web01~]#nginx: configuration file /usr/local/nginx/conf/nginx.conf test is successful[root@web01 ~]# echo "Hello Word" > /usr/local/nginx/html/index.html[root@web01 ~]# /usr/local/nginx/sbin/nginx[root@web01 ~]# curl 192.168.16.186Hello Word