原文链接:http://blog.csdn.net/qq_37936542/article/details/79258158
jquery file upload是一款实用的上传文件插件,项目中刚好用到,在这里记录分享一下。
一:准备相关js文件
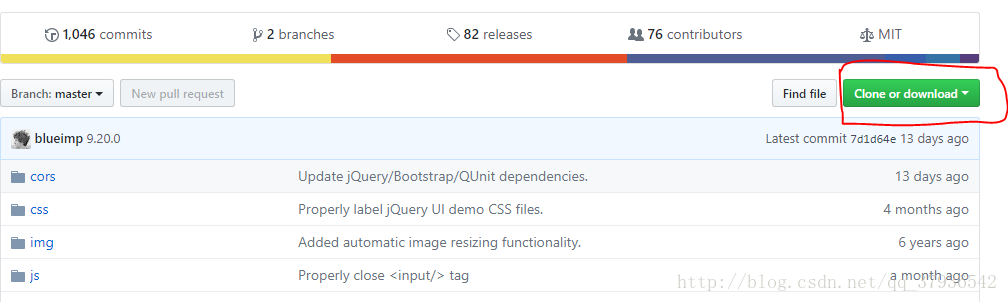
jquery file upload 下载地址:点击打开链接 点击下面红圈中的按钮下载
jquery.js下载地址:点击打开链接
二:导入js文件
注意:js文件引入的先后顺序不可以乱
- <script src="https://code.jquery.com/jquery-3.2.1.min.js"></script>
- <!-- jquery file upload相关js -->
- <script src="js/jquery.ui.widget.js"></script>
- <script src="js/jquery.iframe-transport.js"></script>
- <script src="js/jquery.fileupload.js"></script>
- <script src="js/jquery.fileupload-process.js"></script>
- <script src="js/jquery.fileupload-validate.js"></script>
三:jsp代码
- <style>
- /* input样式 */
- #uploadImg{
- display: none;
- }
- /* button样式 */
- #chooseFile{
- background: #93b6fc;
- }
- #uploadFile,#rechooseFile {
- display: none;
- background: #93b6fc;
- }
- #image{
- 200px;
- height:200px;
- }
- /* 进度条样式 */
- .bar {
- background-image: -webkit-linear-gradient(top,#5cb85c 0,#449d44 100%);
- background-image: -o-linear-gradient(top,#5cb85c 0,#449d44 100%);
- background-image: -webkit-gradient(linear,left top,left bottom,from(#5cb85c),to(#449d44));
- background-image: linear-gradient(to bottom,#5cb85c 0,#449d44 100%);
- filter: progid:DXImageTransform.Microsoft.gradient(startColorstr='#ff5cb85c', endColorstr='#ff449d44', GradientType=0);
- background-repeat: repeat-x;
- height: 20px;
- line-height: 20px;
- -webkit-box-shadow: inset 0 -1px 0 rgba(0,0,0,.15);
- box-shadow: inset 0 -1px 0 rgba(0,0,0,.15);
- -webkit-transition: width .6s ease;
- -o-transition: width .6s ease;
- transition: width .6s ease;
- }
- #progress {
- filter: progid:DXImageTransform.Microsoft.gradient(startColorstr='#ffebebeb', endColorstr='#fff5f5f5', GradientType=0);
- background-repeat: repeat-x;
- height: 20px;
- 0%;
- margin-bottom: 20px;
- overflow: hidden;
- background-color: #f5f5f5;
- border-radius: 4px;
- -webkit-box-shadow: inset 0 1px 2px rgba(0,0,0,.1);
- box-shadow: inset 0 1px 2px rgba(0,0,0,.1);
- margin-top: 20px;
- }
- </style>
- <body>
- <div class="jquery-fileupload">
- <div class="">
- <input id="uploadImg" type="file" name="uploadImg" multiple style="display: none" />
- <button id="chooseFile">+选择文件</button>
- <button id="uploadFile">~开始上传</button>
- <button id="rechooseFile">+重新选择</button>
- </div>
- <div>
- <img id="image" src="">
- </div>
- <div id="progress">
- <div class="bar" style=" 0%;"></div>
- </div>
- </div>
- </body>
四:js代码
- $(function() {
- $("#chooseFile").on("click", function() {
- $("#uploadImg").click();
- });
- $('#uploadImg').fileupload({
- url : '/FileTest/upload',//请求发送的目标地址
- Type : 'POST',//请求方式 ,可以选择POST,PUT或者PATCH,默认POST
- //dataType : 'json',//服务器返回的数据类型
- autoUpload : false,
- acceptFileTypes : /(gif|jpe?g|png)$/i,//验证图片格式
- maxNumberOfFiles : 1,//最大上传文件数目
- maxFileSize : 1000000, // 文件上限1MB
- minFileSize : 100,//文件下限 100b
- messages : {//文件错误信息
- acceptFileTypes : '文件类型不匹配',
- maxFileSize : '文件过大',
- minFileSize : '文件过小'
- }
- })
- //图片添加完成后触发的事件
- .on("fileuploadadd", function(e, data) {
- //validate(data.files[0])这里也可以手动来验证文件格式和大小
- //隐藏或显示页面元素
- $('#progress .bar').css(
- 'width', '0%'
- );
- $('#progress').hide();
- $("#chooseFile").hide();
- $("#uploadFile").show();
- $("#rechooseFile").show();
- //获取图片路径并显示
- var url = getUrl(data.files[0]);
- $("#image").attr("src", url);
- //绑定开始上传事件
- $('#uploadFile').click(function() {
- $("#uploadFile").hide();
- jqXHR = data.submit();
- //解绑,防止重复执行
- $("#uploadFile").off("click");
- })
- //绑定点击重选事件
- $("#rechooseFile").click(function(){
- $("#uploadImg").click();
- //解绑,防止重复执行
- $("#rechooseFile").off("click");
- })
- })
- //当一个单独的文件处理队列结束触发(验证文件格式和大小)
- .on("fileuploadprocessalways", function(e, data) {
- //获取文件
- file = data.files[0];
- //获取错误信息
- if (file.error) {
- console.log(file.error);
- $("#uploadFile").hide();
- }
- })
- //显示上传进度条
- .on("fileuploadprogressall", function(e, data) {
- $('#progress').show();
- var progress = parseInt(data.loaded / data.total * 100, 10);
- $('#progress').css(
- 'width','15%'
- );
- $('#progress .bar').css(
- 'width',progress + '%'
- );
- })
- //上传请求失败时触发的回调函数
- .on("fileuploadfail", function(e, data) {
- console.log(data.errorThrown);
- })
- //上传请求成功时触发的回调函数
- .on("fileuploaddone", function(e, data) {
- alert(data.result);
- })
- //上传请求结束后,不管成功,错误或者中止都会被触发
- .on("fileuploadalways", function(e, data) {
- })
- //手动验证
- function validate(file) {
- //获取文件名称
- var fileName = file.name;
- //验证图片格式
- if (!/.(gif|jpg|jpeg|png|gif|jpg|png)$/.test(fileName)) {
- console.log("文件格式不正确");
- return true;
- }
- //验证excell表格式
- /* if(!/.(xls|xlsx)$/.test(fileName)){
- alert("文件格式不正确");
- return true;
- } */
- //获取文件大小
- var fileSize = file.size;
- if (fileSize > 1024 * 1024) {
- alert("文件不得大于一兆")
- return true;
- }
- return false;
- }
- //获取图片地址
- function getUrl(file) {
- var url = null;
- if (window.createObjectURL != undefined) {
- url = window.createObjectURL(file);
- } else if (window.URL != undefined) {
- url = window.URL.createObjectURL(file);
- } else if (window.webkitURL != undefined) {
- url = window.webkitURL.createObjectURL(file);
- }
- return url;
- }
- });
五:服务器端代码
1:导入依赖
- <dependency>
- <groupId>commons-fileupload</groupId>
- <artifactId>commons-fileupload</artifactId>
- <version>1.3.1</version>
- </dependency>
2:配置springmvc上传解析器
- <!-- springmvc文件上传解析器 -->
- <bean id="multipartResolver"
- class="org.springframework.web.multipart.commons.CommonsMultipartResolver">
- <property name="defaultEncoding" value="UTF-8" />
- <property name="maxUploadSize" value="-1" />
- </bean>
3:java代码
- package com.mote.upload;
- import java.io.File;
- import java.io.IOException;
- import java.io.InputStream;
- import java.text.SimpleDateFormat;
- import java.util.Date;
- import javax.servlet.http.HttpServletRequest;
- import org.apache.commons.io.FileUtils;
- import org.springframework.stereotype.Controller;
- import org.springframework.web.bind.annotation.RequestMapping;
- import org.springframework.web.bind.annotation.RequestMethod;
- import org.springframework.web.bind.annotation.RequestParam;
- import org.springframework.web.bind.annotation.ResponseBody;
- import org.springframework.web.multipart.MultipartFile;
- @Controller
- public class FileUploadController {
- /**
- * 将图片上传到服务器根目录下
- * @param @param multipartFile
- * @param @param request
- * @param @return
- * @return String
- * @throws
- */
- @RequestMapping(value = "/upload",method=RequestMethod.POST)
- @ResponseBody
- public String upload(
- @RequestParam("uploadImg") MultipartFile multipartFile,
- HttpServletRequest request) {
- try {
- //获取项目路径
- String realPath = request.getSession().getServletContext()
- .getRealPath("");
- InputStream inputStream = multipartFile.getInputStream();
- String contextPath = request.getContextPath();
- //服务器根目录的路径
- String path = realPath.replace(contextPath.substring(1), "");
- //根目录下新建文件夹upload,存放上传图片
- String uploadPath = path + "upload";
- //获取文件名称
- String filename = getUploadFileName(multipartFile);
- //将文件上传的服务器根目录下的upload文件夹
- File file = new File(uploadPath, filename);
- FileUtils.copyInputStreamToFile(inputStream, file);
- //返回图片访问路径
- String url = request.getScheme() + "://" + request.getServerName()
- + ":" + request.getServerPort() + "/upload/" + filename;
- return url;
- } catch (IOException e) {
- e.printStackTrace();
- }
- return null;
- }
- /**
- * 获取上传文件的名称,新文件名为原文件名加上时间戳
- *
- * @param multipartFile
- * multipartFile
- * @return 文件名
- */
- private String getUploadFileName(MultipartFile multipartFile) {
- String uploadFileName = multipartFile.getOriginalFilename();
- String fileName = uploadFileName.substring(0,
- uploadFileName.lastIndexOf("."));
- String type = uploadFileName.substring(uploadFileName.lastIndexOf("."));
- SimpleDateFormat sdf = new SimpleDateFormat("yyyyMMddHHmmss");
- String timeStr = sdf.format(new Date());
- String name = fileName + "_" + timeStr + type;
- return name;
- }
- }
文末福利:
福利一:前端,Java,产品经理,微信小程序,Python等8G资源合集大放送:https://www.jianshu.com/p/e8197d4d9880
福利二:微信小程序入门与实战全套详细视频教程
领取方式:
如果需要学习视频,欢迎关注 【编程微刊】微信公众号,回复【领取资源】一键领取以下所有干货资源,获取更多有用技术干货、文档资料。所有文档会持续更新,欢迎关注一起成长!