续上篇
https://www.cnblogs.com/wangql/p/13373022.html
安装logstash
下载地址:wget https://artifacts.elastic.co/downloads/logstash/logstash-6.1.0.rpm

#安装
rpm -ivh logstash-6.1.0.rpm

#启动服务
systemctl  restart logstash.service
systemctl  status logstash.service
systemctl  enable logstash.service
测试基本输入输出
 [root@elk2 ~]# /usr/share/logstash/bin/logstash -e  'input { stdin{} } output { stdout{} }'

WARNING: Could not find logstash.yml which is typically located in $LS_HOME/config or /etc/logstash. You can specify the path using --path.settings. Continuing using the defaultsCould not find log4j2 configuration at path /usr/share/logstash/config/log4j2.properties. Using default config which logs errors to the consoleThe stdin plugin is now waiting for
input:Abc                  #输入这个
2020-06-17T05:38:32.783Z elk2 abc    #输出这个
使用rubydebug详细输出
[root@elk2 ~]# /usr/share/logstash/bin/logstash -e 'input { stdin{} } output { stdout{ codec => rubydebug} }'

WARNING: Could not find logstash.yml which is typically located in $LS_HOME/config or /etc/logstash. You can specify the path using --path.settings. Continuing using the defaultsCould not find log4j2 configuration at path /usr/share/logstash/config/log4j2.properties. Using default config which logs errors to the consoleThe stdin plugin is now waiting for
input:Hello                  #输入
{          "host" => "elk2",          #输出
"@timestamp" => 2020-06-17T05:40:38.039Z,
"message" => "hello",
"@version" => "1"
}


[root@elk2 ~]# /usr/share/logstash/bin/logstash -e 'input { stdin{} } output { elasticsearch { hosts => ["192.168.0.208:9200"]} }'

WARNING: Could not find logstash.yml which is typically located in $LS_HOME/config or /etc/logstash. You can specify the path using --path.settings. Continuing using the defaultsCould not find log4j2 configuration at path /usr/share/logstash/config/log4j2.properties. Using default config which logs errors to the consoleThe stdin plugin is now waiting for
input:123456
wangshibo
huanqiu
hahaha
logstash的配置
配置地址
/etc/logstash/conf.d下,以*.conf结尾
vim /etc/logstash/conf.d/elk1.conf

input { stdin { } }
output {
    elasticsearch { hosts => ["192.168.0.208:9200"]}
    stdout { codec => rubydebug }
}
执行
[root@elk2 ~]# /usr/share/logstash/bin/logstash -f /etc/logstash/conf.d/elk1.conf

WARNING: Could not find logstash.yml which is typically located in $LS_HOME/config or /etc/logstash. You can specify the path using --path.settings. Continuing using the defaultsCould not find log4j2 configuration at path /usr/share/logstash/config/log4j2.properties. Using default config which logs errors to the consoleThe stdin plugin is now waiting for
input:Beijing        #输入
{      "@version" => "1",    #输出

"host" => "elk2",
 "message" => "beijing",
 "@timestamp" => 2020-06-17T05:48:29.275Z
}
更多用法后续列出
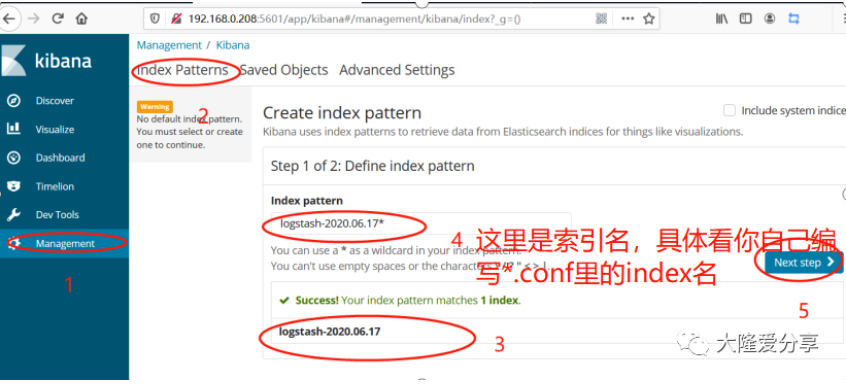
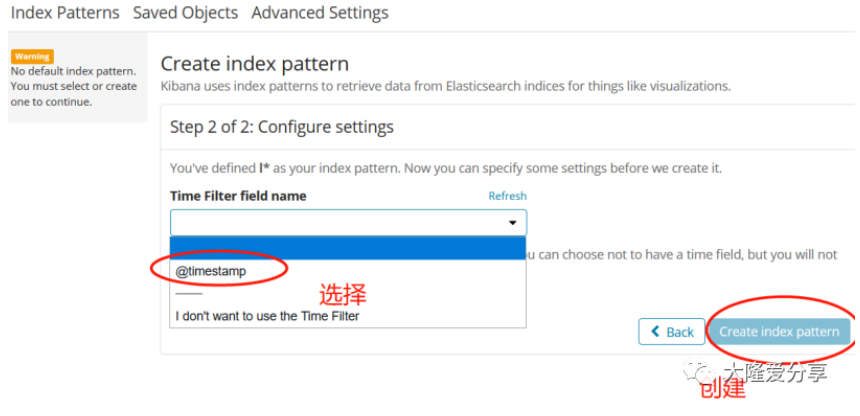
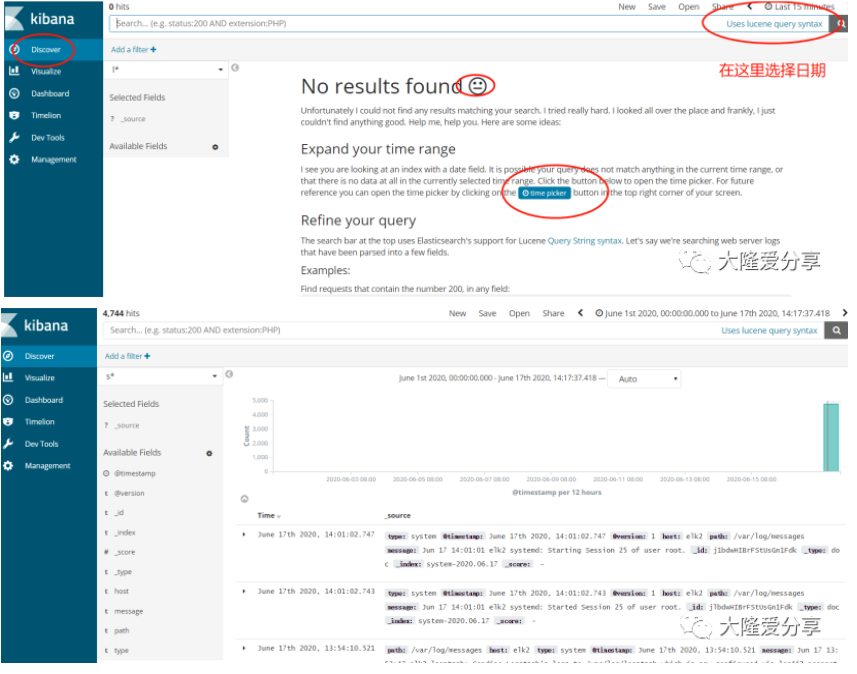
安装kibana
下载地址:wget https://artifacts.elastic.co/downloads/kibana/kibana-6.1.0-x86_64.rpm

#安装
rpm -ivh kibana-6.1.0-x86_64.rpm
修改配置文件
vim /etc/kibana/kibana.yml

2 server.port: 5601                #端口
7 server.host: "0.0.0.0"              #服务监听地址
21 elasticsearch.url: "http://192.168.0.213:9200"    #声明地址,从哪里查,集群里面随便选一个
30 kibana.index: ".kibana"            #kibana自己创建的索引
33 kibana.defaultAppId: "discover"        #打开kibana页面时,默认打开discover
62 elasticsearch.pingTimeout: 1500        #ping检测超时时间
66 elasticsearch.requestTimeout: 30000      #请求超时时间
80 elasticsearch.startupTimeout: 5000        #启动超时时间
114 i18n.locale: "zh-CN"        #启用中文
启动服务
systemctl  restart  kibana.service
systemctl  status kibana.service
systemctl  enable kibana.service
查看端口
netstat -utnlp | grep 5601
访问服务
http://192.168.0.208:5601

如果起不来
curl -XDELETE http://localhost:9200/.kibana*


到这里我们的elk就搭建成功了,下一篇教大家安装es 的插件,方便后续更好的维护。
本文为我自己的学习笔记,难免有些遗漏,欢迎指正。遇事不慌,大隆来帮,也请大家关注我,支持我,谢谢!
没有理论,只有实战
更多干货
来关注我