SSH 框架为 Struts + Spring + Hibernate 的一个集成框架,是目前较流行的一种 web 应用程序开源框架。
集成SSH框架的系统从职责上分为四层:表示层、业务逻辑层、数据持久层和域模块层,以帮助开发人员在短期内搭建结构清晰、可复用性好、维护方便的Web应用程序。其中使用Struts作为系统的整体基础架构,负责MVC的分离,在Struts框架的模型部分,控制业务跳转,利用Hibernate框架对持久层提供支持,Spring做管理,管理struts和hibernate。具体做法是:用面向对象的分析方法根据需求提出一些模型,将这些模型实现为基本的Java对象,然后编写基本的DAO(Data Access Objects)接口,并给出Hibernate的DAO实现,采用Hibernate架构实现的DAO类来实现Java类与数据库之间的转换和访问,最后由Spring做管理,管理struts和hibernate。SSH框架分析图如下: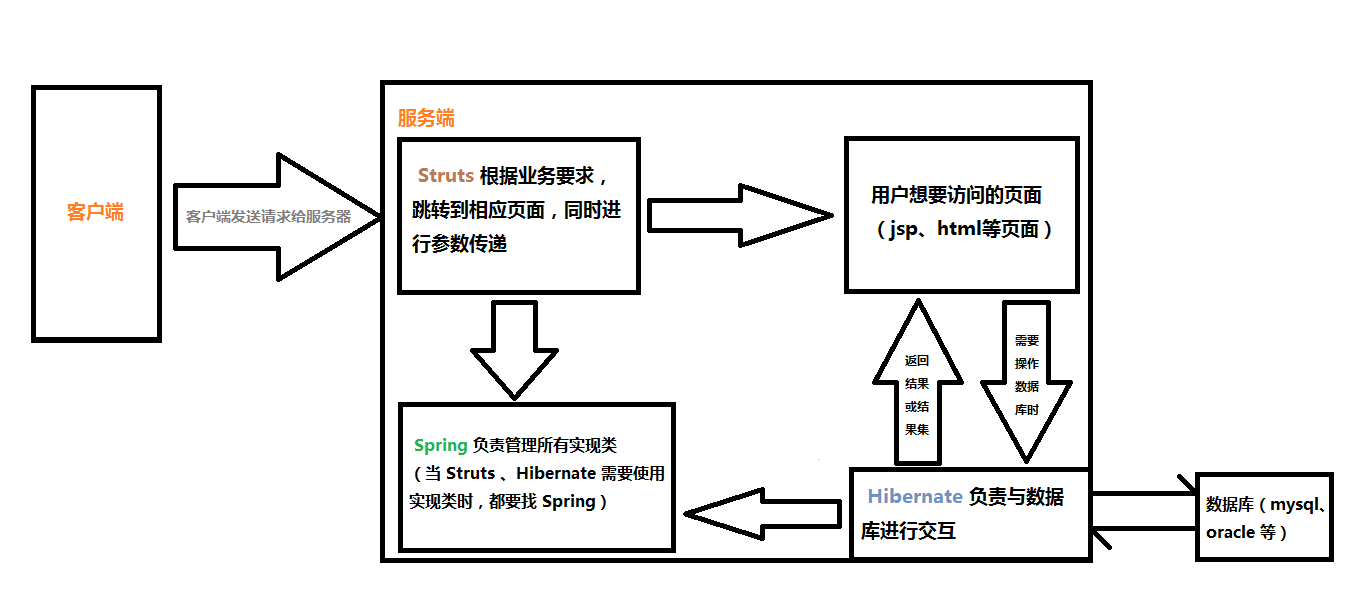
|——————— 注意:本文使用的版本为 Struts2 + Spring4 + Hibernate5 —————————|
运行环境为:JDK1.8、Tomcat v8.0、eclipse4.6.0
一、Struts
1)本质:过滤器(就像一条看门狗,一旦有请求访问就要经过它)
2)功能:对用户发送的请求,按照不同的业务要求,跳转到不同的页面,把部分信息作为参数传递
3)在 eclipse 中使用 Struts2 :
①、导入相应的 jar 包(小技巧):
从官网(http://struts.apache.org)下载文件 struts-2.3.30-all.zip ==解压打开==> apps 目录下 ====> struts2-blank.war ==解压打开==> WEB-INF 目录下 ====> lib 目录下所有 jar 包
②、配置 web.xml 文件添加 Filter
   <!-- 配置 Struts -->
    <filter>
        <filter-name>struts2</filter-name>
        <filter-class>org.apache.struts2.dispatcher.ng.filter.StrutsPrepareAndExecuteFilter</filter-class>
    </filter>

    <filter-mapping>
        <filter-name>struts2</filter-name>
        <url-pattern>/*</url-pattern>
    </filter-mapping>
③、编写显示页面
我们需要一个 jsp 页面来呈现信息,根据不同需求,编写不同的 jsp 页面
④、编写 Action 类
新建一个 class 文件继承父类 ActionSupport , class 文件中至少需要有一个返回字符串类型的方法,根据业务逻辑返回不同的值,同时 Struts 接收到不同的返回值跳转到不同的页面
⑤、编写 struts.xml 文件
我们需要在 struts.xml 中进行相应配置来将 Action 类和 Struts 联系起来。
在 src 目录下新建 struts.xml 文件,该文件内容如下:
<!DOCTYPE struts PUBLIC
    "-//Apache Software Foundation//DTD Struts Configuration 2.3//EN"
    "http://struts.apache.org/dtds/struts-2.3.dtd">
<struts>
    <!-- 定义包名,方便管理、阅读和避免重名 -->
    <package name="packageName" extends="struts-default">
    <!-- 配置action类的对应配置 -->
        <action name="actionName" class="actionClassName" method="action类中返回 String 类型的方法名(默认为execute)">
            <!-- 根据结果跳转到对应的url地址 -->
            <result name="对应Action类中返回值,默认为success">url地址</result>
        </action>
    </package>
</struts>
二、Spring
1)本质:监听器(就像一只鹰,盘旋在空中,监视着程序运行,在程序运行过程中负责注入实例)
【注入:替代代码中 new ClassName(); 语句,这样子程序员就不用考虑具体的实现类是什么,只要修改一下配置文件即可。
步骤:定义私有化变量用来保存需要的实现类→→→定义 set() 方法
】
2)功能:管理所用到的实现类。
3)在 eclipse 中使用 Spring4(配置好 Struts 的基础上):
①、导入相应的 jar 包( spring 官方包里,lib 目录里除了带 resource 和 javadoc 后缀的jar包):
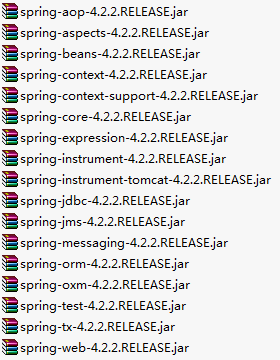
除了以上 spring 核心库外还要导入 commons-logging.jar 和 struts2-spring-plugin.jar(该包在 Struts2 中)
②、配置 web.xml 文件添加 Listener
<!-- spring的监听器配置开始 -->
        <!-- 配置上下文参数,保存 applicationContext.xml 文件的路径,该文件一般直接写在 src 目录下 -->
    <context-param>
                <!-- 参数名称(固定不变) -->
        <param-name>contextConfigLocation</param-name>
                <!-- classpath(既 src 目录)":"等价于"/",多个配置文件之间用","隔开 -->
        <param-value>classpath:applicationContext.xml,classpath:xxx.xml,……</param-value>
    </context-param>
    <!-- 监听器配置 -->
    <listener>
        <listener-class>org.springframework.web.context.ContextLoaderListener</listener-class>
    </listener>
③、编写 applicationContext.xml 文件
<?xml version="1.0" encoding="UTF-8"?>
<beans xmlns="http://www.springframework.org/schema/beans"
        xmlns:xsi="http://www.w3.org/2001/XMLSchema-instance"
        xmlns:p="http://www.springframework.org/schema/p"
        xmlns:aop="http://www.springframework.org/schema/aop"
        xmlns:context="http://www.springframework.org/schema/context"
        xmlns:jee="http://www.springframework.org/schema/jee"
        xmlns:tx="http://www.springframework.org/schema/tx"
        xsi:schemaLocation="
            http://www.springframework.org/schema/aop http://www.springframework.org/schema/aop/spring-aop-4.2.xsd
            http://www.springframework.org/schema/beans http://www.springframework.org/schema/beans/spring-beans-4.2.xsd
            http://www.springframework.org/schema/context http://www.springframework.org/schema/context/spring-context-4.2.xsd
            http://www.springframework.org/schema/jee http://www.springframework.org/schema/jee/spring-jee-4.2.xsd
            http://www.springframework.org/schema/tx http://www.springframework.org/schema/tx/spring-tx-4.2.xsd">
    <!-- 类似于财务部门一样,类就是钱,所有需要类的实例都由srping去管理 -->
        <!-- 给 Struts 注入相应的实现类 -->
    <bean id="myIndexAction" class="ssh.action.IndexAction" scope="prototype">
        <!-- 等价于 setIs(myIndexService),实现注入 -->
        <property name="is" ref="myIndexService"/>
    </bean>

    <!-- 等价于myIndexService = new ssh.service.IndexServiceImpl() -->
    <bean id="myIndexService" class="ssh.service.IndexServiceImpl" scope="prototype">
        <property name="id" ref="myIndexDao"/>
    </bean>
    <!-- 同上 -->
    <bean id="myIndexDao" class="ssh.dao.IndexDaoImpl" scope="prototype">
     <!-- 加入 hibernate 的配置信息,这里先不用管 -->
        <property name="sf" ref="sessionFactory"></property>
    </bean>
</beans>
三、Hibernate
1)本质:服务器和数据库交互的媒介
2)功能:负责对数据库的一些操作(如:建表、增、删、查、改等)
3)在 eclipse 中使用 Hibernate5(在配置好 Struts2 和 Spring4 的基础上)【注意:本文使用的数据库是 mysql 还需要导入相应的驱动包】
①、导入相应的 jar 包
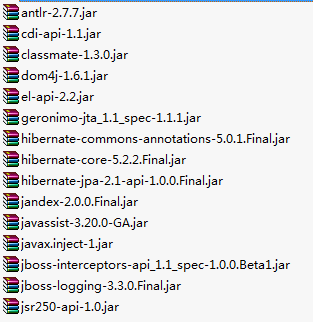
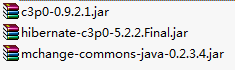
从官网下载好官方包==解压打开==> lib 目录下 ====> required 目录下所有的 jar 包 和 optional 目录下 c3p0 目录下所有的 jar 包
【 c3p0 :本文使用的数据库连接池,根据不同的连接池需要导不同的包。】
required 目录下:
c3p0 目录下:
②、编写映射文件
命名规则:JavaBeanName.hbm.xml 【注意:该文件必须和实体类在同一个目录(包)】
<?xml version="1.0"?>
<!DOCTYPE hibernate-mapping PUBLIC "-//Hibernate/Hibernate Mapping DTD 3.0//EN"
"http://hibernate.sourceforge.net/hibernate-mapping-3.0.dtd">
<!-- Generated 2016-8-30 14:25:36 by Hibernate Tools 3.5.0.Final -->
<hibernate-mapping>
    <!-- name="实体类的包名.类名" table="表名" -->
    <class name="ssh.entity.BookCard" table="BOOKCARD">
        <!-- id元素表内主键字段对应实体类字段 -->
        <id name="cid" type="int">
            <column name="CID" />
            <generator class="assigned" /><!-- 标识符生成器,主键生成规则 -->
        </id>
        <!-- 将实体类字段和表内字段一一对应 -->
        <property name="name" type="java.lang.String">
            <column name="NAME" />
        </property>
        <property name="sex" type="java.lang.String">
            <column name="SEX" />
        </property>
        <property name="cardDate" type="java.util.Date">
            <column name="CARDDATE" />
        </property>
        <property name="deposit" type="java.math.BigDecimal">
            <column name="DEPOSIT" />
        </property>
    </class>
</hibernate-mapping>
③、编写 applicationContext.xml
将 hibernate.cfg.xml 文件内的信息写入到该文件中:<bean id="sessionFactory" class="org.springframework.orm.hibernate5.LocalSessionFactoryBean">
        <!-- 注入连接池,包含了数据库用户名,密码等等信息 -->
        <property name="dataSource" ref="myDataSource" />
        <!-- 配置Hibernate的其他的属性 -->
        <property name="hibernateProperties">
            <props>
                <!-- 数据库方言 -->
                <prop key="hibernate.dialect">org.hibernate.dialect.MySQL5Dialect</prop>
                <!-- 显示sql语句 -->
                <prop key="hibernate.show_sql">true</prop>
                <!-- 格式化sql语句 -->
                <prop key="hibernate.format_sql">true</prop>
                <!-- 自动提交 -->
                <prop key="hibernate.connection.autocommit">false</prop>
                <!-- 开机自动生成表,存在表就直接更新 -->
                <prop key="hibernate.hbm2ddl.auto">update</prop>
            </props>
        </property>
        <!-- 映射文件来源 -->
        <property name="mappingResources">
        <!-- 实体类映射文件列表 -->
        <list>
                <value>ssh/entity/BookCard.hbm.xml</value>
        </list>
    </property>
</bean>
<!-- c3p0 -->
<bean name="myDataSource" class="com.mchange.v2.c3p0.ComboPooledDataSource">
    <!-- 配置数据库连接信息 -->
    <!-- 从 jdbc.properties 文件中读取 -->
    <property name="driverClass" value="${driverClass}" />
    <property name="jdbcUrl" value="${jdbcUrl}" />
    <property name="user" value="${user}" />
    <property name="password" value="${password}" />
    <!-- 每300秒检查所有连接池中的空闲连接 -->
    <property name="idleConnectionTestPeriod" value="300"></property>
    <!-- 最大空闲时间,900秒内未使用则连接被丢弃。若为0则永不丢弃 -->
    <property name="maxIdleTime" value="900"></property>
    <!-- 最大连接数 -->
    <property name="maxPoolSize" value="20"></property>
</bean>
④、编写 jdbc.properties 文件
driverClass=com.mysql.jdbc.Driver    数据库驱动
jdbcUrl=jdbc:mysql://localhost:3306/CardDB    数据库连接url
user=root    用户名
password=980317    密码
|———————————————————————————————————————————————|
以上,就是关于SSH框架整合的总结。
献上本文所用到的工具包:Struts2 所用 jar 包、Spring4 所用 jar 包、hibernate5 所用 jar 包