参考:
1)https://www.colabug.com/3204345.html
2)https://www.toptal.com/ethereum/one-click-login-flows-a-metamask-tutorial#utilize-unreal-developers-today
1)智能合约开发 – 如何实现一键化登录 Dapp
https://www.colabug.com/3204345.html
任何有帐户体系的网站和 app 都会有自己的登录模块,有时候还会集成 oauth2 (weibo, weixin,github)一键化登录.开发者肯定也都或多或少的开发过注册,登录的功能。那么基于以太坊的 Dapp 中登录功能会有什么区别呢?本文主要介绍了 Dapp 帐号体系的构成,以及如何基于 Metamask 开发一键化登录的功能。
首先 Dapp 跟普通的网站(app)没多少区别,完全可以延续之前的帐号体系登录,注册。在需要用到以太坊区块链的时候(比如创建交易,支付等)调用钱包或者 MetaMask 插件即可。
当然本身以太坊就有自己的帐号,每个人都可以创建 Address 来和区块链交互,所以如果我们的 Dapp 跟 Address 能够绑定并实现登录的话,整体的体验会好很多。
解决方案是利用私钥对 payload 加密生成 signature,然后再用
ecdsa_recover 方法对 signature 解密可以拿到对应的公钥。
2)今天从这个实例开始学习,这个实例是在教你怎么在网页上登录metamask的例子:
https://www.toptal.com/ethereum/one-click-login-flows-a-metamask-tutorial#utilize-unreal-developers-today
Web3.js is a JavaScript interface to the Ethereum blockchain. There are functions to:

Get the latest block of the chain (web3.eth.getBlockNumber)
Check the current active account on MetaMask (web3.eth.coinbase)
Get the balance of any account (web3.eth.getBalance)
Send transactions (web3.eth.sendTransaction)
Sign messages with the private key of the current account (web3.personal.sign)
However, some functions (like web3.eth.sendTransaction and web3.personal.sign) need the current account to sign some data with its private key. These functions trigger MetaMask to show a confirmation screen(就是怎么再出现一个metamask窗口让你再次点击它进行确认), to double-check that the user knows what she or he is signing.
Let’s see how to use MetaMask for this. To make a simple test, paste the following line in the DevTools console:
web3.personal.sign(web3.fromUtf8("Hello from Toptal!"), web3.eth.coinbase, console.log);
This command means: Sign my message, converted from utf8 to hex, with the coinbase account (i.e. current account), and as a callback, print the signature. A MetaMask popup will appear, and if you sign it, the signed message will be printed.(好像意思是说,只要你做的操作是需要签名或交易的,那么这个窗口是会自己弹出来的)
然后就想试试吧
在页面的JavaScript中写:
        window.addEventListener('load', function() {
            if (!window.web3) {//用来判断你是否安装了metamask
              window.alert('Please install MetaMask first.');//如果没有会去提示你先去安装
              return;
            }
            if (!web3.eth.coinbase) {//这个是判断你有没有登录,coinbase是你此时选择的账号
              window.alert('Please activate MetaMask first.');
              return;
            }
          // Checking if Web3 has been injected by the browser (Mist/MetaMask)
            if (typeof web3 !== 'undefined') {

                // Use the browser's ethereum provider
                web3.personal.sign(web3.fromUtf8("Hello from wanghui!"), web3.eth.coinbase, console.log);
       }
    });
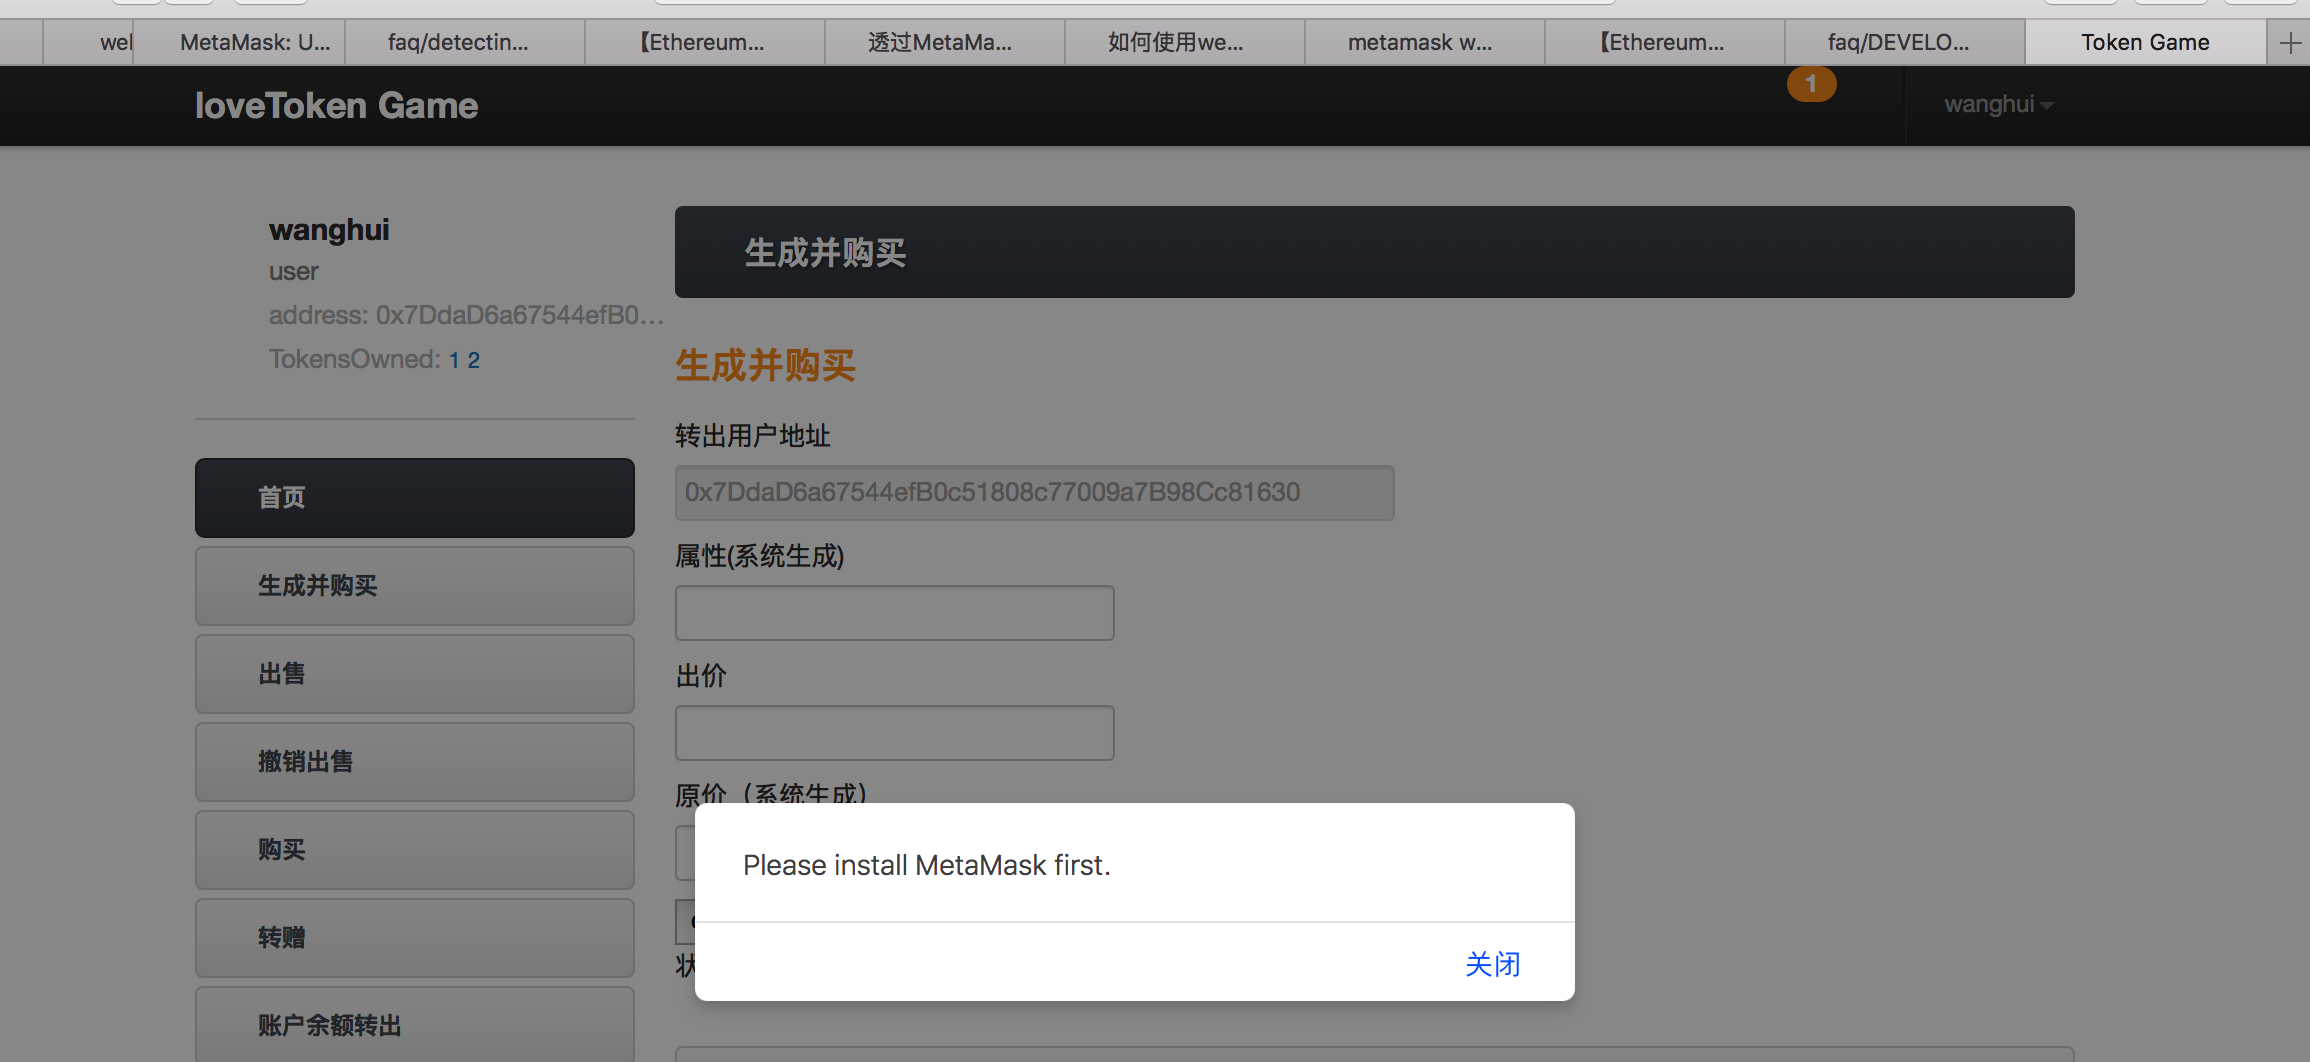
如果你此时使用的浏览器是没有metamask的,那么你就会返回这样的警告,要求你先安装metamask:
警告:这里如果要判断用户有没有安装metamask,那个判断语句是:
        window.addEventListener('load', function() {
            if (!window.web3) {//用来判断你是否安装了metamask
              window.alert('Please install MetaMask first.');//如果没有会去提示你先去安装
              return;
            }
是if (!window.web3) 而不是if (!web3),在没有安装metamask的浏览器中,web3会报错:
ReferenceError: Can't find variable: web3
而window.web3的返回值是undefined
当然,这里的写法也可以是下面的这种:
var Web3 = require('web3');
getWeb3 = new Promise(function(resolve) {
    window.addEventListener('load', function() {
        var results;
        var web3 = window.web3;//将window.web3赋值为web3,这样当没有安装metamask并没解锁的时候window.web3的返回值为undefined
        if (typeof web3 !== 'undefined') {
            // Use Mist/MetaMask's provider.
            web3 = new Web3(web3.currentProvider);
            results = {
                web3: web3
            };
            console.log('Injected web3 detected.');
            resolve(results);
        } else {
            alert('请安装MetaMask插件并解锁您的以太坊账户');
        }
    })
});
var web3;
getWeb3.then(function(results) {
    web3 = results.web3;
});
当判断出你安装了metamask后,你就能直接用web3了,可以不用window.web3了
因为在已经安装了metamask的浏览器中查看
        window.addEventListener('load', function() {
            console.log(window.web3);
            console.log(web3);
        });
发现这两个值得到的内容其实是一样的,结果:

当想访问这个网站前,此时如果metamask没有登录的话,就会先弹出这样的警告:

然后根据上面的操作,我们可以看见其实我还是进入了这个页面的,但是后面会改一下,让其没能进入该页面。这样上面就判断完了用户的安装与登录metamask的情况
这时候一访问这个页面,那个确认签名的metamask页面果然是出来了:

然后当我们点击sign后,就会看见相应的签名信息就出来了,用于确认用户的确自己授权进入了我们这个页面进行交易,留在我们网站作为一个凭证

A final note about this section: MetaMask injects web3.js into your current browser, but there are actually other standalone browsers which also inject web3.js, like Mist, for example. However, in my opinion, MetaMask offers today the best UX and simplest transition for regular users to explore dapps.
How the Login Flow Works
We will make one assumption: That all users visiting our front-end web page have MetaMask installed(就是用户都已经安装了metamask). With this assumption, we will show how a passwordless (不需要密码)cryptographically-secure login flow works.
Step 1: Modify the User Model (Back-end)
First of all, our User model needs to have two new required fields: publicAddress and nonce. Additionally, publicAddress needs to be unique. You can keep the usual username, email, and password fields—especially if you want to implement your MetaMask login parallely to an email/password login—but they are optional.
就是在User模块中有两个值:publicAddress和nonce.publicAddress是一个独一无二的值,你也可以有常见的username、email和password等值,尤其是你想要实现metamask登录的方式并且也能够使用邮箱/密码登录的方式进行登录
The signup process will also slightly differ, as publicAddress will be a required field on signup, if the user wishes to use a MetaMask login. Rest assured, the user will never need to type their publicAddress manually, since it can be fetched via web3.eth.coinbase.
如果用户希望使用metamask去登录的话,那么publicAddress是必须的值;当然,用户并不需要手动去输入publicAddress,网站能够自己通过接口web3.eth.coinbase来获得它
Step 2: Generate Nonces (Back-end)
For each user in the database, generate a random string in the nonce field. For example, nonce can be a big random integer.
Step 3: User Fetches Their Nonce (Front-end)
In our front-end JavaScript code, assuming MetaMask is present, we have access to window.web3. We can therefore call web3.eth.coinbase to get the current MetaMask account’s public address.
首先我们假设已经安装并使用了metamask,那就有了window.web3的接口,因此我们就能够调用web3.eth.coinbase去等到目前账号的address
When the user clicks on the login button, we fire an API call to the back end to retrieve the nonce associated with their public address. Something like a route with a filter parameter GET /api/users?publicAddress=${publicAddress} should do. Of course, since this is an unauthenticated API call, the back end should be configured to only show public information (including nonce) on this route.
当用户点击了登录的按钮,我们将通过API接口调用后端去检索与该address相关的nonce,即从数据库中调取,访问route为GET /api/users?publicAddress=${publicAddress} (就是去查看有没有与这个address相关的nonce,说明它之前登录过)。因为这是一个还没有授权的API调用(即没有新的nonce)那么后端在只会返回一些公共信息(包括nonce)
If
the previous request doesn’t return any result, it means that the
current public address hasn’t signed up yet. We need to first create a
new account via POST /users, passing publicAddress in the request body. On the other hand, if there’s a result, then we store its nonce.
如果之前的调用没有返回任何数据,那么就说明这个address之前还没有注册过,我们需要创建账号并传递address(然后后端就会存储这个address并生成一个nonce发回前端)。如果有数据,那我们将存储这个nonce,给下一步签名使用
Step 4: User Signs the Nonce (Front-end)
Once the front end receives nonce in the response of the previous API call, it runs the following code:
web3.personal.sign(nonce, web3.eth.coinbase, callback);
This will prompt MetaMask to show a confirmation popup for signing the message. The nonce will be displayed in this popup, so that the user knows she or he isn’t signing some malicious data.
When she or he accepts it, the callback function will be called with the signed message (called signature) as an argument. The front end then makes another API call to POST /api/authentication, passing a body with both signature and publicAddress.
一旦前端从之前的API调用中收到nonce,那么他将调用web3.personal.sign。这将会提示metamask去弹出一个签名消息的确认窗口。在窗口上将会展示nonce,所以使用者将会知道他没有签署什么奇怪的数据。
它用户接受后,将签署信息当作变量的回调函数将会被调用。前端将会使用另一个API调用 POST /api/authentication,传递签名和address
Step 5: Signature Verification (Back-end)
When the back end receives a POST /api/authentication request, it first fetches the user in the database corresponding to the publicAddressgiven in the request body. In particular it fetches the associated nonce.
Having the nonce, the public address, and the signature, the back end can then cryptographically verify that the nonce has been correctly signed by the user. If this is the case, then the user has proven ownership of the public address, and we can consider her or him authenticated. A JWT or session identifier can then be returned to the front end.
当后端收到请求 POST /api/authentication 后,它首先根据请求上的publicAddress去数据库中寻找相应的用户。特别是得到相关的nonce
有了nonce,address,signature,后端就可以进行核查nonce到底是不是被这个用户签名的。如果是,用户则证明了它对address的拥有,将对其进行授权
Step 6: Change the Nonce (Back-end)
To prevent the user from logging in again with the same signature (in case it gets compromised), we make sure that the next time the same user wants to log in, she or he needs to sign a new nonce. This is achieved by generating another random nonce for this user and persisting it to the database.
Et voilà! This is how we manage a nonce-signing passwordless login flow.
为了防止用户使用相同的签名,我们要保证下一次同样的用户想要登录时,它需要签署一个新的nonce。这通过为用户生成一个新的随机nonce来实现,并将其保存在数据库中
Why the Login Flow Works
Authentication, by definition, is really only the proof of ownership of an account. If you uniquely identify your account using a public address, then it’s cryptographically trivial to prove you own it.
To prevent the case where a hacker gets hold of one particular message and your signature of it (but not your actual private key), we enforce the message to sign to be:
- Provided by the back end, and
- Regularly changing
We changed it after each successful login in our explanation, but a timestamp-based mechanism could also be imagined.
就是整个大概的意思就是,你注册时将会生成一个nonce,并与address对应存储在数据库中(当然在这里会同时进行签名,即sign);然后后面你想要登录了,你就传递address去数据库得到相应的nonce,并对nonce进行签名,将nonce,address,signature传到后端去验证你的签名的正确行来确认你为该用户
这里用于核查的标准就是每次私钥进行签名的nonce都不一样,而且都是由后端提供的,然后由ecdsa_recover (nonce,signature)方法来对签名得到公钥,与传递来的公钥两相对比来进行核查签名
Let’s Build It Together
In this section, I’ll go through the six steps above, one by one. I’ll show some snippets of code for how we can build this login flow from scratch, or integrate it in an existing back end, without too much effort.
I created a small demo app for the purpose of this article. The stack I’m using is the following:
- Node.js, Express, and SQLite (via the Sequelize ORM) to implement a RESTful API on the back end. It returns a JWT on successful authentication.
- React single-page application on the front-end.
I try to use as few libraries as I can. I hope the code is simple enough so that you can easily port it to other tech stacks.
The whole project can be seen in this GitHub repository. A demo is hosted here.
代码的实现为:
login-with-metamask-demo/frontend/src/Login/Login.js
import React, { Component } from 'react';
import Web3 from 'web3';

import './Login.css';

let web3 = null; // Will hold the web3 instance

class Login extends Component {
  state = {
    loading: false // Loading button state,一开始设metamask连接状态为false
  };

  handleAuthenticate = ({ publicAddress, signature }) =>
    fetch(`${process.env.REACT_APP_BACKEND_URL}/auth`, {//19 调用后台
      body: JSON.stringify({ publicAddress, signature }),
      headers: {
        'Content-Type': 'application/json'
      },
      method: 'POST'
    }).then(response => response.json());

  handleClick = () => {//3
    const { onLoggedIn } = this.props;//React中的每一个组件,都包含有一个属性(props),属性主要是从父组件传递给子组件的,在组件内部,我们可以通过this.props获取属性对象
                                                                                   //就是点击页面按钮时传来的属性对象

    if (!window.web3) {//4 先检查是否安装了metamask
      window.alert('Please install MetaMask first.');
      return;
    }
    if (!web3) {//5 检查metamask是否连接上了网络
      // We don't know window.web3 version, so we use our own instance of web3
      // with provider given by window.web3
      web3 = new Web3(window.web3.currentProvider);
    }
    if (!web3.eth.coinbase) {//6 检查metamask是否登录
      window.alert('Please activate MetaMask first.');
      return;
    }
    const publicAddress = web3.eth.coinbase.toLowerCase();
    this.setState({ loading: true });//到这里metamask就连接上了,状态为true

    // Look if user with current publicAddress is already present on backend
    fetch(
      `${
        process.env.REACT_APP_BACKEND_URL
      }/users?publicAddress=${publicAddress}` //7 去后端查看这个address是否之前是否已经注册过了
    )
      .then(response => response.json())
      // If yes, retrieve it. If no, create it.
      .then(//10 如果不为0,说明之前注册过,那就得到users[0] = (nonce,publicAddress,username);如果users.length为0,则create it,调用this.handleSignup(publicAddress)
        users => (users.length ? users[0] : this.handleSignup(publicAddress))
      )
      // Popup MetaMask confirmation modal to sign message
      .then(this.handleSignMessage)//15 然后这时候的address在数据库上都生成的自己的数据,所以可以对得到的nonce进行签名了
      // Send signature to backend on the /auth route
      .then(this.handleAuthenticate)//18 进行签名的核查
      // Pass accessToken back to parent component (to save it in localStorage)
      .then(onLoggedIn)
      .catch(err => {
        window.alert(err);
        this.setState({ loading: false });
      });
  };

  handleSignMessage = ({ publicAddress, nonce }) => {//16 然后就使用私钥和nonce来进行签名
    return new Promise((resolve, reject) =>
      web3.personal.sign(
        web3.fromUtf8(`I am signing my one-time nonce: ${nonce}`),
        publicAddress,
        (err, signature) => {
          if (err) return reject(err);
          return resolve({ publicAddress, signature });//17 得到publicAddress, signature
        }
      )
    );
  };

  handleSignup = publicAddress =>
    fetch(`${process.env.REACT_APP_BACKEND_URL}/users`, {//11 访问后端,发送address
      body: JSON.stringify({ publicAddress }),
      headers: {
        'Content-Type': 'application/json'
      },
      method: 'POST'
    }).then(response => response.json());//14 得到创建的用户的信息

  render() {//1
    const { loading } = this.state;//得到状态false
    return (//返回页面
      <div>
        <p>
          Please select your login method.<br />For the purpose of this demo,
          only MetaMask login is implemented.
        </p>
        <button className="Login-button Login-mm" onClick={this.handleClick}>//2 点击进行登录
          {loading ? 'Loading...' : 'Login with MetaMask'}
        </button>
        <button className="Login-button Login-fb" disabled>
          Login with Facebook
        </button>
        <button className="Login-button Login-email" disabled>
          Login with Email
        </button>
      </div>
    );
  }
}

export default Login;
login-with-metamask-demo/backend/src/services/users/routes.js
import jwt from 'express-jwt';
import express from 'express';

import config from '../../config';
import * as controller from './controller';

const router = express.Router();

/** GET /api/users */
router.route('/').get(controller.find);//8 查找现在进行登录的address在数据库中的情况

/** GET /api/users/:userId */
/** Authenticated route */
router.route('/:userId').get(jwt({ secret: config.secret }), controller.get);

/** POST /api/users */
router.route('/').post(controller.create);//12 创建新address的相应数据库数据

/** PATCH /api/users/:userId */
/** Authenticated route */
router
  .route('/:userId')
  .patch(jwt({ secret: config.secret }), controller.patch);

export default router;
login-with-metamask-demo/backend/src/services/auth/routes.js
import express from 'express';

import * as controller from './controller';

const router = express.Router();

/** POST /api/auth */
router.route('/').post(controller.create);//20

export default router;
login-with-metamask-demo/backend/src/services/users/controller.js
import db from '../../db';

const User = db.models.User;//数据库中的User表

export const find = (req, res, next) => {//9 查看address在的行的数据users的所有信息,其实就是为了得到nonce
  // If a query string ?publicAddress=... is given, then filter results
  const whereClause = req.query &&
    req.query.publicAddress && {
      where: { publicAddress: req.query.publicAddress }
    };

  return User.findAll(whereClause)
    .then(users => res.json(users))
    .catch(next);
};

export const get = (req, res, next) => {
  // AccessToken payload is in req.user.payload, especially its `id` field
  // UserId is the param in /users/:userId
  // We only allow user accessing herself, i.e. require payload.id==userId
  if (req.user.payload.id !== +req.params.userId) {
    return res.status(401).send({ error: 'You can can only access yourself' });
  }
  return User.findById(req.params.userId)
    .then(user => res.json(user))
    .catch(next);
};

export const create = (req, res, next) =>//13 创建一个nonce,address = req.body,username的数据放在数据库中
  User.create(req.body)
    .then(user => res.json(user))
    .catch(next);

export const patch = (req, res, next) => {
  // Only allow to fetch current user
  if (req.user.payload.id !== +req.params.userId) {
    return res.status(401).send({ error: 'You can can only access yourself' });
  }
  return User.findById(req.params.userId)
    .then(user => {
      Object.assign(user, req.body);
      return user.save();
    })
    .then(user => res.json(user))
    .catch(next);
};
login-with-metamask-demo/backend/src/models/user.model.js
import Sequelize from 'sequelize';

export default function(sequelize) {//13 在生成数据时,nonce是使用了Math.random()来随机生成的,username不设置则为空
  const User = sequelize.define('User', {
    nonce: {
      allowNull: false,
      type: Sequelize.INTEGER.UNSIGNED,
      defaultValue: () => Math.floor(Math.random() * 10000) // Initialize with a random nonce
    },
    publicAddress: {
      allowNull: false,
      type: Sequelize.STRING,
      unique: true,
      validate: { isLowercase: true }
    },
    username: {
      type: Sequelize.STRING,
      unique: true
    }
  });
}
login-with-metamask-demo/backend/src/services/auth/controller.js
import ethUtil from 'ethereumjs-util';
import jwt from 'jsonwebtoken';

import config from '../../config';
import db from '../../db';

const User = db.models.User;

export const create = (req, res, next) => {
  const { signature, publicAddress } = req.body;
  if (!signature || !publicAddress)//21 查看是否传递了所需的数据
    return res
      .status(400)
      .send({ error: 'Request should have signature and publicAddress' });

  return (
    User.findOne({ where: { publicAddress } }) //22 在数据库中查找该数据的相关信息
      ////////////////////////////////////////////////////
      // Step 1: Get the user with the given publicAddress
      ////////////////////////////////////////////////////
      .then(user => {
        if (!user)
          return res.status(401).send({
            error: `User with publicAddress ${publicAddress} is not found in database`
          });
        return user;
      })
      ////////////////////////////////////////////////////
      // Step 2: Verify digital signature
      ////////////////////////////////////////////////////
      .then(user => {//23 然后通过从数据库中得到nonce来得知签名的消息内容为
        const msg = `I am signing my one-time nonce: ${user.nonce}`;

        // We now are in possession of msg, publicAddress and signature. We
        // can perform an elliptic curve signature verification with ecrecover
        const msgBuffer = ethUtil.toBuffer(msg);//24 然后进行下面的验证
        const msgHash = ethUtil.hashPersonalMessage(msgBuffer);//对消息进行hash
        const signatureBuffer = ethUtil.toBuffer(signature);
        const signatureParams = ethUtil.fromRpcSig(signatureBuffer);//将签名分成v,r,s
        const publicKey = ethUtil.ecrecover(//调用ecrecover来从签名中恢复公钥
          msgHash,
          signatureParams.v,
          signatureParams.r,
          signatureParams.s
        );
        const addressBuffer = ethUtil.publicToAddress(publicKey);//然后将公钥转为address,是buffer格式的
        const address = ethUtil.bufferToHex(addressBuffer);//转成16进制格式

        // The signature verification is successful if the address found with
        // ecrecover matches the initial publicAddress
        if (address.toLowerCase() === publicAddress.toLowerCase()) {//然后将得到的address的值域数据库中的比较,如果相等则返回用户信息user,否则报错
          return user;
        } else {
          return res
            .status(401)
            .send({ error: 'Signature verification failed' });
        }
      })
      ////////////////////////////////////////////////////
      // Step 3: Generate a new nonce for the user
      ////////////////////////////////////////////////////
      .then(user => {25 验证完成后要更新nonce的内容
        user.nonce = Math.floor(Math.random() * 10000);
        return user.save();
      })
      ////////////////////////////////////////////////////
      // Step 4: Create JWT(看本博客Json Web Token是干什么)
      ////////////////////////////////////////////////////
      .then(//26 相当于实现了一个类似session的功能,这里则是使用token
        user =>
          new Promise((resolve, reject) =>
            // https://github.com/auth0/node-jsonwebtoken
            jwt.sign(//得到token
              {
                payload: {
                  id: user.id,
                  publicAddress
                }
              },
              config.secret,
              null,
              (err, token) => {
                if (err) {
                  return reject(err);
                }
                return resolve(token);
              }
            )
          )
      )//将上面形成的token传回前端
      .then(accessToken => res.json({ accessToken }))
      .catch(next)
  );
};
注意:这个有个不好的点就是他至今还不能在手机端实现