参考:https://pytorch.org/tutorials/advanced/neural_style_tutorial.html
具体的理论就不解释了,这里主要是解释代码:
⚠️使用的是python2.7
1.导入包和选择设备
下面是需要用来实现神经迁移的包列表:
- torch, torch.nn, numpy (使用pytorch实现神经网络必不可少的包)
- torch.optim (有效梯度下降)
- PIL, PIL.Image, matplotlib.pyplot (下载和显示图像)
- torchvision.transforms (转移PIL图像为张量)
- torchvision.models (训练或下载预训练模型)
- copy (深度复制模型;系统包)
代码为:
from __future__ import print_function

import torch
import torch.nn as nn
import torch.nn.functional as F
import torch.optim as optim

from PIL import Image
import matplotlib.pyplot as plt

import torchvision.transforms as transforms
import torchvision.models as models

import copy
接下来我们就需要去选择使用什么设备去运行网络,以及导入内容和风格图片。在大图像上运行神经迁移算法要更长时间,但是如果运行在GPU中它能够运行地更快一些。我们可以使用torch.cuda.is_available()去检测本地是否有GPU能够使用。接下来,我们将通过torch.device设置该GPU,让他能在整个教程中使用。.to(device)方法也用来将张量和模块移动到想要使用的设备上。
代码为:
device = torch.device("cuda" if torch.cuda.is_available() else "cpu")
即如果有CUDA就使用它,没有就使用CPU
2.下载图片
现在我们将导入风格和内容图片。原始的PIL图片有在0-255之间的值,但是当转换成torch张量后,他们的值就转换成了0-1.为了有相同的维度,这些图片也需要被调整大小。一个重要的细节需要被注意——来自torch库的神经网络是使用值在0-1的张量来进行训练的。如果你想要传给网络0-255张量的图片,那么激活特征映射将不能够感知想要的内容和风格。可是来自Caffe库的预训练网络就是使用0-255的张量进行训练的。
⚠️
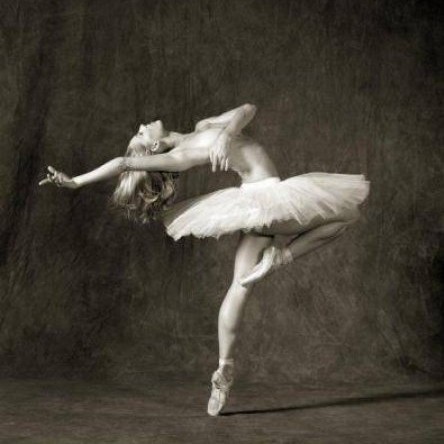
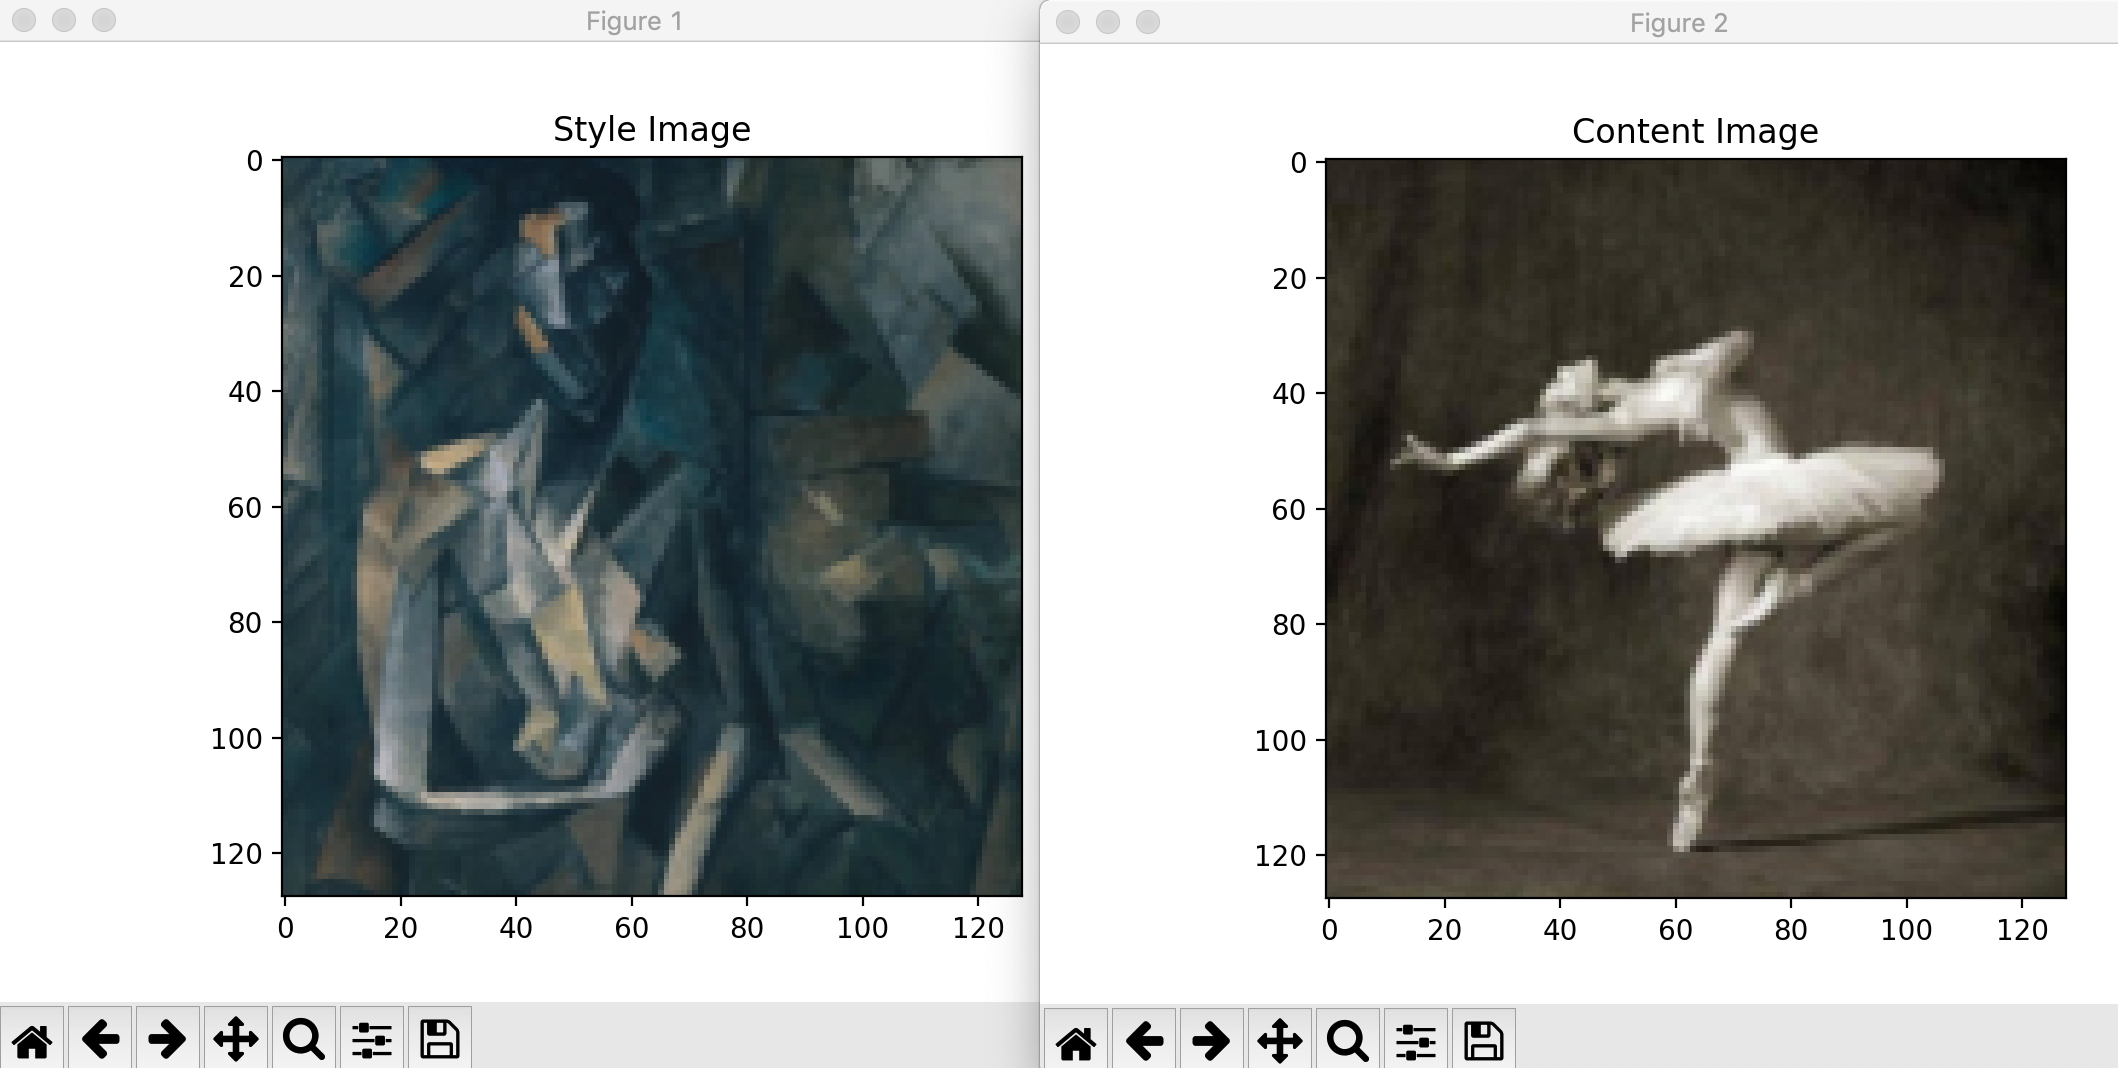
在这个课程中需要下载两张图片:picasso.jpg 和 dancing.jpg.
下载这两个图片,并将它们添加在你本地路径的data/images目录当中
代码为:
#输出图片的期望大小
imsize = 512 if torch.cuda.is_available() else 128  # 如果使用的设备不是GPU,那么就使用小点的大小

loader = transforms.Compose([
    transforms.Resize(imsize),  # 输入图像的规模,调整其大小
    transforms.ToTensor()])  # 将其转换成torch张量


def image_loader(image_name):
    image = Image.open(image_name)
    # 用来满足网络的输入维度的假batch维度,即不足之处补0
    image = loader(image).unsqueeze(0)
    return image.to(device, torch.float)

#下载的风格图像可很容图像
style_img = image_loader("./data/imagese/picasso.jpg")
content_img = image_loader("./data/images/dancing.jpg")

#断言风格图像和内容图像是否大小一致,如果大小不一致则报错,说明需要大小一致的内容和风格图像
assert style_img.size() == content_img.size(),
    "we need to import style and content images of the same size"
PIL:Python Imaging Library,Python平台的图像处理标准库
现在,让我们创建一个通过再次转换图片的复制体成PIL格式和使用plt.imshow命令显示复制体的方法来显示一张图片的函数。我们将试着显示风格和内容图像去保证他们已经成功导入
代码为:
unloader = transforms.ToPILImage()  # 将图像再次转换成PIL图像

plt.ion()

def imshow(tensor, title=None):  #该函数用来显示你上传的内容和风格两张图像
    image = tensor.cpu().clone()  # 克隆张量并不进行更改
    image = image.squeeze(0)      # 移除假batch维度,即删掉上面添加的0remove the fake batch dimension
    image = unloader(image)       #将图像转换成PIL图像
    plt.imshow(image)             #显示图像
    if title is not None:
        plt.title(title) #title用于为图片标注标题
    plt.pause(0.001) # 稍作停顿,以便更新绘图


plt.figure()
imshow(style_img, title='Style Image')

plt.figure()
imshow(content_img, title='Content Image')
图为,之后运行了以后再截自己的图:
3.损失函数
1)内容损失
我们将直接在卷积层后添加内容损失模块,该模块将用于计算内容距离。这样子每当网络传进输入图像后,该内容损失将会在期望的层次进行计算,同时计算梯度。为了使内容损失层透明,我们必须要定义一个forward函数去计算内容损失,并返回该层的输出。该计算损失降作为模型的参数进行存储
代码为:
class ContentLoss(nn.Module):

    def __init__(self, target,):
        super(ContentLoss, self).__init__()
        # 我们从用于动态计算梯度的树中“分离”目标内容:这是一个状态值,而不是一个变量
        # 否则该标准的forward方法将抛出一个error
        self.target = target.detach()

    def forward(self, input):
        self.loss = F.mse_loss(input, self.target)
        return input
⚠️虽然这个模块命名为ContentLoss,但是它并不是一个真的PyTorch损失函数。如果你想要定义你自己的内容损失作为PyTorch损失函数,你必须创建一个autograd函数去在backward方法中重计算或手动实现梯度
2)风格损失
风格损失模块与内容损失模块的实现是相似的。它将作为一个网络中的透明层去计算该层的风格损失。为了去计算风格损失,我们需要去计算gram矩阵GXL。该gram矩阵是他的转置矩阵和一个给定矩阵相乘的结果。在该应用中,这个给定矩阵是层次L的特征映射FXL的改造版本。FXL被改造去形成F̂ XL,这是一个K*N矩阵,K是L层中特征映射的数量,N是所有垂直特征映射的长度FkXL。比如F̂ XL的第一行与第一个垂直特征映射F1XL相关
最后,必须通过将每个元素除以矩阵中元素的总数来规范化gram矩阵。这个规范化用以抵消带有N维F̂ XL矩阵将在gram矩阵中生成更大的值这一事实。这些较大的值将导致第一个层(池化层之前)在梯度下降期间产生较大的影响。风格特性往往位于网络的更深层,因此这一标准化步骤至关重要。
代码为:
def gram_matrix(input):
    a, b, c, d = input.size()  # a=batch size(=1)
    # b=number of feature maps
    # (c,d)=dimensions of a f. map (N=c*d)

    features = input.view(a * b, c * d)  # resise F_XL into hat F_XL

    G = torch.mm(features, features.t())  # 计算gram产出

    # 我们通过在每一个特征映射中数亿元素数量的方法来规范化gram矩阵的值
    return G.div(a * b * c * d)
现在风格损失模块看起来几乎就像风格损失模块了。这个风格距离也是使用 GXL 和GSL均方差的方法来计算的。代码为:
class StyleLoss(nn.Module):

    def __init__(self, target_feature):
        super(StyleLoss, self).__init__()
        self.target = gram_matrix(target_feature).detach()

    def forward(self, input):
        G = gram_matrix(input)
        self.loss = F.mse_loss(G, self.target)
        return input
4.导入模块
现在我们需要导入一个预训练神经网络。我们将使用在论文中的19层VGG网络。
VGG的PyTorch的实现是一个分成两个子序列模块的模块:features(包含卷积和池化层)和classifier(包含全连接层)。我们将使用features模块,应为我们需要独立卷积层的输出去测量内容和风格损失。在训练过程中,一些层有着与评估时不同的行为,所以我们必须使用.eval()将网络设置为评估模式,即:
cnn = models.vgg19(pretrained=True).features.to(device).eval()
除此之外,VGG网络将在每个通道都被mean=[0.485, 0.456, 0.406] 和std=[0.229, 0.224, 0.225]规范化的图片上进行训练。我们将使用他们在将图片发送到网络之前去将其规范化,即:
cnn_normalization_mean = torch.tensor([0.485, 0.456, 0.406]).to(device)
cnn_normalization_std = torch.tensor([0.229, 0.224, 0.225]).to(device)

# 创建一个模块去规范化输入图像,所以我们能够轻易地将其输入到nn.Sequential
class Normalization(nn.Module):
    def __init__(self, mean, std):
        super(Normalization, self).__init__()
        # 使用.view方法去将mean和std值变为[C x 1 x 1]维,所以他们能够直接与形状为[B x C x H x W]的图像张量工作
        # B是batch大小,C是通道数,H是高,W是宽度
        self.mean = torch.tensor(mean).view(-1, 1, 1)
        self.std = torch.tensor(std).view(-1, 1, 1)

    def forward(self, img):
        #规范化img
        return (img - self.mean) / self.std
Sequential模块包含了一个子模块的顺序列表。比如vgg19.features包含按深度的正确顺序对齐的序列(Conv2d, ReLU, MaxPool2d, Conv2d, ReLU…)。我们需要在他们检测的卷积层后面马上添加我们的内容损失和风格损失层。为了这么做,我们一定要创建一个新的Sequential模块去正确地插入内容损失和风格损失
# 想要用来计算风格/内容损失的层次深度
content_layers_default = ['conv_4']
style_layers_default = ['conv_1', 'conv_2', 'conv_3', 'conv_4', 'conv_5']

def get_style_model_and_losses(cnn, normalization_mean, normalization_std,
                               style_img, content_img,
                               content_layers=content_layers_default,
                               style_layers=style_layers_default):
    cnn = copy.deepcopy(cnn)

    # 规范化模块
    normalization = Normalization(normalization_mean, normalization_std).to(device)

    # 只是为了获得迭代入口或内容/风格损失
    content_losses = []
    style_losses = []

    # 假设cnn是一个nn.Sequential,所以我们创建了一个新的nn.Sequential去放入假设被顺序激活的模块
    model = nn.Sequential(normalization)

    i = 0  # 每次看见卷积时自增
    for layer in cnn.children(): //去判断cnn中的子序列是什么类型的层
        if isinstance(layer, nn.Conv2d):
            i += 1
            name = 'conv_{}'.format(i)
        elif isinstance(layer, nn.ReLU):
            name = 'relu_{}'.format(i)
            # 本地版本没有和我们下面插入的ContentLoss和StyleLoss相处地很好
            # 所以我们使用另一个版本来替代它
            layer = nn.ReLU(inplace=False)
        elif isinstance(layer, nn.MaxPool2d):
            name = 'pool_{}'.format(i)
        elif isinstance(layer, nn.BatchNorm2d):
            name = 'bn_{}'.format(i)
        else:
            raise RuntimeError('Unrecognized layer: {}'.format(layer.__class__.__name__))
     //只有是上面几种类型的层才会添加到规范化的model中
        model.add_module(name, layer)

        if name in content_layers: //如果该name存在于content_layers,就会为其添加内容损失的计算
            # 添加内容损失
            target = model(content_img).detach()
            content_loss = ContentLoss(target)
            model.add_module("content_loss_{}".format(i), content_loss)
            content_losses.append(content_loss)

        if name in style_layers: //如果该name存在于style_layers,就会为其添加风格损失的计算
            # 添加风格损失
            target_feature = model(style_img).detach()
            style_loss = StyleLoss(target_feature)
            model.add_module("style_loss_{}".format(i), style_loss)
            style_losses.append(style_loss)

    # 现在我们在最后一个内容和风格损失后修建层次
    for i in range(len(model) - 1, -1, -1): //由后向前获得model的值
        if isinstance(model[i], ContentLoss) or isinstance(model[i], StyleLoss):
            break

     model = model[:(i + 1)]

    return model, style_losses, content_losses
接下来,我们选择输入图像。你可以使用一个内容图像的副本或白噪声
input_img = content_img.clone()
# 如果你想要使用白噪声,请取消下面一行的注释
# input_img = torch.randn(content_img.data.size(), device=device)

# 添加原始输入图像到figure:
plt.figure()
imshow(input_img, title='Input Image')

5.梯度下降
我们使用L-BFGS算法去运行梯度下降。不像训练一个网络,我们想要训练一个输入的图像去最小化内容/风格损失。我们将创建一个PyTorch L-BFGS优化器 optim.LBFGS,然后将我们的图像作为一个张量传给他去优化
def get_input_optimizer(input_img):
    # 该行用于显示输入是一个需要梯度的参数
    optimizer = optim.LBFGS([input_img.requires_grad_()])
    return optimizer
最后我们必须要定义一个可以形成神经迁移的函数。对于网络的每一次迭代,它都将会传入更新后的输入并计算新的损失。我们将会运行每一个损失模块中的backward方法去动态计算他们的梯度。该优化器需要一个“封闭”函数,用于重新计算模块并返回损失
我们还有最后一个约束需要解决。网络可能尝试去为了图像优化带着超过图像的0到1张量范围值的输入。我们可以在网络每次运行时通过修正输入值为0-1之间来解决这个问题
def run_style_transfer(cnn, normalization_mean, normalization_std,
                       content_img, style_img, input_img, num_steps=300,
                       style_weight=1000000, content_weight=1):
    """运行风格转移"""
    print('Building the style transfer model..')

    model, style_losses, content_losses = get_style_model_and_losses(cnn,
        normalization_mean, normalization_std, style_img, content_img)

    optimizer = get_input_optimizer(input_img)

    print('Optimizing..')
    run = [0]
    while run[0] <= num_steps:

        def closure():
            # 修正更新过的输入图像的值
            input_img.data.clamp_(0, 1)

            optimizer.zero_grad()
            model(input_img)
            style_score = 0
            content_score = 0

            for sl in style_losses:
                style_score += sl.loss
            for cl in content_losses:
                content_score += cl.loss

            style_score *= style_weight
            content_score *= content_weight

            loss = style_score + content_score
            loss.backward()

            run[0] += 1
            if run[0] % 50 == 0:
                print("run {}:".format(run))
                print('Style Loss : {:4f} Content Loss: {:4f}'.format(
                    style_score.item(), content_score.item()))
                print()

            return style_score + content_score

        optimizer.step(closure)

    # 最后一次修正
    input_img.data.clamp_(0, 1)

    return input_img
最后我们可以运行这个算法:
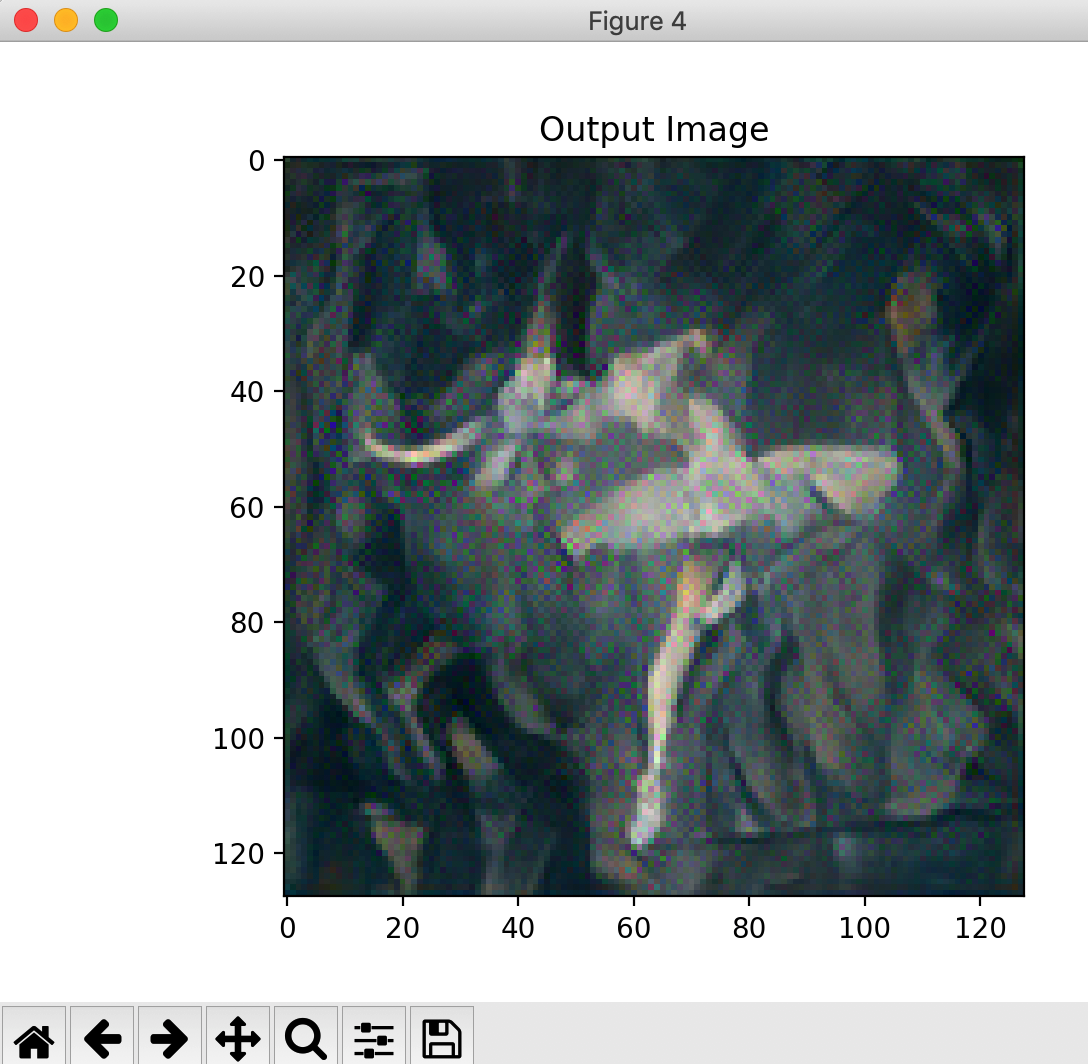
output = run_style_transfer(cnn, cnn_normalization_mean, cnn_normalization_std,
                            content_img, style_img, input_img)

plt.figure()
imshow(output, title='Output Image')

# sphinx_gallery_thumbnail_number = 4
plt.ioff()
plt.show()
运行起来为:
(deeplearning2) userdeMBP:neural transfer user$ python neural_style_tutorial.py
Downloading: "https://download.pytorch.org/models/vgg19-dcbb9e9d.pth" to /Users/user/.torch/models/vgg19-dcbb9e9d.pth
100.0%
Building the style transfer model..
neural_style_tutorial.py:121: UserWarning: To copy construct from a tensor, it is recommended to use sourceTensor.clone().detach() or sourceTensor.clone().detach().requires_grad_(True), rather than torch.tensor(sourceTensor).
  self.mean = torch.tensor(mean).view(-1, 1, 1)
neural_style_tutorial.py:122: UserWarning: To copy construct from a tensor, it is recommended to use sourceTensor.clone().detach() or sourceTensor.clone().detach().requires_grad_(True), rather than torch.tensor(sourceTensor).
  self.std = torch.tensor(std).view(-1, 1, 1)
Optimizing..
run [50]:
Style Loss : 93.626976 Content Loss: 17.819944

run [100]:
Style Loss : 22.882374 Content Loss: 15.977382

run [150]:
Style Loss : 9.978903 Content Loss: 14.216763

run [200]:
Style Loss : 5.153259 Content Loss: 12.498219

run [250]:
Style Loss : 3.383650 Content Loss: 10.965824

run [300]:
Style Loss : 2.633158 Content Loss: 9.868271
图像为: