1.新建项目
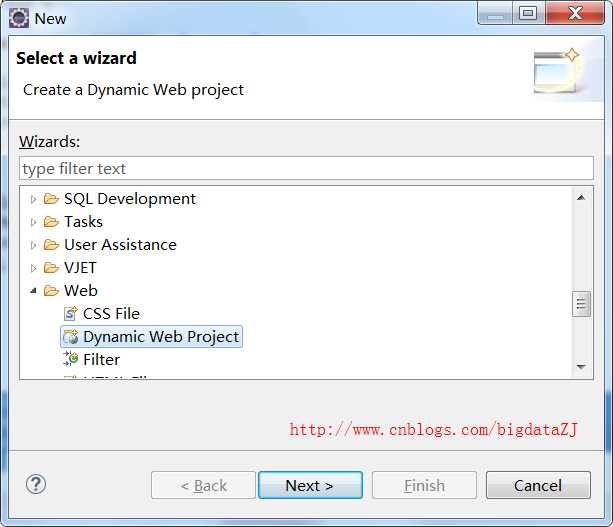
File->New->Other,选择Dynamic web project:
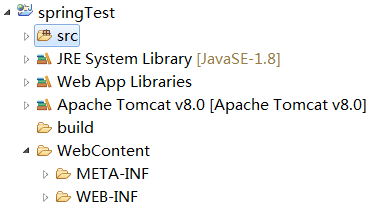
项目建好之后,目录结构如下:
2.WEB-INF/web.xml 中配置 dispatcherServlet
<?xml version="1.0" encoding="UTF-8"?>
<web-app xmlns:xsi="http://www.w3.org/2001/XMLSchema-instance"
    xmlns="http://xmlns.jcp.org/xml/ns/javaee"
    xsi:schemaLocation="http://xmlns.jcp.org/xml/ns/javaee http://xmlns.jcp.org/xml/ns/javaee/web-app_3_1.xsd"
    version="3.1">
    <welcome-file-list>
        <welcome-file>index.jsp</welcome-file>
    </welcome-file-list>
    <servlet>
        <servlet-name>spring-dispatcher</servlet-name>
        <servlet-class>org.springframework.web.servlet.DispatcherServlet</servlet-class>
        <!-- 配置Spring mvc下的配置文件 ,如果不配置,默认加载WEB-INF下XXX-servlet.xml(XXX为上面的<servlet-name>)-->
        <init-param>
            <param-name>contextConfigLocation</param-name>
            <param-value>classpath:spring/spring-*.xml</param-value>
        </init-param>
        <load-on-startup>1</load-on-startup>
    </servlet>
...
</web-app>
3.在src目录下新建spring-web.xml等
<?xml version="1.0" encoding="UTF-8"?>
  <beans xmlns="http://www.springframework.org/schema/beans"
      xmlns:xsi="http://www.w3.org/2001/XMLSchema-instance"
      xmlns:context="http://www.springframework.org/schema/context"
      xmlns:mvc="http://www.springframework.org/schema/mvc"
      xsi:schemaLocation="http://www.springframework.org/schema/beans http://www.springframework.org/schema/beans/spring-beans.xsd
          http://www.springframework.org/schema/context http://www.springframework.org/schema/context/spring-context-4.0.xsd
          http://www.springframework.org/schema/mvc http://www.springframework.org/schema/mvc/spring-mvc-4.0.xsd">

         <!-- 配置自动扫描的包 -->
         <context:component-scan base-package="com.jackie.springmvc"></context:component-scan>

         <!-- 配置视图解析器 如何把handler 方法返回值解析为实际的物理视图 -->
         <bean class="org.springframework.web.servlet.view.InternalResourceViewResolver">
             <property name = "prefix" value="/WEB-INF/views/"></property>
             <property name = "suffix" value = ".jsp"></property>
         </bean>
 </beans>
4.HelloWorld.java(com.jackie.springmvc.handlers下)
//1. 首先要在类的前面添加“Controller”注解,表示是spring的控制器
@Controller
 public class HelloWorld {
     //@RequestMapping, 是用于匹配请求的路径,比如这里匹配的请求路径就是“http://localhost:8080/springTest/springmvc/helloworld”
     @RequestMapping("/helloworld")
     public String hello(){
         System.out.println("hello world");
         //这个返回的字符串与上面springmvc.xml进行配合,springmvc.xml中声明了prefix和suffix,而夹在这两者之间的就是这里返回的字符串,所以执行完这个方法后,我们可以得到这样的请求资源路径“/WEB-INF/views/success.jsp”,这个success.jsp是需要我们新建的
         return "success";
     }
 }
5.index.jsp(WebContent下)
在新建success.jsp之前,我们需要有一个入口,也就是这里的index.jsp:
<%@ page language="java" contentType="text/html; charset=ISO-8859-1"
      pageEncoding="ISO-8859-1"%>
  <!DOCTYPE html PUBLIC "-//W3C//DTD HTML 4.01 Transitional//EN" "http://www.w3.org/TR/html4/loose.dtd">
  <html>
  <head>
  <meta http-equiv="Content-Type" content="text/html; charset=ISO-8859-1">
  <title>Insert title here</title>
  </head>
  <body>

 <a href="helloworld">hello world</a>

 </body>
 </html>
当访问index.jsp时,页面上会展示一个超链接,点击超链后,url中的地址就会发生跳转,由“http://localhost:8080/springTest/index.jsp”跳转到“http://localhost:8080/springTest/helloworld”,而这个url请求就会进入HelloWorld中的hello方法,因为其与该方法上的“/helloworld”匹配
6.success.jsp
<%@ page language="java" contentType="text/html; charset=utf-8"pageEncoding="utf-8"%>
<!DOCTYPE html PUBLIC "-//W3C//DTD HTML 4.01 Transitional//EN" "http://www.w3.org/TR/html4/loose.dtd">
<html>
<head>
<title>success</title>
</head>
<body>
<h4>Success Page</h4>
</body>
</html>