官方文档:https://www.zabbix.com/documentation/3.0/manual
中文文档 https://www.zabbix.com/documentation/3.4/zh/manual/quickstart/host
优秀的参考blog:https://www.cnblogs.com/clsn/p/7885990.html#auto_id_20
1、zabbix
1.zabbix
分布式开源的监控系统
1. 支持多种采集方式
       几乎可以采集和处理所有类型的监控数据
2.灵活的报警机制
        可实现各种自定义报警策略
3. 强大的拓展,自定义监控项,图像,模板
4.支持自动注册和发现
5.丰富的api
2.为甚选择zabbix?
其他监控系统
cacti,nagios,ManageEngin_ApplicationsManager,lepus,smokeping,piwiki等
zabbix:简单!高效!灵活!
3、常见监控系统架构
数据采集---数据存储---数据分析、展示、告警

2、zabbix安装
1、选择版本
请看zabbix的发行版本和开发周期
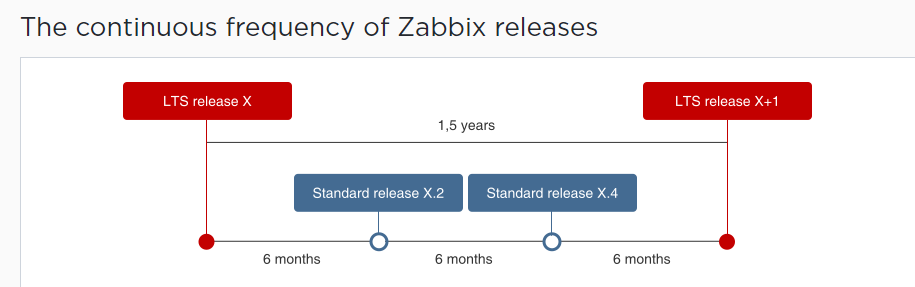
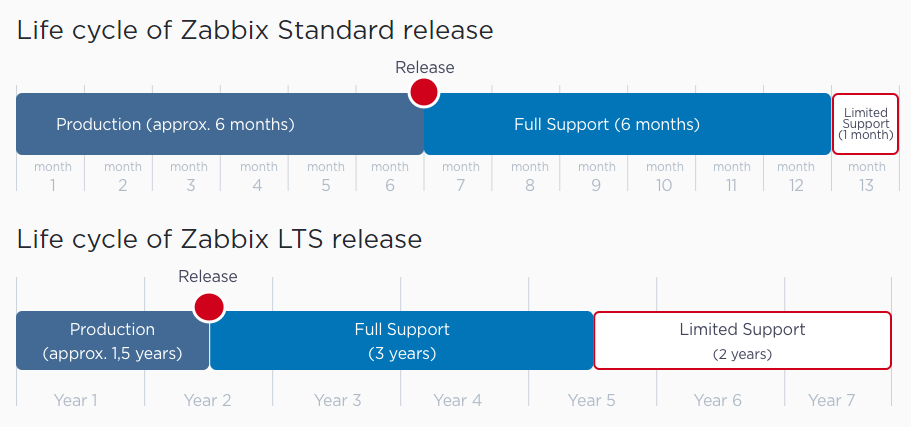
最终选择了:zabbix3.0LTS
2、时间同步
agent时间不同步会影响后续的操作
[root@linux-node1 ~]# yum install -y ntpdate
[root@linux-node1 ~]# vim /var/spool/cron/root
'* * * * * /usr/sbin/ntpdate ntp1.aliyun.com
3、最低要求
https://www.zabbix.com/documentation/3.0/manual/installation/requirements
3、安装和配置zabbix Server
官方文档:
https://www.zabbix.com/documentation/3.4/manual/installation/install_from_packages/rhel_centos
1. Install Zabbix repository
[root@linux-node1 /etc/yum.repos.d]#rpm -ivh http://repo.zabbix.com/zabbix/3.0/rhel/7/x86_64/zabbix-release-3.0-1.el7.noarch.rpm
[root@linux-node1 /etc/yum.repos.d]# yum clean all
# 卸载
[root@localhost /etc/yum.repos.d]# rpm -e zabbix-release-3.2-1.el6.noarch

更好yum源 :地址aliyun
http://mirrors.aliyun.com/zabbix/zabbix/3.0/rhel/7/
http://mirrors.aliyun.com/zabbix/non-supported/rhel/7/
[root@linux-node1 ~]# vim /etc/yum.repos.d/zabbix.repo
[zabbix]
name=Zabbix Official Repository - $basearch
baseurl=http://mirrors.aliyun.com/zabbix/zabbix/3.0/rhel/7/$basearch/
enabled=1
gpgcheck=1
gpgkey=file:///etc/pki/rpm-gpg/RPM-GPG-KEY-ZABBIX

[zabbix-non-supported]
name=Zabbix Official Repository non-supported - $basearch
baseurl=http://mirrors.aliyun.com/zabbix/non-supported/rhel/7/$basearch/
enabled=1
gpgkey=file:///etc/pki/rpm-gpg/RPM-GPG-KEY-ZABBIX
gpgcheck=1
2. Install Zabbix server, frontend
zabbix-server-mysql # 包含mysql表数据
zabbix-web-mysql # web前端php代码
[root@localhost /etc/yum.repos.d]# yum install zabbix-server-mysql zabbix-web-mysql -y
3. Create initial database
安装mysql或者mariadb
[root@localhost ~]# yum install mariadb-server -y
[root@localhost ~]# systemctl enable mariadb
[root@localhost ~]# netstat -nlp|grep mysql
设置密码
[root@localhost ~]# mysql_secure_installation
授权
# mysql -uroot -p
password
MariaDB [(none)]> create database zabbix character set utf8 collate utf8_bin;
Query OK, 1 row affected (0.01 sec)

MariaDB [(none)]> grant all on zabbix.* to zabbix@'localhost' identified by 'zabbix';
Query OK, 0 rows affected (0.02 sec)
MariaDB [(none)]> flush privileges;
导入mysql数据
查看安装包释放的文件
[root@localhost ~]# rpm -ql zabbix-server-mysql
...
/usr/share/doc/zabbix-server-mysql-3.0.28/create.sql.gz
...
查看表
[root@localhost ~]# mysql -uroot -proot
MariaDB [(none)]> use zabbix
MariaDB [zabbix]> show tables;

4. Start Zabbix server httpd
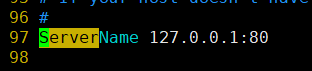
启动httpd服务
[root@localhost ~]# vim /etc/httpd/conf/httpd.conf
ServerName 127.0.0.1:80


[root@localhost ~]# systemctl enable httpd.service
[root@localhost ~]# systemctl restart httpd.service
[root@localhost ~]# netstat -nlp |grep 80
zabbix server 服务
配置文件
[root@linux-node1 ~]# vim /etc/zabbix/zabbix_server.conf

启动
[root@linux-node1 ~]# systemctl enable zabbix-server
[root@linux-node1 ~]# systemctl restart zabbix-server
5.web页面安装
Installing frontend官方文档:https://www.zabbix.com/documentation/3.0/manual/installation/install#installing_frontend
地址: http://192.168.194.131/zabbix/setup.php
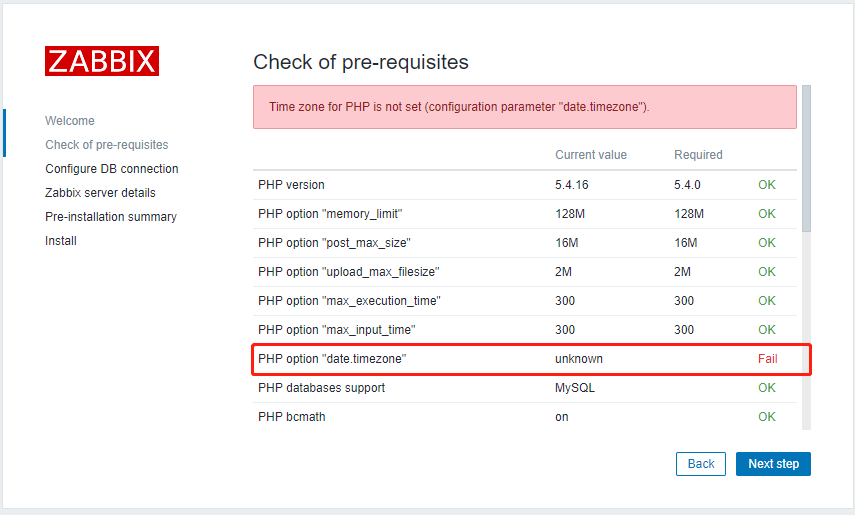
1. Configure PHP for Zabbix frontend
修改时区
[root@linux-node1 ~]# vim /etc/httpd/conf.d/zabbix.conf
        php_value date.timezone Asia/Shanghai

[root@linux-node1 ~]# systemctl restart httpd

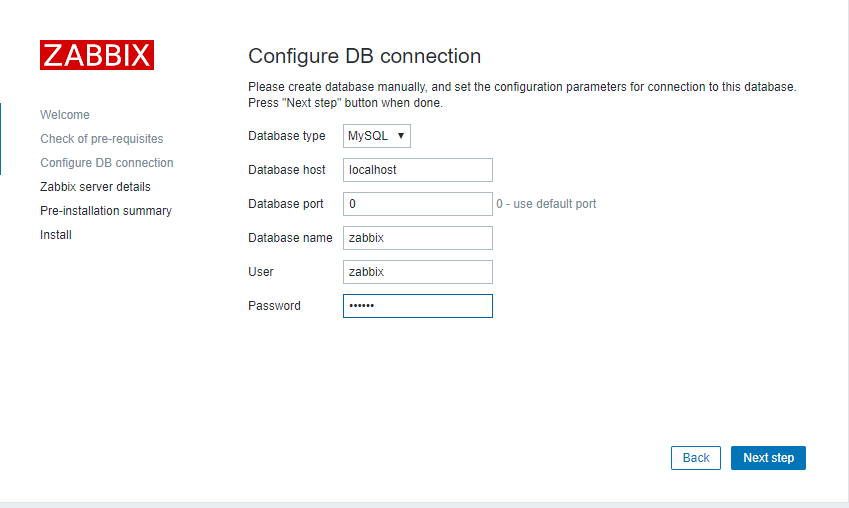
2.填写zabbix server

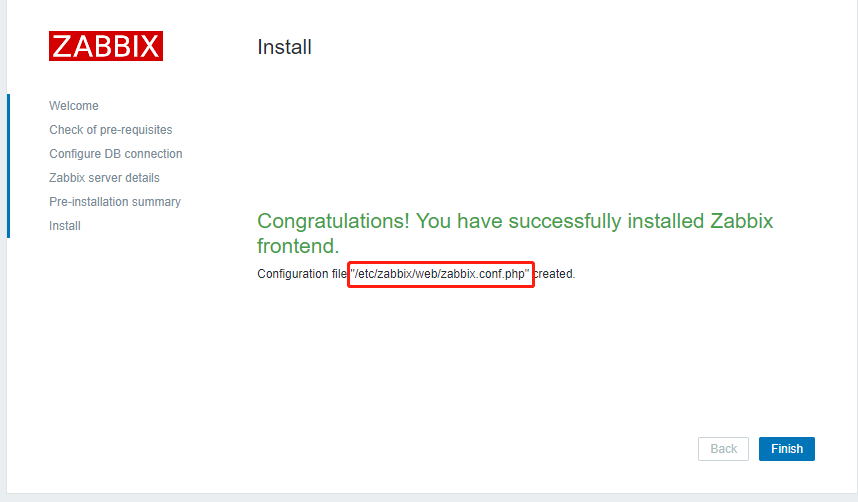
3.Configuration file "/etc/zabbix/web/zabbix.conf.php" created.
4、登录

5. Configure the database for Zabbix server
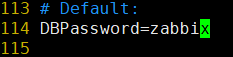
Edit file /etc/zabbix/zabbix_server.conf
[root@localhost ~]# vim /etc/zabbix/zabbix_server.conf
DBPassword=zabbix

[root@localhost ~]# systemctl restart zabbix-server
[root@localhost ~]# netstat -nltp
tcp        0      0 192.168.194.131:80      0.0.0.0:*               LISTEN      6545/httpd
tcp6       0      0 :::10051                :::*                    LISTEN      7096/zabbix_server
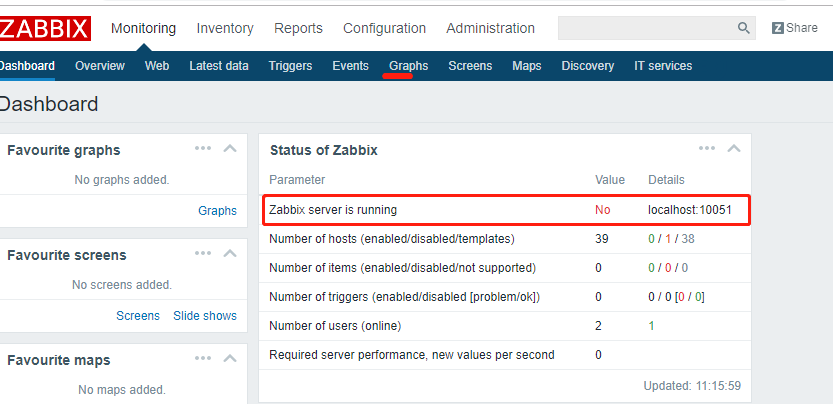
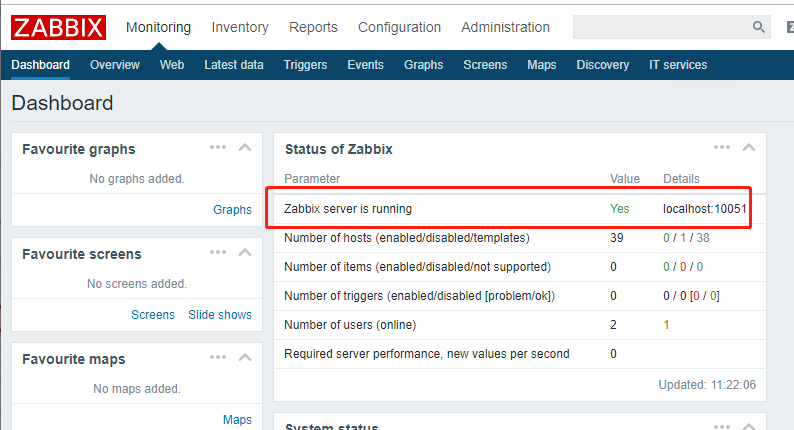
6、启用
查看日志
[root@localhost ~]# tail -f /var/log/zabbix/zabbix_server.log


4、zabbix agent部署安装
监控别人,也可以监控自己
1、node1
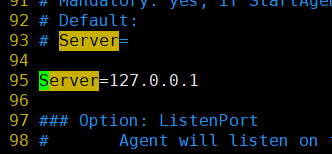
配置ip为127.0.0.1即可,配置其他error
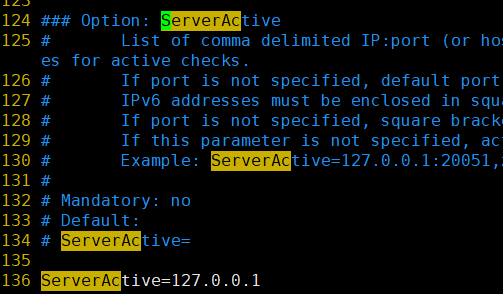
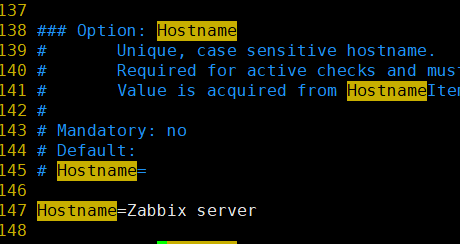
[root@localhost ~]# yum install zabbix-agent -y
[root@localhost ~]# cat /etc/zabbix/zabbix_agentd.conf
# 需要关注的
server:zabbix server的ip
serverActive    活动的,运行的ip
Hostname=Zabbix server  该主机对应的hostname,唯一标识
[root@localhost ~]# systemctl enable zabbix-agent
[root@localhost ~]# systemctl restart zabbix-agent
[root@localhost ~]# netstat -nltp
tcp        0      0 0.0.0.0:3306            0.0.0.0:*               LISTEN      3774/mysqld
tcp        0      0 192.168.194.131:80      0.0.0.0:*               LISTEN      6545/httpd
tcp6       0      0 :::10050                :::*                    LISTEN      7032/zabbix_agentd
tcp6       0      0 :::10051                :::*                    LISTEN      7096/zabbix_server
2、node2
安装repo
修改yum
安装agent
[root@localhost ~]# yum install zabbix-agent -y [root@localhost ~]# cat /etc/zabbix/zabbix_agentd.conf
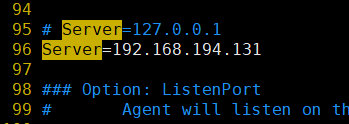
Server=192.168.194.131
ServerActive=192.168.194.131
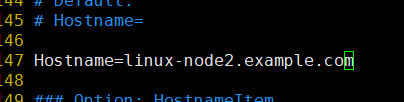
Hostname=linux-node2.example.com

[root@localhost ~]# systemctl enable zabbix-agent
[root@localhost ~]# systemctl restart zabbix-agent
[root@localhost ~]# netstat -nlpt
ERROR

解决如下:
不用131了,直接改成135
[root@localhost ~]# cat /etc/zabbix/zabbix_agentd.conf
Server=192.168.194.135
ServerActive=192.168.194.135
Hostname=linux-node2.example.com

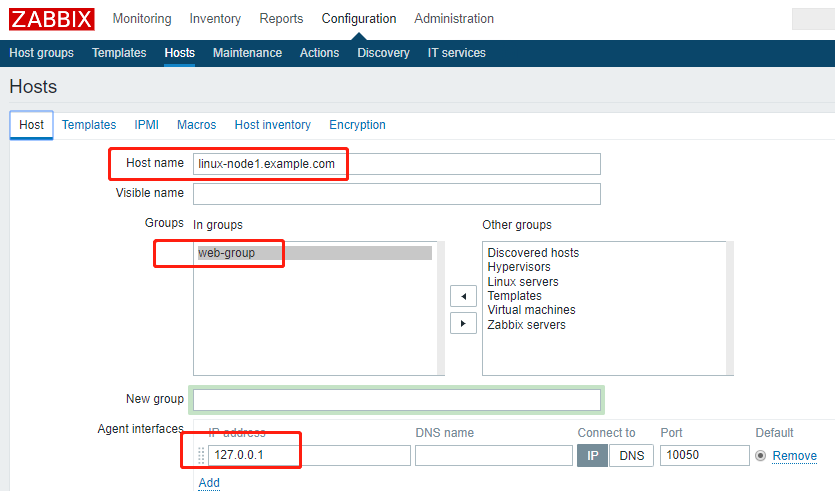
3、web界面,创建host

(1)创建hostgroups

(2)创建host2
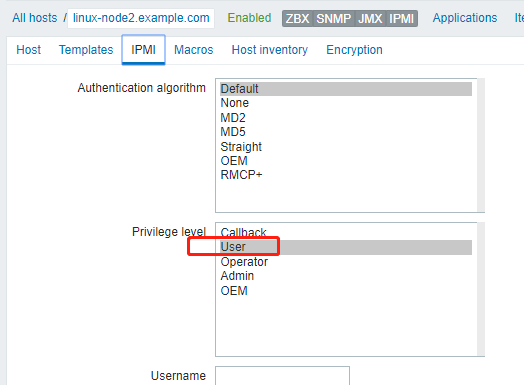
host、Templates、IPMI
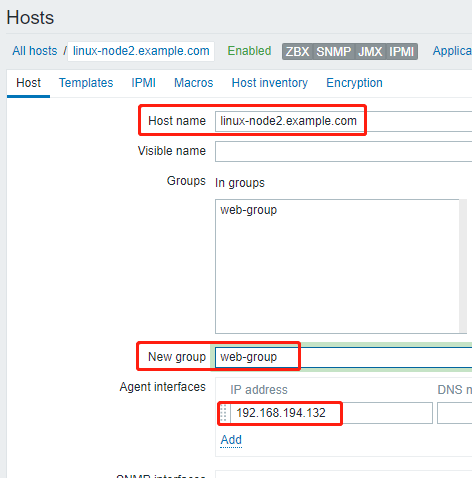

(3)创建host2
5、总结
1、问题
Question 参考blog
https://blog.51cto.com/fengzhige/1034485
(1)Question 1
--> Finished Dependency Resolution
Error: Package: zabbix-server-mysql-3.0.28-1.el7.x86_64 (zabbix)
Requires: libiksemel.so.3()(64bit)
You could try using --skip-broken to work around the problem
You could try running: rpm -Va --nofiles --nodigest
解决:重置yum.repo.d 文件夹,删除重新找
(2)Question2

解决:
好像是网络配置那边的问题
不能 删除DHCP ,其他的随意

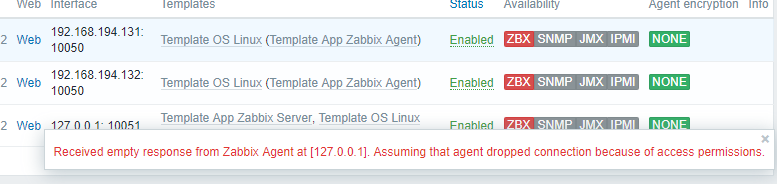
(3)Question3
Received empty response from Zabbix Agent at [127.0.0.1]. Assuming that agen
问题比较大
第1点:agent对应的 server ip问题
Agent配置文件中的ip
Node1的为127.0.0.1
Node2 的为 192.168.194.131
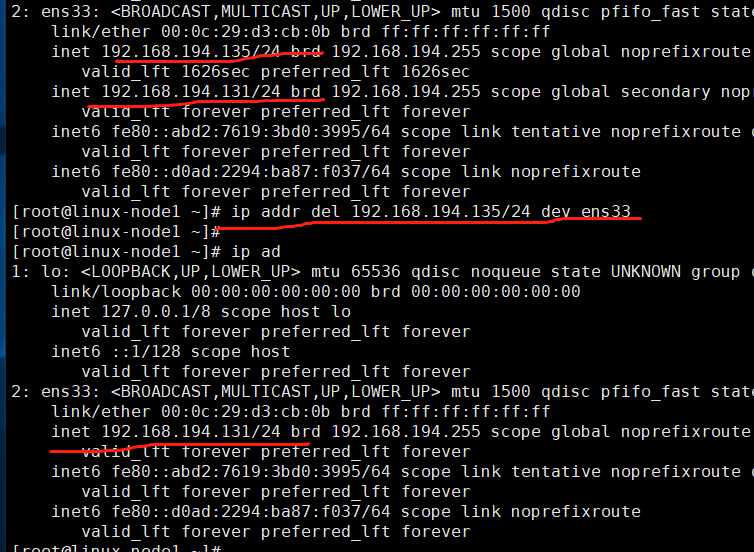
第2点:多个ip问题


解决:删除多余的ip
[root@linux-node1 ~]# ip addr del 192.168.194.135/24 dev ens33
第3点:zabbix server的问题
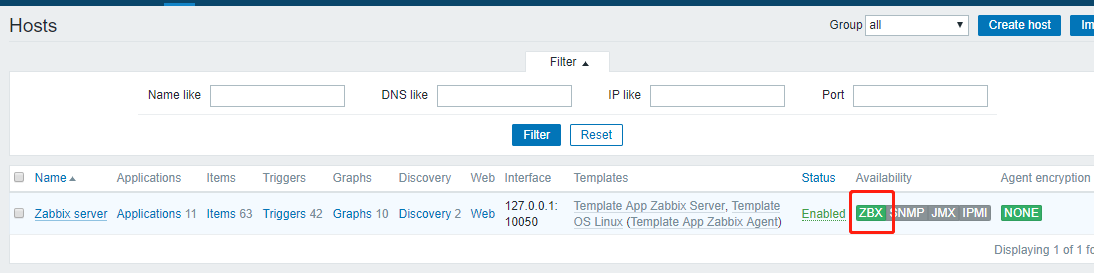
Web页面
必须是10050端口吗?不是server端吗

(4)Question4

原因:多个ip

删除另一个ip
2、日志排错
[root@linux-node1 ~]# tail -f /var/log/zabbix/zabbix_agentd.log
[root@linux-node1 ~]# tail -f /var/log/zabbix/zabbix_server.log


3、总结
麻痹,终于调试成功了,现在看下配置

Server
httpd服务 这个配置无关紧要
[root@linux-node1 ~]# vim /etc/httpd/conf/httpd.conf
Web页面
必须是10050端口吗?不是server端吗

Agent1
[root@linux-node1 ~]# vim /etc/zabbix/zabbix_agentd.conf

为啥不配 192.168.194.131呢? 反正配上就不通。
有可能是之前web界面安装的时候默认localhost
Agent2
[root@linux-node1 ~]# vim /etc/zabbix/zabbix_agentd.conf

配置server的ip地址,这点没问题
多个ip的时候,会影响

[root@linux-node1 ~]# ip addr del 192.168.194.135/24 dev ens33