这里我们选择mysql数据库,然后各种配置,最后使用spark进行调试。说简单也简单,但是还是做下笔记吧。毕竟人老了。记忆里不如当年。
环境搭建
源码下载
从Tigase官网下载Tigase源码,可以选择git和https的方式,如:
git clone git://repository.tigase.org/git/tigase-server.git
建议最好选择下某一个tag版本,因为master并不稳定。
下载完成后可以看一下目录结构,其中包含database,certs,script,jar,etc,conf,module,logs等等文件夹,其中一些文件我们会进行配置
数据库创建
源码下载后可以看到有一个database文件夹,里面包含了一些数据库脚本文件。有两种方式可以创建数据库。 本地安装完数据库后,记住数据库用户名和密码。可别忘了。懒的找。
- 手动创建
mysql -u username -p(进入数据库)create database tigasedb;(创建数据库)source database/mysql-schema-5-1.sql(导入数据库)
- 自动创建
./scripts/db-create-mysql.sh 数据库用户名 数据库密码 数据库名 root用户名 root密码 主机名 ./scripts/db-create-mysql.sh root 123456 tigasedb root 123456 127.0.0.1 执行后就创建完成了数据库。
- 注意: 我使用的是mysql5.7,创建时会报错,因为mysql-schema-4-schema.sql文件似乎有问题。不确定是否是官方的问题。可以看看我的更改:
create table if not exists tig_users (
	uid bigint unsigned NOT NULL auto_increment,

	-- Jabber User ID
	user_id varchar(2049) NOT NULL,
	-- UserID SHA1 hash to prevent duplicate user_ids
	sha1_user_id char(128) NOT NULL,
	-- User password encrypted or not
	user_pw varchar(255) default NULL,
	-- Time the account has been created
	acc_create_time timestamp DEFAULT CURRENT_TIMESTAMP,
	-- Time of the last user login
	last_login timestamp DEFAULT CURRENT_TIMESTAMP,           (1)
	-- Time of the last user logout
	last_logout timestamp DEFAULT CURRENT_TIMESTAMP,           (2)
	-- User online status, if > 0 then user is online, the value
	-- indicates the number of user connections.
	-- It is incremented on each user login and decremented on each
	-- user logout.
	online_status int default 0,
	-- Number of failed login attempts
	failed_logins int default 0,
	-- User status, whether the account is active or disabled
	-- >0 - account active, 0 - account disabled
	account_status int default 1,

	primary key (uid),
	unique key sha1_user_id (sha1_user_id),
	key user_pw (user_pw),
--	key user_id (user_id(765)),
	key last_login (last_login),
	key last_logout (last_logout),
	key account_status (account_status),
	key online_status (online_status)
)
ENGINE=InnoDB default character set utf8 ROW_FORMAT=COMPRESSED KEY_BLOCK_SIZE=8;
环境配置
- 安装完成数据库后,我们需要对默认的配置进行更改,如下:
-
更改
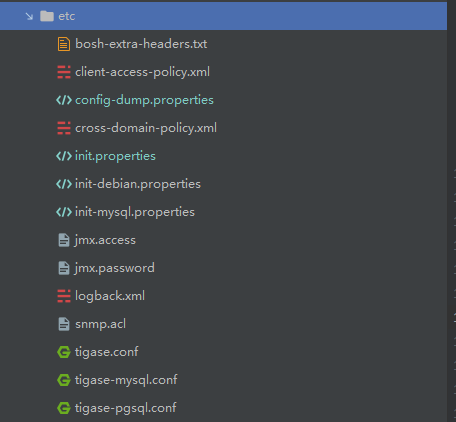
JDK位置,在etc目录下,有一个tigase.conf,我们需要加上JDKPath="/usr/local/java8" -
同样在etc目录下,有一个init.properties((config-dump会自动更改,这个配置不用管))文件。更改下面这样
config-type=--gen-config-def
--admins=admin@xmpp-domain
--virt-hosts=xmpp-domain
---cluster-mode=false --debug=server --user-db = mysql --user-db-uri=jdbc:mysql://127.0.0.1:3306/tigasedb?user=root&password=123456 # http rest --comp-name-1=http --comp-class-1=tigase.http.HttpMessageReceiver --api-keys[s]=open_access --api-keys=open_access http/api-key=open_access http/server-class=tigase.http.jetty.JettyStandaloneHttpServer ## monitor #--monitoring=jmx:9050,http:9080,snmp:9060 # muc --comp-name-2 = muc --comp-class-2 = tigase.muc.MUCComponent ## pubsub #--comp-name-3 = pubsub #--comp-class-3 = tigase.pubsub.PubSubComponent # message archive --comp-name-4=message-archive --comp-class-4=tigase.archive.MessageArchiveComponent message-archive/archive-repo-uri=jdbc:mysql://127.0.0.1:3306/tigasedb?user=root&password=123456 sess-man/plugins-conf/message-archive-xep-0136/component-jid=message-archive@dc-a4b8eb92-xmpp.jiangtao.tech. sess-man/plugins-conf/message-archive-xep-0136/default-store-method=message sess-man/plugins-conf/message-archive-xep-0136/required-store-method=message # plugins --sm-plugins=+message-archive-xep-0136,+urn:ietf:params:xml:ns:xmpp-stanzas,+urn:ietf:params:xml:ns:xmpp-sasl
数据库配置可能需要自己更改,别的都ok。
- 开始准备运行,选择项目右键-->run as—>run config。

具体运行时参数可以直接copy
- program argument
--property-file etc/init.properties
- VM argument
-Dfile.encoding=UTF-8 -Dsun.jnu.encoding=UTF-8
-Djdbc.drivers=com.mysql.jdbc.Driver  -server
-Xms100M -Xmx200M -XX:PermSize=32m -XX:MaxPermSize=256m -XX:MaxDirectMemorySize=128m
运行调试
记得别忘了把数据库服务器打开。
测试
- 去Spark社区下载安装,此spark非大数据spark。别搞错了。
打开spark,简单的在高级里边设置下你的服务器ip,本地的话自己ip,或者if一下。
- 自己注册一个账号,域名就填写刚才配置文件填写的
--virt-hosts,然后登录