首先创建一个普通的webproject,然后看官网教程喽 https://www.genuitec.com/products/myeclipse/learning-center/web/myeclipse-jsf-development-overview/
配置开发环境JSF Development in MyEclipse
1. JSF Support for Web Projects
Before creating a JSF project, you must have an existing MyEclipse Web Project. Add the JSF facet to the project to give it JSF support. JSF Support includes a configured web.xml, generated faces-config.xml, and all necessary JSF run-time libraries.
Note: JSF 2.0 and higher does not require the faces-confix.xml file. Regardless, the file is generated in the project and can be used for configuration.
When a JSF facet is installed, the following occurs:
- If the project's target server does not provide JSF support by default, your selected JSF libraries are added to the build classpath and are automatically selected for deployment.
- The project's Web deployment descriptor (web.xml) is updated ensuring that the Faces Servlet is present along with your specification for:
- Faces Servlet Name
- Faces Servlet URL Mappings
- Context Params for the application configuration file
- An empty Faces configuration file using the specified name and location is created. If a file with that name already exists at that location, this step is skipped.
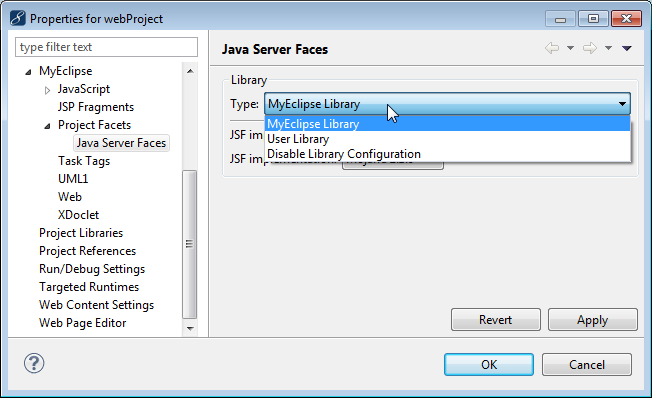
The project should have the JSF implementation JAR files in its classpath for JSF design-time support to work correctly. This can be configured by right-clicking the project, selecting Properties, expanding MyEclipse>Project Facets, and selecting Java Server Faces. If your target server provides JSF libraries, select Provided by Target Runtime from the Type drop-down list. Otherwise, select MyEclipse Library or User Libraries. If you want to provide JARs on your own, you can select Disable Library Configuration.
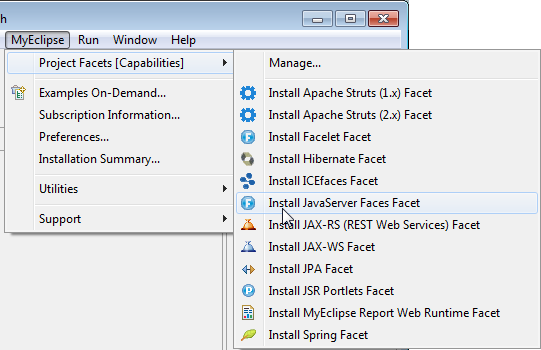
To add JSF Project support to an existing MyEclipse Web Project, select MyEclipse>Project Facets>Install JavaServer Faces Facet from the menu.
Adding JSF capabilities to Web project
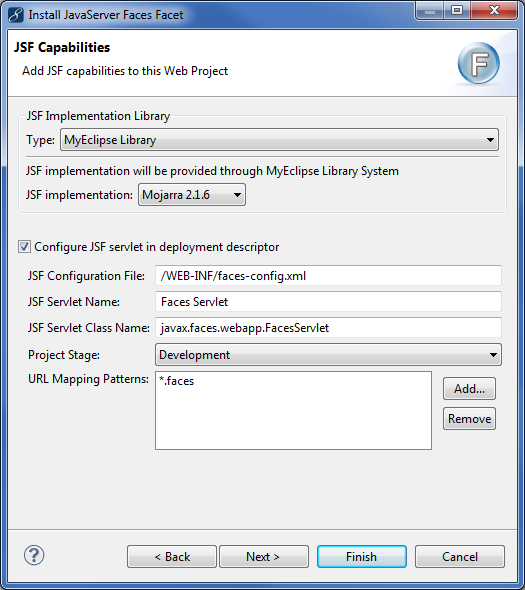
The Install JavaServer Faces Facet wizard allows selection of the JSF implementation, config path, servlet name, and URL pattern. Optional support for facelets can also be added.
但是我的myeclipse2014只支持到 jsf1.2
Add JSF Facets window
When you click Finish, the Web project is configured with JSF runtime libraries, the web.xml is configured with the necessary configuration, and afaces-config.xml file is added to the project.

Initial JSF project contents
MyEclipse comes bundled with JSF implementations that are configurable using the project-specific Project Facets preferences. To open the preferences, right-click the project, and select Properties from the menu. Expand MyEclipse>Project Facets, and select JavaServer Faces. You can change the library options, including selecting a user library instead of the MyEclipse library.
JSF runtime libraries
MyEclipse has an advanced visual Faces Config editor as the default editor for faces-config.xml files. Double-click the file to open the MyEclipse JSF Config Editor, or right-click the file, and select Open With>MyEclipse JSF Config Editor from the menu.

Opening the MyEclipse JSF Config Editor
The JSF Config Editor has multiple editing pages: the Navigation Rule, ManagedBean, Component, Others, and Source pages. Access the pages, by clicking the appropriate tab at the bottom of the view. See Modifying the JSF Configuration File.
Add new JSF pages that use JSP by clicking the New icon  on the toolbar, expanding MyEclipse>Web, and selecting JSP (Advanced templates).

New JSP page using advanced template
After you click Next, select Default JSF template from the Template to use drop-down.
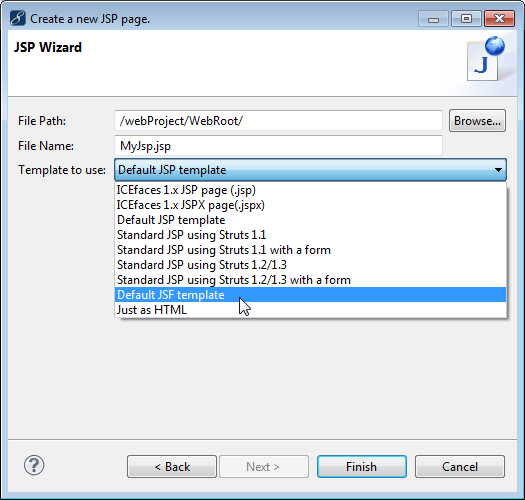
Selecting template to use
For existing JSF projects using JSF specification version 1.2 or below, add Facelets support by selecting MyEclipse>Project Facets>Install Facelet Facet from the menu. Facelets support is already included when you add the JSF facet version 2.0 or higher.