hibernate开发的基本步骤:
- 编写配置文档hibernate.cfg.xml;
- 编写实体类;
- 生成对应实体类的映射文件并添加到配置文档中;
- 调用hibernate API进行测试。
Hibernate的一个小例子(慕课网教程整理的代码):
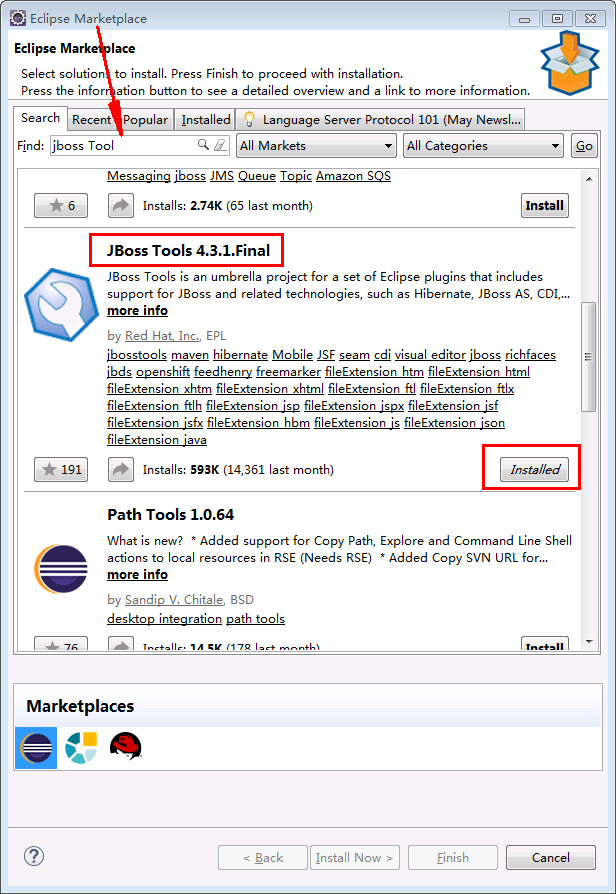
首先在eclipse--help--Eclipse MarketPlace中搜索“jboss Tool”
导入hibernate核心jar包、Junit包。
创建一个java类:
 1 package com.imooc.hibernate;
 2
 3 import java.util.Date;
 4
 5 public class Students {
 6
 7     private int sid;
 8     private String sname;
 9     private String gender;
10     private Date birthday;
11     private String address;
12
13     public Students(int sid, String sname, String gender, Date birthday, String address) {
14         super();
15         this.sid = sid;
16         this.sname = sname;
17         this.gender = gender;
18         this.birthday = birthday;
19         this.address = address;
20     }
21
22     @Override
23     public String toString() {
24         return "Students [sid=" + sid + ", sname=" + sname + ", gender=" + gender + ", birthday=" + birthday
25                 + ", address=" + address + "]";
26     }
27
28     public int getSid() {
29         return sid;
30     }
31
32     public void setSid(int sid) {
33         this.sid = sid;
34     }
35
36     public String getSname() {
37         return sname;
38     }
39
40     public void setSname(String sname) {
41         this.sname = sname;
42     }
43
44     public String getGender() {
45         return gender;
46     }
47
48     public void setGender(String gender) {
49         this.gender = gender;
50     }
51
52     public Date getBirthday() {
53         return birthday;
54     }
55
56     public void setBirthday(Date birthday) {
57         this.birthday = birthday;
58     }
59
60     public String getAddress() {
61         return address;
62     }
63
64     public void setAddress(String address) {
65         this.address = address;
66     }
67 }
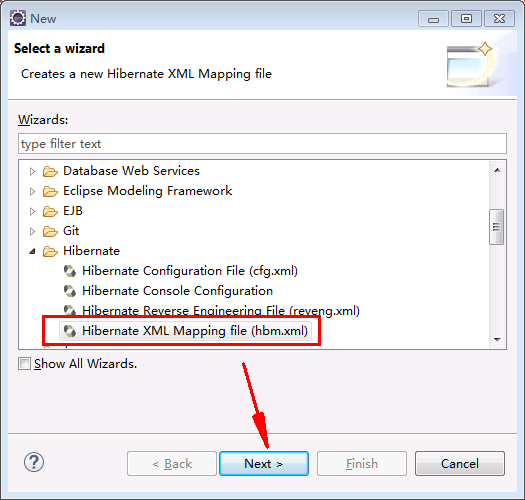
点击项目名,右键new--other--自动生成类的配置文件:
 1 <?xml version="1.0"?>
 2 <!DOCTYPE hibernate-mapping PUBLIC "-//Hibernate/Hibernate Mapping DTD 3.0//EN"
 3 "http://hibernate.sourceforge.net/hibernate-mapping-3.0.dtd">
 4 <!-- Generated 2017-5-23 0:24:09 by Hibernate Tools 3.5.0.Final -->
 5 <hibernate-mapping>
 6     <class name="com.imooc.hibernate.Students" table="STUDENTS">
 7         <id name="sid" type="int">
 8             <column name="SID" />
 9             <generator class="assigned" />
10         </id>
11         <property name="sname" type="java.lang.String">
12             <column name="SNAME" />
13         </property>
14         <property name="gender" type="java.lang.String">
15             <column name="GENDER" />
16         </property>
17         <property name="birthday" type="java.util.Date">
18             <column name="BIRTHDAY" />
19         </property>
20         <property name="address" type="java.lang.String">
21             <column name="ADDRESS" />
22         </property>
23     </class>
24 </hibernate-mapping>
生成hibernate配置文件:

1 <?xml version="1.0" encoding="UTF-8"?>
2 <!DOCTYPE hibernate-configuration PUBLIC
3 "-//Hibernate/Hibernate Configuration DTD 3.0//EN"
4 "http://www.hibernate.org/dtd/hibernate-configuration-3.0.dtd">
5 <hibernate-configuration>
6 <session-factory>
7 <property name="connection.username">root</property>
8 <property name="connection.password">root</property>
9 <property name="connection.driver_class">com.mysql.jdbc.Driver</property>
10 <property name="connection.url">jdbc:mysql://localhost:3306/hibernate?useUnicode=true&characterEncoding=UTF-8</property>
11 <property name="dialect">org.hibernate.dialect.MySQLDialect</property>
12 <!-- 是否将sql语句打印到控制台,编码阶段便于测试,建议设为true -->
13 <property name="show_sql">true</property>
14 <!-- 是否将sql语句进行排版,建议设为true -->
15 <property name="format_sql">true</property>
16 <!-- 生成表结构的策略。create是如果之前有表结构,先删除表结构再重建;
17 update:原有的基础上更新;
18 create-drop:先删除表结构再重建
19 validate:与原表进行验证,如果和原表表结构不同,则不进行创建。
20 一般使用create和update
21 -->
22 <property name="hbm2ddl.auto">create</property>
23
24 <mapping resource="com/imooc/hibernate/Students.hbm.xml"/>
25 </session-factory>
26 </hibernate-configuration>
写StudentsTest.java文件:
 1 package com.icoom.test;
 2 import static org.junit.Assert.fail;
 3
 4 import java.util.Date;
 5
 6 import org.hibernate.Session;
 7 import org.hibernate.SessionFactory;
 8 import org.hibernate.Transaction;
 9 import org.hibernate.cfg.Configuration;
10 import org.hibernate.service.ServiceRegistry;
11 import org.hibernate.service.ServiceRegistryBuilder;
12 import org.junit.After;
13 import org.junit.Before;
14 import org.junit.Test;
15
16 import com.imooc.hibernate.Students;
17
18 public class StudentsTest {
19
20     private SessionFactory sessionFactory;
21     private Session session;
22     private Transaction transaction;
23
24     @Before
25     public void init() {
26         // 1.创建配置对象
27         Configuration config = new Configuration().configure();
28         // 2.创建服务注册对象
29         ServiceRegistry serviceRegistry = new ServiceRegistryBuilder().applySettings(config.getProperties()).buildServiceRegistry();
30         // 3.创建会话工厂对象
31         sessionFactory = config.buildSessionFactory(serviceRegistry);
32         // 会话对象
33         session = sessionFactory.openSession();
34         // 开启事务
35         transaction = session.beginTransaction();
36     }
37     @After
38     public void destory() {
39         transaction.commit();
40         session.close();
41         sessionFactory.close();
42     }
43     @Test
44     public void testSaveStudents() {
45         // 生成学生对象
46         Students s = new Students(1, "老张", "男", new Date(), "山东");
47         session.save(s);//保存对象进入数据库
48     }
49
50 }
使用Junit执行,然后在数据库中就会看到新建的表结构和插入的数据。
hibernate.cfg.xml文件中的<property name="hbm2ddl.auto">create</property>指定由hibernate新建表。
-------------------------------------
以上是对hibernate的配置文件元素的作用和hibernate的用法做一个简单的了解,一开始学习新技术要保持不求甚解,先快速入门以避免从入门到放弃。等达到一定熟练度再深入了解其原理。因此强烈推荐慕课网的教程,先快速了解再深入学习。